Tag: mushrooms
-
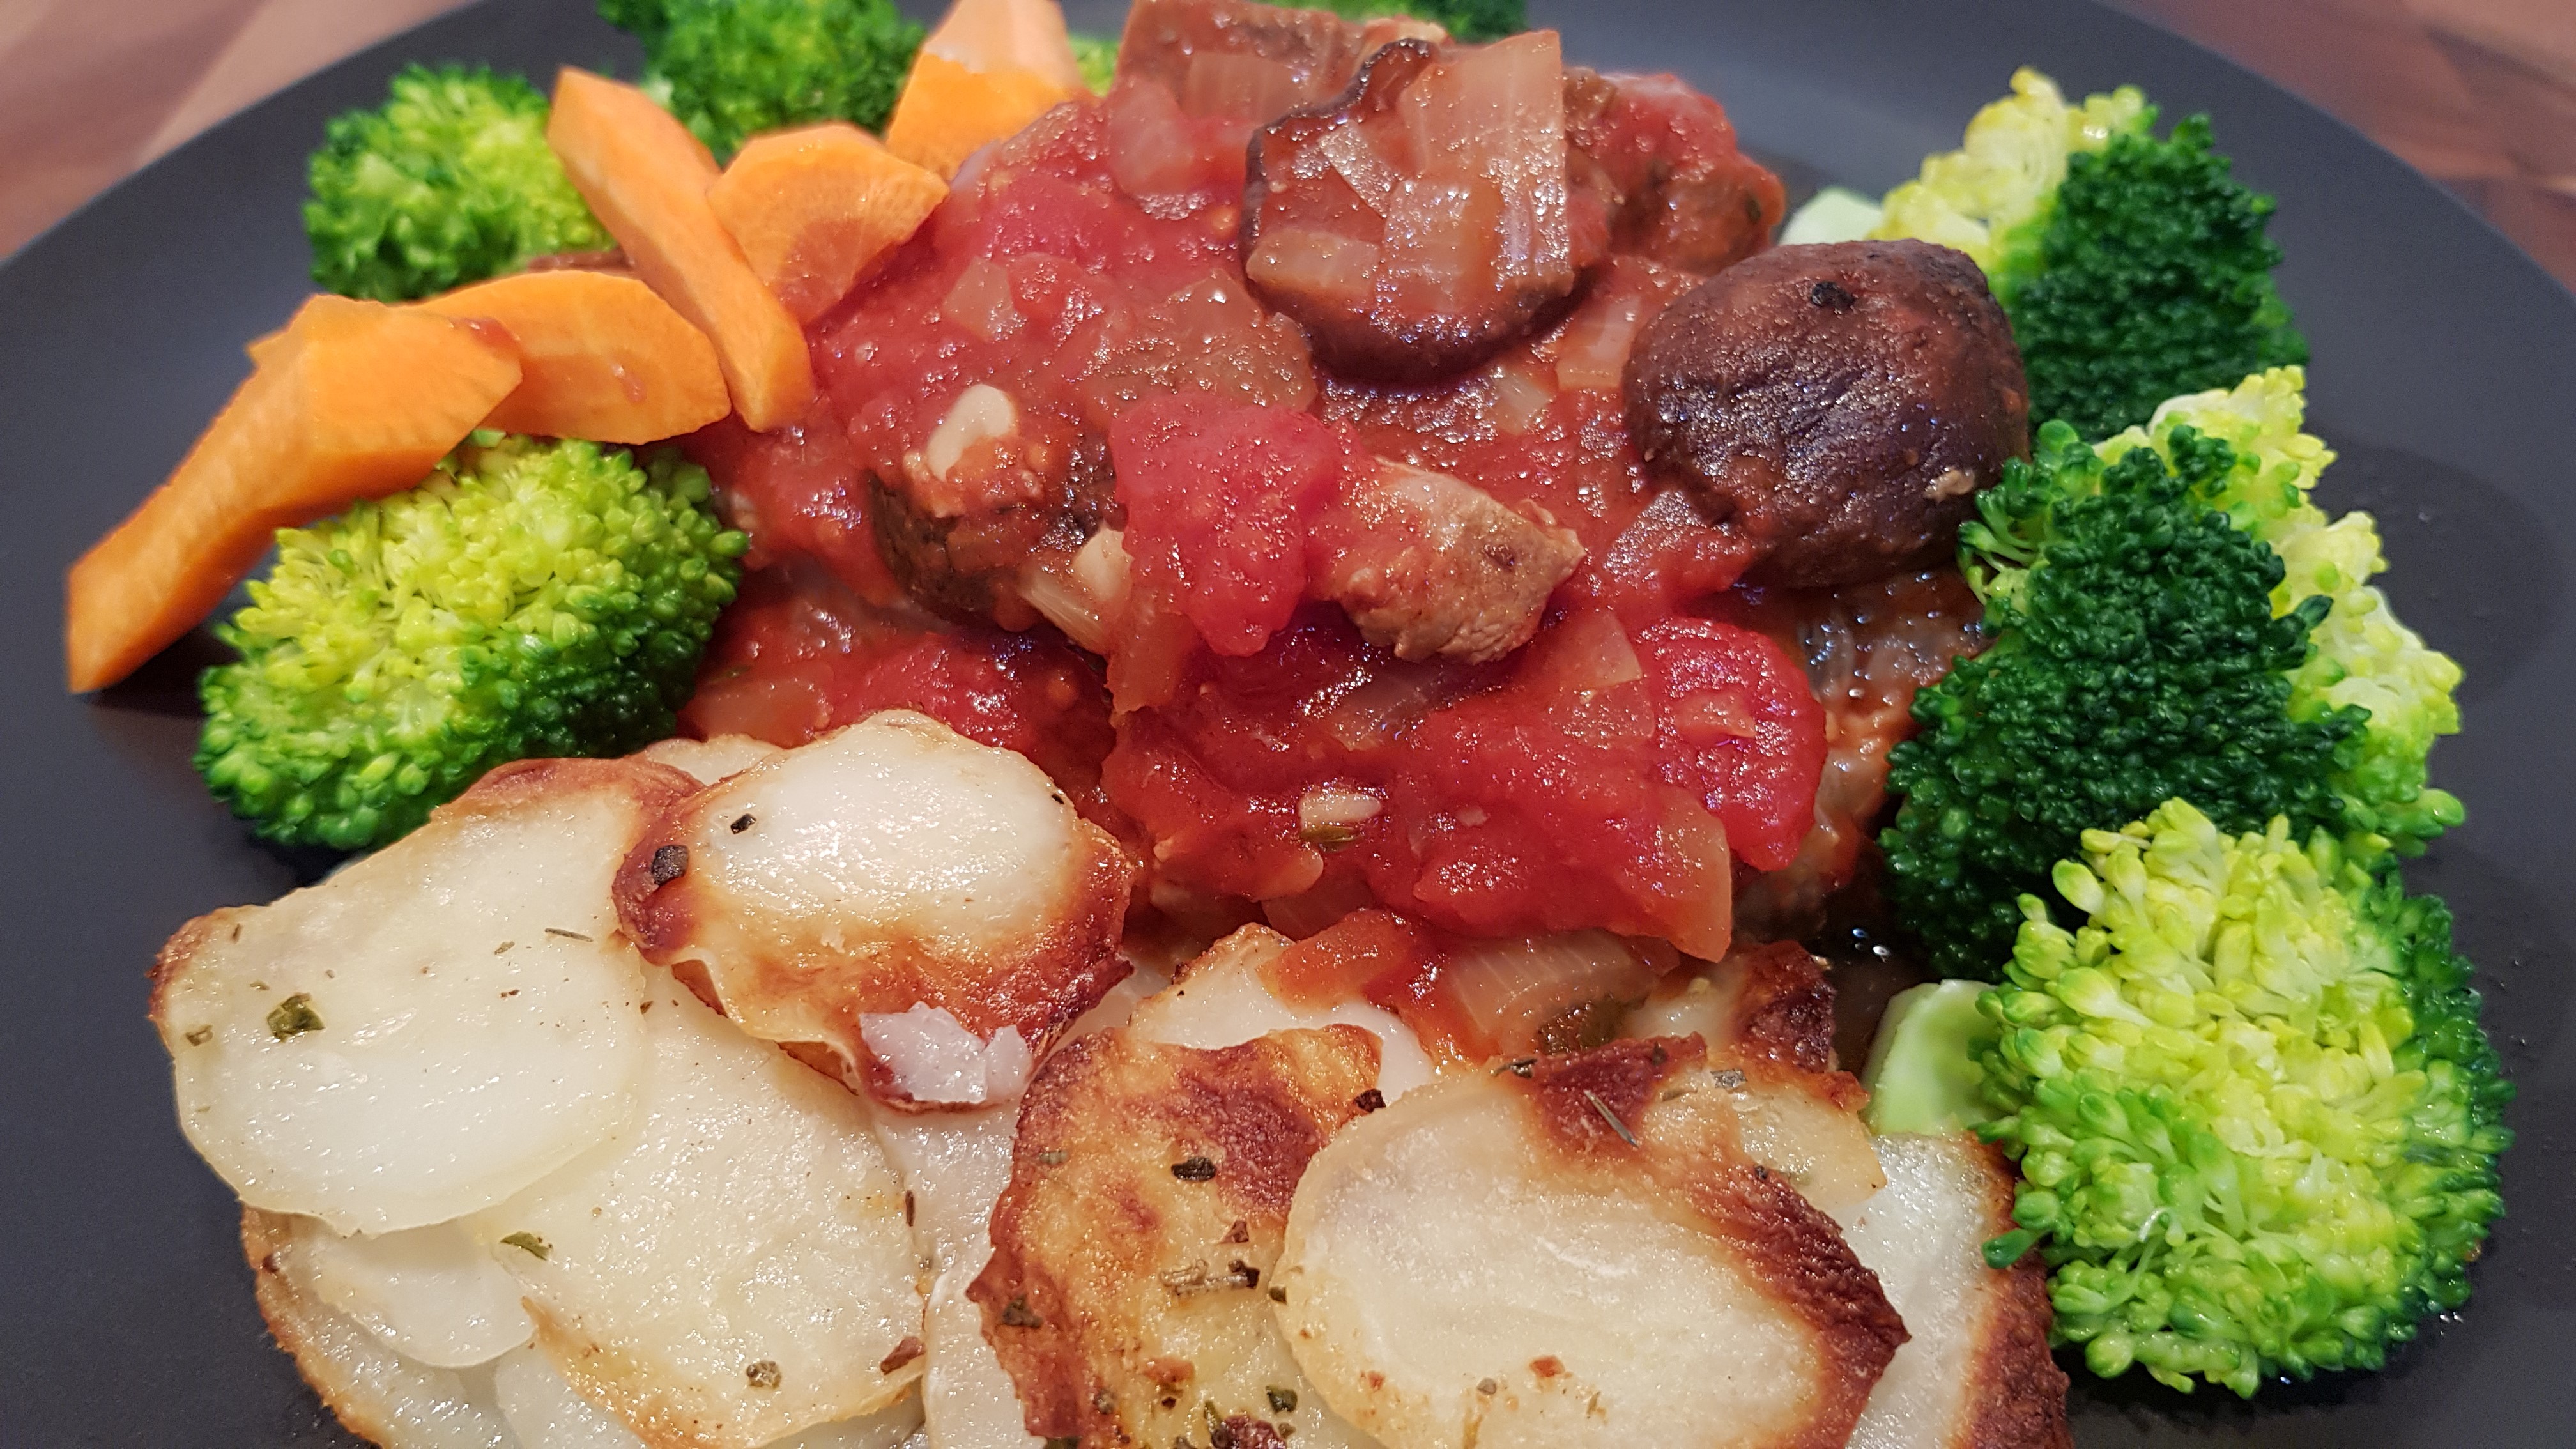
PK’s Slow Cooker Lamb Chops
I love this lamb chop stew! Not only is it super tasty but it is so simple to make. You simply brown the chops and then walk away. 🙂
Steps
- Browning the chops
- Slow cooking (~5 hrs)
- Serving
Equipment
- 1 chefs knife
- 1 fry pan
- 1 slow cooker
Ingredients
- 8 lamb chops
- A slug of olive oil
- A good slug of tomato paste
- One 400g can of diced tomatoes
- Water (half fill the tomato can)
- 3 garlic cloves, diced
- 1 brown onion, diced
- Mushrooms, a couple of handfuls
- Thyme and oregano, to taste
- Salt and pepper, to taste
Browning the chops
Brown the 8 chops (in batches) in some oil on medium heat.

Pop them and the rest of the ingredients into your slow cooker on low heat.

Give everything a gentle stir.

Slow cooking (~5 hrs)
Cover and cook for around 5 hours. The meat should be falling of the bone.

Serving
There are a myriad of serving options. It pairs great with potatoes and crusty bread.

This stew freezes well and I take it to work for the perfect lunch with pasta or rice.

Enjoy,
PK
Here are a few slow cooker and lamb posts I thought you might:
Written by
·
-

How To Pickle Oyster Mushrooms
If I am not using my mushrooms super fresh I prefer to preserve them. One of my favourite ways is pickling them in apple cider vinegar.
Simply clean your mushrooms and put them in a sterilised jar. If you want to keep them down in the vinegar solution you can use a layer of apple slices. This works great if you dont have enough mushrooms for the jar.
I also added black peppercorns and a few cloves of garlic. Slices of chili would also go a treat.


I had these set aside for two and a half months and they are amazing. They have a subtle nutty apple flavour with a bit of a zing and soft texture.

Enjoy,
PK
YOU MIGHT ALSO LIKE
USING OYSTER MUSHROOMS
MUSHROOM DISHES
GROWING MUSHROOMS
PRESERVING YOUR HARVEST
Please consider subscribing to a weekly email summary of our posts or check us out on Facebook @growitcatchitcookit.
[mc4wp_form id=”15771″]
Written by
·
-
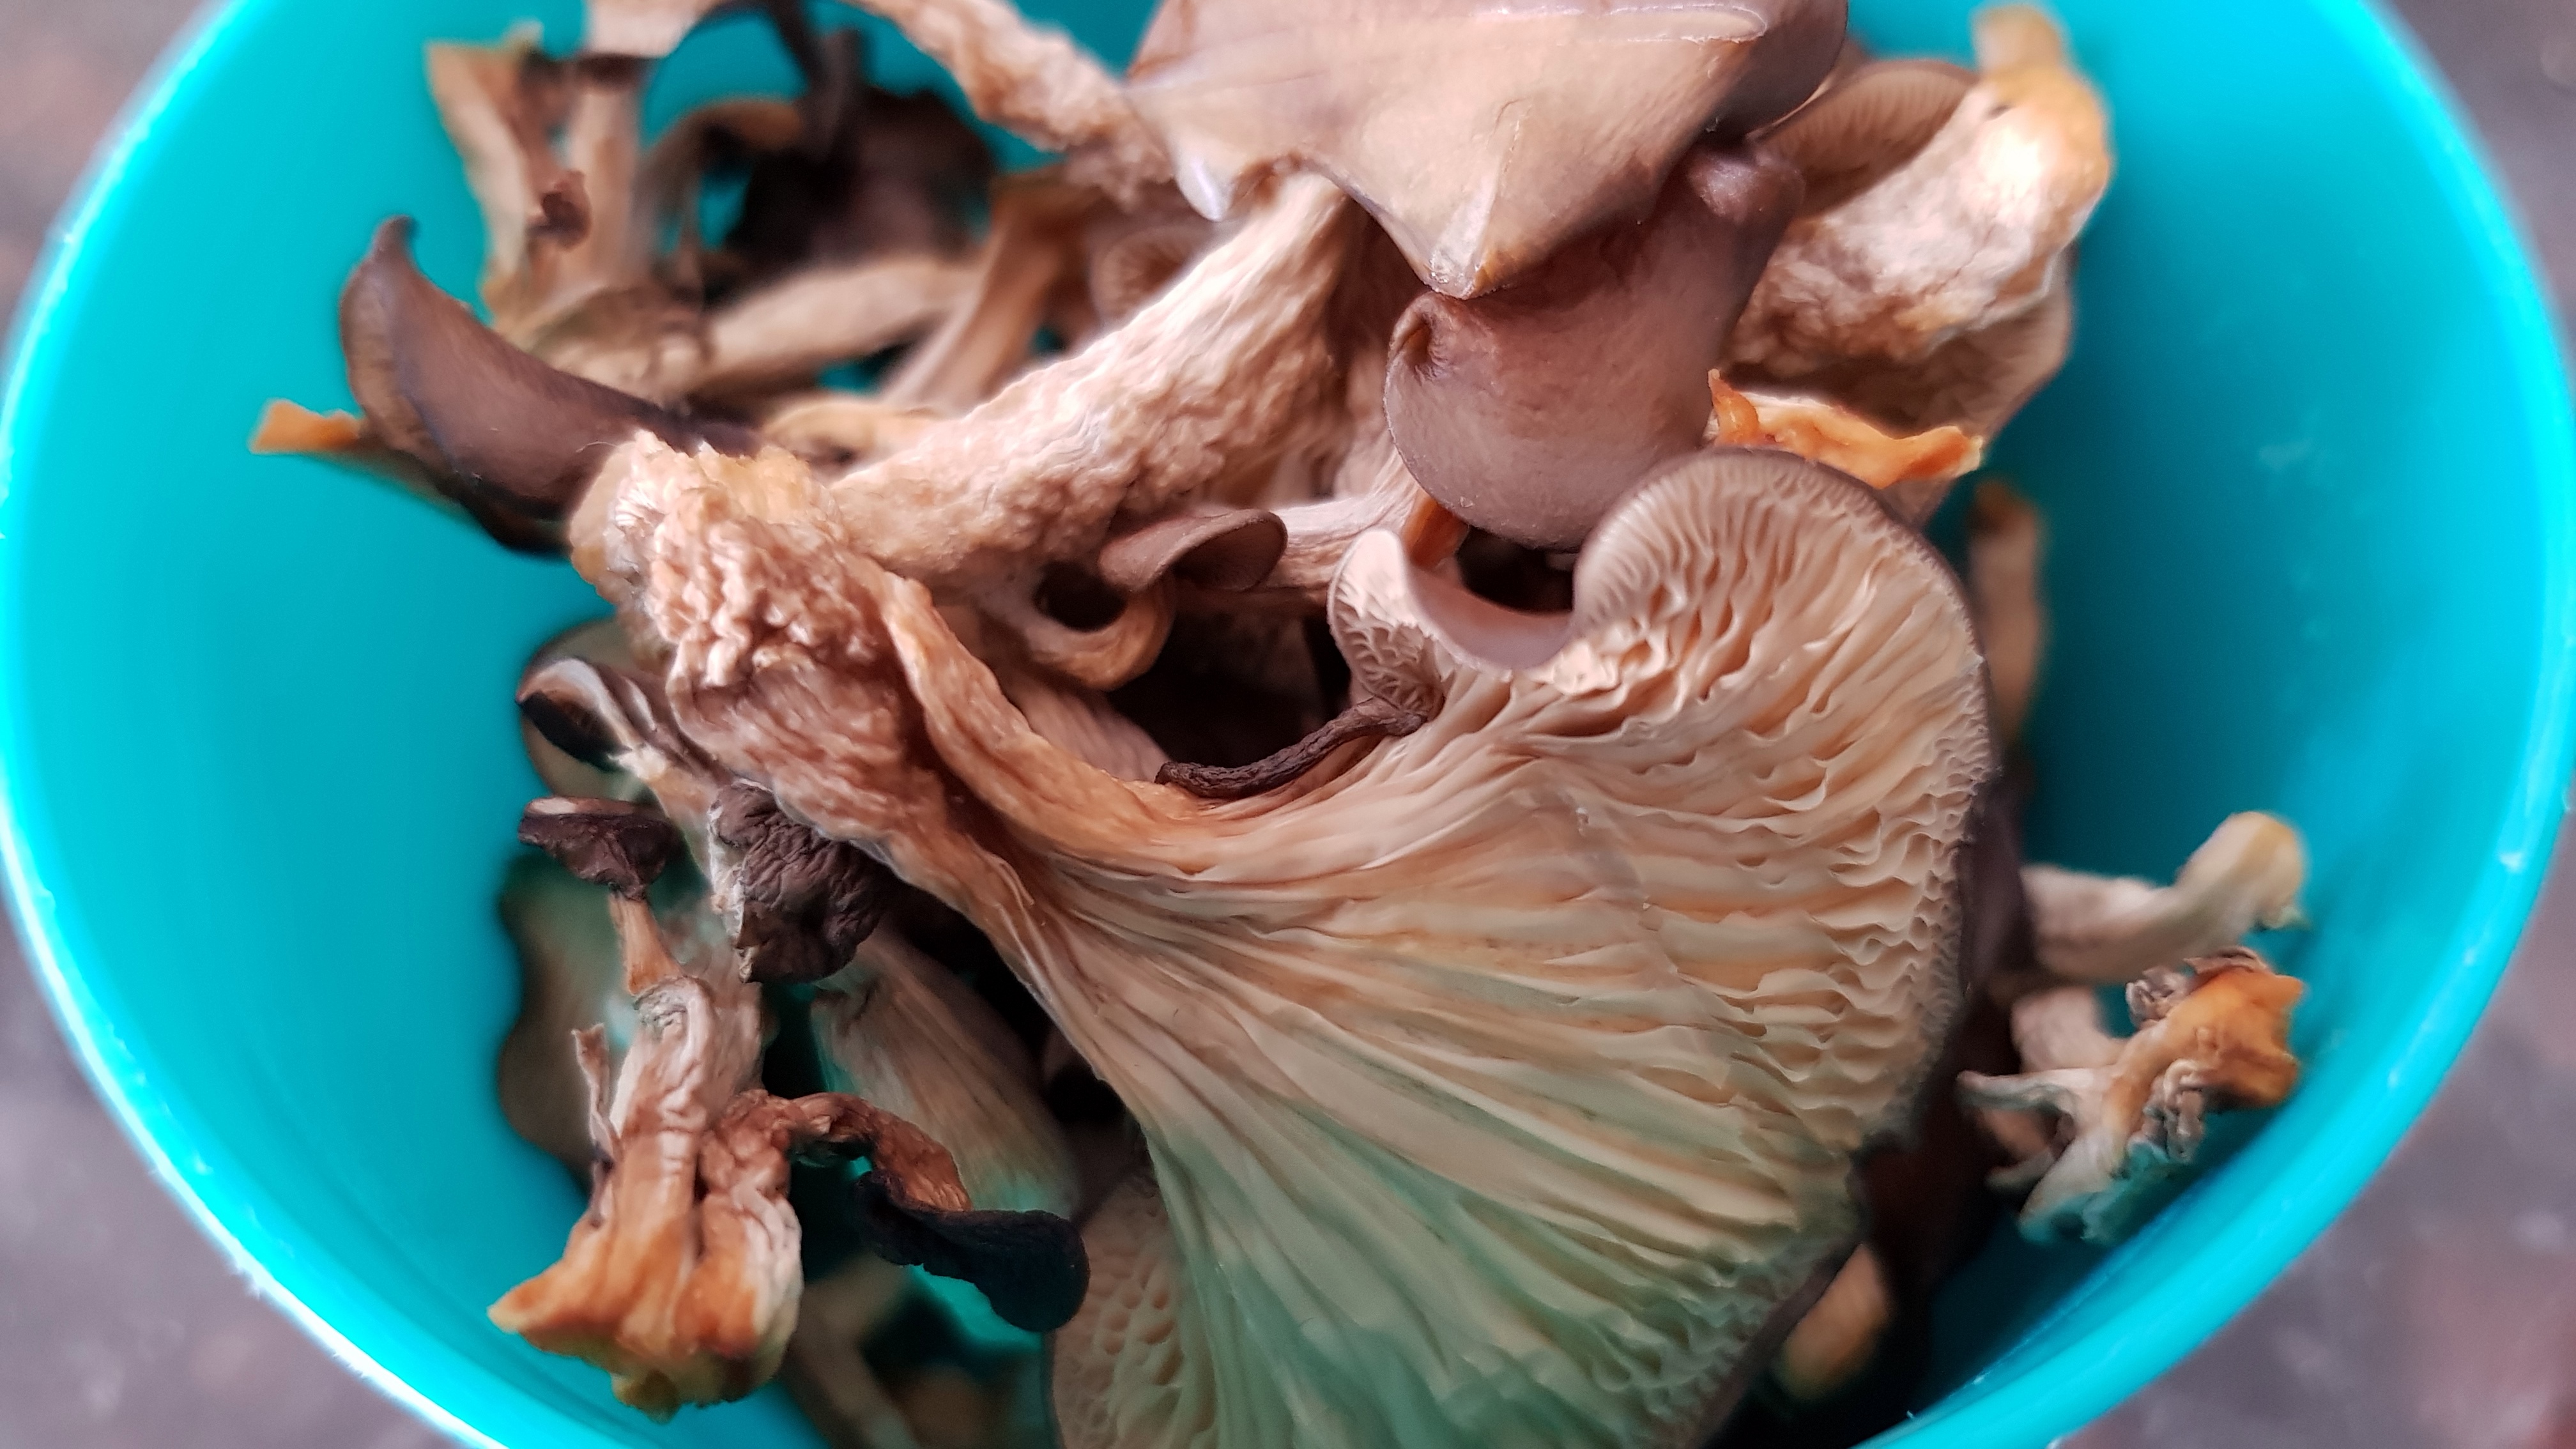
How To Dry Oyster Mushrooms
If I am not using my mushrooms super fresh I prefer to dry them. Dried they really transform slow cooked broths, stocks and casseroles.
I love Growing Oyster Mushrooms At Home but they go gangbusters from nothing to massive in no time. This means lots of mushrooms in a hurry.
If you want to see my fresh mushroom recipes click here but read on to see how I dry and store them.
Chuck the mushies on a cooling rack and set your fan forced oven to 50 degrees C.


Keep drying them until they feel dry to the touch. Then store them in an airtight container. They should last for several months this way.

Enjoy,
PK
YOU MIGHT ALSO LIKE
USING OYSTER MUSHROOMS
MUSHROOM DISHES
GROWING MUSHROOMS
PRESERVING YOUR HARVEST
Please consider subscribing to a weekly email summary of our posts or check us out on Facebook @growitcatchitcookit.
[mc4wp_form id=”15771″]
Written by
·
-
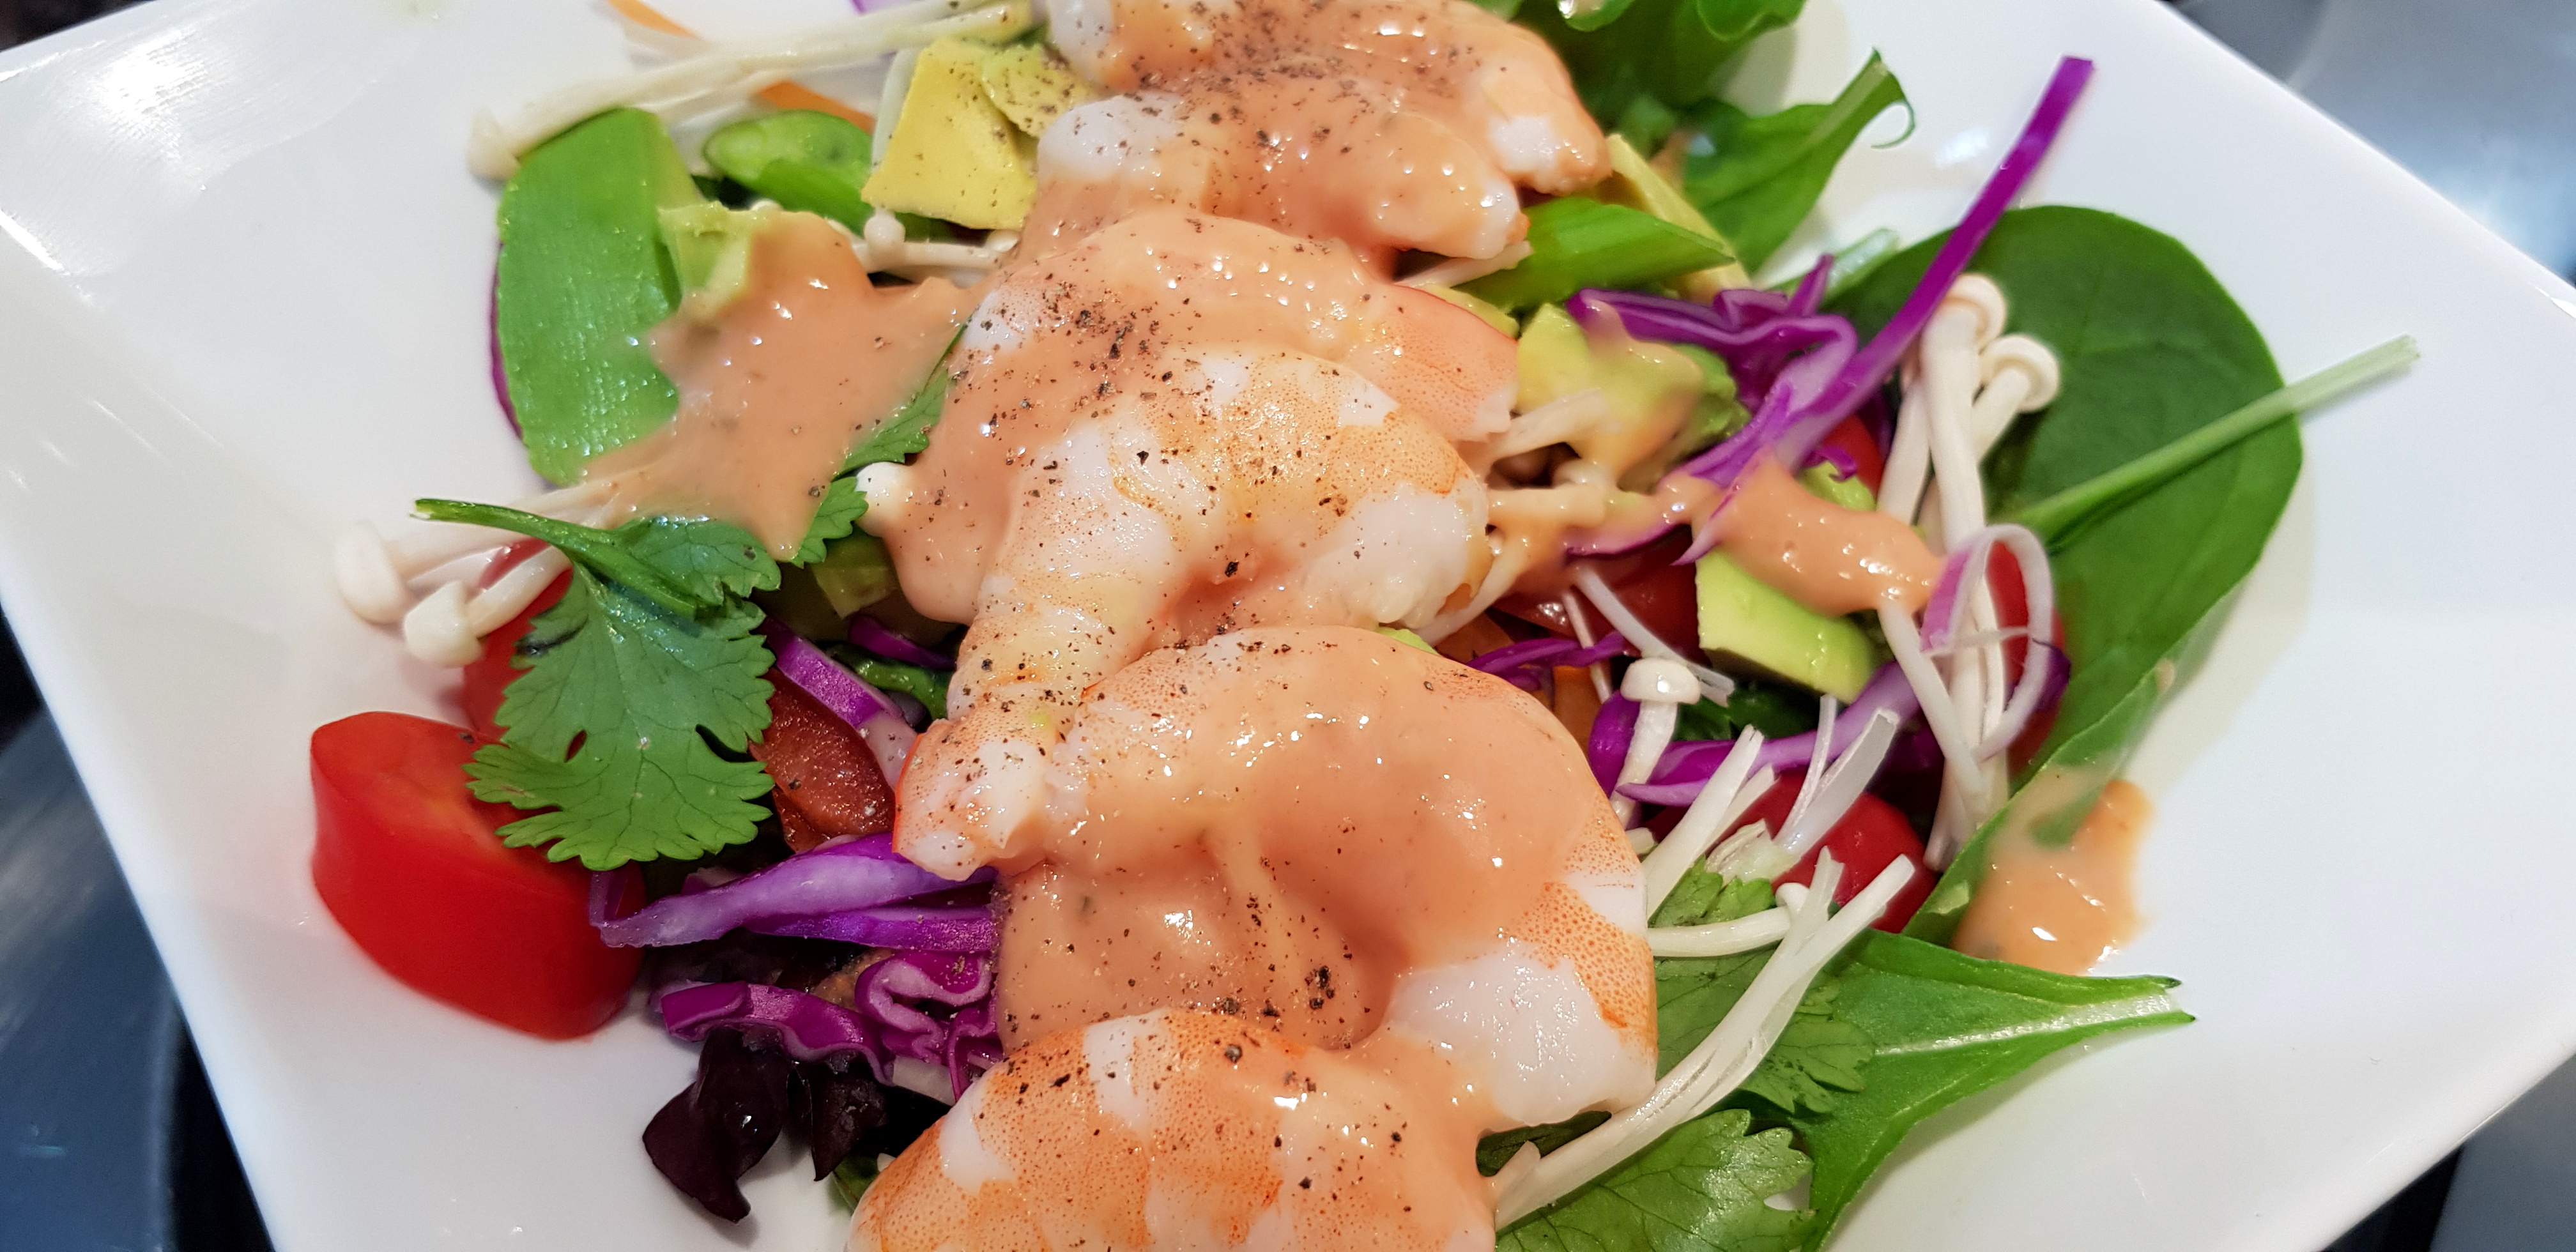
Easy Prawn Cocktail Salad
A prawn cocktail salad is the perfect light and easy summer lunch or dinner. Very Xmas friendly 🙂
I made a colourful salad with lots of avocado, topped it with chilled pre-cooked prawns and doused the lot with Thousand Island dressing.
Secure your cooked prawns in the lead up to Christmas!

Make this recipe your own by using your favourite salad ingredients and garnishes.
Enjoy,
PK
Here are more prawn dishes and salad posts:
Written by
·
-

Growing Oyster Mushrooms At Home
If you have ever thought about growing your own mushrooms but thought it was too time consuming or difficult, rest assured. I bought an oyster mushroom grow bag from David Proudmore (Swan Valley Gourmet Fungi) when I was at the FarmersMarket: Manning – Perth.
I want to share how easy and fun it was. It is also exceptionally cheap!!
The only problem was working out what to do with all the mushrooms. I had to share a lot of them with my friends and family and see the bottom of the post for recipe ideas. 🙂
Their instruction sheet was simple to follow and the bag was already pinning (showing early signs the fungi was fruiting). They say you should get at least 2 and hopefully 3 blooms or flushes of mushrooms from the same bag.
I cut the bag where indicated and then put it in a plastic tub (no lid) lined with moist newspaper.
This is the first bloom:
I then changed the newspaper, cut off little bits of failed/stunted pins, put the bag back on and let the kit rest. During this time I didn’t mist but I did keep an eye out for bugs and mould.
So far I had harvest almost 1.3kg of mushrooms from 2 main bouquets and several smaller ones and was looking forward to the next bloom.
When on day 21 the bag started pinning again I started misting.
I will add to this post until the bag is finished and then I will compost it. I will also be posting how you can grow several types of mushroom on coffee grounds. The process starts by placing the bottom part of an mushroom stem in a jar of coffee grounds!
Enjoy,
PK
YOU MIGHT ALSO LIKE
USING OYSTER MUSHROOMS
MUSHROOM DISHES
GROWING MUSHROOMS
Please consider subscribing to a weekly email summary of our posts or check us out on Facebook @growitcatchitcookit.
[mc4wp_form id=”15771″]
Written by
·
-
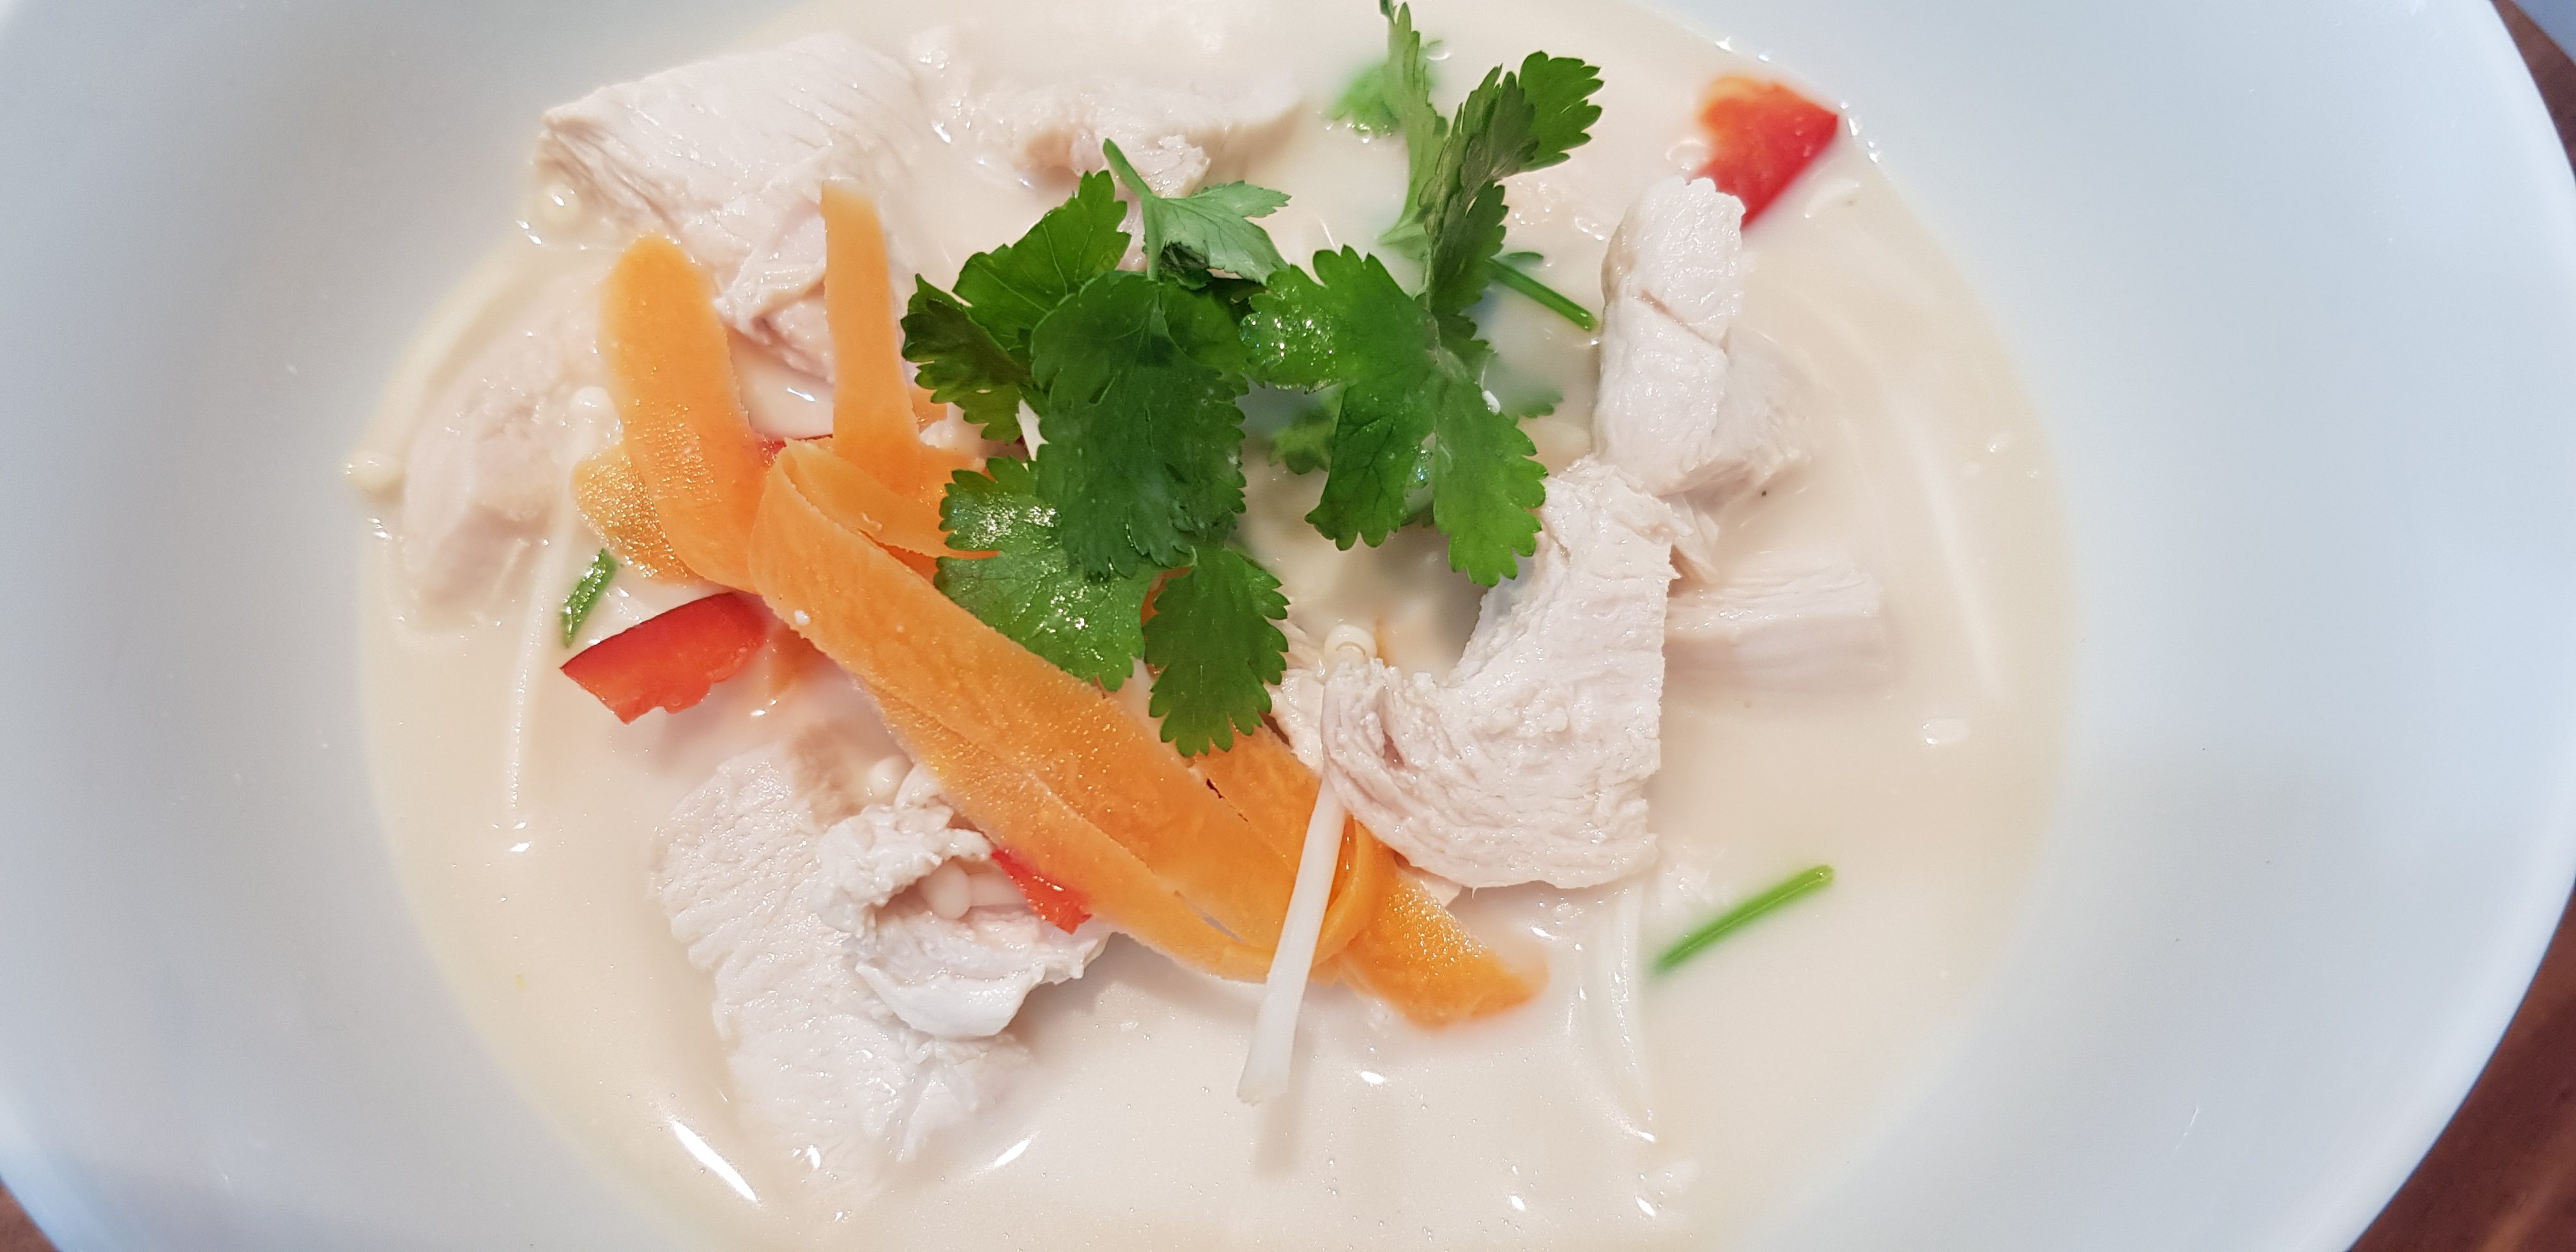
PK’s Simple Tom Kha Gai
My way of making Tom Kha, a Thai coconut, chicken and galangal soup, one bowl at a time is great if you have a family with widely different stands on what they will or won’t eat. For example, I love tomatoes, mushrooms and spring onions so I use lots of them in my bowl. My lads don’t so they get more mushrooms, carrot and corn.
It is also great when you have your friends over for lunch or dinner. Simply put a big pot of soup on the table with the vegetables and rice separate and everyone can build their own bowl. Don’t forget slices of lime, chopped Thai chilies and extra fish sauce. 🙂
Note: I think this makes enough soup for 2 hungry adults.

Steps
- Preparing the ingredients
- Bringing the soup to the boil
- Serving
Ingredients
- 1 poached chicken breast
- 1 small coriander plant (roots and leaves), whole
- 1 chunk of fresh galangal, bruised
- 3 kaffir lime leaves, bruised
- 1 lemongrass stalk, bruised
- 1 Tbsp fish sauce for the pot and 1 Tbsp for each serving bowl
- 1 Tbsp lime juice for the pot and 1 Tbsp for each serving bowl
- 1/2 cup water
- 2 cups chicken stock
- 1 cup coconut milk
- 3 Thai chiles, sliced (optional but encouraged)
- Your personal choice of vegetables
- Coriander leaves to garnish
Equipment
- 1 chef’s knife
- 1 chopping board
- 1 wooden spoon
- 1 saucepan/soup pot
Preparing the ingredients
- Cut your poached chicken breast into cubes or slices.
- Bruise the galangal chunk and the lemongrass stalk and add to the pot.
- Bruise the kaffir lime leaves, or like I have put little tears in the edges to release the flavour better, and add to the pot.
- Add one small coriander plant.
- Add:
- 1 Tbsp fish sauce
- 1 Tbsp lime juice
- 1/2 cup water
- 2 cups chicken stock
- 1 cup coconut milk
- 3 Thai chiles (optional)

Bringing the soup to the boil
- Let everything come to a boil really slowly to infuse all the flavours. I don’t move it very often and then only a gentle swirl.
- Once you have a gentle boil, turn the heat down a bit and add the poached chicken.
- Cook until the chicken is safely warmed through but not for too long or it will go stringy.

Serving
- Build up a bowl of your favourite vegetables and add 1 Tbsp fish sauce and 1 Tbsp lime juice.
- Add some chicken and then add as much soup as you want (liquid only, the rest stays behind).
- Provide your guests with some cooked rice, slices of lime, extra chiles and fish sauce.

Enjoy,
PK
YOU MIGHT ALSO LIKE
MORE THAI DISHES
MORE ASIAN CUISINE
CHICKEN DISHES
MORE SOUP POSTS
Please consider subscribing to a weekly email summary of our posts or check us out on Facebook @growitcatchitcookit.
[mc4wp_form id=”15771″]
Written by
·
-
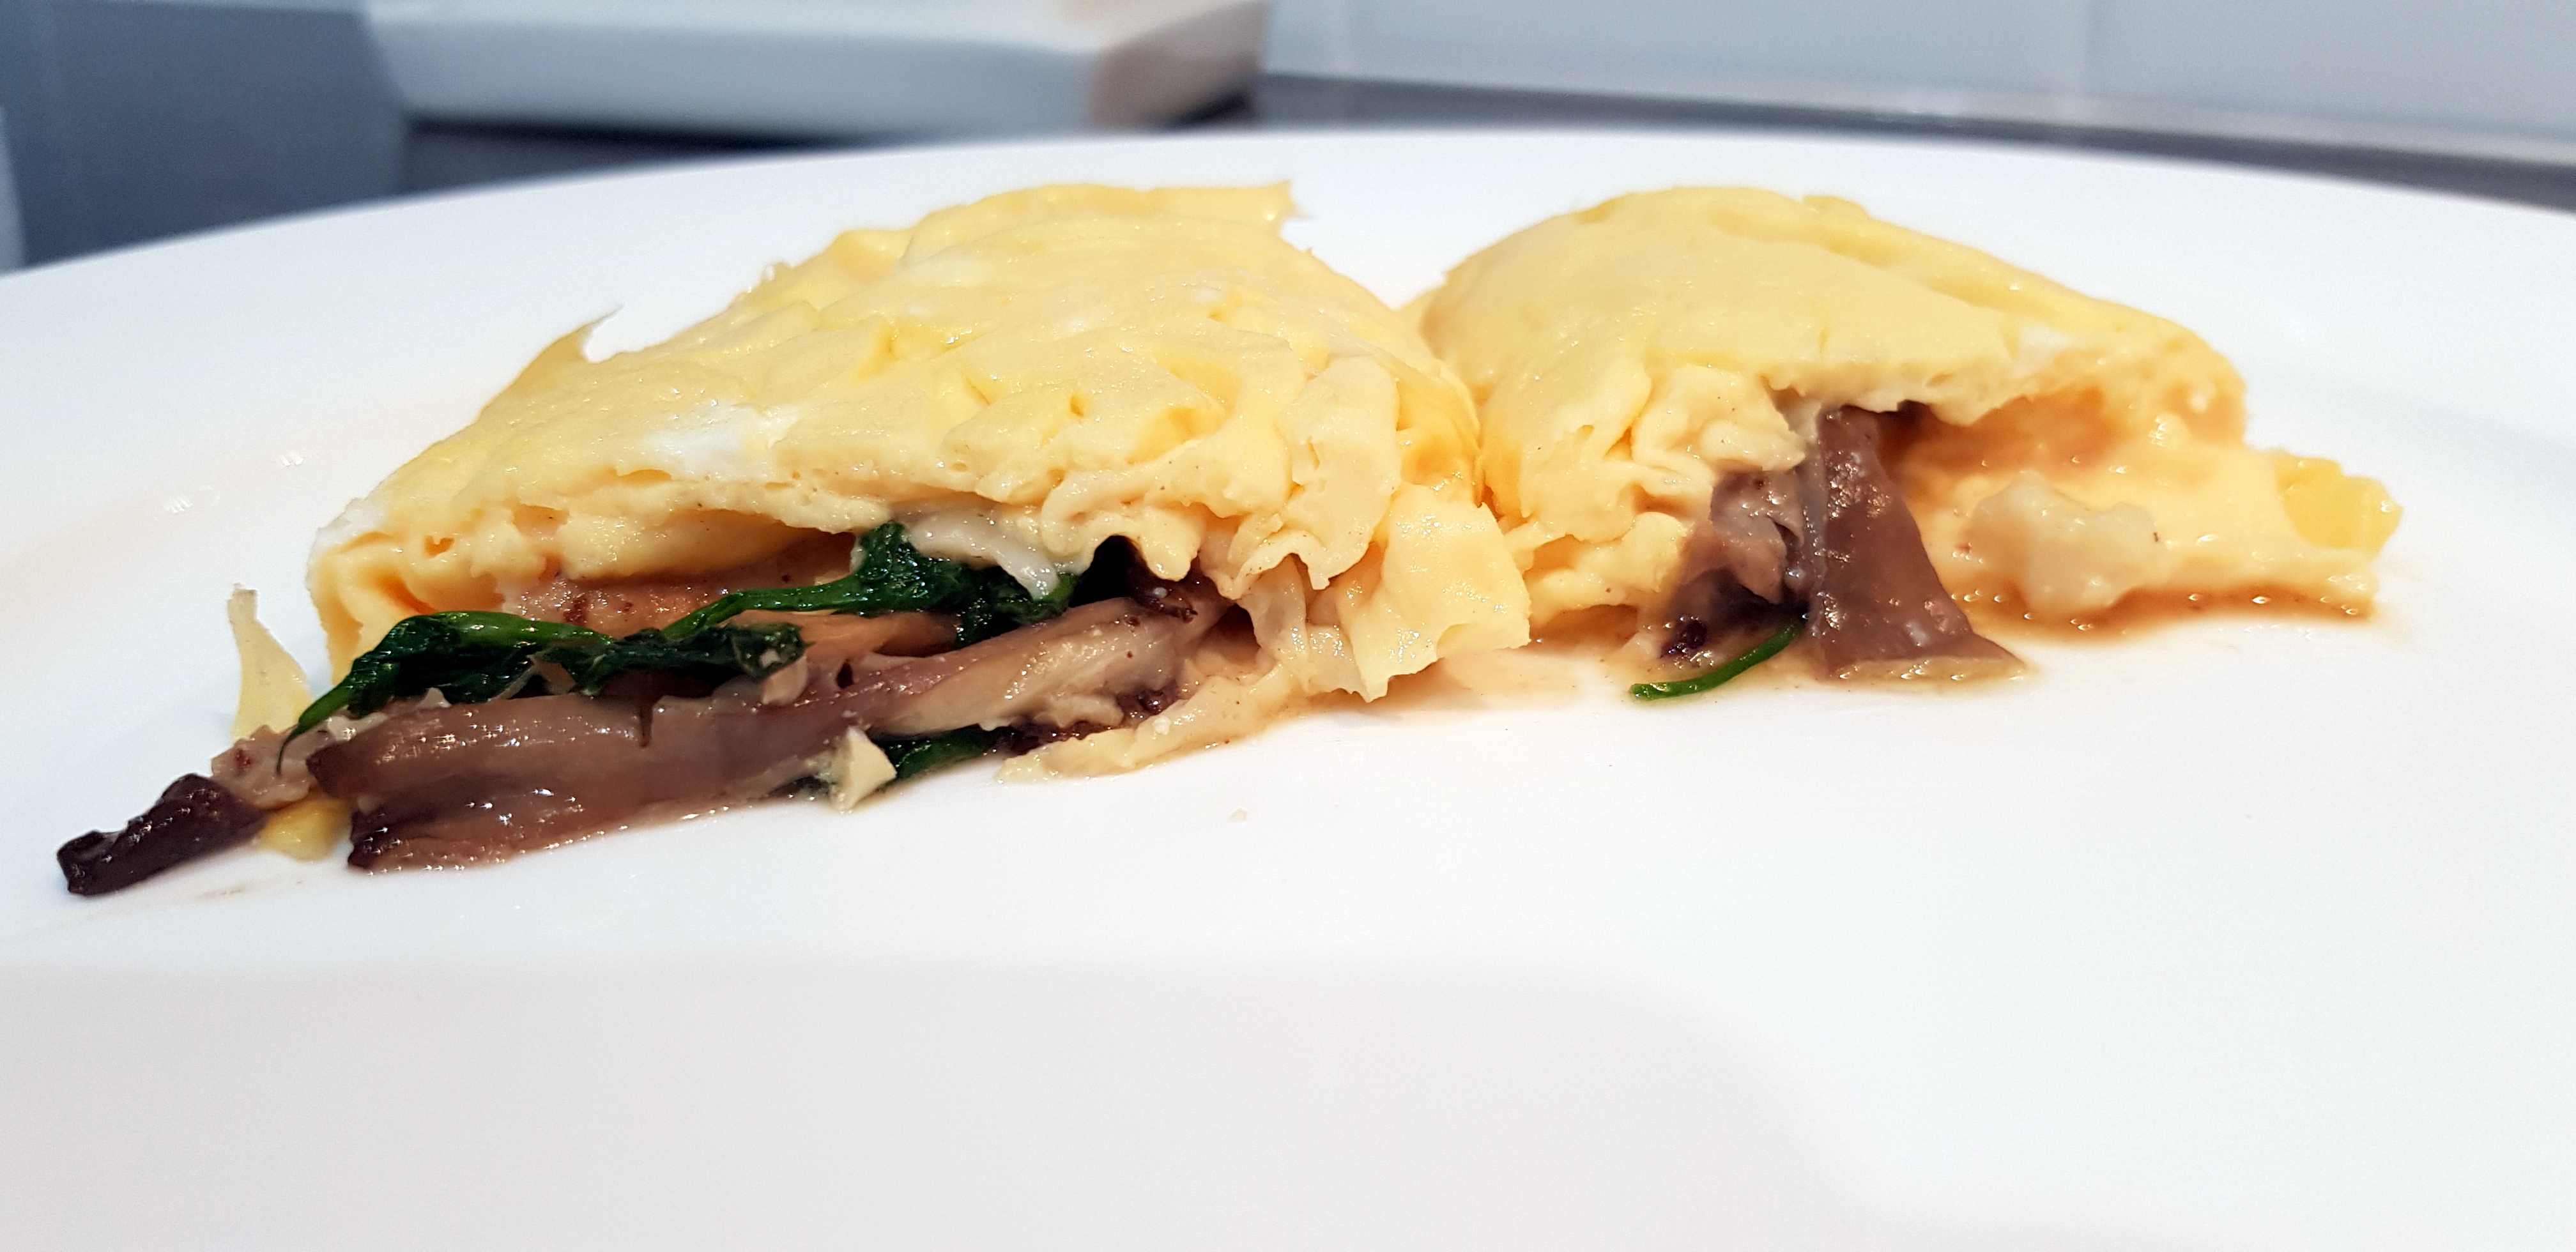
PK’s Easy Oyster Mushroom Omelette
I have to admit to being an omelette novice. So I went on the hunt for some help.
I learnt so much from watching two amazing youtube videos. One is by Jamie Oliver and the other by a chef I have only just stumbled upon called Jacques Pépin. I have attached their videos to the bottom of this post.
As I have a overwhelming amount of oyster mushrooms I decided to test my new knowledge with them. Practice makes perfect but I don’t mind as the not so good ones taste amazing too. 🙂
The Technique
The oyster mushrooms easily split/peel into nice little strips. I then cooked them quickly in some oil and butter.
I then whisked 2 eggs for about one minute. You really want to mix the white into the yolk but you don’t need to over do it either.

I then melted some butter in my fry pan. Note that I am using one that has curved sides as this helps when you come to fold the omelette over.
I added the egg and slowly moved the curds around using a spoon. I always thought you just left the egg alone until it ‘set’ and then flipped it. The liquid egg will move into the spots left behind by you moving the curds, forming more curds. This process gives the omelette a creamier texture.
Once you get the egg cooked to your liking (some like it runnier than others) stuff the omelette with the mushrooms and fold it over.


Then serve. 🙂

Cooked through but still lovely and creamy on the inside.

Please watch the master chefs’ videos below.
Enjoy,
PK
YOU MIGHT ALSO LIKE
DISHES USING EGGS
OYSTER MUSHROOMS
MORE NORECIPE GOODNESS
15 MINUTE MEALS
Please consider subscribing to a weekly email summary of our posts or check us out on Facebook @growitcatchitcookit.
[mc4wp_form id=”15771″]
Written by
·
-
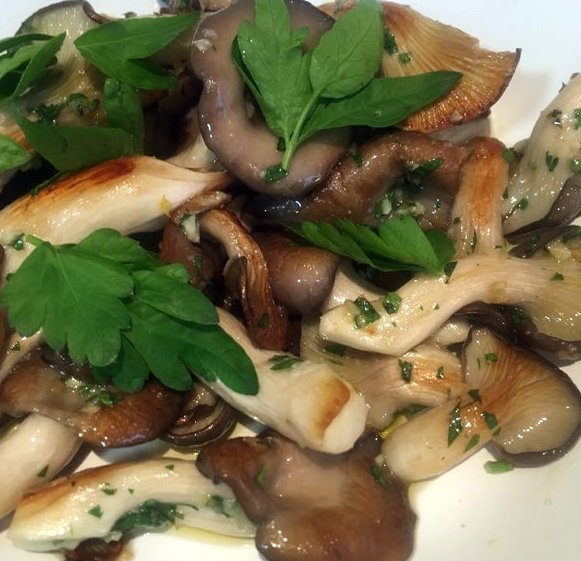
Paul’s Oyster Mushrooms With Olive Oil And Garlic
I gave Paul a bunch of oyster mushrooms the other day and this is what he did with them.
Ingredients: oyster mushrooms, olive oil, garlic, parsley, salt & pepper
In a hot wok, drizzle some olive and throw the mushrooms in and let it sizzle. During this stage don’t stir the mushroom around as you want to get a golden colour all round and reduce the water content to increase flavour.
After a couple of minutes give them a flip and let it sizzle for a couple more minutes then add in chopped garlic and parley, give it a toss and season to taste.
If you want, drop a knob of butter to add more flavour, stir, serve and munch.😀


Enjoy,
Paul
YOU MIGHT ALSO LIKE
USING OYSTER MUSHROOMS
MUSHROOM DISHES
MORE NORECIPE GOODNESS
15 MINUTE MEALS
Please consider subscribing to a weekly email summary of our posts or check us out on Facebook @growitcatchitcookit.
[mc4wp_form id=”15771″]
Written by
·
-
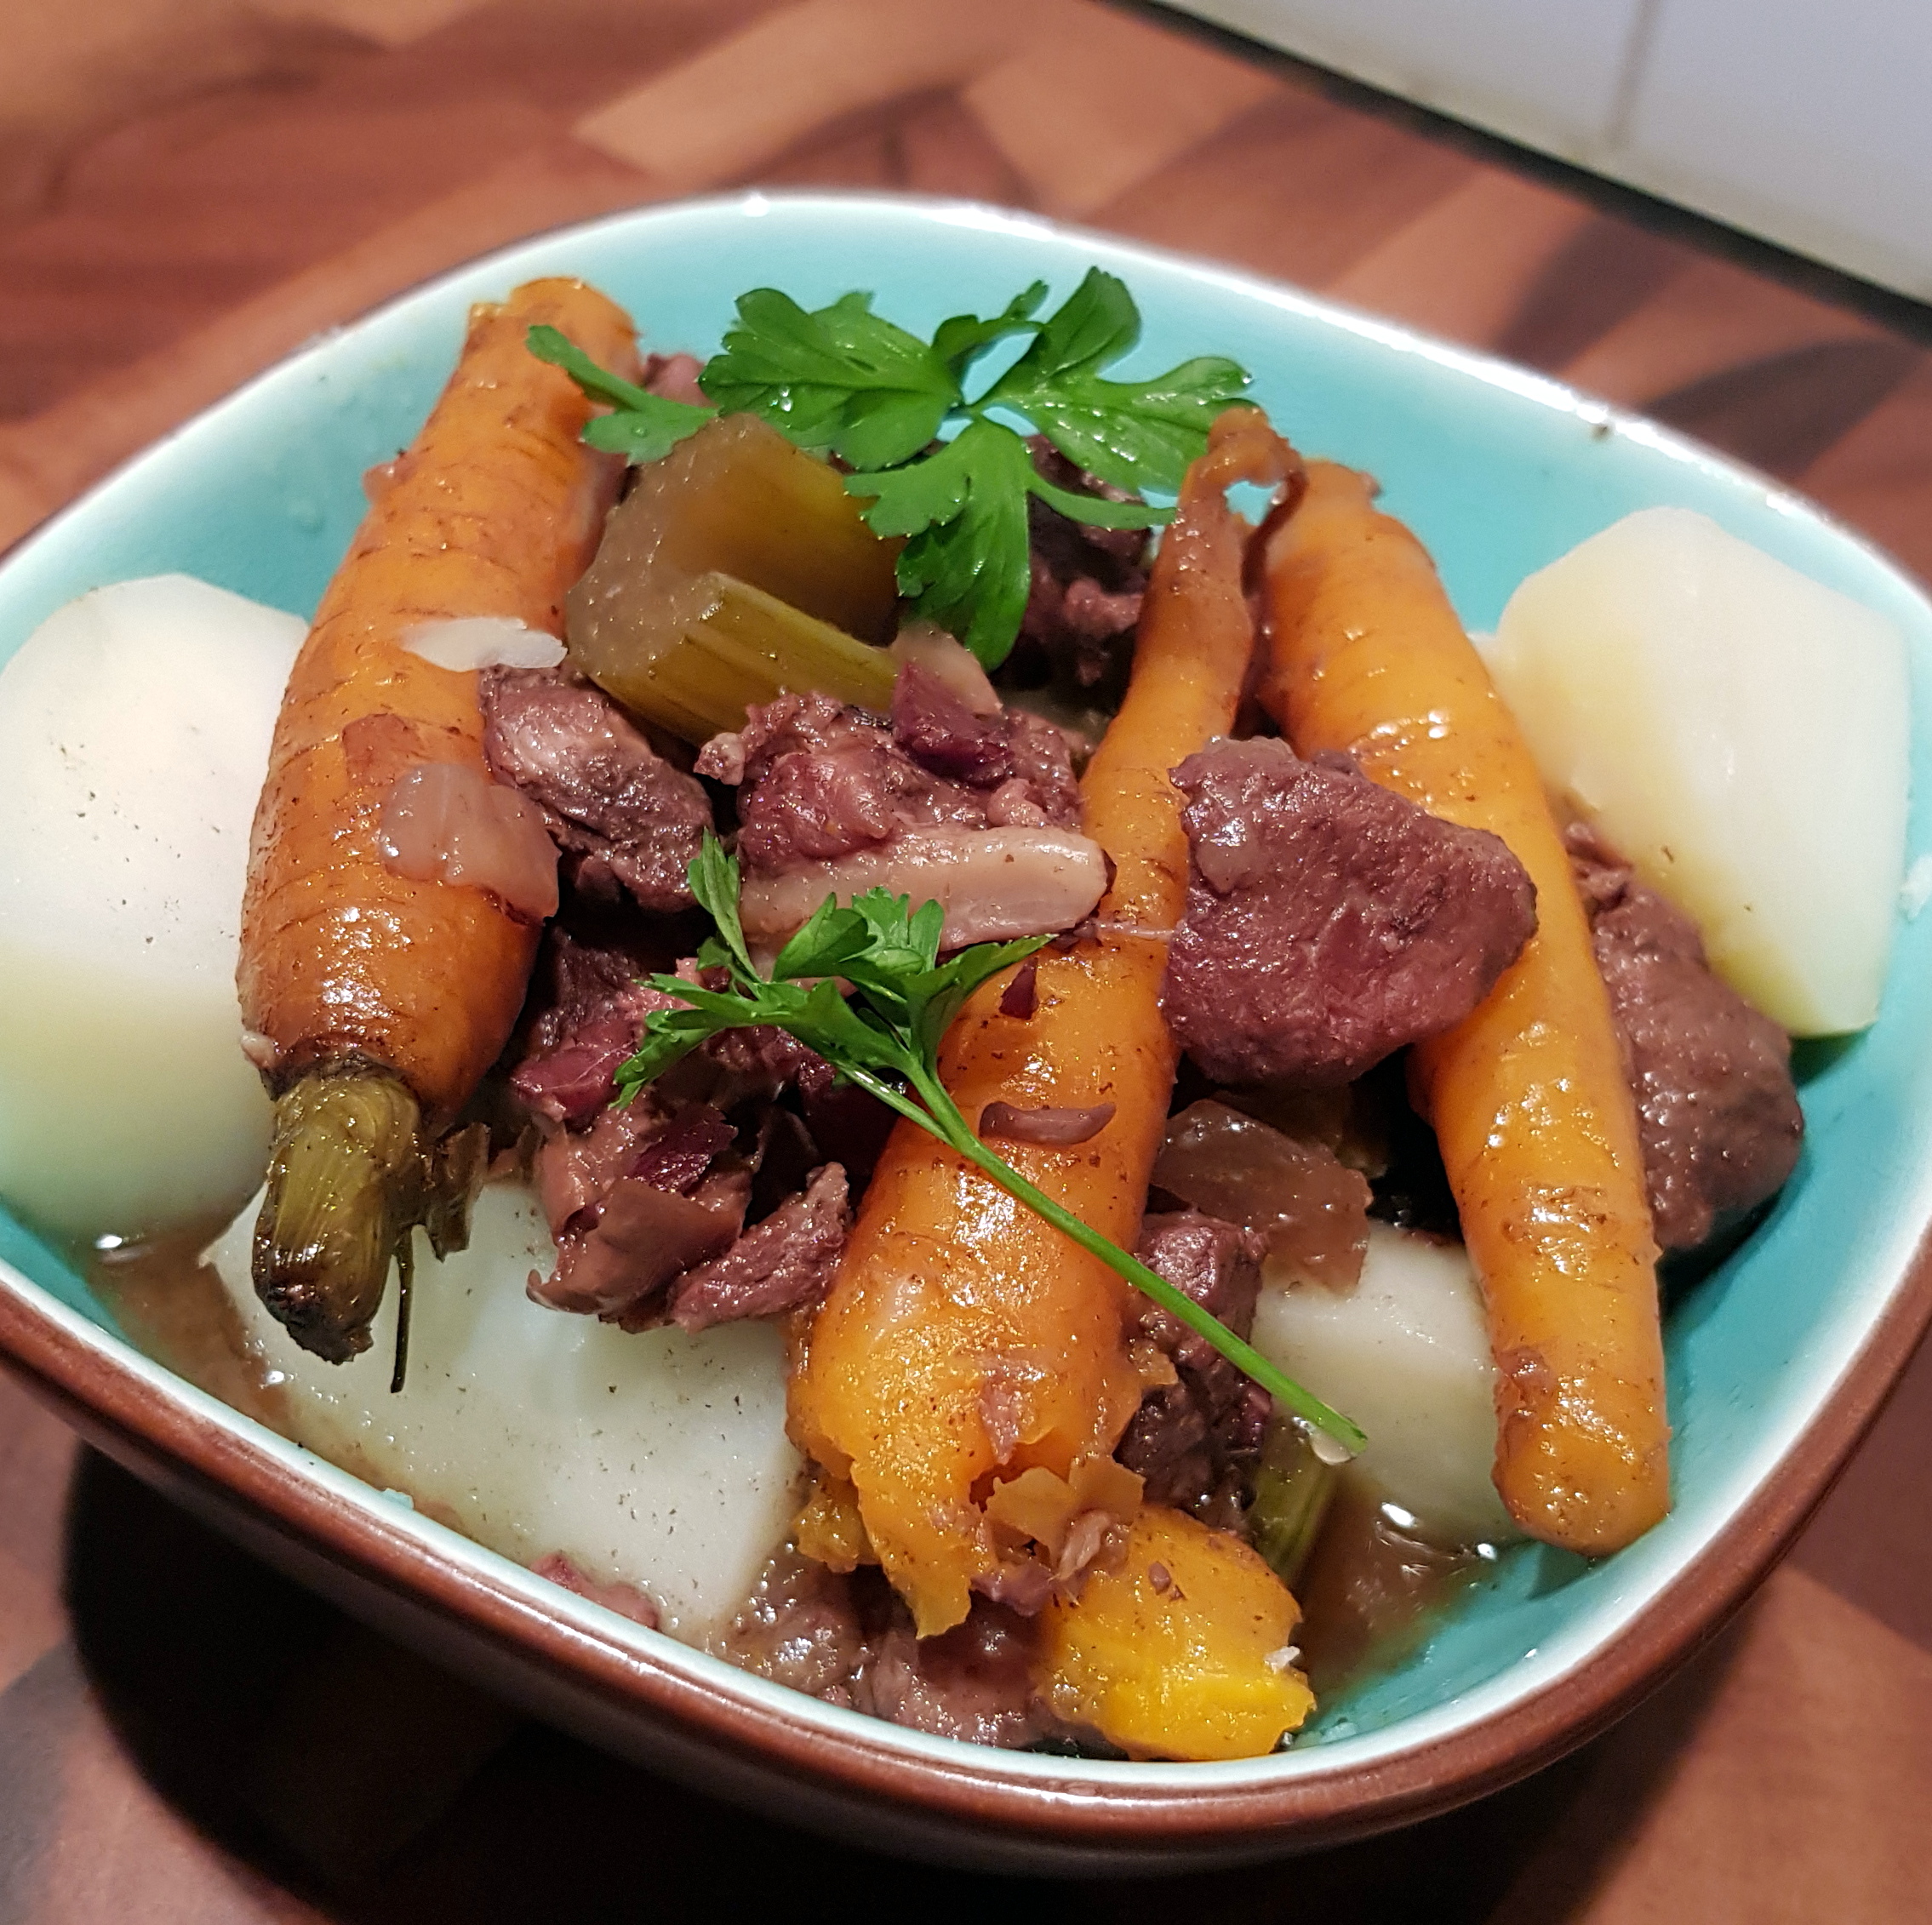
PK’s Slow Cooked Beef Bourguignon
Beef Bourguignon is a very yummy and very ‘French’ slow cooked beef dish that sounds hard to make. Nothing could be further from the truth, especially if you grew up calling it Beef Burgundy. The hardest part of this recipe is waiting the 4 hours to get to eat it. 🙂 🙂
The French sure know how to take basic peasant farm yard ingredients, the chewier cuts of meat and turn them into a meal fit for royalty.

You will be:
- Preparing everything
- Boiling the wine
- Rendering the bacon
- Browning the meat
- Softening the vegetables
- Cooking low and slow
- Serving
You will need:
- Ingredients:
- 1kg (2.2lb) beef chuck steak (a bit more or less is fine too), cubed
- 6 slices short cut bacon, cut into strips
- 2 cups red wine (plus a splash for glazing the casserole dish)
- 1 cup stock (any will do but I used beef)
- A Bouquet Garni
- 2 garlic cloves, peeled and diced
- A handful of dried mushrooms (or 2 of fresh)
- 2 brown onions, peeled and sliced
- 3 celery stalks, chopped
- 6 baby carrots, scrubbed clean but left whole
- 3 Tbsp duck fat
- Salt and pepper to taste
- Equipment:
- 2 chef’s knives (or 1 if you wash it after the meat)
- 2 chopping boards
- 1 large casserole dish or equivalent
- 1 slow cooker
- 1 slotted spoon
Preparing everything
I like to bring everything together before I start cooking. Not only does it look and smell amazing but it leads to stress free cooking.

I used a handful of rough chopped dried mixed forest mushrooms (Bolets, Pleurotes and Champignons noirs). I am sorry mushroom haters (I used to be one so I understand) but the mushrooms are integral to the dish.

I had already premade my Bouquet Garni bag with my go to mix of bay leaves, thyme, savoury and parsley.

Boiling the wine
- Pop the casserole dish on the hob and slowly bring the 2 cups of red wine to the boil, keep it there for a few minutes.
- Turn your slow cooker on to low and transfer the wine to it when safe to do so.
- Also add the 1 cup of stock and the bouquet garni bag to the slow cooker.
- Wipe the casserole dish clean.

Rendering the bacon
- On medium heat, add the 3 Tbsp duck fat to the casserole dish along with the 2 garlic cloves.
- Add bacon strips to the fat, stirring occasionally, for 10 minutes.
- We are trying to get the bacon fat to render down and release its flavour into the duck fat, not trying to crisp it up, so adjust the heat accordingly,

Browning the beef
- Season the 1kg of cubed beef with salt and pepper.
- In batches, brown the meat in the fat and transfer to the slow cooker (using the slotted spoon) as you go.

Softening the vegetables
- Now add the 2 brown onions, 3 celery stalks and 6 baby carrots to the casserole dish.
- Cook them on low heat, occasionally and very gently moving them around, until they have softened somewhat.
- Add them and the handful of dried mushrooms to the slow cooker.
- Deglaze the casserole dish with a splash of red wine and then add that to the slow cooker too.


Cooking low and slow
Cook on low for 3 to 4 hours, turning everything over occasionally.
Serving
The options are endless but I served it with some boiled peeled potatoes and garnished with parsley. Perhaps the most interesting serving idea I have seen on the internet was on a bed of flat pasta.

Enjoy,
PK
YOU MIGHT ALSO LIKE
BEEF DISHES
MORE FRENCH CUISINE
MORE SLOW COOKER POSTS
Please consider subscribing to a weekly email summary of our posts or check us out on Facebook @growitcatchitcookit.
[mc4wp_form id=”15771″]
Written by
·
-
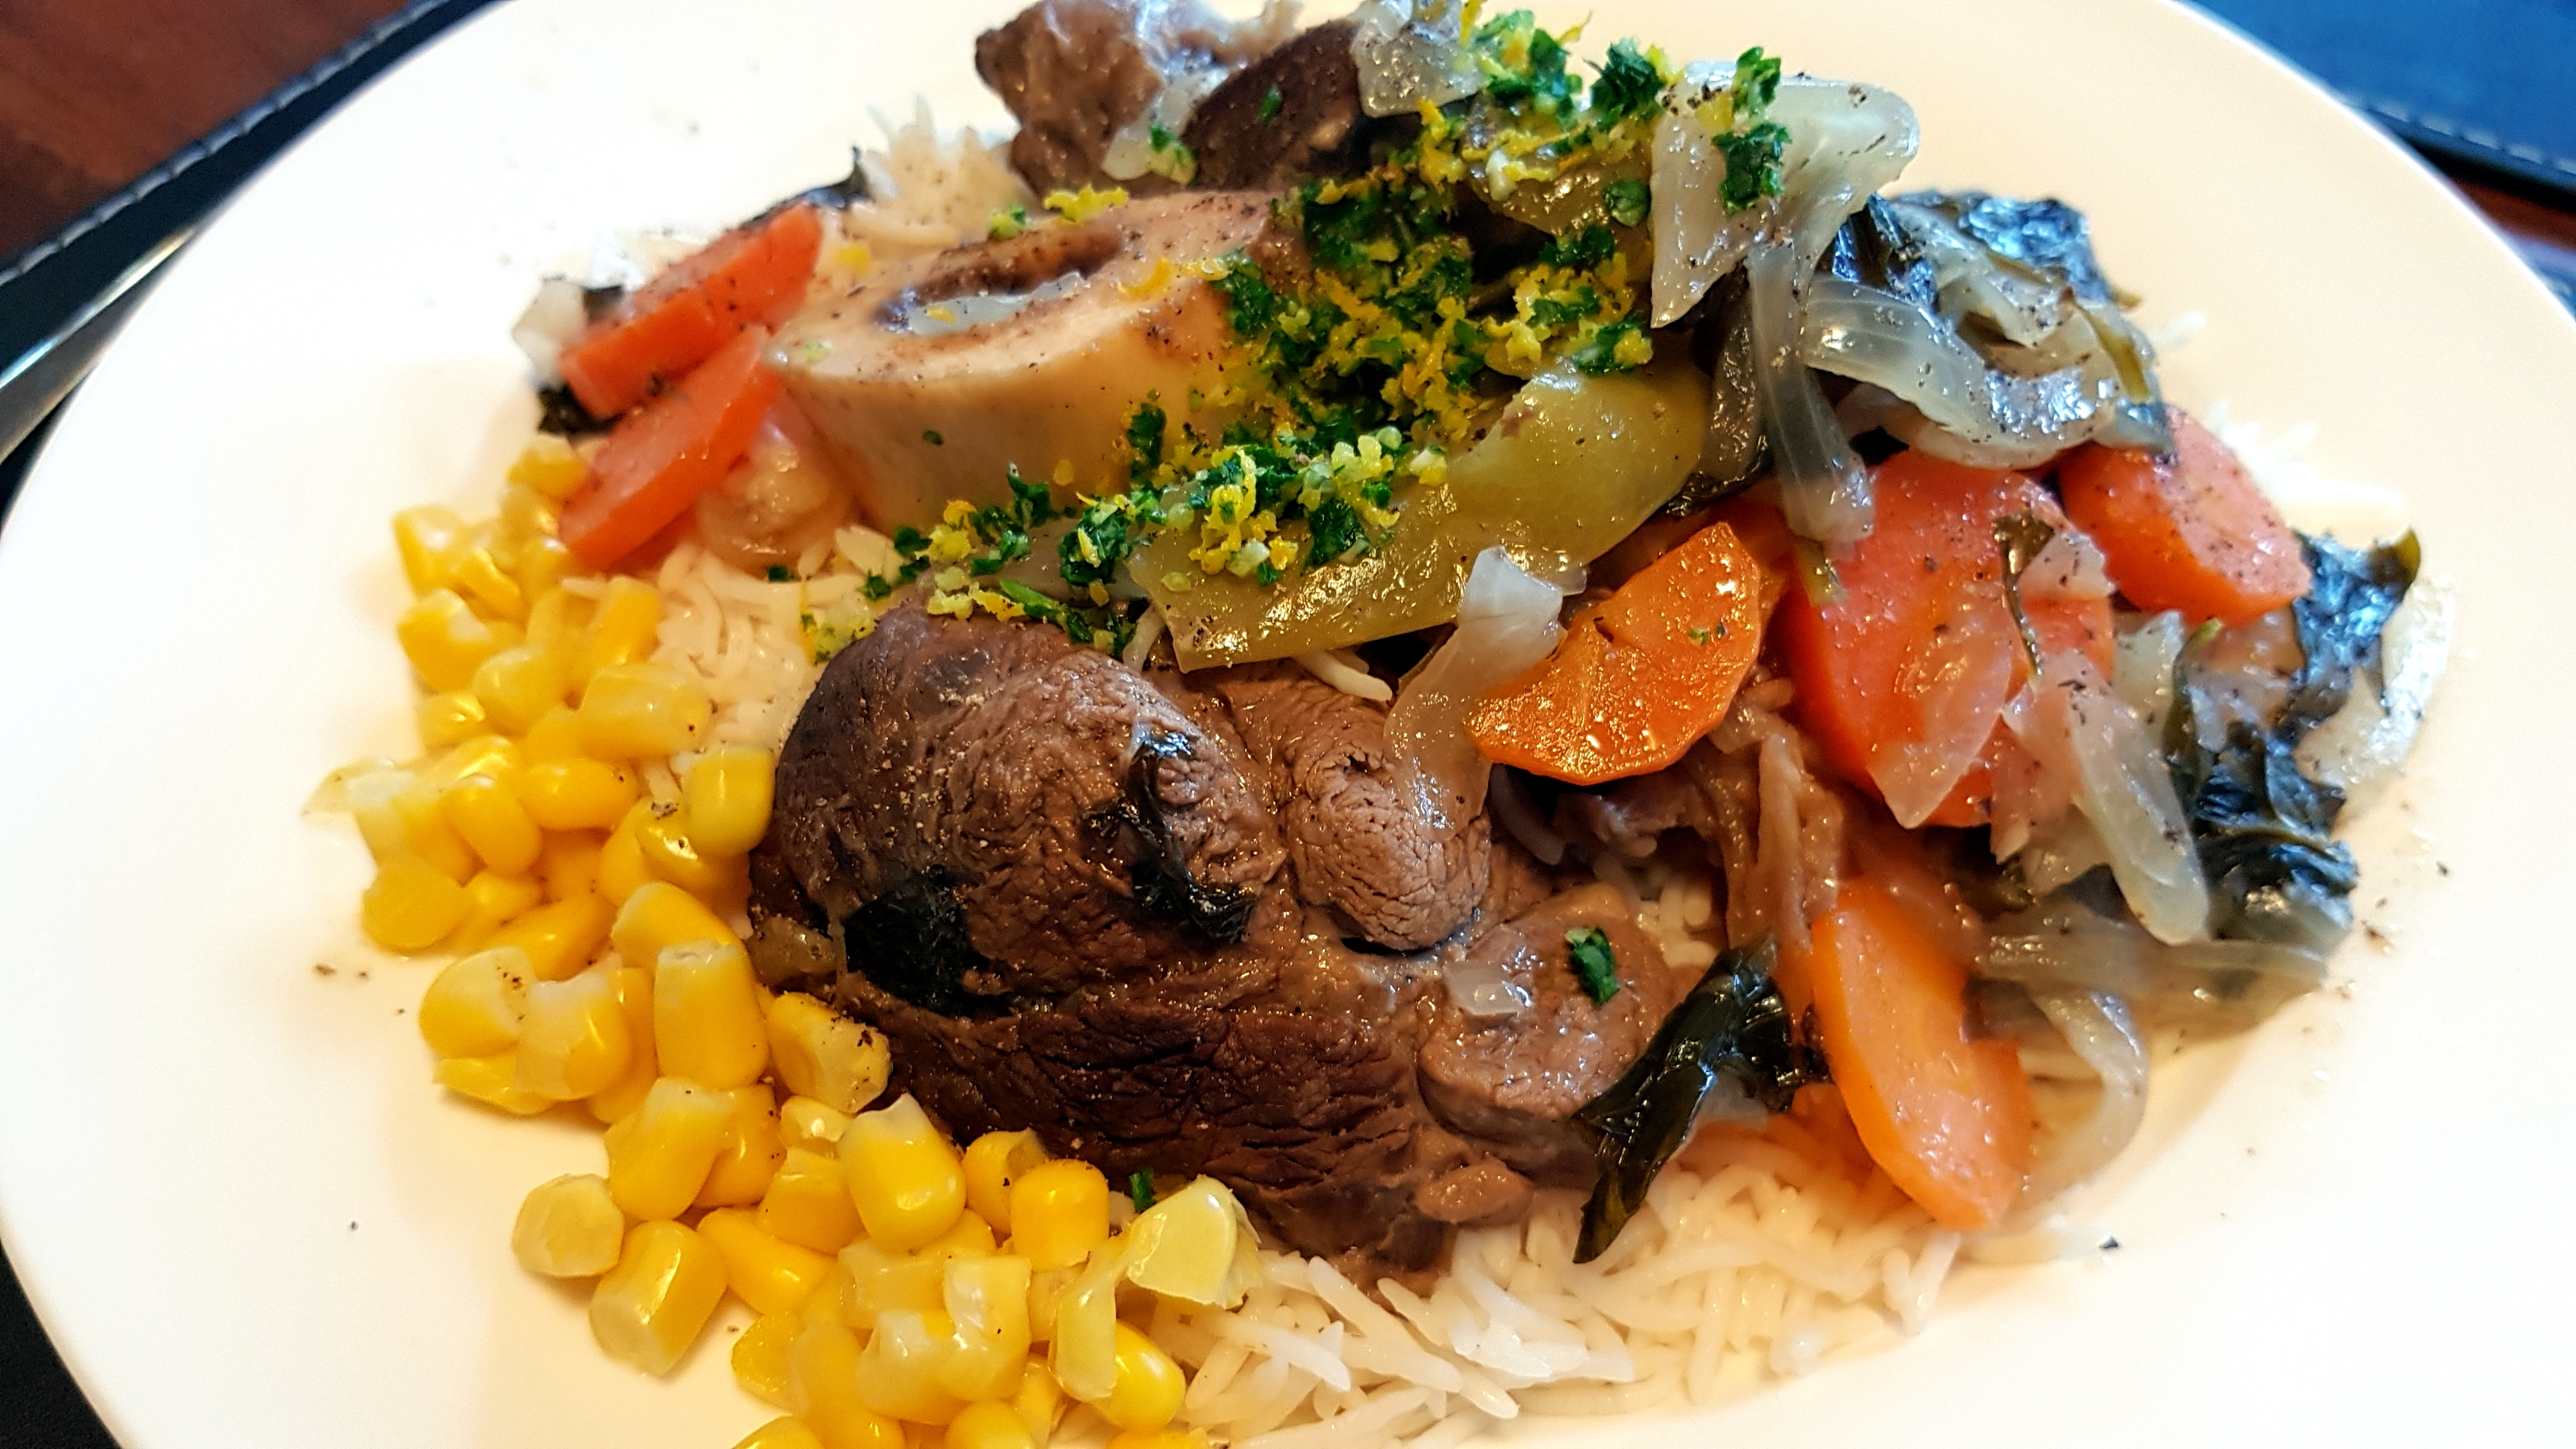
Hugh Fearnley-Whittingstall’s Osso Buco Slow Cooker
Considering how much I love lamb shanks I am surprised it took me this long to cook Osso Buco for the first time. I always use Hugh’s recipe for the shanks (River Cottage’s Citrus Braised Lamb Shanks) so it is a no surprise I am using his Osso Buco Alla Milanese.
You will be using thick slices of beef or veal shins with the shin bone still present. Look at the beautiful rich colour.

The result was tender beef that was falling off the bone and a lovely sauce that was hearty but less fatty than you would get cooking with lamb.
Note: Pop this on early in the day because it might take 6 hours or more on your slow cooker’s medium setting.
You will be:
- Preparing everything
- Sealing the beef shins
- Sweating the vegetables
- Slow cooking everything
- Serving
You will need:
- Ingredients:
- 4 – 6 slices of beef shin with the bone still in the middle (about 1.3kg)
- enough plain white flour to coat the shins
- table salt and cracked black peppercorns to taste
- 50g salted butter
- A couple of slugs olive oil
- 2 garlic cloves, diced
- 2 celery sticks and their leaves, chopped
- 2 brown onions, chopped
- 1 carrot, chopped
- A handful of snow peas, whole
- 2 cups dry white wine
- 2 cups stock (I have used homemade Slow Cooker Chicken Stock and Italian Beef Stock: Brodo Di Manzo but use anything you have to hand)
- A handful of chopped mushrooms (optional)
- Equipment:
- 1 long sharp knife
- 1 chopping board
- 1 frypan
- 1 slow cooker
Preparing everything
- While you let the beef shins come to room temperature prepare the:
- 2 garlic cloves, diced
- 2 celery sticks chopped
- 2 brown onions, chopped
- 1 carrot, chopped
- a handful of snow peas, whole
- Dry the beef shin slices with paper towel, season with salt and pepper and then dust them in the flour.


Sealing the beef shins
- Turn your slow cooker on to high, add a slug of olive oil and cover.
- Melt the 50g of salted butter in a frypan and then add a good slug of olive oil.
- Brown both sides of the shins (if they start to curl on you during cooking, clip the outer ring of connective tissue with kitchen shears).
- Add them to the slow cooker.


Sweating the vegetables
- Add the 2 cups white wine and the 2 cups of stock to the same frypan and bring to a gentle boil.
- Reduce the heat to low and then add the vegetables.
- Cook until they soften and then add everything to the slow cooker.

Slow cooking everything
Turn the slow cooker down to medium or low and cover. Mine took 6 hours before the beef was ready.
Serving
Serve on a bed of basmati rice with extra vegetables and some of Hugh’s gremolata.

Enjoy,
PK
Related Links:
Written by
·