Tag: panko
-
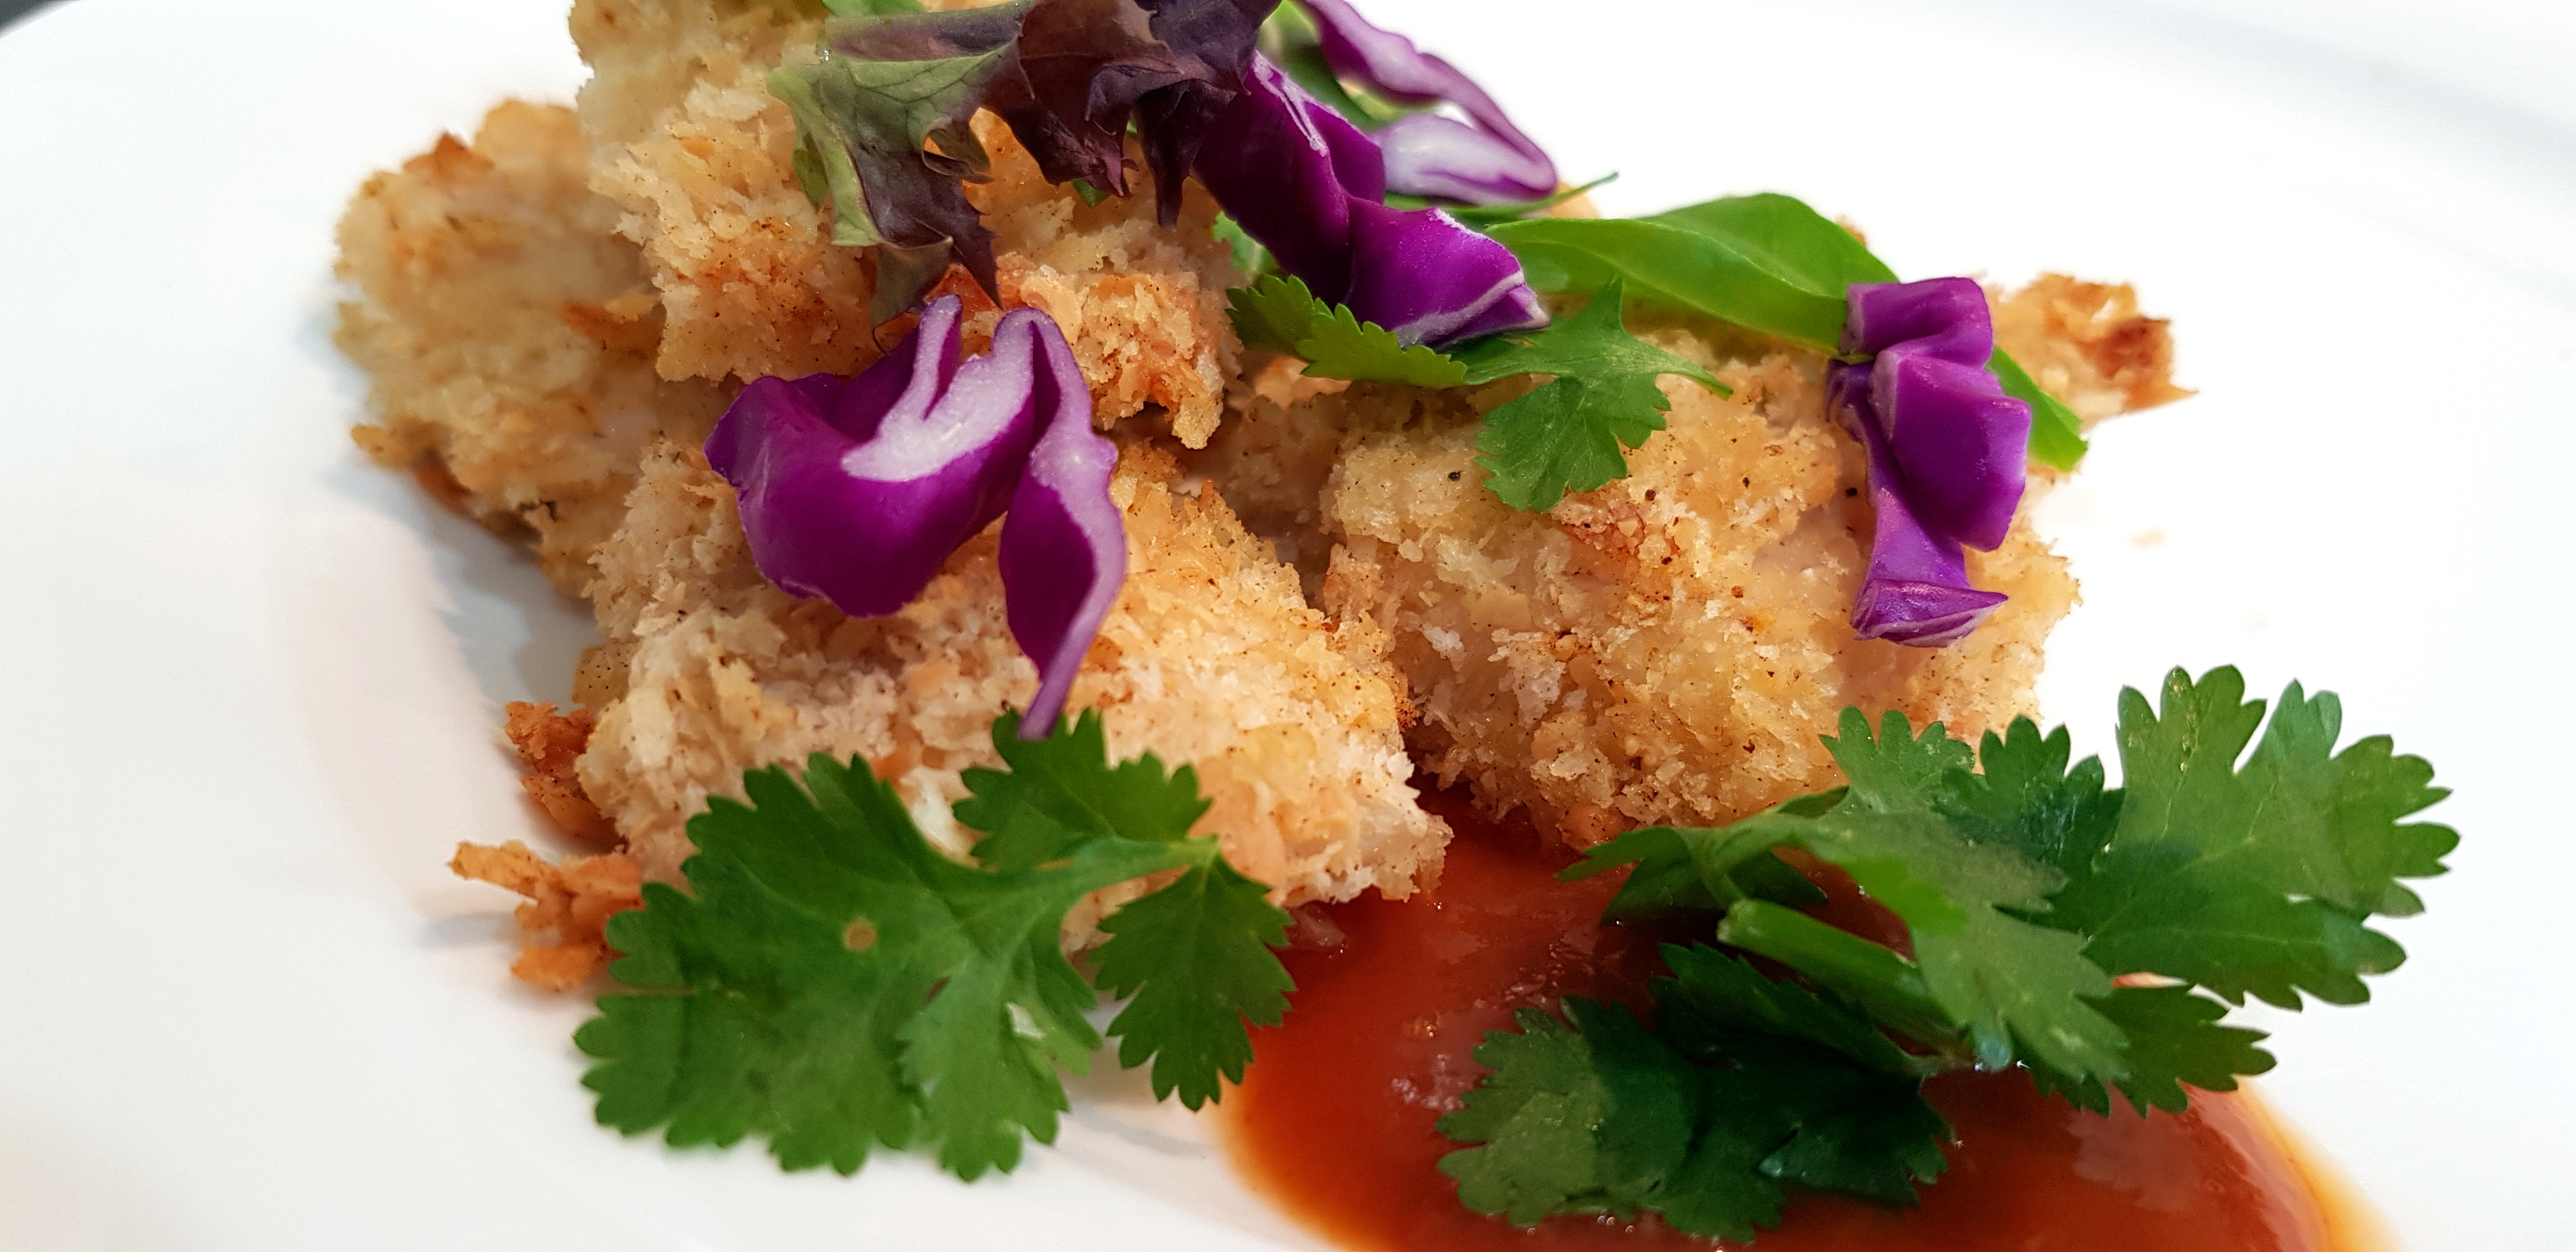
PK’s Panko Cheese Chicken Tenderloin Nuggets
I am always looking for meals that my lads will wolf down without complaints. I am happy to say that I can’t make enough of these baked chicken and cheese nuggets.
Let me know how you fare and there are more kid (and big kid) friendly meal links at the end of the post.
Steps
- Cutting and coating the chicken nuggets
- Cooking the nuggets
- Serving
Ingredients
- ~600g chicken tenderloins
- 2 Tbsp butter, melted
- Nugget coating mix:
- 1 cup Parmesan cheese, crumbled
- 2 cups Panko breadcrumbs
- 1 pinch garlic powder
- 1 pinch paprika powder
- Black peppercorns, cracked, to taste
- Table salt, to taste
Equipment
- 1 chef’s knife
- 1 chopping board
- 2 mixing bowls
- 1 baking tray, lined with baking paper
Cutting and coating the chicken nuggets
- Cut the chicken tenderloins into smallish chunks.
- Melt the 2 Tbsp butter in one of the mixing bowls.
- Add the chicken chunks and mix until the chicken is fully coated in butter.
- In the second mixing bowl combine:
- 1 cup Parmesan cheese, crumbled
- 2 cups Panko breadcrumbs
- 1 pinch garlic powder
- 1 pinch paprika powder
- Black peppercorns, cracked, to taste
- Table salt, to taste
- Take 1 piece of chicken at a time and:
- Put it into the bowl containing the breadcrumb mix.
- Turn it over a few times to get a good coating.
- Place it on an oven tray lined with baking paper.
- Pop the tray into the fridge for about 30 minutes.


Cooking the nuggets
- Take the tray out of the fridge about 10 minutes before cooking.
- During that time preheat your fan-forced oven to 180C.
- Cook the nuggets for about 25 minutes aiming for them to be cooked through and a golden in colour (you could turn them over if you want mid way).

Serving
Chicken nuggets go with anything. 🙂
Here I have served them with a green salad and a generous amount of Sriracha Hot Sauce.

Enjoy,
PK
YOU MIGHT ALSO LIKE
MORE KID FRIENDLY MEALS
PANKO RECIPES
MORE CHICKEN DISHES
Please consider subscribing to a weekly email summary of our posts or check us out on Facebook @growitcatchitcookit.
[mc4wp_form id=”15771″]
Written by
·
-
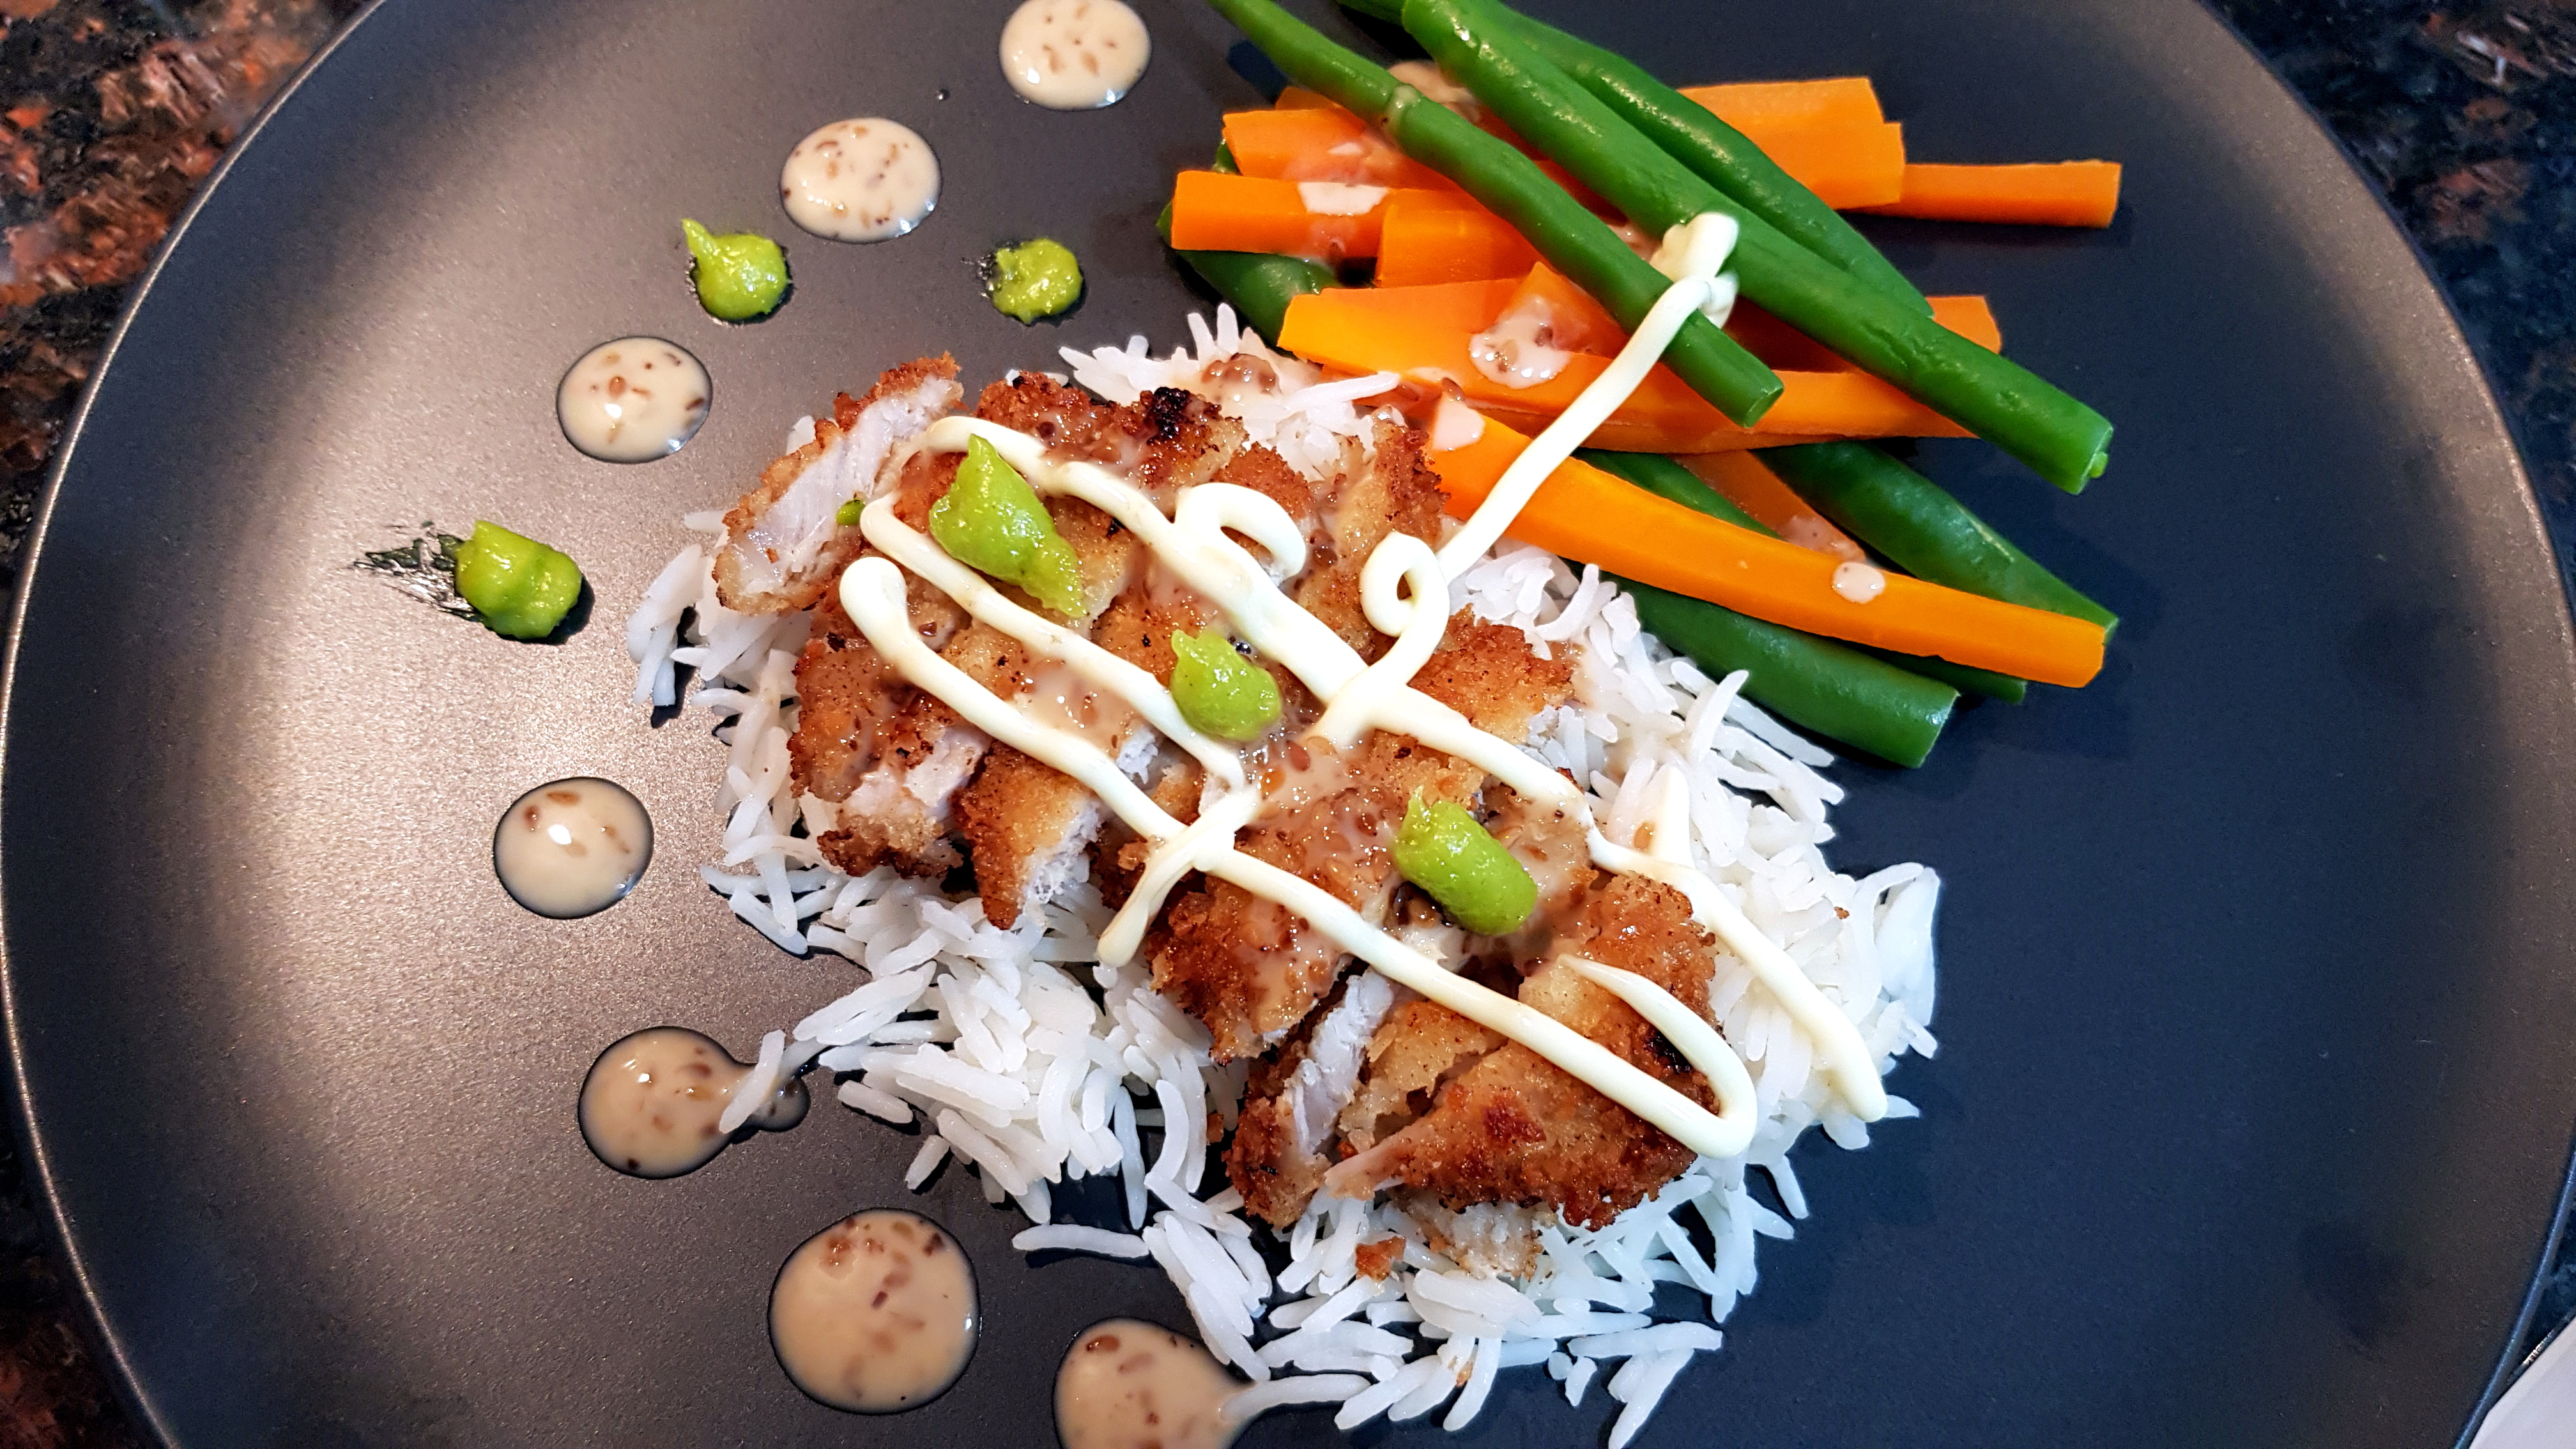
PK’s Asian Style Crumbed Pork Loin Cutlets
Just like my Crumbed Panko Chicken Breasts these crumbed eye of pork loin cutlets are so lite and easy. Simply throw some noodles or rice at it and serve with wasabi paste, Japanese Mayonnaise and Japanese Roasted Sesame Dressing.
Your guests will be blown away!

Takes about 20 minutes of preparation and cooking not including 30 minutes of refrigerating the cutlets after crumbing them.
Steps
- Crumbing the pork eye of loin
- Shallow frying the crumbed pork
- Serving
Ingredients
- 5 pork eye of loin cutlets, each one halved
- 2 eggs, whisked
- 1 garlic clove, finely minced
- Cracked black pepper and table salt to taste
- Panko breadcrumbs, enough to coat the cutlets
- Peanut Oil, enough to cover the bottom of your fry pan
Equipment
- 1 chef’s knife
- 1 chopping board
- 1 plate for the panko crumbs
- 1 bowl for the whisked egg
- 1 whisk or fork
- 1 tray, covered in baking paper
- 1 fry pan to shallow fry the cutlets
Preparing the pork eye of loin
- Take each cutlet and slice them to give you two thin cutlets a piece.
- Season them with a bit of cracked pepper and salt to taste.
- Whisk the 2 eggs in a bowl and then mix in the 1 tsp minced garlic.
- Add the cutlets to the egg mix and spread the panko breadcrumbs on a plate.
- Take each cutlet and roll in the panko getting a nice thick coating.
- Pop them on the the baking paper lined tray and then refrigerate for about half an hour.


Shallow frying the crumbed pork
- Heat the oil over a high heat and then shallow fry the crumbed cutlets, in batches, until they are golden brown.

Serving
Goes great on a bed of rice and vegetables and your favourite Japanese condiments. Or in my kids case, tomato ketchup. 😉

Enjoy,
PK
YOU MIGHT ALSO LIKE
MORE JAPANESE DISHES
MORE ASIAN CUISINE
PORK DISHES
Please consider subscribing to a weekly email summary of our posts or check us out on Facebook @growitcatchitcookit.
[mc4wp_form id=”15771″]
Written by
·
-
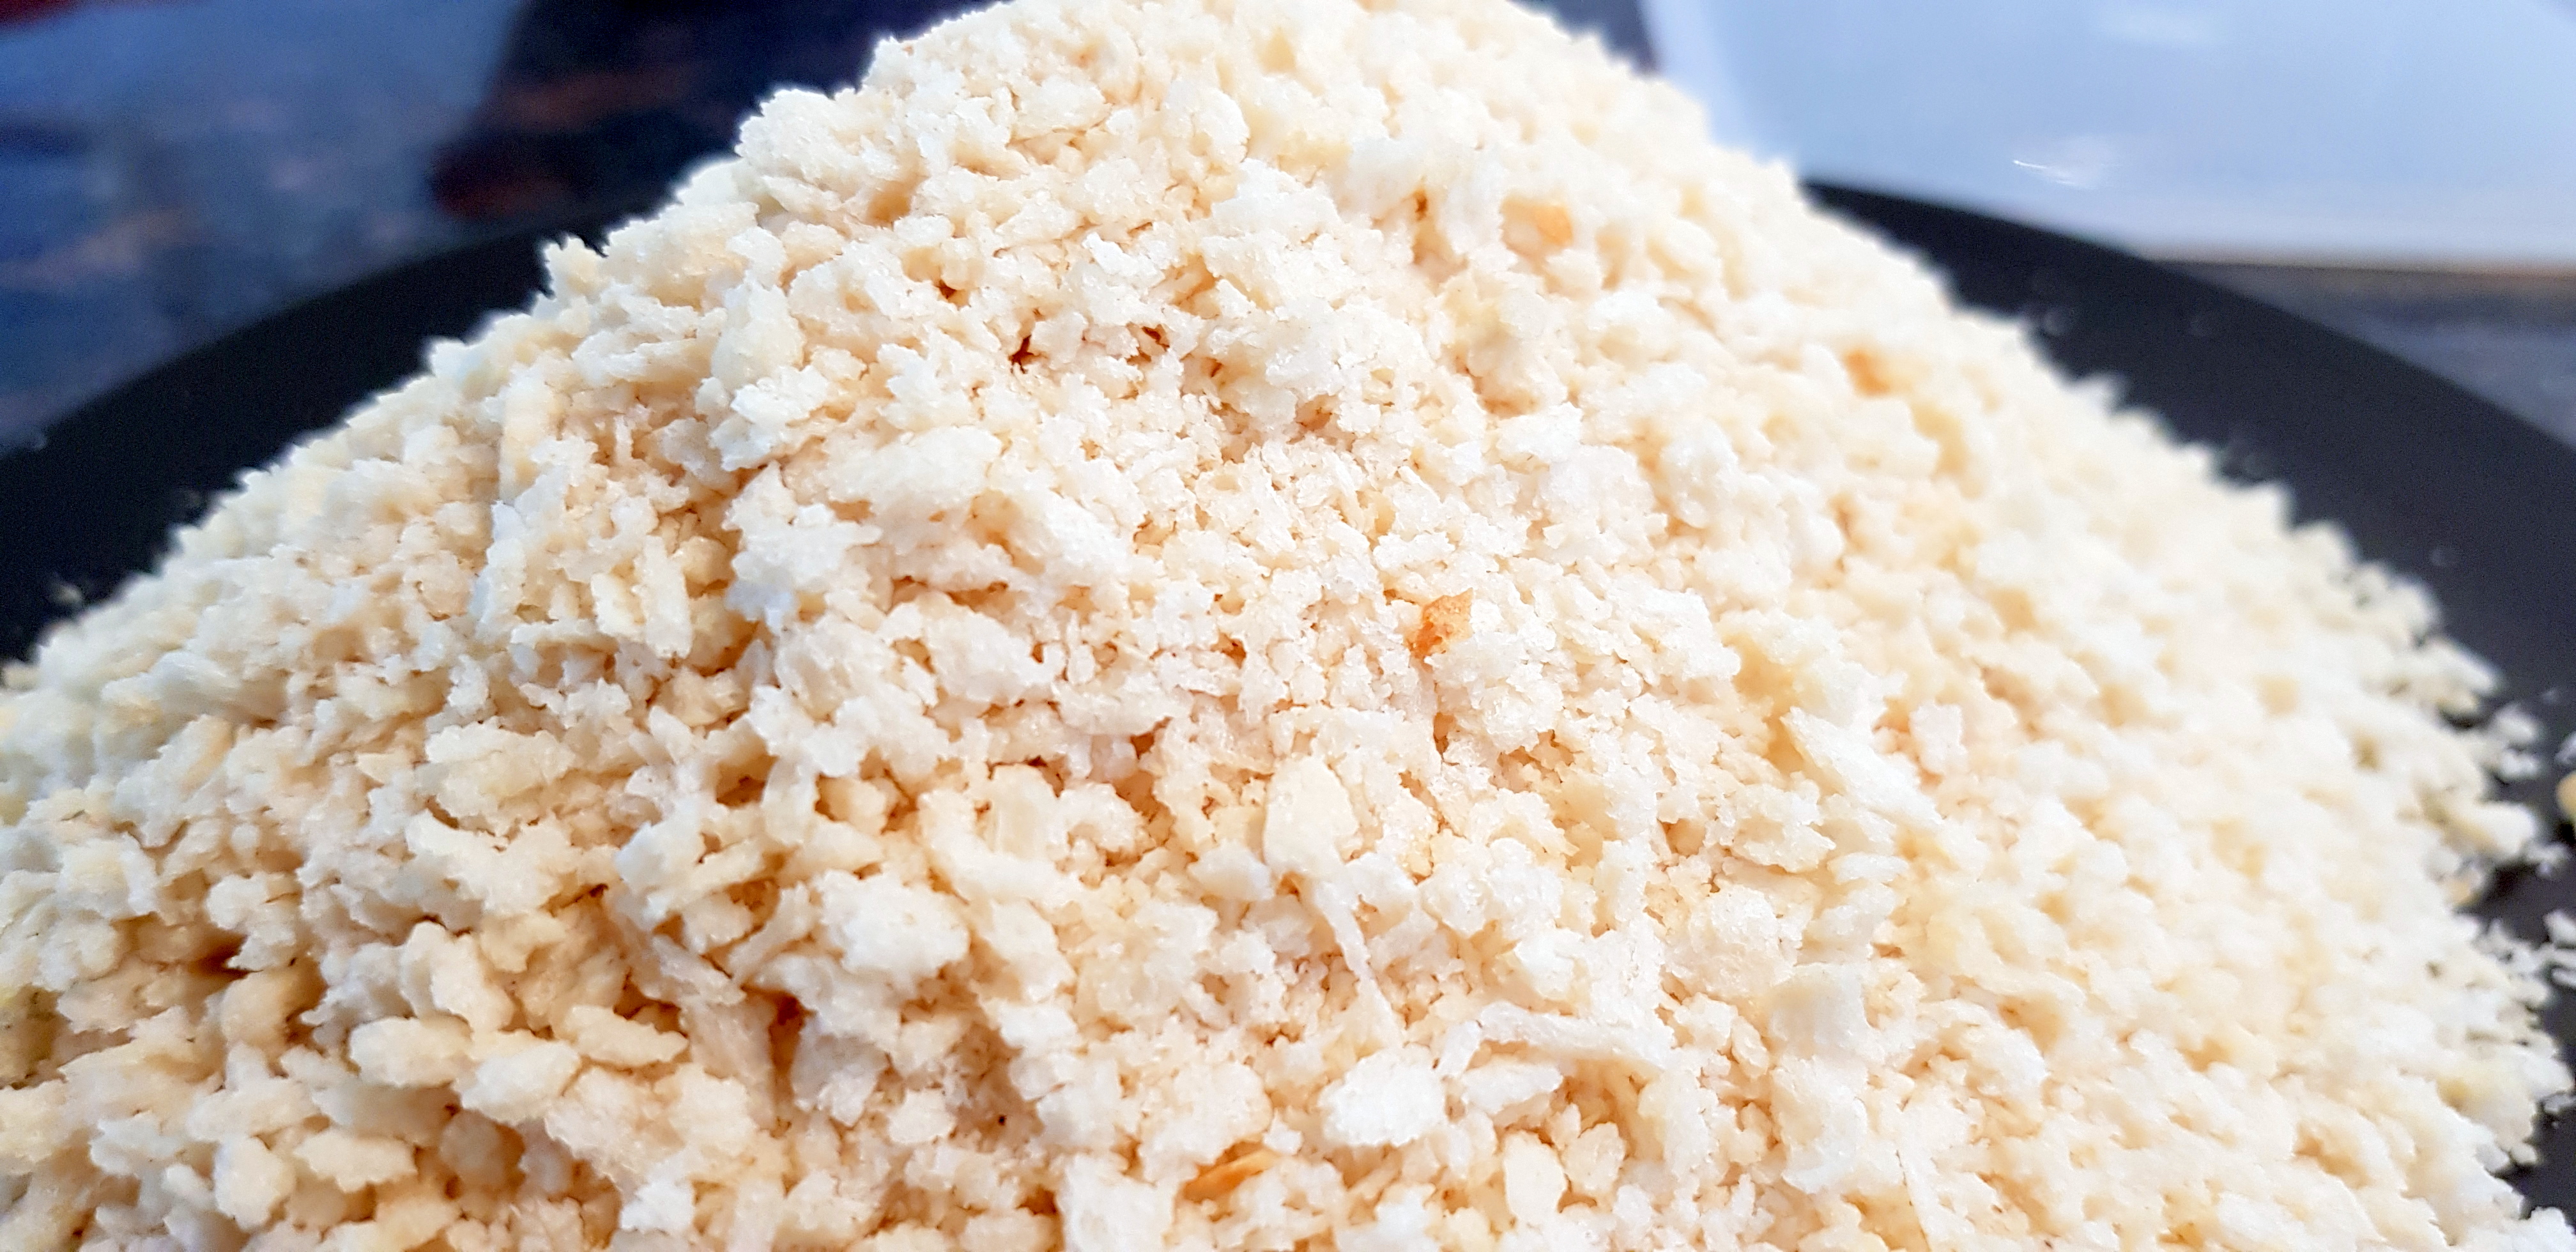
Panko Breadcrumbs
Panko breadcrumbs are made from white bread using a technique that gives large coarse flakes. This makes them fluffy and light when used.

I use them anywhere you would use regular breadcrumbs, especially when shallow frying crumbed meat and vegetables. If you haven’t used them before, drop what you are doing and go and buy some. 🙂
Look how light and golden they go when shallow fried in peanut oil.
I have some more recipes using panko for you in the links below. 🙂
This particular cooking ingredient is in PK’s Essential Pantry Cupboard Contents.
Enjoy,
PK
YOU MIGHT ALSO LIKE
MORE ON USING PANKO BREADCRUMBS
MORE ASIAN CUISINE
THE FULL GICICI INGREDIENTS LIST
Please consider subscribing to a weekly email summary of our posts or check us out on Facebook @growitcatchitcookit.
[mc4wp_form id=”15771″]
Written by
·
-

PK’S Broccoli Filled Beef Meatloaf
Meatloaf is a great way to make a little go a long way. I use minced beef, vegetables and cheese to hook my fussy little eaters (lamb, pork, chicken work a treat too). My wife loved it as well, mostly as it is a ‘one pan’ dish!
The broccoli filling was supposed to stay hidden but they were too smart for me. It still worked though thanks to the grilled cheese. 🙂

Steps
- Preparing everything
- Making the loaf
- Cooking and grilling the loaf
- Serving
Ingredients
- 500g beef mince
- 1 Tbsp Worcestershire Sauce
- 1 egg
- 1 small broccoli head, chopped into bite sized pieces
- 1/2 brown onion, diced
- 1 cup cheddar cheese, grated
- 1 handful of parsley, rough chopped
- 1 garlic clove, finely diced
- 1/4 cup breadcrumbs (panko would go a treat)
- Cracked black peppercorns and salt to taste
- Olive oil spray
Equipment
- 1 chef’s knife
- 1 chopping board
- 1 mixing bowl
- 1 non stick baking tin
Preparing everything
- Beat the egg and mix in the 1 Tsbp Worcestershire sauce.
- Chop the broccoli into small pieces and microwave for 1 minute.
- Dice half of a brown onion, store the rest for another day.
- Grate enough cheddar cheese to get 1 cup.
- Roughly chop a handful of parsley and finely dice the garlic clove.
- Mix the above ingredients together in a bowl, sprinkling with salt and pepper as you go.

Making the loaf
- Preheat your fan-forced oven to 180C.
- Put half the mince mix into the bottom of baking tin that you have sprayed with olive oil.
- Tamp it
- Layer the broccoli over this, leaving a gap right around the edges.
- Add a similar layer using half of the grated cheese.
- Top this with the rest of the mince and press down around the edges to make a bit of a seal.


Cooking and grilling the loaf
- Pop the tin into the oven and cook for 30 minutes.
- Cover the mince loaf rest of the grated cheese and grill it until golden brown.


Serving
You could just serve it as is thanks to the broccoli filling but we try and use fresh greens from the garden with every meal. 🙂
It makes for the best leftovers and frozen lunches by the way.

Enjoy,
PK
YOU MIGHT ALSO LIKE
MORE KID FRIENDLY MEALS
MORE ONE PAN RECIPE
Please consider subscribing to a weekly email summary of our posts or check us out on Facebook @growitcatchitcookit.
[mc4wp_form id=”15771″]
Written by
·
-
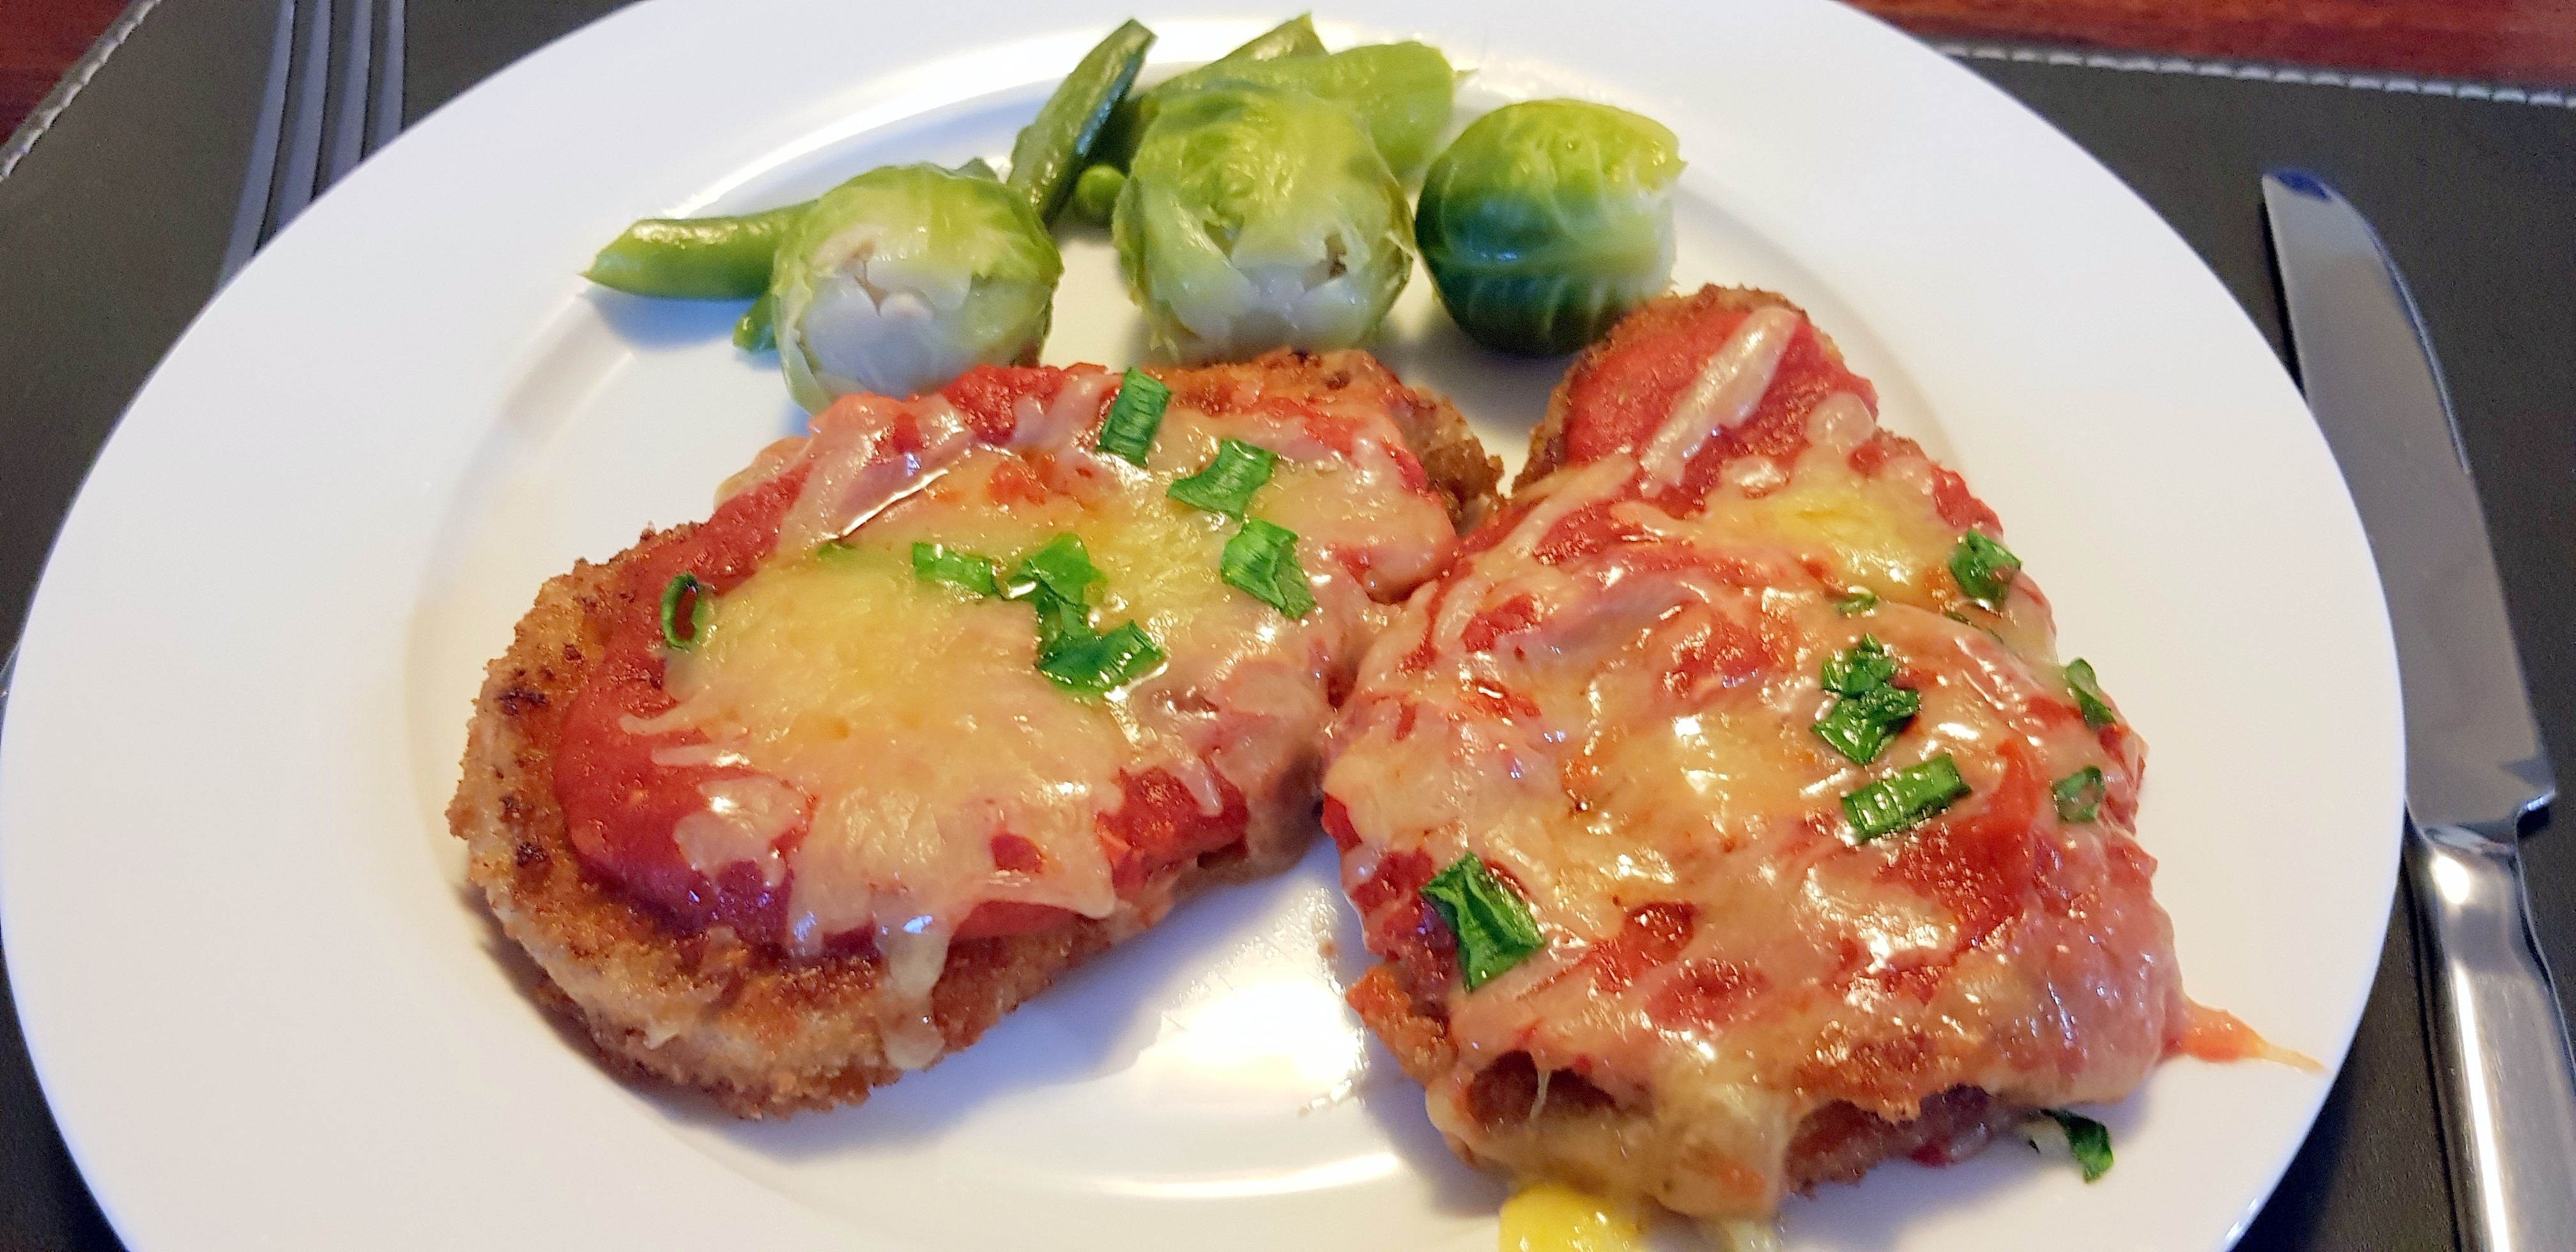
PK’s Beef Parmigiana
This is simple home cooking at its best. The classic Beef Parmigiana (we Aussies call it a Parmi) is a great way to make a little go a long way. They are deceptively rich and filling!
Plus you get to take out any of the day’s frustrations out on the cutlets when you give them a good hitting with the mallet. 🙂
I am using beef cutlets, thin slices of either leg or rib meat, but you can adapt the recipe to use pork, chicken, lamb and even eggplant.
Steps
- Bashing the beef
- Crumbing the beef
- Making the sauce
- Shallow frying the beef
- Melting the cheese
- Serving
Ingredients
- 6 to 8 beef or veal cutlets (you might see them called beef scaloppine)
- 1/2 cup plain white flower
- 1 chicken egg, whisked
- Breadcrumbs, enough to cover the cutlets (panko works a treat)
- Olive oil (enough to shallow fry the cutlets)
- 1 small brown onion, finely diced
- 2 garlic cloves, finely diced
- 700g tomato passata
- A small handful of basil leaves
- 2 spring onion tops (ie the green bits only), chopped
- 1 cup grated cheese (I used a mild cheddar)
- Salt and cracked black pepper to taste
Equipment
- 1 meat mallet
- 3 sheets of baking paper
- 2 chopping boards
- 1 plate
- 1 bowl
- 1 fry pan
- 1 oven dish
- 1 heavy pan (suitable for shallow frying)
Bashing the beef
- Place the cutlets between two sheets of baking paper (or dust your mallet in flour).
- I like to flatten them a lot but be careful, we don’t want to make them so thin they break apart.
- Give them as much salt and cracked black pepper as you like.


Crumbing the beef
- Now for a little trick my dad showed me growing up. Pop the cutlets, the 1/2 cup plain white flour and some more salt and pepper into a dry plastic vegetable bag (I wash and reuse mine a few times).
- Close the top and gently massage and jiggle the flour mix into every nook and cranny of the cutlets.
- Throw the bag in the fridge if you are running ahead of time.
- Whisk the egg in a bowl.
- Lay out a bed of breadcrumbs on a dinner plate.
- Dip each cutlet into the egg mix, getting full coverage, then fully coat in breadcrumbs.
- Pop them onto a sheet of baking paper as you go (you can reuse a sheet from the tenderising step above).


Making the sauce
- Add a splash of olive oil to your fry pan and start softening up the single sliced onion and the 2 finely diced garlic cloves.
- Add 700g of passata and a small handful of fresh basil leaves to the pan.
- The idea is that we will slowly thicken the tomato sauce while we are shallow frying the crumbed beef.
- It should be nice and gluggy by the time the beef is ready to go into the oven (see below), so adjust the heat accordingly.


Shallow frying the beef
- Bring enough olive oil to shallow fry the cutlets (based on your choice of pan) to a gentle bubble.
- Brown each side, it won’t take long because the meat is so thin, and drain.
- Preheat your fan forced oven to 200C.
- Place them as a single layer in an oven dish.
- Again, we want to time this to be done as the tomato sauce is ready.


Melting the cheese
- Top each cutlet with a layer of our tomato sauce.
- Sprinkle with grated cheese and chopped spring onion tops.
- Pop the oven dish into your preheated oven (200C) and cook until the cheese has melted.

Serving
Serve with some green vegetables and a side of rice.

Enjoy,
PK
YOU MIGHT ALSO LIKE
BEEF DISHES
MORE ITALIAN CUISINE
Please consider subscribing to a weekly email summary of our posts or check us out on Facebook @growitcatchitcookit.
[mc4wp_form id=”15771″]
Written by
·
-
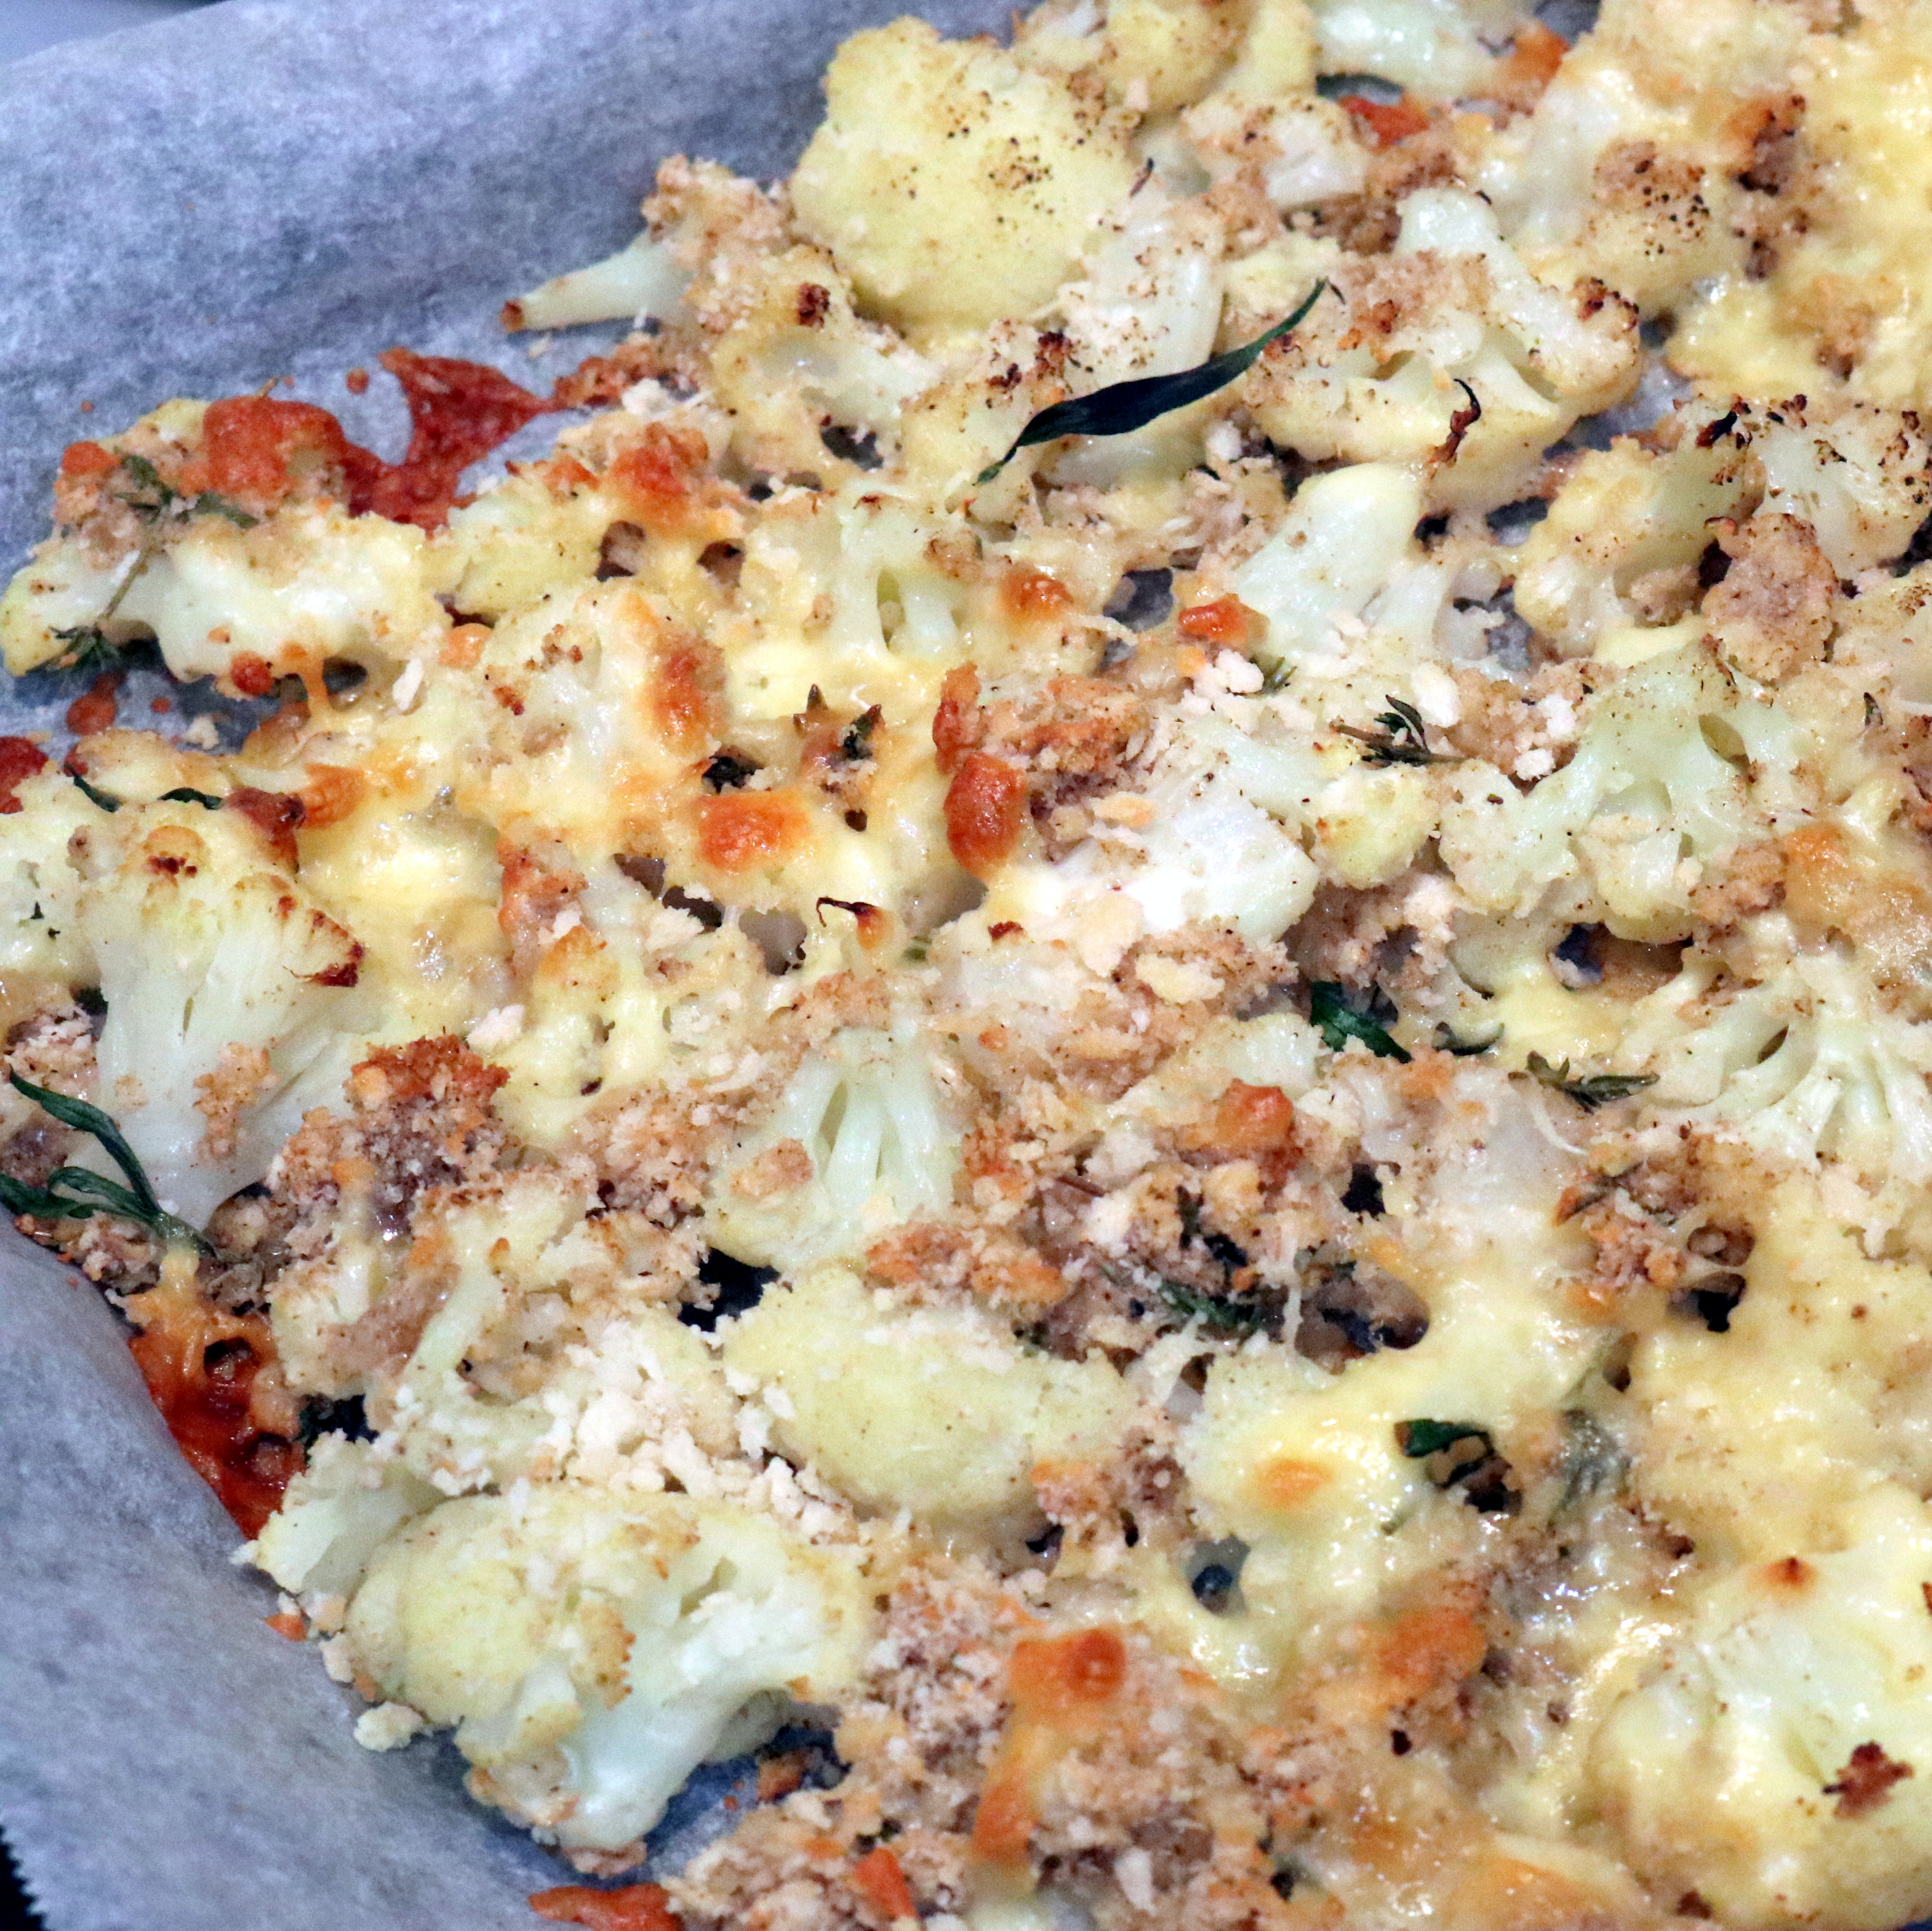
PK’s Baked Cauliflower Slice
This simple cauliflower and cheese dish is irresistible to children and adults alike. I am always looking for kid friendly meals that require little effort to make. 🙂
Let’s face it, the gooey cheese (grilled to perfection on top) is the best bit, so if you are a vegetarian you could use dairy free cheese, omit the egg and chuck in some chia seeds. It will have a slightly different texture but will be oh so yummy.

You will be:
- Precooking the cauliflower
- Mixing all the ingredients
- Baking for 10 minutes
- Serving
You will need:
- Ingredients:
- 1/2 a cauliflower, broken/cut into puffed corn sized pieces
- 1 chicken egg
- 6 sprigs of Mediterranean herbs (I used thyme and tarragon), roughly chopped
- 1/2 cup panko crumbs (breadcrumbs will work too)
- 1/4 cup aged Italian cheese (I used provolone but Parmigiano-Reggiano would rock too), finely grated
- a very generous sprinkle (or two) of Garam Masala
- spray oil
- Equipment:
- a long sharp knife
- a chopping board
- a sauce pan or steamer
- a fork or whisk
- a mixing bowl
- an oven tray
- baking paper
Precooking the cauliflower
- I used my hands to twist off the cauliflower florets (aiming for puffed wheat sized chunks) and the knife to chop up the heart.
- Lightly boil or steam the chunks (aiming for a bit of crunch).
Mixing all the ingredients
- Preheat the fan forced oven to 200C.
- Whisk the egg in a large mixing bowl.
- Mix in the:
- cauliflower
- 6 sprigs of Mediterranean herbs
- 1/2 cup panko crumbs
- 1/4 cup aged Italian cheese
- Cover an oven tray with baking paper and spray it with a bit of olive oil.
- Spread the cauliflower mix over the tray.
- Sprinkle generously with garam masala.
- Spray again with the olive oil.
Baking for 10 minutes
- Bake for 10 minutes and check the colour.
- The cheese should be melted and slightly golden.
- If you want, use the grill or a chef’s torch.
Serving
Goes great with a nice juicy steak. 🙂
Enjoy,
PK
Please consider subscribing to a weekly email summary of our posts or check us out on Facebook @growitcatchitcookit.
[mc4wp_form id=”15771″]
Written by
·
-
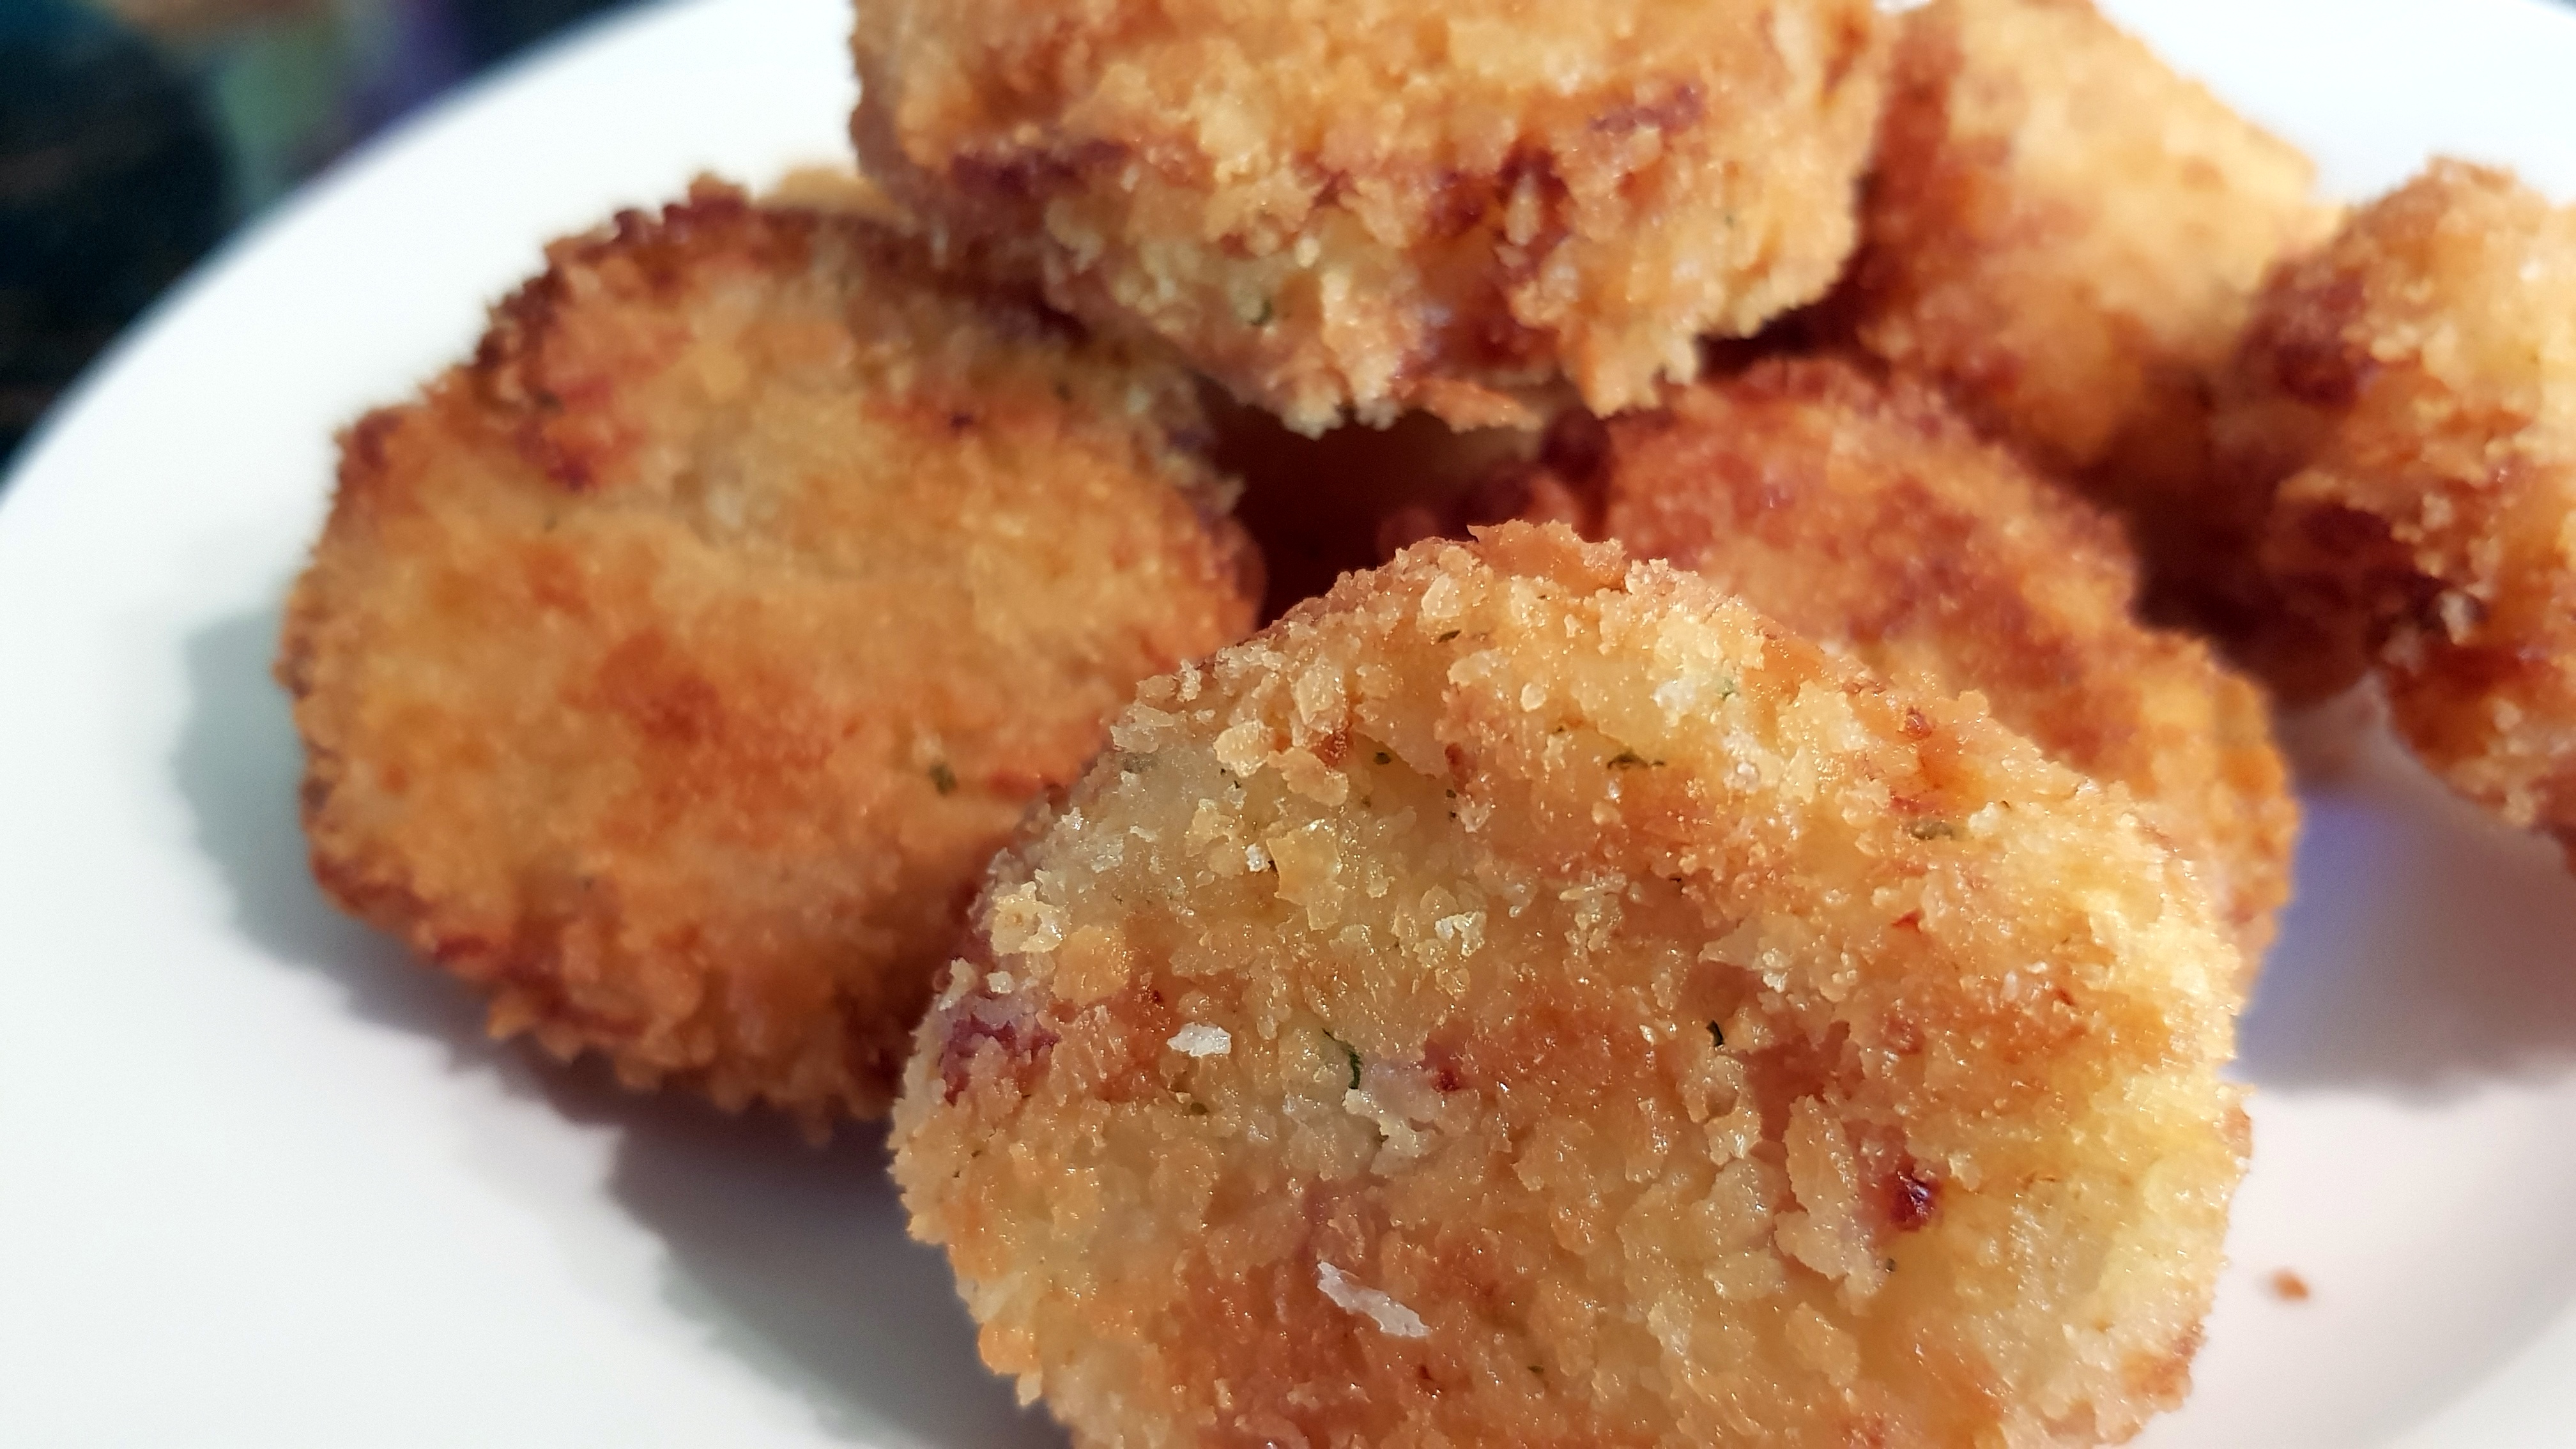
PK’s Potato And Bacon Tater Tots: Did Someone Say Panko?
I made these little bacon and potato tots for my young ones the other day and they demolished the lot. Not only was that a great testimonial but they are easy and fun to make too.

Hot Tips:
- Make them in multiple batches as they freeze very well.
- You can spray them sparingly with oil and bake them if you prefer.
You will be:
- Making the mash
- Making the tots
- Cooking the tots
- Serving
You will need:
- Ingredients:
- 4 cups potato and bacon mash
- 2 chicken eggs
- 1/2 cup plain white flour
- Enough panko flakes to coat the tots (bread crumbs will do but the result will not be as light and fluffy)
- herbs and spices to taste (I used some of my home-made Dried Garlic and cracked pepper)
- enough peanut oil for shallow frying
- Equipment:
- 1 chef’s knife
- 1 chopping board
- 1 potato peeler
- 1 potato masher
- 1 deep fry pan
Making the mash
- Make your mashed potato (sans any milk or butter), slice the bacon (I used short-cut bacon) and mix everything together (use your own ratios).


Making the tots
- Whisk the two chicken eggs and add to the mash.
- Add the 1/2 cup of plain white flour to the mash and gently but thoroughly mix.
- Make little round balls with the mash mix and then roll them in the panko crumbs.
- Store any surplus tots on baking paper and freeze for next time (I use a multi layered container for easy splitting and thawing of the right amount for dinner).

Cooking the tots
- Heat a shallow amount of peanut oil in a deep pan.
- Cook the tots in small batches, turning mid way, until golden brown and the drain them on paper towel or a rack.


Serving
Serve them anyway you or your young ones will eat them. Personally I like a bit of tomato sauce and sour cream. You might even like to try my Home-made Creamy Aioli.

Enjoy,
PK
YOU MIGHT ALSO LIKE
MORE POTATO DISHES
MORE KID FRIENDLY MEALS
Please consider subscribing to a weekly email summary of our posts or check us out on Facebook @growitcatchitcookit.
[mc4wp_form id=”15771″]
Written by
·
-

PK’s Baked Chicken Sticks
As a kid one of my favourite meals was a large serve of Ingham’s Chicken Chippies, tomato sauce and a very very optional salad :).
The advert was hilarious:
I am not sure if you can still buy them but I would rather make my kids the home made equivalent anyway as you can control the ingredients. They loved them and I even got my toddler in there helping me make them :).
You will be:
- Prepping the ingredients.
- Dusting and coating the chicken sticks.
- Cooking the chicken sticks.
- Serving.
You will need:
- Ingredients:
- 1 chicken breast (slightly frozen making it easier to cut and shape into sticks)
- 1/2 cup flour
- 1/2 Tbsp ground tumeric
- 1 to 2 eggs (if doubling the recipe you only need 3 eggs)
- ~1 cup Panko breadcrumbs to coat chicken strips
- 1/2 tsp beetroot powder (optional, just for looks)
- a sprinkle of ground paprika (optional, just for looks)
- ground black peppercorns to taste
- some spray olive oil
- Equipment:
- a chopping board
- a long sharp knife
- a fork or whisk to beat the egg
- a mixing bowl
- several plates
- an oven tray lined with baking paper
Steps:
Prepping the ingredients
- Take a still partially frozen chicken breast and flatten it out some what with your hands.
- Chop breast in to sticks (see how they look like chunky fries).

- In a large mixing bowl mix the 1/2 cup flour, 1/2 Tbsp ground tumeric and the 1/2 tsp beetroot powder (optional, just for looks).

- Whisk the 1 to 2 eggs in a bowl.
- Lay the panko crumbs out on a plate.

Dusting and coating the chicken stick
- Spray the baking paper lined oven tray with some spray oil.
- Roll each stick in the flour mix, dip in the egg and then coat with panko crumbs.
- Place them on the baking paper as you go.
- Sprinkle each stick with ground paprika (optional) and ground black peppercorns to taste.
- Give the top of the sticks a light spray with spray oil.
- Pop them into the fridge for 15 minutes or so to set.

Cooking the chicken sticks
Pop the tray into a fan-forced oven (preheated to 200C) for 15 to 20 minutes or until golden brown.

Serving
They really just need your favourite dipping sauce and those optional greens I mentioned :).

Enjoy,
PK
Written by
·
-
Crumbed Baked Chicken Sticks
As a kid, one of my favourite treat meals was a large serve of Ingham’s Chicken Chippies doused in tomato sauce.
Chicken chippies were chip shaped slices of chicken coated in breadcrumbs and then snap-frozen for retail sale.
The advert was hilarious:
I am not sure if you can still buy them but I now prefer the home made equivalent.
Needless to say, they are very kid friendly 🙂
You will be:
- Prepping the ingredients.
- Dusting and coating the chicken sticks.
- Cooking the chicken sticks.
- Serving.
You will need:
- Ingredients:
- 1 chicken breast (slightly frozen making it easier to cut and shape into sticks)
- 1/2 cup flour
- 1/2 Tbsp ground tumeric
- 1 to 2 eggs (if doubling the recipe you only need 3 eggs)
- ~1 cup Panko breadcrumbs to coat chicken strips
- 1/2 tsp beetroot powder and or ground paprika (optional, just for looks)
- ground black peppercorns to taste
- some spray olive oil
- Equipment:
- a chopping board
- a long sharp knife
- a fork or whisk, to beat the egg
- a mixing bowl
- several plates
- an oven tray lined with baking paper
Prepping the ingredients
- Take a still partially frozen chicken breast and flatten it out some what with your hands.
- Chop breast in to sticks (see how they look like chunky fries).

- In a large mixing bowl mix the 1/2 cup flour, 1/2 Tbsp ground tumeric and the 1/2 tsp beetroot powder (optional, just for looks).

- Whisk the 1 to 2 eggs in a bowl.
- Lay the panko crumbs out on a plate.

Dusting and coating the chicken sticks
- Spray the baking paper lined oven tray with some spray oil.
- Roll each stick in the flour mix, then dip it in the egg and then coat it with panko crumbs.
- Place the finished sticks the baking paper as you go.
- Sprinkle each stick with ground paprika (optional) and ground black peppercorns to taste.
- Give the top of the sticks a light spray with spray oil.
- Pop them into the fridge for 15 minutes or so to set.

Cooking the chicken sticks
Pop the tray into a fan-forced oven (preheated to 200C) for 15 to 20 minutes or until golden brown.

Serving
They really just need your favourite dipping sauce and a salad.

PK
Here are some more chicken recipes and kid friendly meals:
Written by
·
-

PK’s Chicken Katsu Udon
Chicken Katsu Udon is an amazingly dish, light enough for both summer and winter. I love it and could eat it every day :).
This recipe will feed two adults for lunch. Add more noodles, chicken, vegetables, and broth, depending on your preferences, to bulk it up for dinner.
You will be:
- Preparing the chicken.
- Frying the onion toppings.
- Preparing the other vegetables.
- Cooking the noodle broth and crumbed chicken
- Serving.
You will need:
- Ingredients
- 1 large chicken breast, butterflied
- ground rock salt, to taste
- ground black pepper corns, to taste
- white flour, enough to coat the chicken breast
- panko bread crumbs, enough to coat the chicken breast
- 1 egg, beaten egg
- 1 brown onion, sliced
- 1 cup Asian greens e.g. bok choy leaves and stems
- 1 small handful torn coriander (cilantro) leaves
- 1 packet of soft Udon noodles
- 4 cups home-made chicken stock
- olive oil and/or chili oil, enough to cover the base of the pan to half the depth of the chicken breast and a splash for frying the onions
- Equipment
- several chopping boards
- a long sharp knife
- a rolling pin or meat tenderiser
- two large plates
- one medium sized bowl for coating the chicken breasts
- a medium sized saucepan for the broth and noodles
- a deep frypan for shallow frying the crumbed chicken
- paper towel to absorb excess oil
- deep bowls for serving
- tongs for cooking the chicken in the oil
- tongs for adding the hot noodles to the serving bowls
Steps:
Prepare the chicken

Steps:
- Take your chicken breast and butterfly it. I completely separate the halves at this stage, place them on a chopping board and bash the stuffing out of them using a rolling pin. This makes them really tender and easier to cook through without burning the outside crumb coating. This dish also works really well with chicken tenderloins (these are the pectoralis minor of a chicken and they don’t need tenderising).
- Salt and pepper them to taste and then successively coat them in flour, dip them in the egg and roll them in the panko crumbs.
- Refrigerate them for 30 minutes or as long as it takes you to prepare the rest of the dish.
Fry the onions
Steps:
- Thinly slice the 1 brown onion.
- Heat the oil in your deep fry pan.
- Add the onions and crisp them up, moving them continuously.
- Pop them into the fridge after soaking up excess oil with paper towel.
- Clean the fry pan with some paper towel so you get rid of any burnt onion bits.

Prepare the vegetables

Steps:
- Roughly chop your Asian greens and other vegetables of choice. No need to cook the greens as they will quickly steam as you add them to the hot broth at serving time.
- Tear the coriander leaves to make a nice garnish.
- Hot Tip – Bring the crumbed chicken breasts out of the fridge at this point and allow them to return to room temperature. This will allow you to cook them golden brown on the outside and avoid a raw center.
Cook the noodle broth and crumbed chicken

You are going to have to keep an eye on two processes here. Sorry 🙂
Steps:
- Add the stock and noodles to the saucepan.
- Heat the oil in the deep frypan so it is lightly bubbling.
- While you are lightly frying the chicken, slowly bring the noodle broth to the boil.
- When golden brown on both sides, remove the chicken from the oil and pat dry with paper towel.
- Slice the chicken.
The panko crumbs are so light that I prefer a longer slower fry:
Cooking the noodles in the broth as it comes to the boil:

The sliced chicken:

Serving
Steps:
- Add the desired amount of noodles to each bowl using tongs.
- Add the desired amount of greens and vegetables to each bowl.
- Pour in the desired amount of broth to each bowl.
- Top with some of the torn coriander and the fried onions.

Happy slurping,
PK
Written by
·