Tag: salt
-
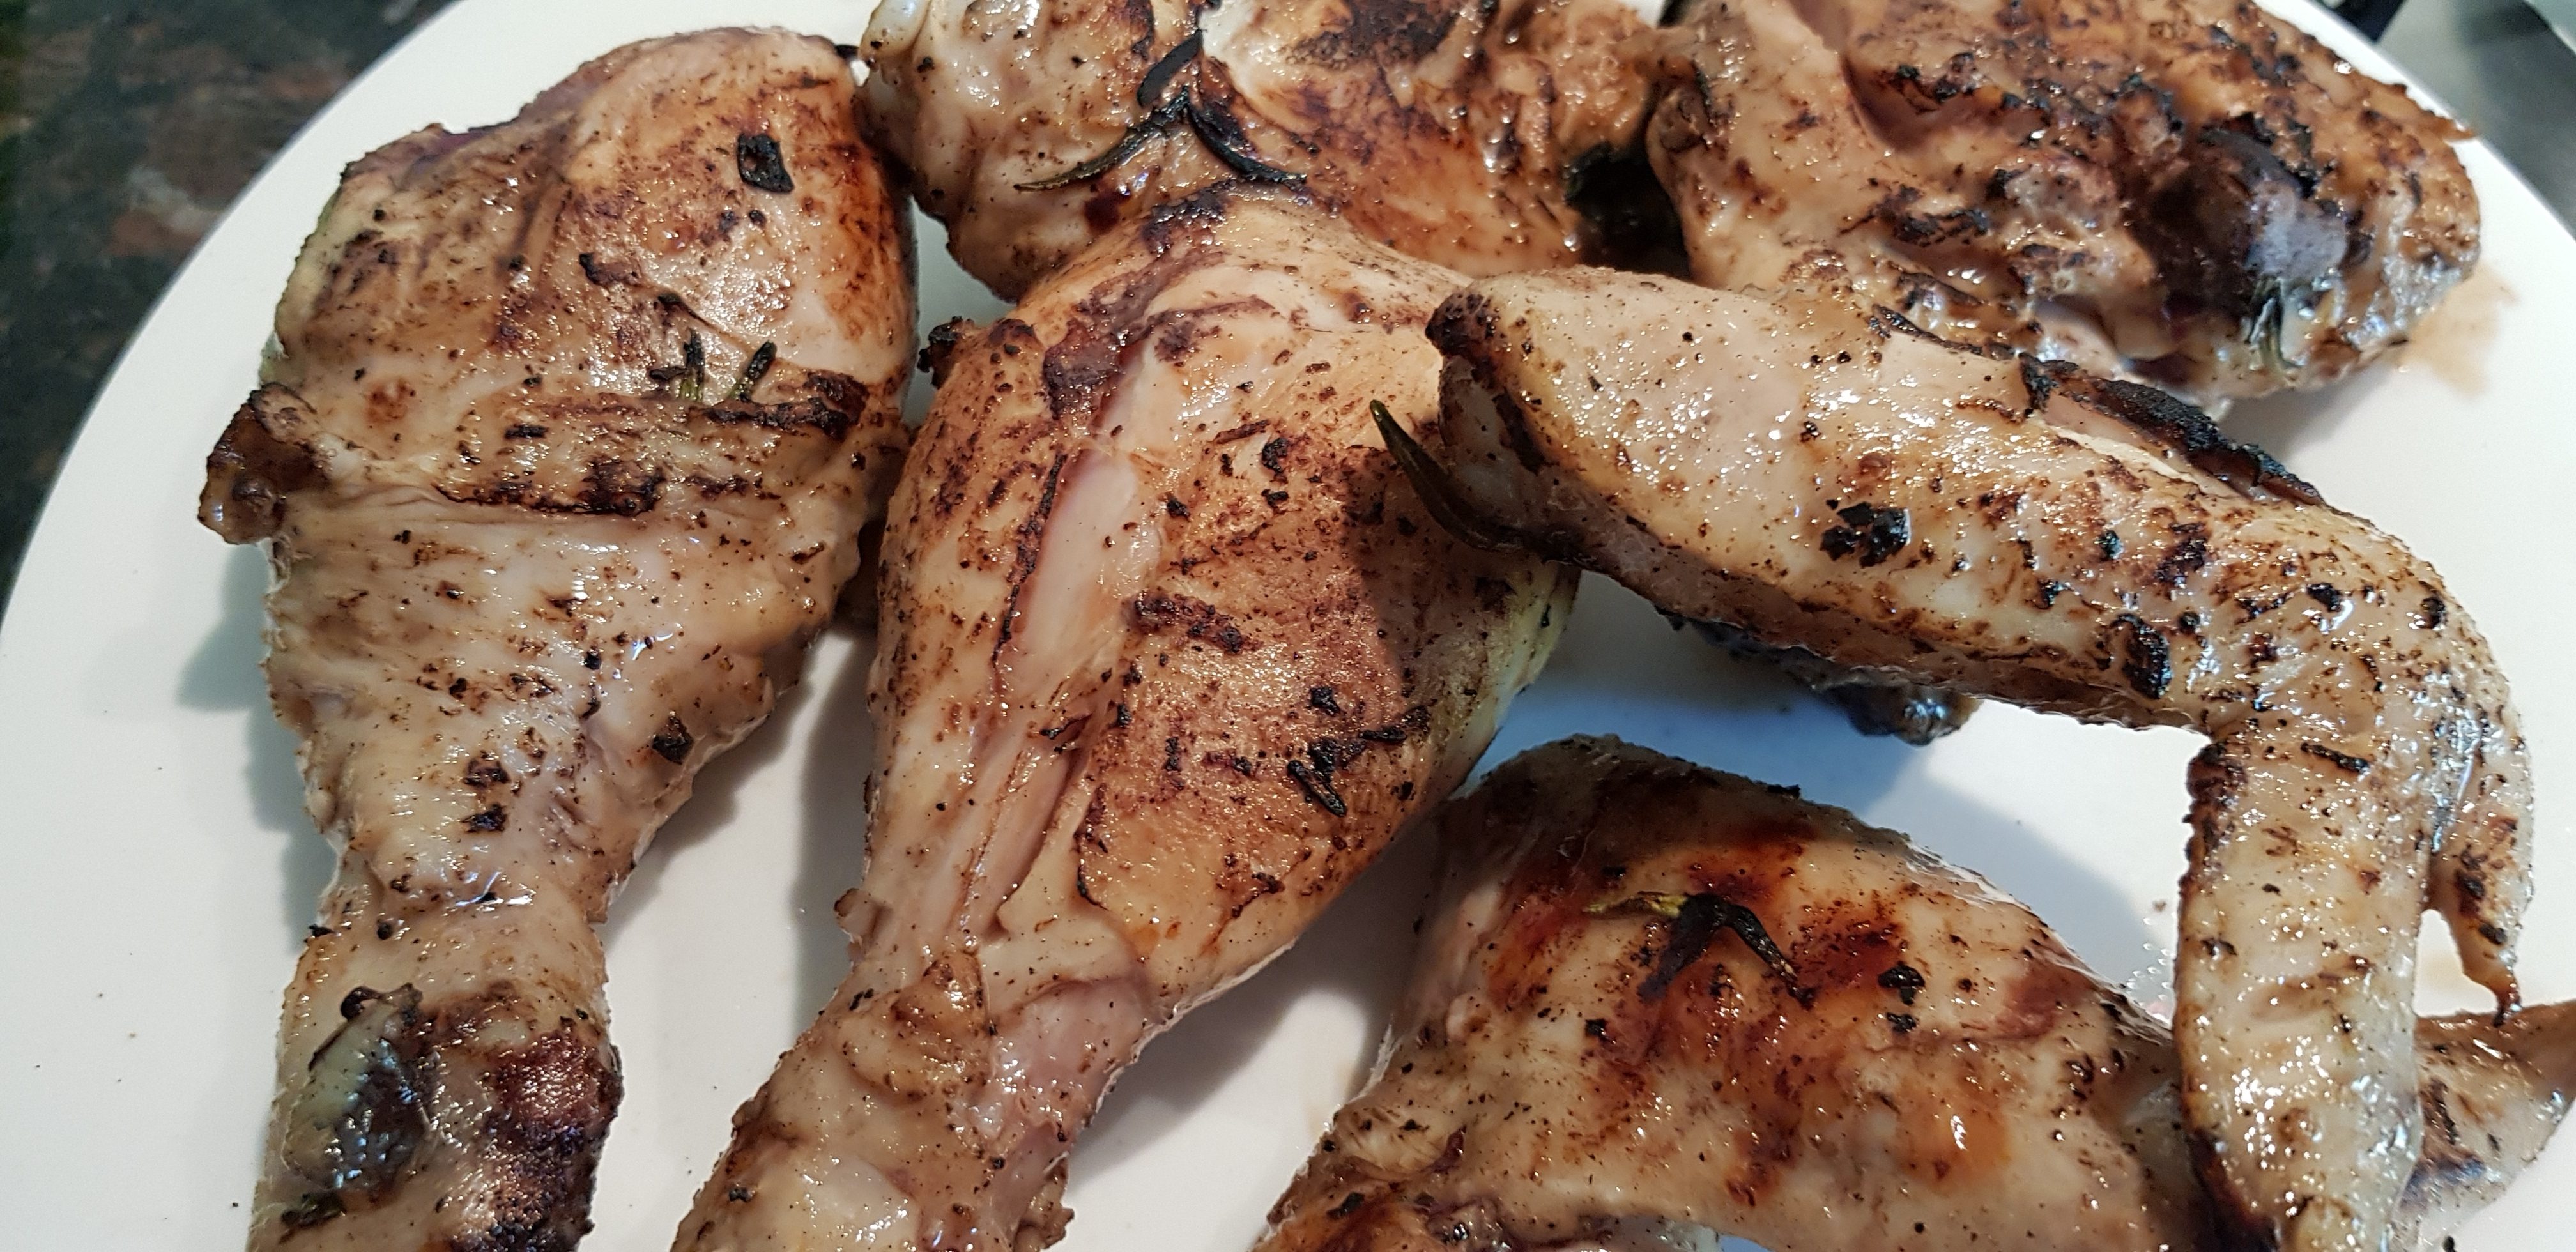
Anna’s Rosemary And Lemon Chicken
I am always gobsmacked by how tasty Italian cuisine is given the simplicity of many dishes. Anna’s easy chicken marinade is no exception and you won’t believe how tasty it is!
Simply mix chicken pieces with some minced garlic, chopped parsley, a generous amount of rosemary leaves, lemon juice and a few slugs of olive oil.
Season with salt to taste and pop the whole lot into the fridge for a few hours.

Then cook the chicken pieces as you normally would.

I served this lot up with a simple green salad and some chips. I bet it would also go great with Anna’s Fennel Salad.

YOU MIGHT ALSO LIKE
ITALIAN CUISINE
MORE CHICKEN DISHES
Please consider subscribing to a weekly email summary of our posts or check us out on Facebook @growitcatchitcookit.
[mc4wp_form id=”15771″]
Written by
·
-
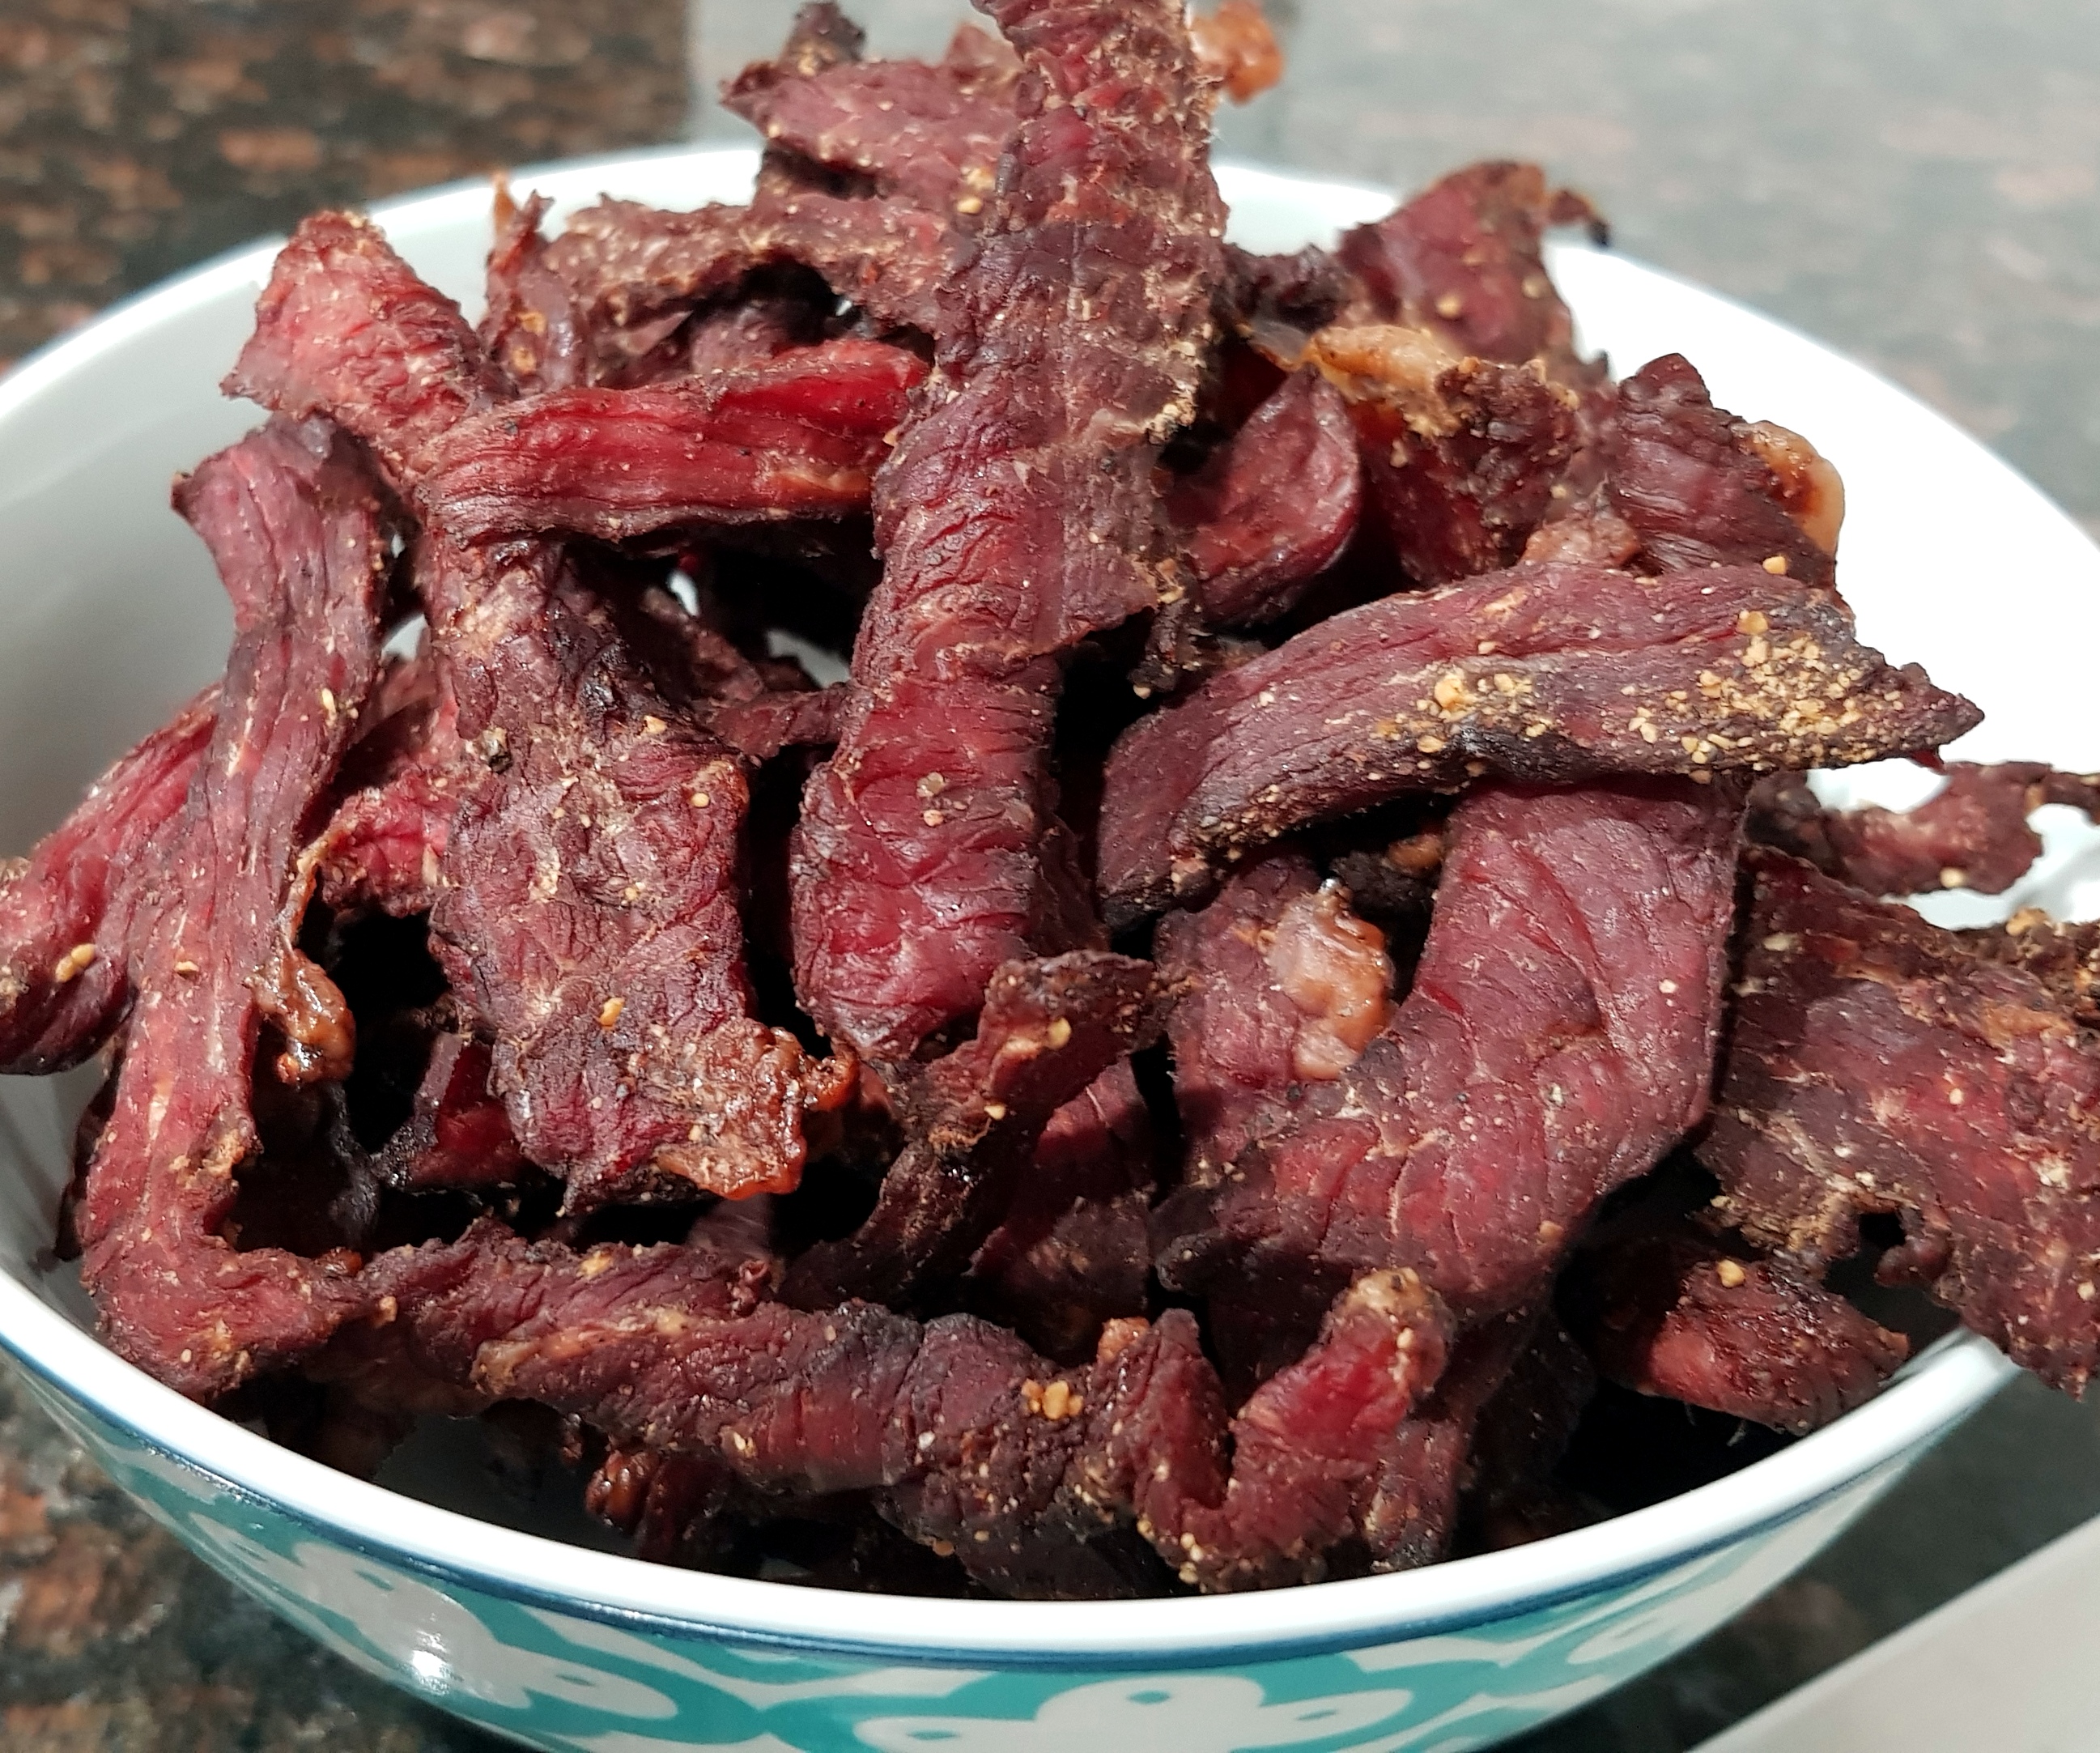
PK’s Beef Jerky #2
I use a couple of different recipes for making beef jerky. This is my second recipe and it uses the same marinading, drying and storing techniques as PK’s Beef Jerky Recipe #1. To that end I am only going to keep this post short.
I am already drooling 🙂
Note: I use corned beef and soy sauce and don’t use much in the way of additional salt. If you are using non-brined cured beef you will need to increase the salt content of the marinade.

Ingredients
- 1.5kg corned beef
- 1 Tbsp black peppercorns, coarsely cracked
- 1 Tbsp dried onion flakes (or onion powder), ground
- 1 tsp table salt
- 1 tsp dried garlic flakes (or garlic powder), ground
- 1/2 cup soy sauce
- 2 Tbsp Worcestershire sauce
- 1/4 tsp liquid smoke
Simply
Combine everything but the beef in a bowl and mix.
Cut the meat into hand length ribbons/strips and submerge in the marinade. Pop the whole lot into the fridge and marinade overnight.
Drain away the marinade, then arrange the strips in your dehydrator. On low or medium heat, thoroughly dry the meat.
I store my beef jerky uncovered in the fridge. This continues the drying process and lets me sneak a piece every time I go in there. 🙂

Enjoy,
PK
Here are some additional preserving food ideas and beef recipes:
Written by
·
-
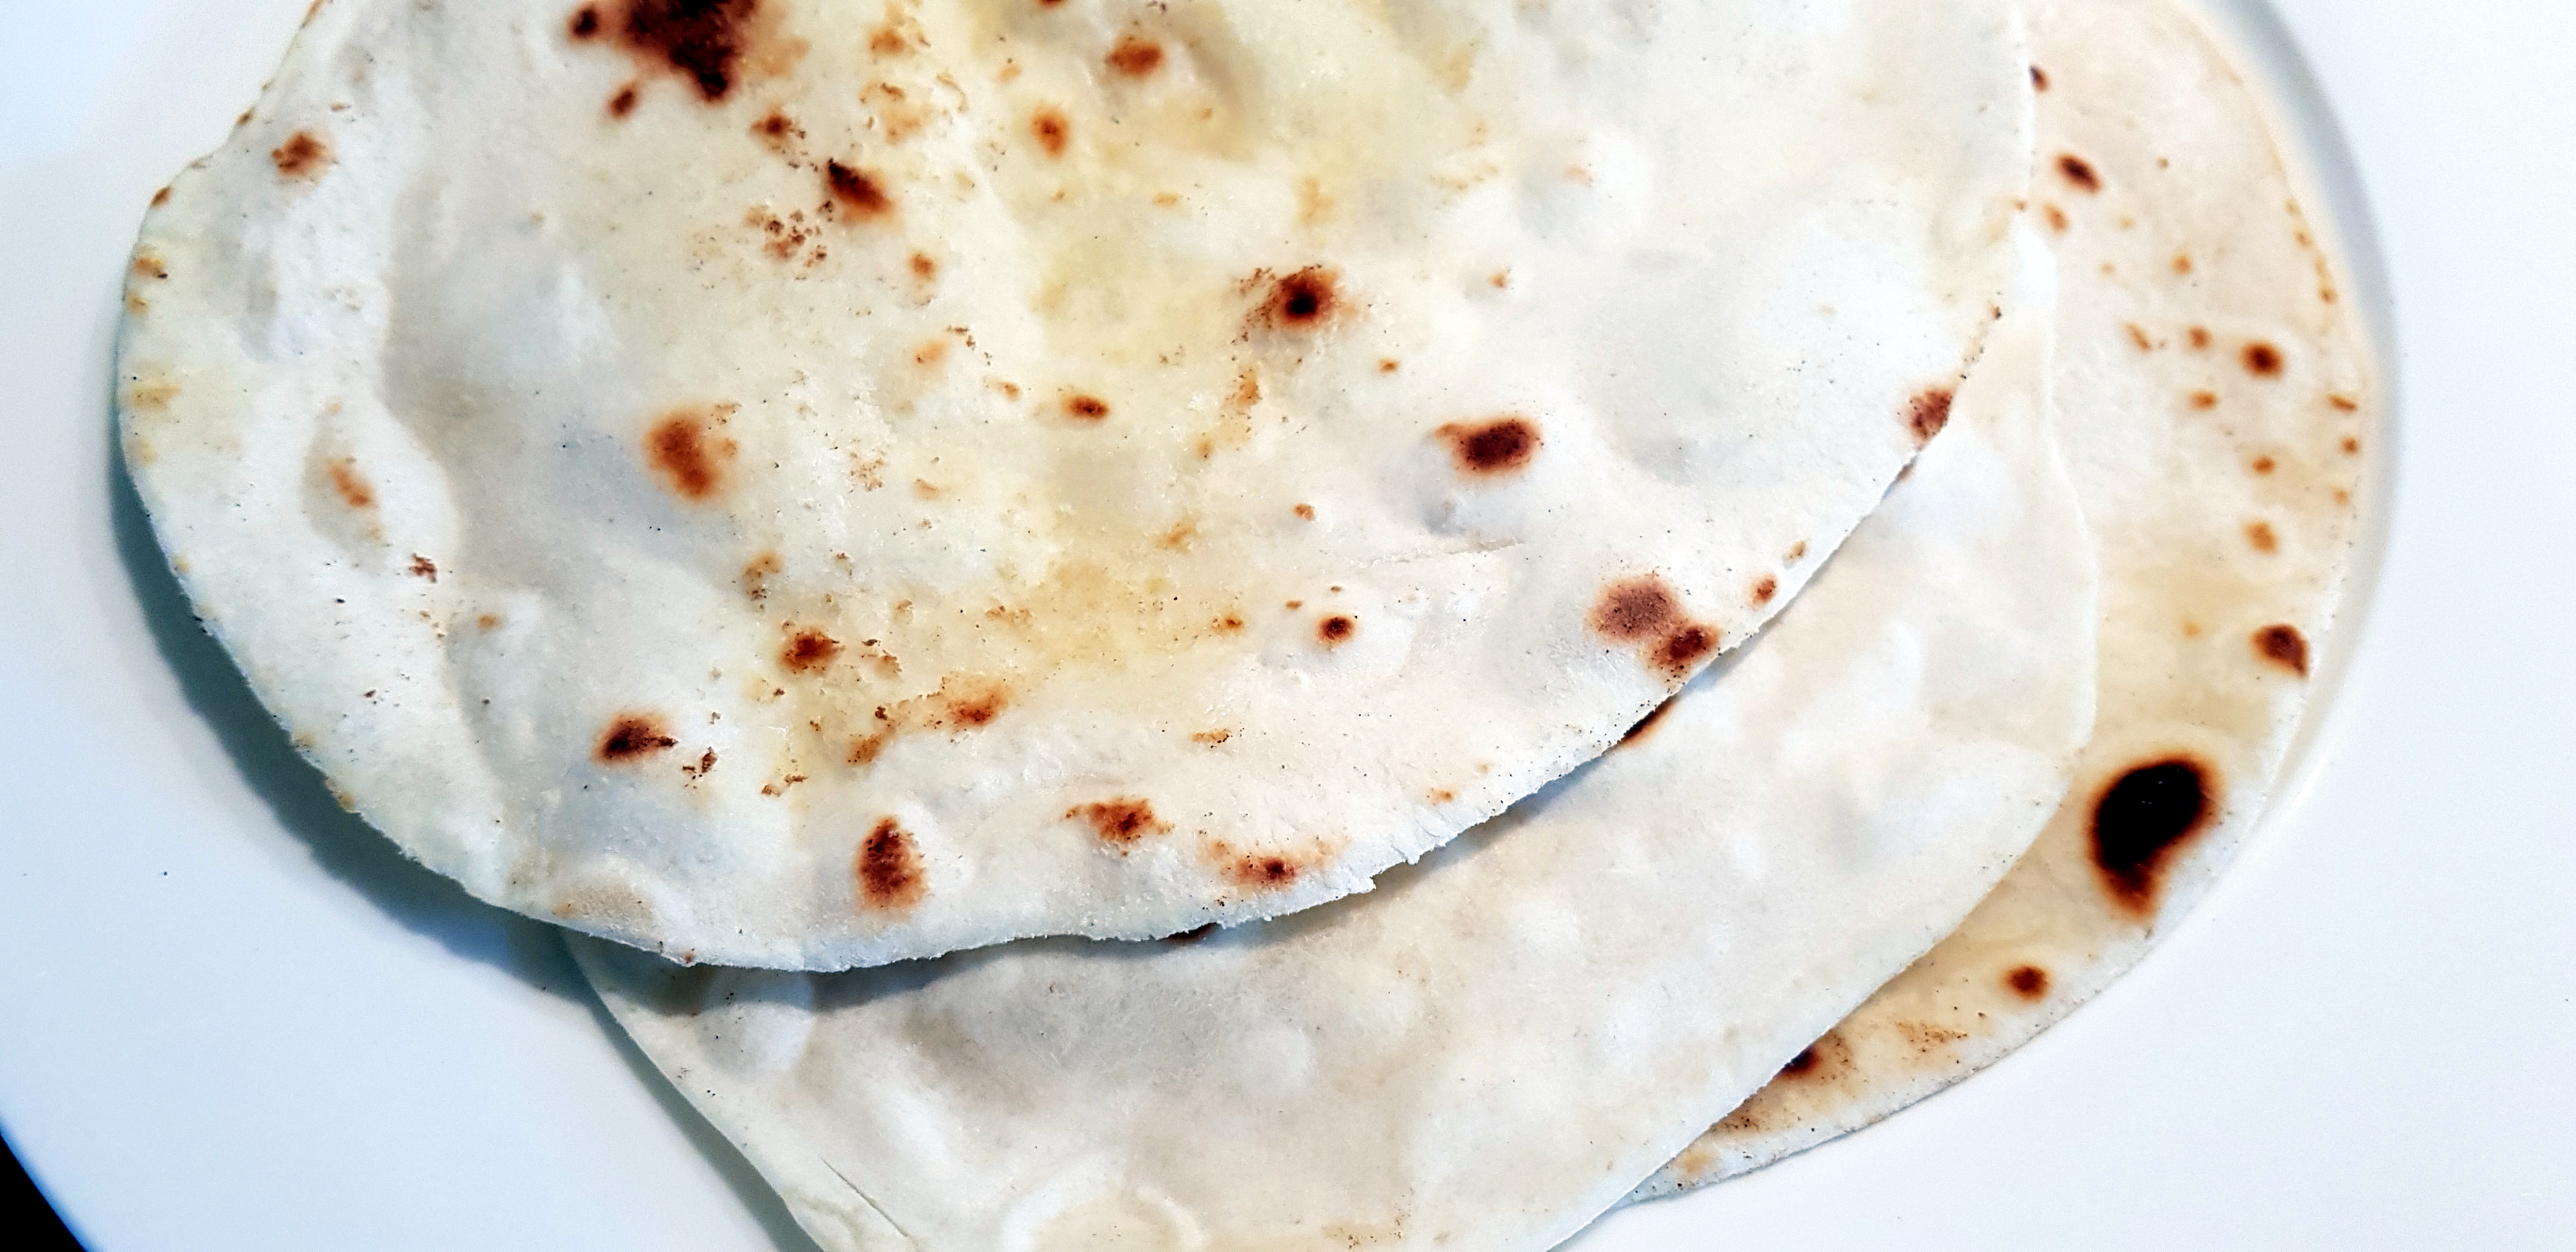
Semolina Flatbread: Rougag
This was my first time making flat bread and I am not much of a baker to begin with so I was stoked with the result. This has to be the oldest form of bread making (that long history in itself is exciting) and you are going need a lot of elbow grease and a bit of practice.

I tend to be drawn to dishes where the simplicity of the ingredients give no hint to the joy that the final product makes you feel. It is what compels me to cook and share my experiences with you.
Steps
- Making the dough
- Kneading the dough
- Cooking the bread
Ingredients (for 3 pieces)
- 100g wheat semolina (preferably from durum wheat and yellow colour)
- 1 tsp salt (I don’t use salt in the rest of my cooking so this was perfect, reduce if needed)
- Cold water
- Plain white flour, to dust work surfaces and hands
- Olive oil to coat fry pan each time
Equipment
- 1 mixing bowl
- 1 rolling pin
- 1 fry pan
Making the dough
- Put the semolina and salt into a mixing bowl.
- Add a tiny bit of cold water and mix with your hands.
- Keep adding cold water and mixing until the dough is elastic and smooth.

Kneading the dough
- Knead the dough for about 15 minutes (if like me you are new to this I have included an external youtube video with a great technique).
- Let the dough sit for 15 minutes and then break into balls (100g of semolina should about get you 3 balls).
- Sprinkle your work surface with some plain white flour and roll the balls out into very flat discs.
Cooking the bread
- Oil your fry pan and bring to a medium low heat.
- Cook one side of the bread, then the other, waiting for it to bubble before flipping.
- Turn the heat down a bit if you find the bread is burning before it is ready to be flipped.
- Wipe the pan clean.
- Repeat steps 1 to 4 for each piece of bread.


Serving
I roughly tore the bread and added them to a Moroccan Style Chickpea Stew With Lamb (ala Chakhchoukha) that I was trying to reverse engineer. It was the perfect taste and texture addition to the meal.
I even used it as a ‘spoon’ to get the last of the sauce from the bowl. A good sign of success and a use of the bread that I understand was probably the whole point mists of time.

Enjoy and please feel free to help me improve my bread making,
PK
YOU MIGHT ALSO LIKE
BAKING
NORTH AFRICAN CUISINE
Please consider subscribing to a weekly email summary of our posts or check us out on Facebook @growitcatchitcookit.
[mc4wp_form id=”15771″]
Written by
·
-
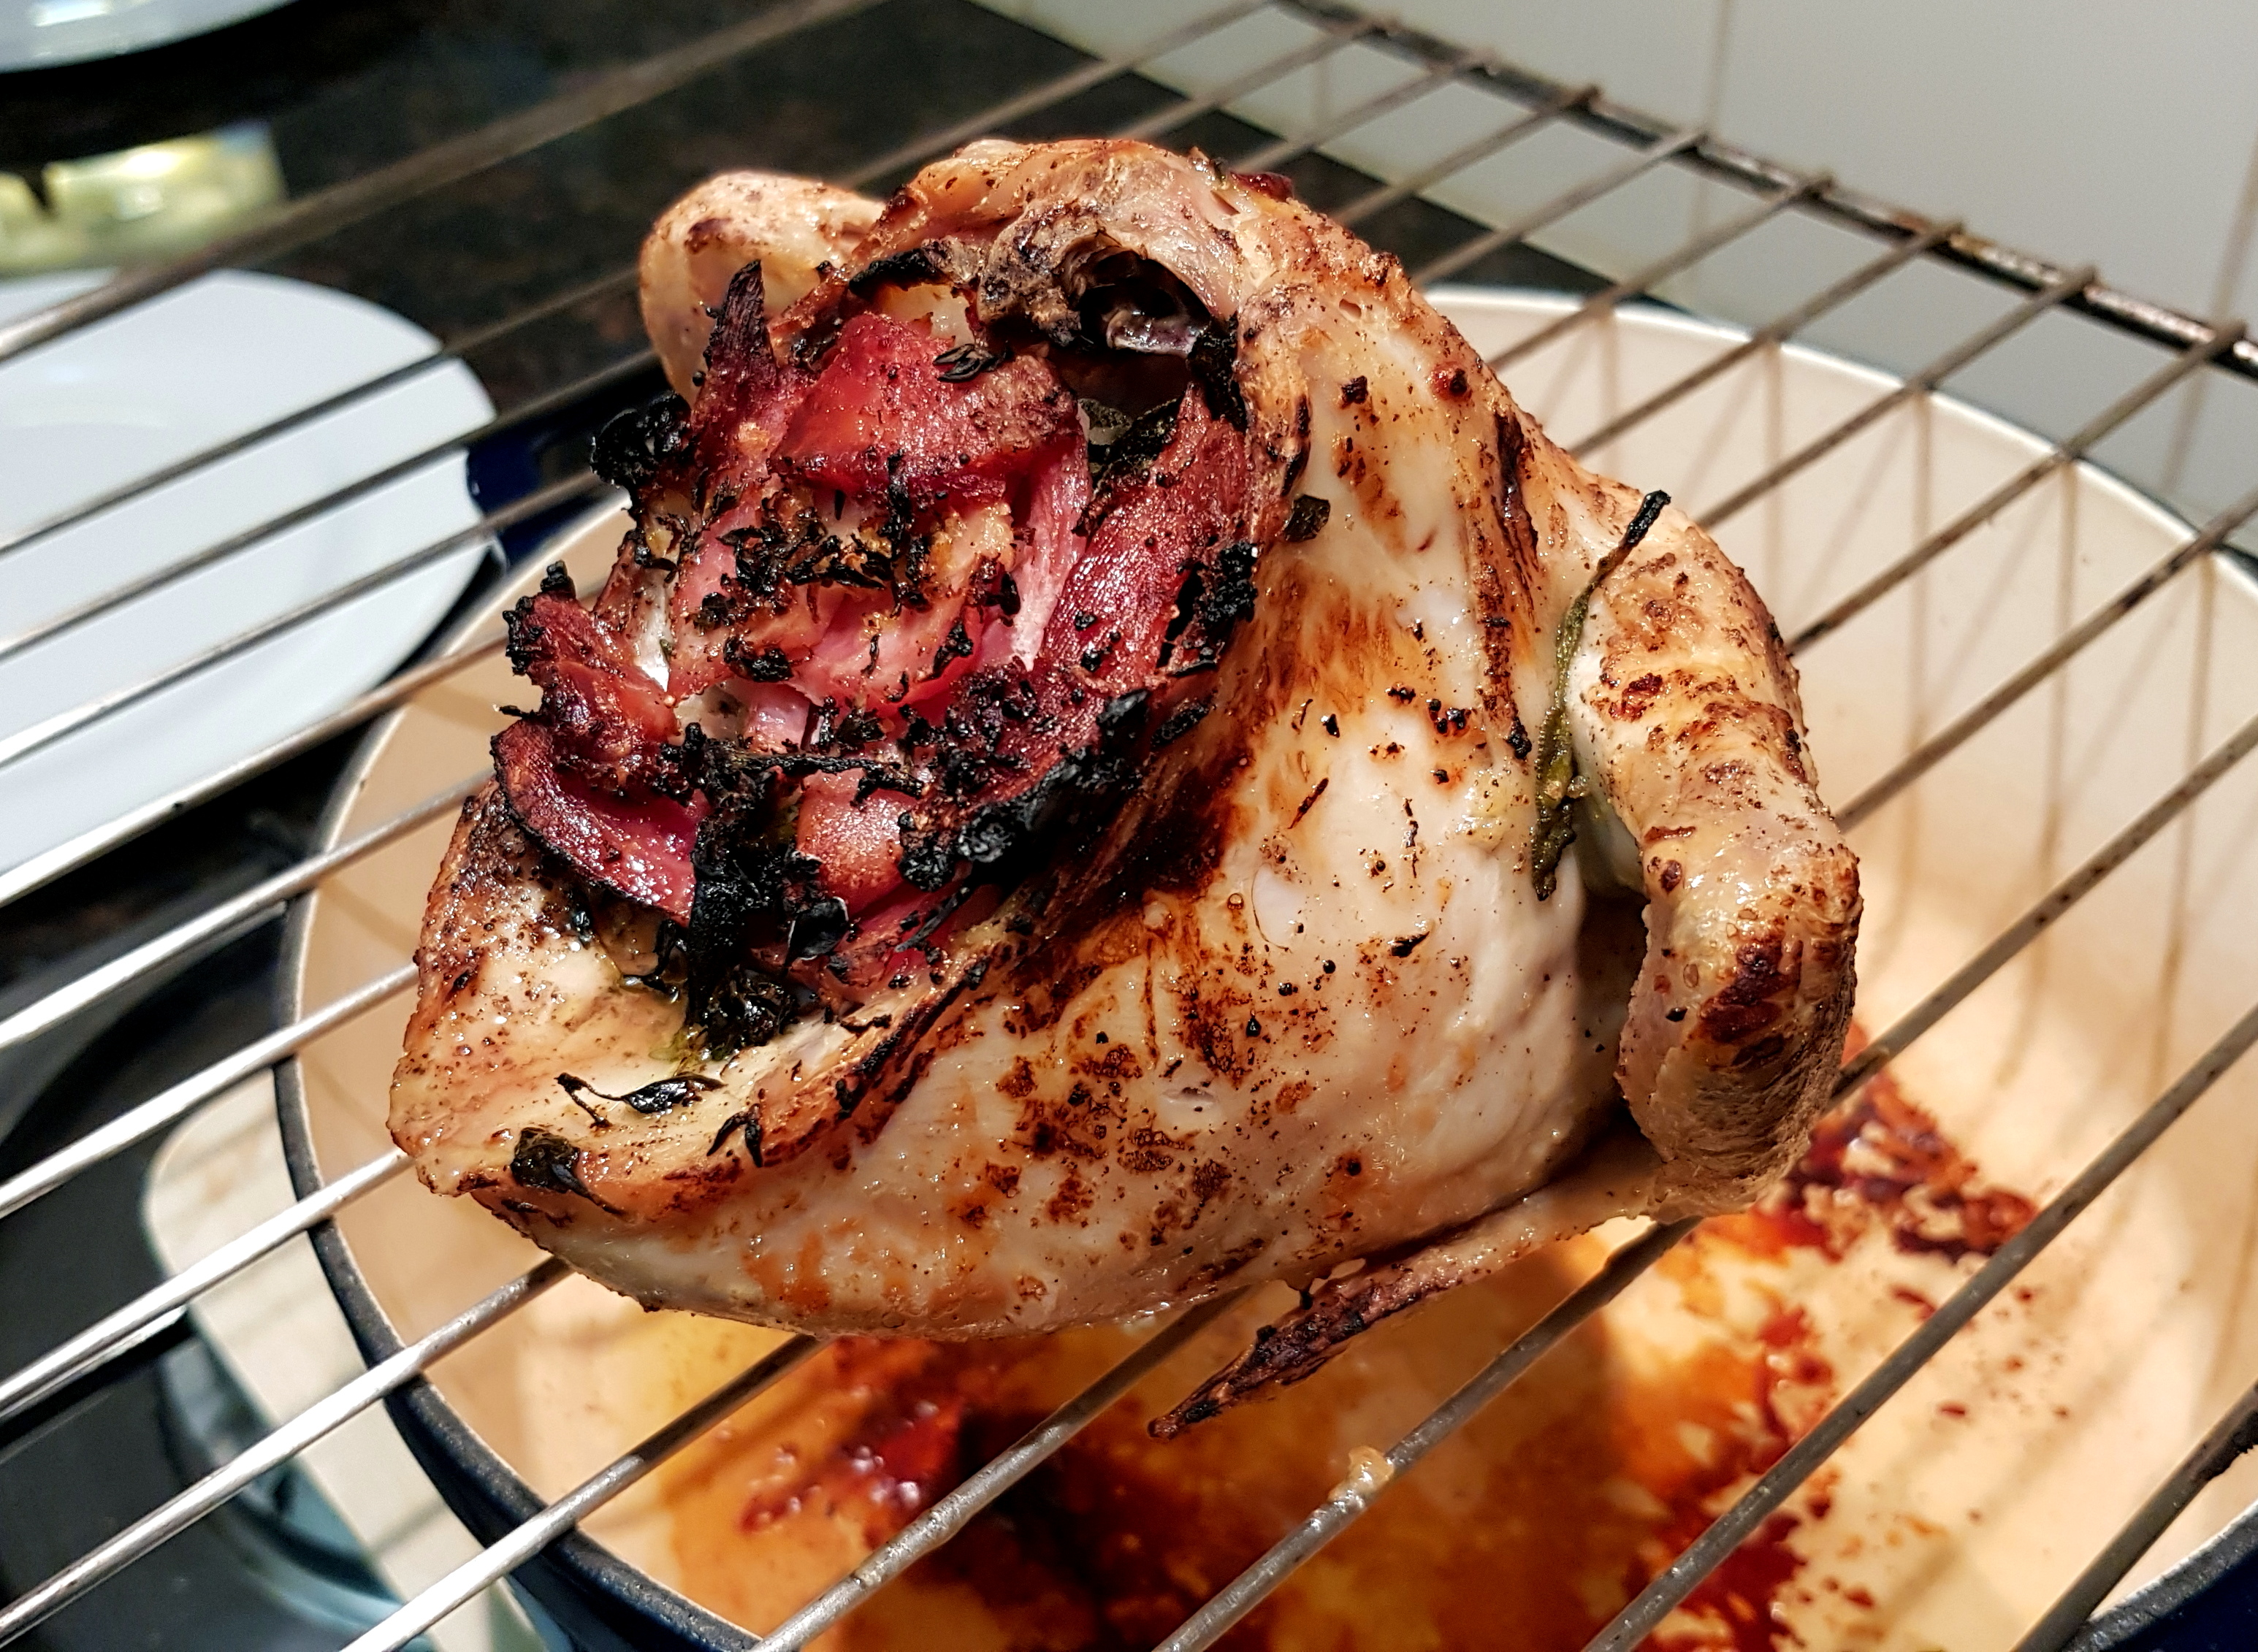
PK’s Chicken Crown Roast With Bacon
I stuffed this chicken crown joint with bacon, sage, thyme, key lime peel and onion. The skin was rubbed in olive oil, cracked black pepper and salt.
I roasted it (~ 1 hour: fan forced oven: 200C) in an upright position to let the stuffing drip and infuse through the roast as it cooked.


Enjoy,
PK
Related Links:
Please consider subscribing to get a weekly email summary of our posts.
[mc4wp_form id=”15771″]
Written by
·
-
PK’s Slow Cooker Whole Chicken
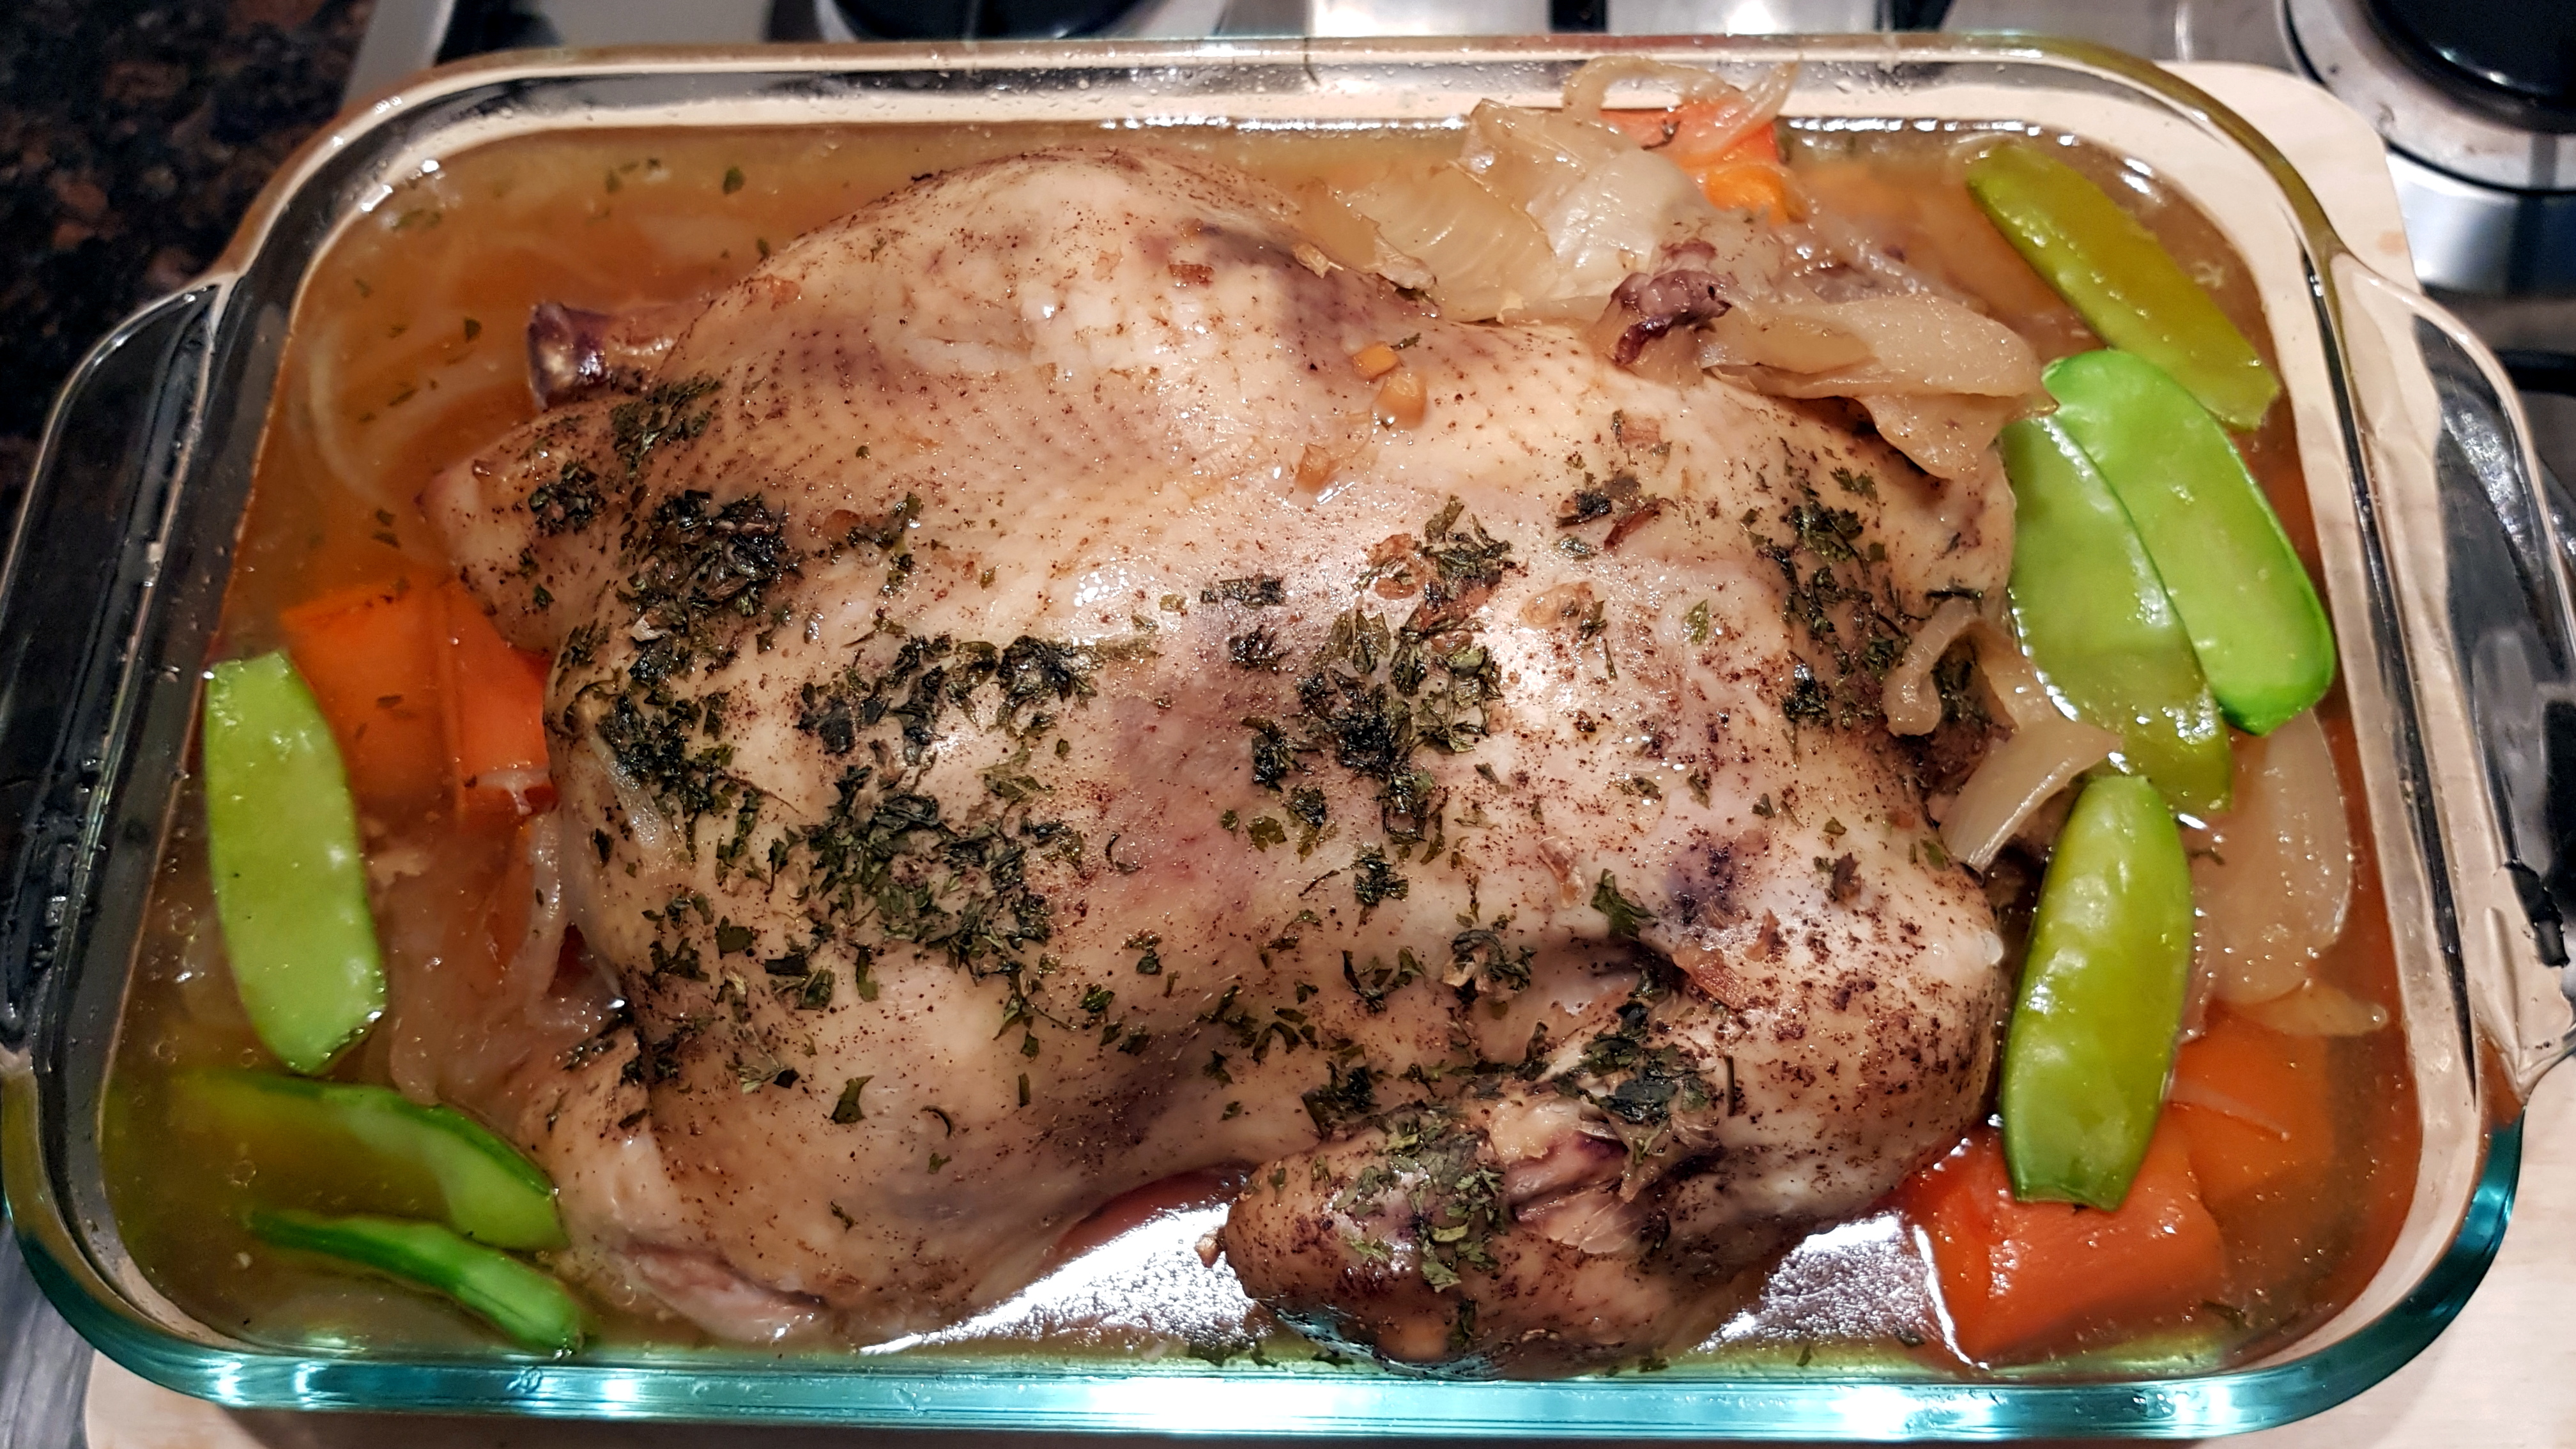
This mouth-watering dish is designed to be super thrifty and dead easy to boot. I managed to use some old tired veggies and to get a free-range chook on special. I am also happy to say it took longer to eat the dish than it did to prepare it.
I simply took a whole chicken, patted it dry and stuffed it with a whole lemon. I then rubbed a very generous amount of garlic salt, celery salt, ground black pepper and parsley flakes into the skin. The bird then went into a slow cooker that already had a bed of roughly chopped onions, carrots, a whole garlic bulb and a cup of white wine.

8 hours on low and the meat was moist and falling off the bone 🙂 . I was very pleased because chicken is a lean meat and can dry out in a slow cooker if you are not careful.


Serving
I served it with some extra steamed vegetables on a bed of white basmati rice.

Enjoy,
PK
P.S. I have a oven variant of this recipe here.
And here are some more chicken dishes and slow cooker recipes:
Please consider subscribing to a weekly email summary of our posts or check us out on Facebook @growitcatchitcookit.
[mc4wp_form id=”15771″]
Written by
·
-

PK’s Shakshuka For One
After recently being introduced to this amazing dish by ShakShukaMoroccan (these guys are super friendly and they bring skill and passion to their work) at the Palmyra Markets (Western Australia), I have dreamt about it ever since. I present my first attempt in the hope you get addicted too :).
There is something captivating about this ‘eat any time of the day’ dish because the list of ingredients is so simple but the end result makes your draw drop and your senses swim. I intend to chop and change some of the ingredients depending on what I have in the back of the fridge but the core is lots of tomatoes, onion, capsicum, cumin, leafy greens and poached eggs.

You will be:
- Preparing your ingredients.
- Stewing the tomato base.
- Poaching the eggs.
- Serving.
You will need:
- Ingredients:
- a punnet of cherry tomatoes, sliced
- half a brown onion, thinly sliced
- half a capsicum (bell pepper), sliced
- 1 -2 garlic cloves, finely diced
- 1/2 tsp cumin seeds, ground
- 1/2 tsp coriander seeds, ground
- a generous dash of dried paprika, ground
- a handful of spinach
- a good slug of olive oil
- a really good slug of tomato paste
- black peppercorns to taste, cracked
- table salt to taste
- chili powder to taste
- coriander leaves to garnish (mint leaves are also good)
- Equipment:
- a long sharp knife
- a chopping board
- a dry mixer or a mortar and pestle
- a cast iron skillet (mine was 21cm wide) or heavy pan
- a wooden spoon
Preparing your ingredients
- Roughly slice the punnet of cherry tomatoes.
- Finely slice or chop the half a brown onion.
- Slice the half a capsicum (use more if you prefer).
- Finely dice the 1 -2 garlic cloves.
- Roast and the grind the:
- 1/2 tsp cumin seeds
- 1/2 tsp coriander seeds
- Wash the handful of spinach.
- Wash the coriander leaves and rip them up some.
Stewing the tomato base
- Bring your skillet to medium to low heat and add a good slug of olive oil.
-
Add the sliced onion, the ground cumin seeds, ground coriander seeds and a generous dash of ground paprika.
- Cook until the onions have started to soften and add the sliced half a capsicum.
- When the capsicum slices are starting to soften add the punnet of sliced cherry tomatoes and the handful of spinach leaves.


Poaching the eggs
- Once you are happy with the tomato stew turn the heat right down.
- Make a couple of indentations in the stew with your wooden spoon.
- Crack an egg into each indent and keep cooking until the eggs are how you like them. You can put a plate over the skillet if you like the top of your eggs cooked.


Serving
Garnish with some ripped coriander leaves or mint and serve piping hot and still in the skillet.I couldn’t wait and started eating it while it was still on the hob :).Enjoy,
PK
YOU MIGHT ALSO LIKE
MORE NORTH AFRICAN CUISINE
Please consider subscribing to a weekly email summary of our posts or check us out on Facebook @growitcatchitcookit.
[mc4wp_form id=”15771″]
Written by
·
-
PK’s Salt N Pepper Squid Rings
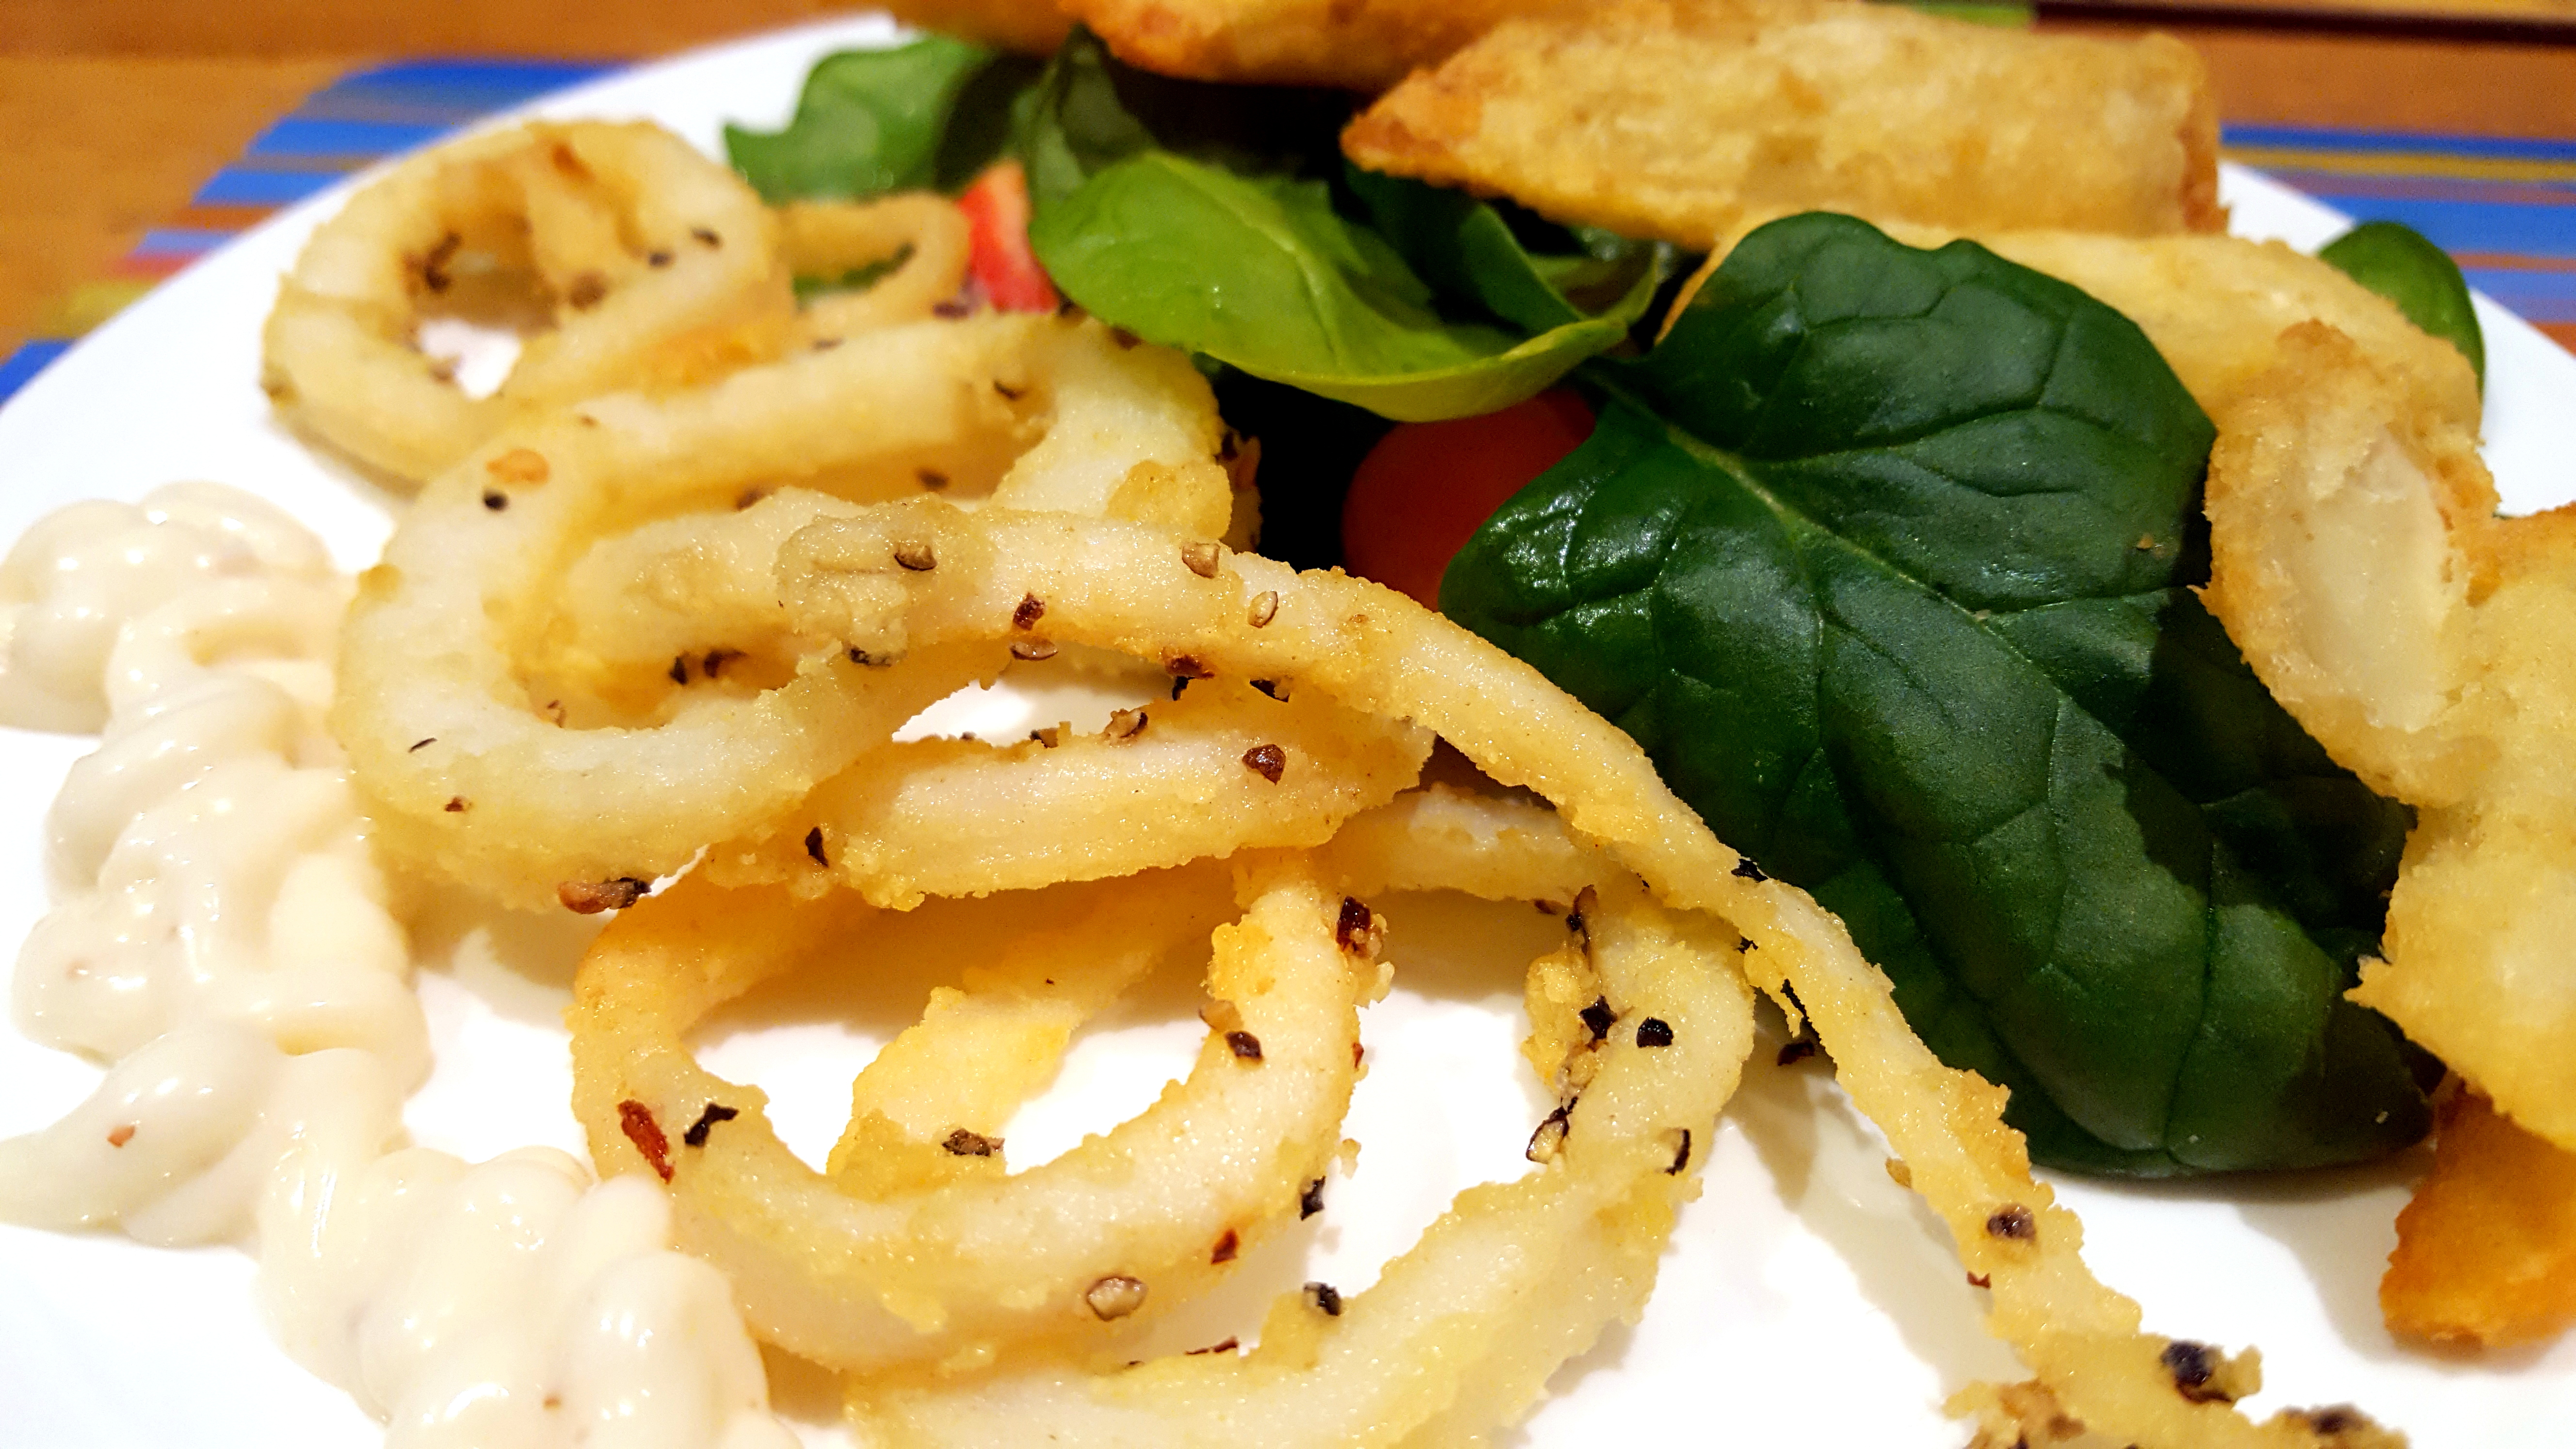
A serve of salt and pepper squid rings is the perfect end to a long day on the water. It takes minutes to prepare and then you can go back to cleaning the rest of your catch :).
Best of all, this will be on your plate in 15 minutes.
You will be:
- Preparing your ingredients.
- Shallow frying the dusted rings.
- Serving.
You will need:
- Ingredients:
- a couple of clean squid hoods my (see Squid Preparation Tips)
- enough olive oil to allow you to shallow fry the rings
- 1/2 cup plain flour
- 1 tsp table salt
- 1 -2 Tbsp cracked black pepper
- ground chili to taste
- Equipment:
- a long sharp knife
- a chopping board
- a pair of tongs
- a fork
- a medium-sized mixing bowl
- a deep pan for shallow frying
Prepare your ingredients
- Cut your squid rings nice and thin.
-
Add to the mixing bowl:
-
1/2 cup plain flour
-
1 tsp table salt
- 1 -2 Tbsp cracked black pepper
-
optional chili to taste
-
- Give everything a good turn over with a fork.
- Add the squid rings to the bowl and (using your hands) toss the rings making sure the flour mix coats them inside and out.
Shallow frying the dusted rings
Get your olive oil to medium heat, remember it has a low smoking temperature, and shallow fry the rings in batches. Make sure you do them quickly so they don’t go chewy :).

Serving
Some creamy aioli, a green salad and some oven baked chips (and a cold beer) is all the squid rings need :).

Enjoy,
PK
YOU MIGHT ALSO LIKE
15 MINUTE MEALS
Please consider subscribing to a weekly email summary of our posts or check us out on Facebook @growitcatchitcookit.
[mc4wp_form id=”15771″]
Written by
·
-

FoodHack: Desalting Salted Peanuts
So you just made something like PK’s Thai Beef Salad where the dressing has the perfect amount of salt already and you reach for some unsalted peanuts as a garnish. Oh no! All you have is salted peanuts.
Don’t worry this FoodHack will save the day. Take the required amount of salted peanuts and give them a quick rinse under the cold tap. Then dry them with paper towel (some people say you need to dry them in an oven but I don’t see the need).
Simple and it really works 🙂

Enjoy,
PK
Written by
·
-
FoodHack: Desalting Peanuts
So you just made something like PK’s Thai Beef Salad where the dressing has the perfect amount of salt already and you reach for some unsalted peanuts as a garnish. Oh no! All you have is salted peanuts.
Don’t worry this FoodHack will save the day. Take the required amount of salted peanuts and give them a quick rinse under the cold tap. Then dry them with paper towel (some people say you need to dry them in an oven but I don’t see the need).
Simple and it really works 🙂

Enjoy,
PK
Related Links:
- see more FoodHacks here
Please consider subscribing to get a weekly email summary of our posts.
[mc4wp_form id=”15771″]
Written by
·
-

Bish’s Burning Mango Salsas
A long time ago I was in Darwin for work and had a few extra days to explore a place I now think of as one of my favourite Australian cities. One of my fondest memories was going to the markets and sampling food that was really unique – fusions of different cultures and tastes I’ve struggled to find anywhere else.
One of the strongest memories of taste was of some dried mango that was dusted with chilli and salt. I’ve not seen this for a while, and with my mother in law giving me a bag of mangoes the other day I decided to embrace my inner Top Ender and see what I can create.

Salsa 1: Mango Salsa with Chilli, Lime and Salt
Take your bounty of mangoes and remove all the flesh from the fruit – as much as you can! I cut the cheeks off and then score the flesh, invert the skin and slide the chunks off (make sure to let the juice dribble in as well, don’t lose that!). Then separately, take a mortar and pestle, and crush up some dried chillies (I still have some really hot birds eye ones from a crop a year or so ago, so I use two for about a small bowl of fruit), and chuck them into the mango chunks. The final two touches – salt (a pinch for a small bowl, but start light and add more if you need to), and some zest of a lime and the juice (about ½ a lime’s worth for a small bowl).


Salsa 2: Mango Salsa with Balachaung
The second one is a bit of a cheat. I am quite fond of a condiment called balachaung, which is a sort of dried relish of dried shallots, garlic, shrimp, salt and chilli. It is a super tasty, hot, salty topping that works a treat on leftovers like fried rice. I get mine from the local Asian supermarkets (pretty much my basket always has some “sweet meat”, a can of soy bean milk and a can of “grass jelly drink”. I’ll have to take PK shopping there sometime…

Repeat the steps above to get the fruit cut up and into a bowl, and then sprinkle the balauchaung on top of the mango. That’s pretty much it – but be careful that you don’t overdo this one.
Serving
Both of these salsas are pretty good by themselves (or on crackers or something), but they also are a pretty good accompaniment to seafood like prawns… which is how we’re going to eat these ones tonight!

Bish
PS pair this dish with Craigo’s NoRecipe BBQ Prawn Skewers
Here are more posts by Bish and uses of chillies:
Written by
·