Tag: pork
-
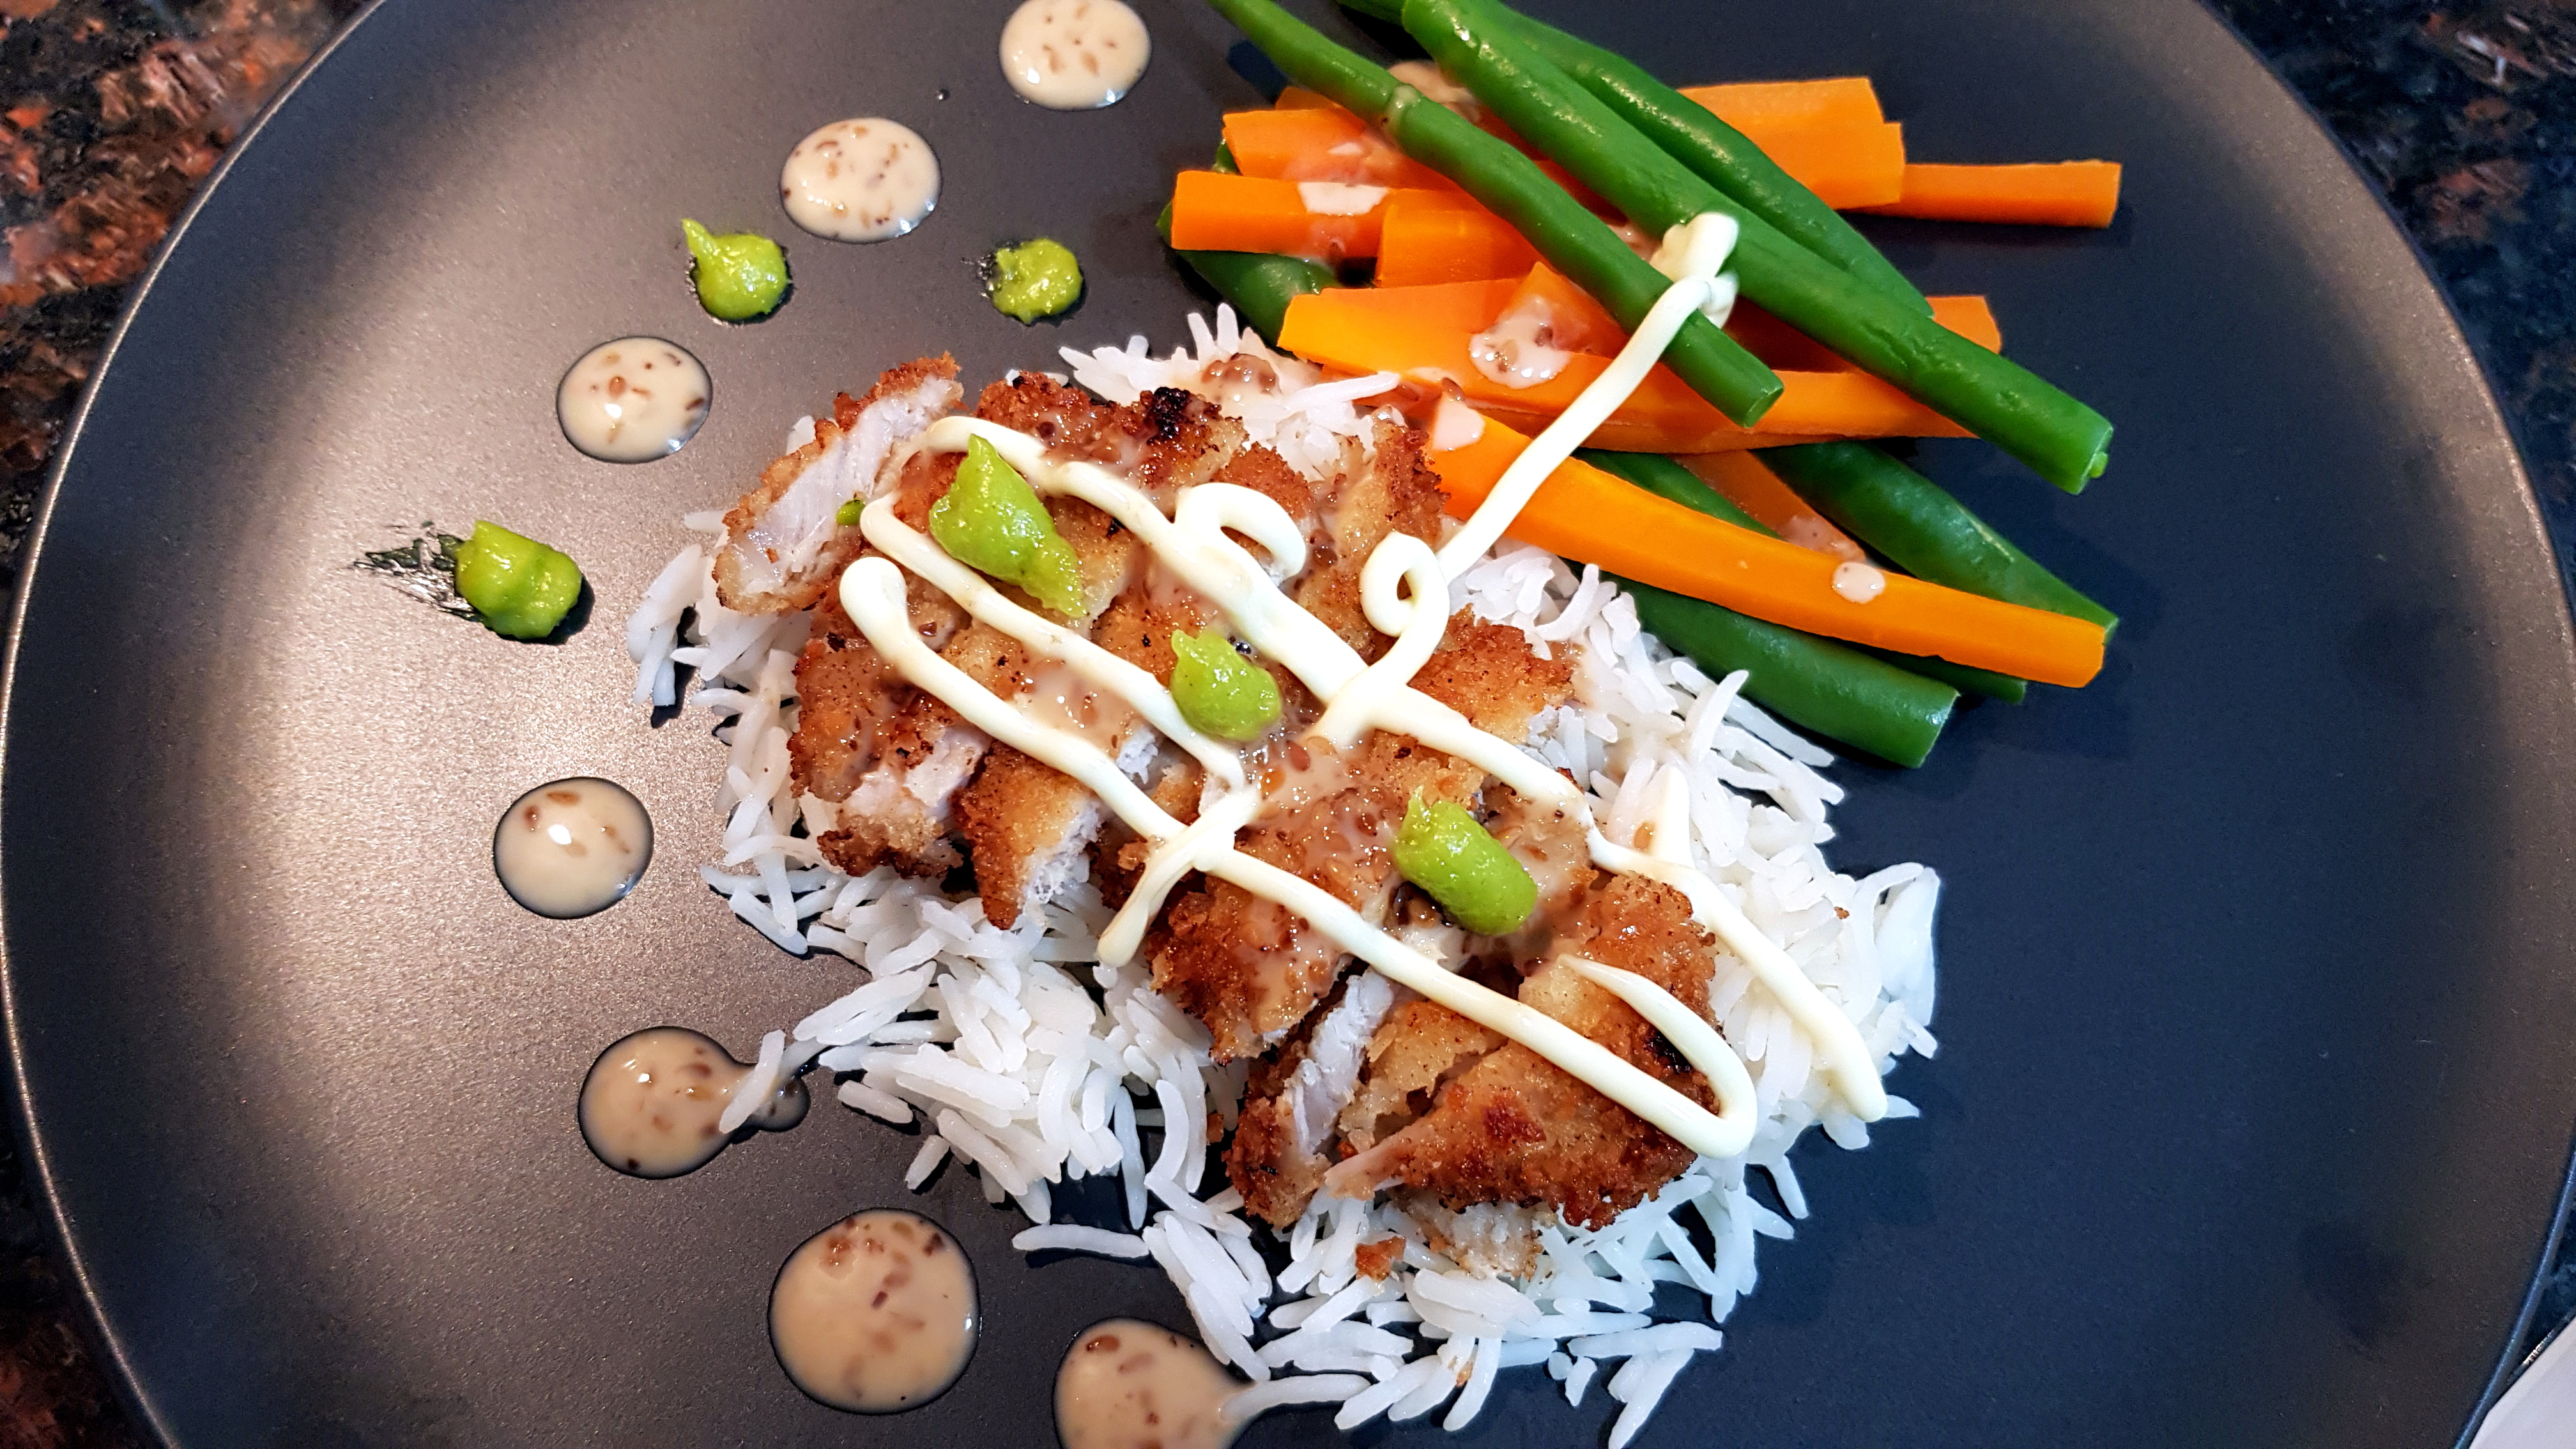
PK’s Asian Style Crumbed Pork Loin Cutlets
Just like my Crumbed Panko Chicken Breasts these crumbed eye of pork loin cutlets are so lite and easy. Simply throw some noodles or rice at it and serve with wasabi paste, Japanese Mayonnaise and Japanese Roasted Sesame Dressing.
Your guests will be blown away!

Takes about 20 minutes of preparation and cooking not including 30 minutes of refrigerating the cutlets after crumbing them.
Steps
- Crumbing the pork eye of loin
- Shallow frying the crumbed pork
- Serving
Ingredients
- 5 pork eye of loin cutlets, each one halved
- 2 eggs, whisked
- 1 garlic clove, finely minced
- Cracked black pepper and table salt to taste
- Panko breadcrumbs, enough to coat the cutlets
- Peanut Oil, enough to cover the bottom of your fry pan
Equipment
- 1 chef’s knife
- 1 chopping board
- 1 plate for the panko crumbs
- 1 bowl for the whisked egg
- 1 whisk or fork
- 1 tray, covered in baking paper
- 1 fry pan to shallow fry the cutlets
Preparing the pork eye of loin
- Take each cutlet and slice them to give you two thin cutlets a piece.
- Season them with a bit of cracked pepper and salt to taste.
- Whisk the 2 eggs in a bowl and then mix in the 1 tsp minced garlic.
- Add the cutlets to the egg mix and spread the panko breadcrumbs on a plate.
- Take each cutlet and roll in the panko getting a nice thick coating.
- Pop them on the the baking paper lined tray and then refrigerate for about half an hour.


Shallow frying the crumbed pork
- Heat the oil over a high heat and then shallow fry the crumbed cutlets, in batches, until they are golden brown.

Serving
Goes great on a bed of rice and vegetables and your favourite Japanese condiments. Or in my kids case, tomato ketchup. 😉

Enjoy,
PK
YOU MIGHT ALSO LIKE
MORE JAPANESE DISHES
MORE ASIAN CUISINE
PORK DISHES
Please consider subscribing to a weekly email summary of our posts or check us out on Facebook @growitcatchitcookit.
[mc4wp_form id=”15771″]
Written by
·
-
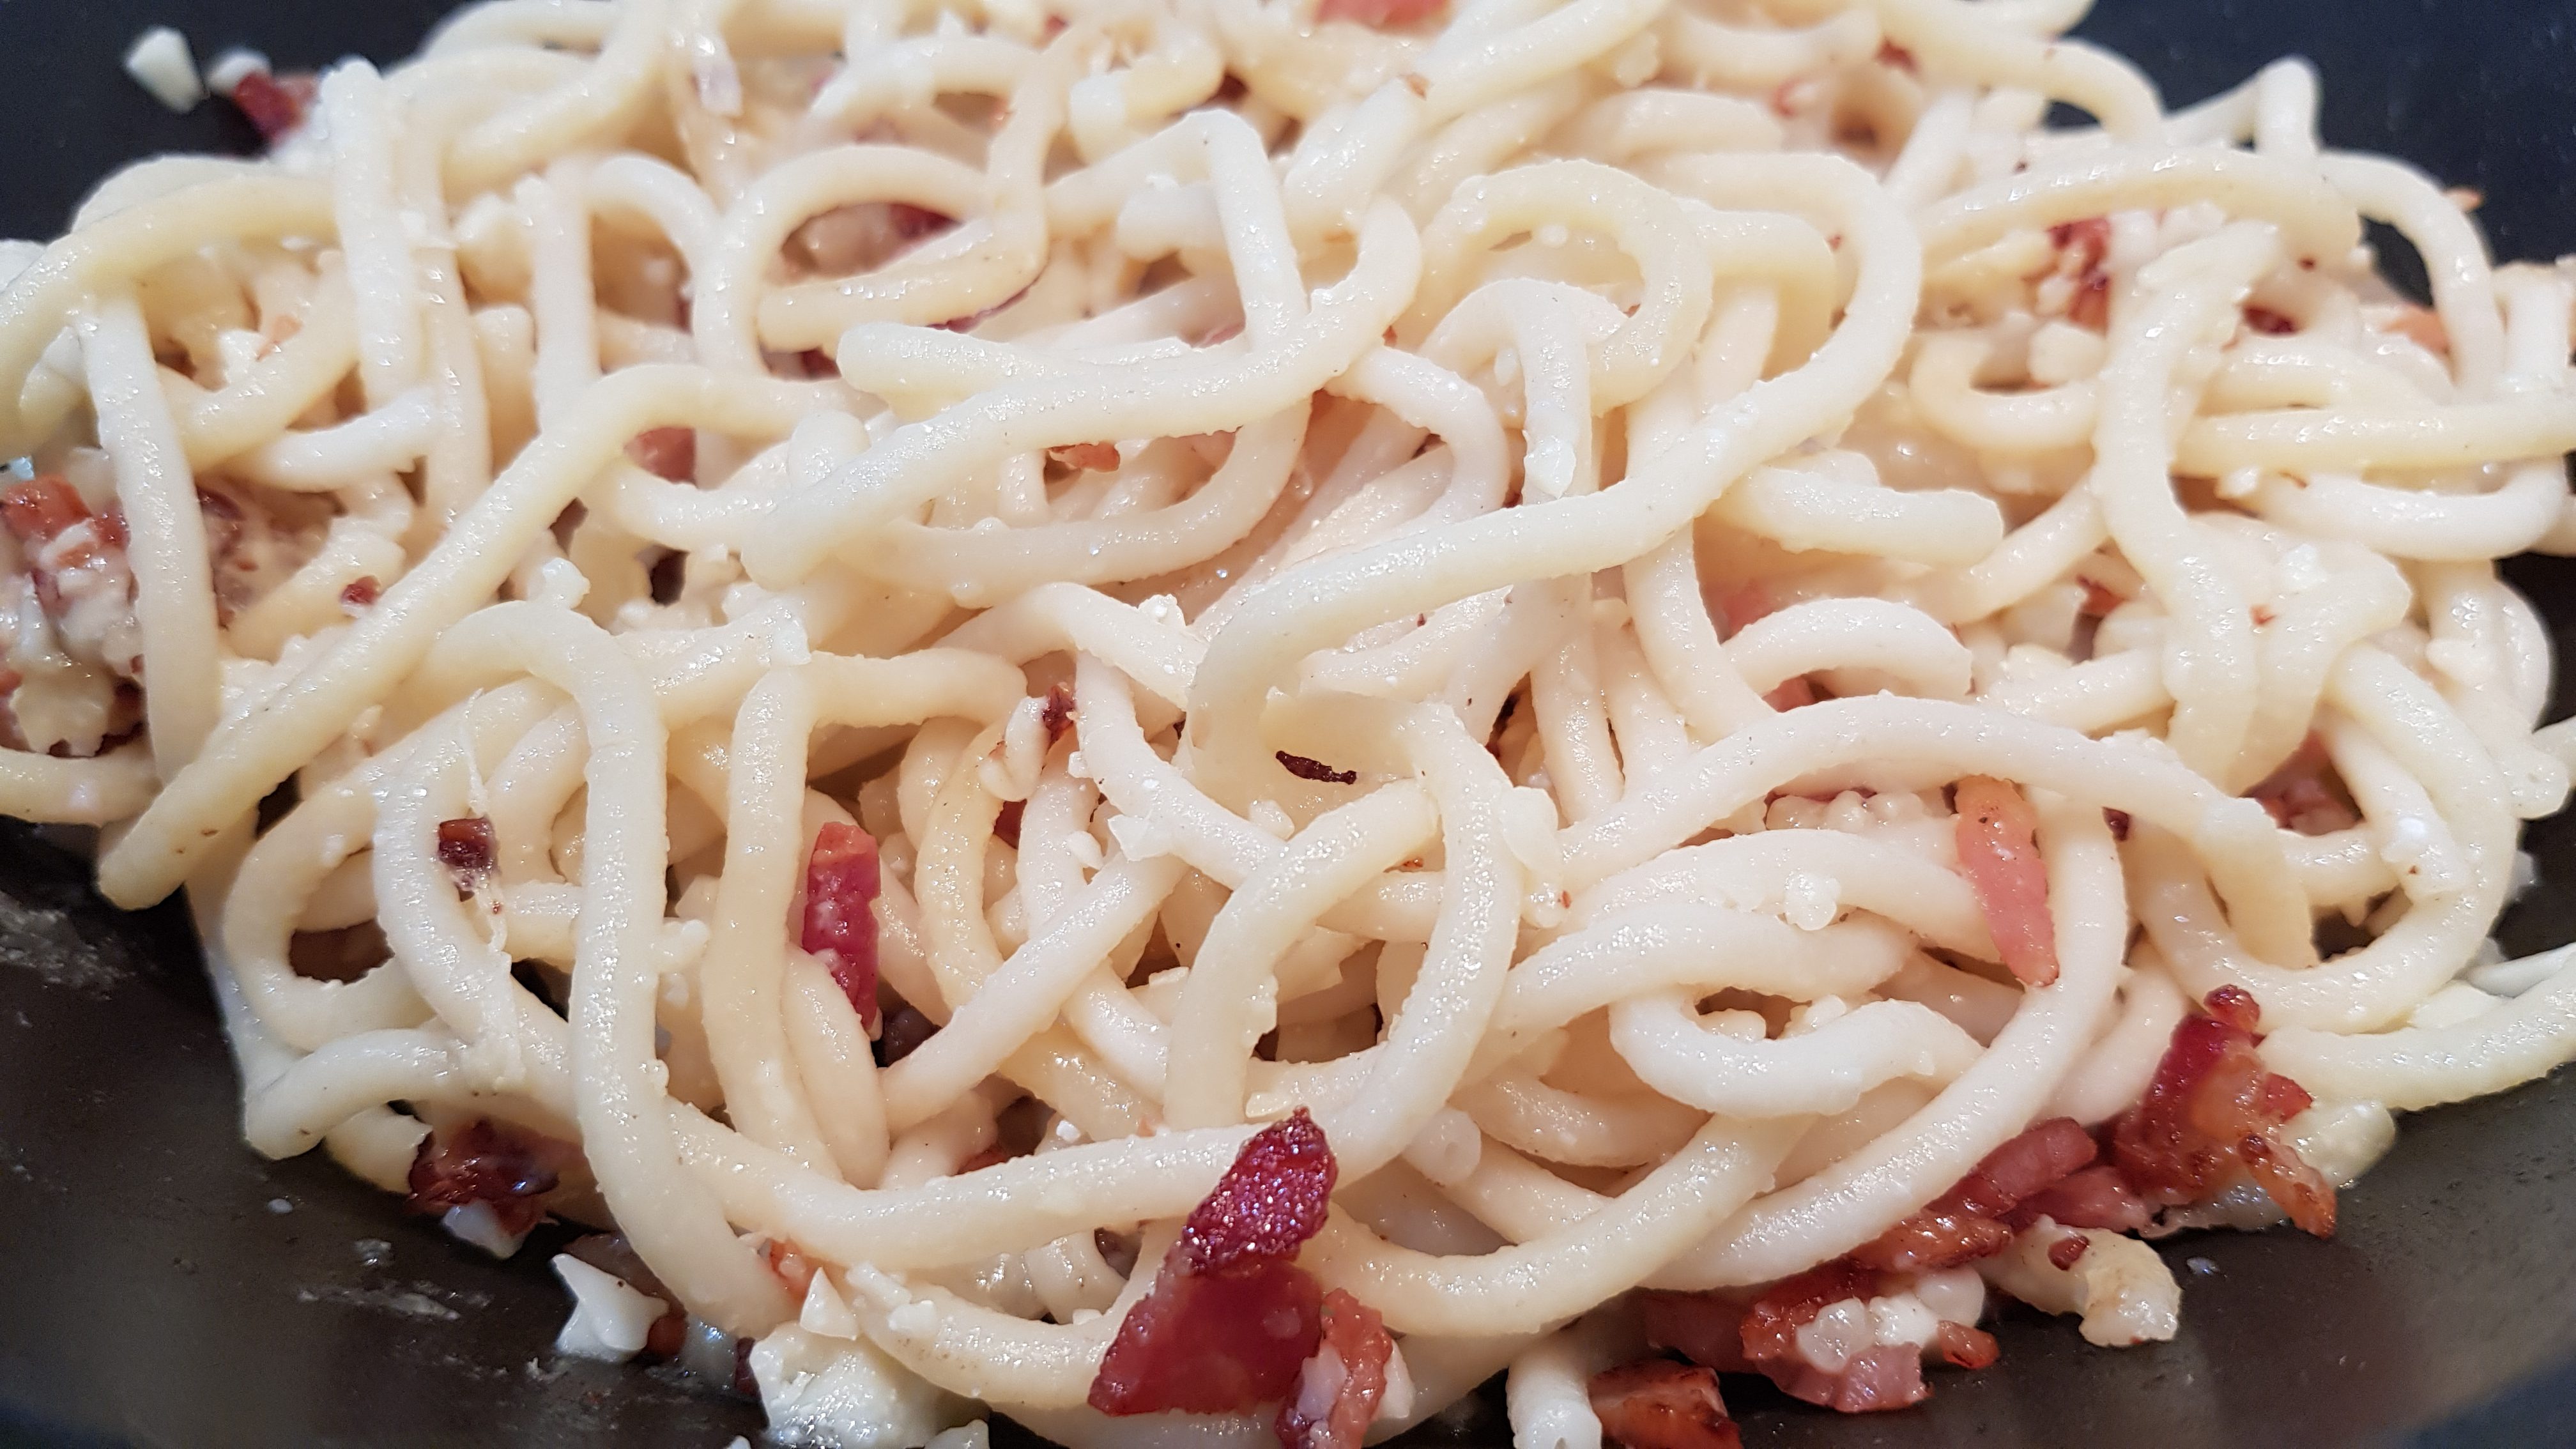
Spaghetti Carbonara
Traditional Spaghetti Carbonara consists of pasta, a beaten egg, hard aged Italian cheese and guanciale. I use pancetta or shortcut bacon if I don’t have any of the latter.
I love this version just as much as the one I make with heavy cream. Check it out here – Spaghetti Carbonara With Cream.
The Technique
A couple hundred grams of fresh spaghetti (I used bucatini made in my Philips Pasta And Noodle Maker) feeds two hungry adults.
Boil the pasta al dente and then drain most but not all of the water. Add fried bacon, aged Italian hard cheese and beaten egg.
Here I have used 200g of pasta, 3 rashers of short bacon, 80g of aged Italian hard cheese (a mix of Calcagno Pecorino With Black Peppercorns and Parmigiano-Reggiano) and the reserved pasta water.
If you like it runnier, use two eggs and a bit more of the pasta water.

Enjoy,
PK
Here are some more Italian food and pasta recipe posts:
Written by
·
-
Scott Rea’s Roast Pork With Perfect Crackling
I have struggled to make roast pork with the perfect crackling forever and a day.
Until now!
Scott Rea guarantees perfect crackling if you follow his pork roast preparation and oven directions. They really do work and I have even tried to prove him wrong. He isn’t and I have linked to his video at the end of the post.
I know what you are thinking, surely it won’t work in a charcoal weber BBQ.
Scott’s Key Tips:
- The best tool for scoring the pork skin is a Stanely knife. Not only are the blades super sharp but you can set it to the right length to slice the fat but not the meat itself.
- Bring the joint out of the fridge at least an hour before cooking to bring it to room temperature. This time will vary depending on the climate.
- Don’t salt the pork fat until right before you cook it. Too early will make the fat moist and it won’t crackle properly.
The Day Before
- Buy your pork joint at least a day or two before you intend to roast it.
- Take it out of the vacuum pack, if that is how you got it, and pat it dry.
- Use a Stanley knife to score the fat of the pork cut you are using.
- Put the pork, uncovered, into the fridge overnight to let the fat dry out (don’t salt it at this point).
The Next Day
- Take the pork out a few hours prior to cooking to bring it to room temperature.
- Preheat your fan-forced oven to 240C.
- Rub salt into the fat’s cuts.
- Optionally get some fennel seeds and or black pepper into them too.
- Cut a bunch of onions or potatoes into slices and layer them in an oven tray to keep the pork off the bottom of the tray.
- Add some water to the tray to stop the vegetable bed from burning and also keep the meat moist.

COOKING TIME
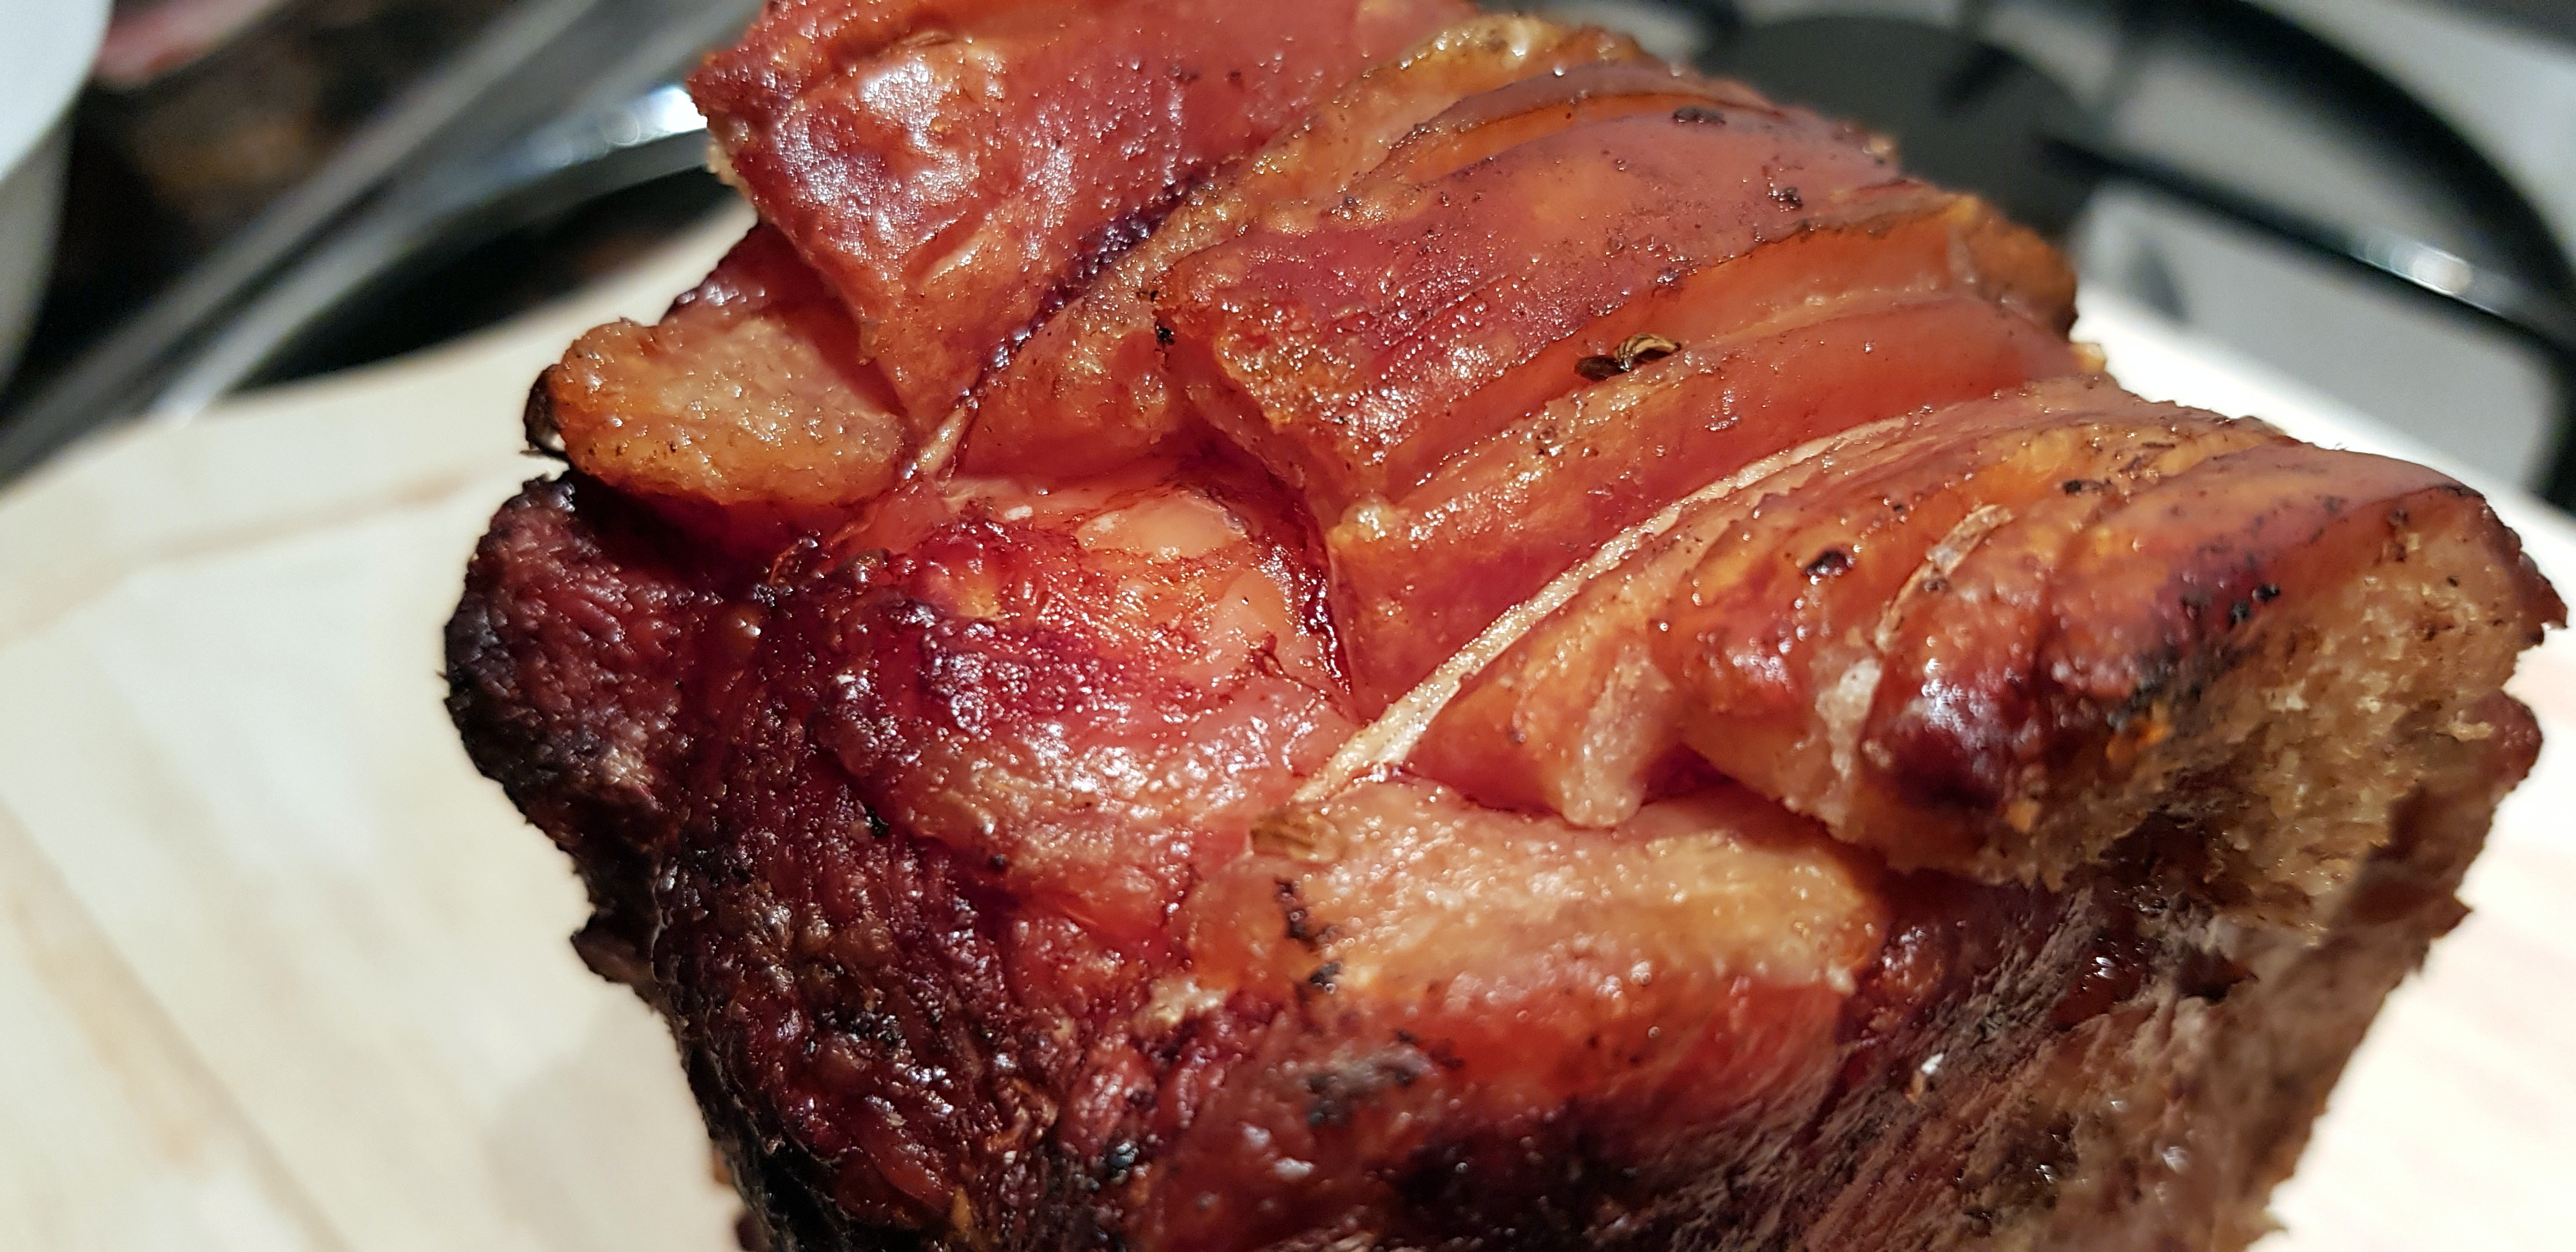
Cook the pork at 240C for 30 minutes so that the crackling looks like this.

Then lower the oven temperature to 180C and cook the roast for another 45 minutes per 450g (~1lb). I also check that the meat’s core temperature is 77C (well done).
Let it rest for 15 minutes and then it will carve perfectly and the meat will melt in your mouth.


Serving
Apple sauce and gravy of course. You could even try Roasted Apples for that something different. 🙂


The Scott Rea Project’s Video
Drop Scott a line if like me, this has cured your crackling problems,
PK
YOU MIGHT ALSO LIKE
MOAR PORK GOODNESS
ROASTS
MORE SCOTT REA TIPS
Please consider subscribing to a weekly email summary of our posts or check us out on Facebook @growitcatchitcookit.
[mc4wp_form id=”15771″]
Written by
·
-
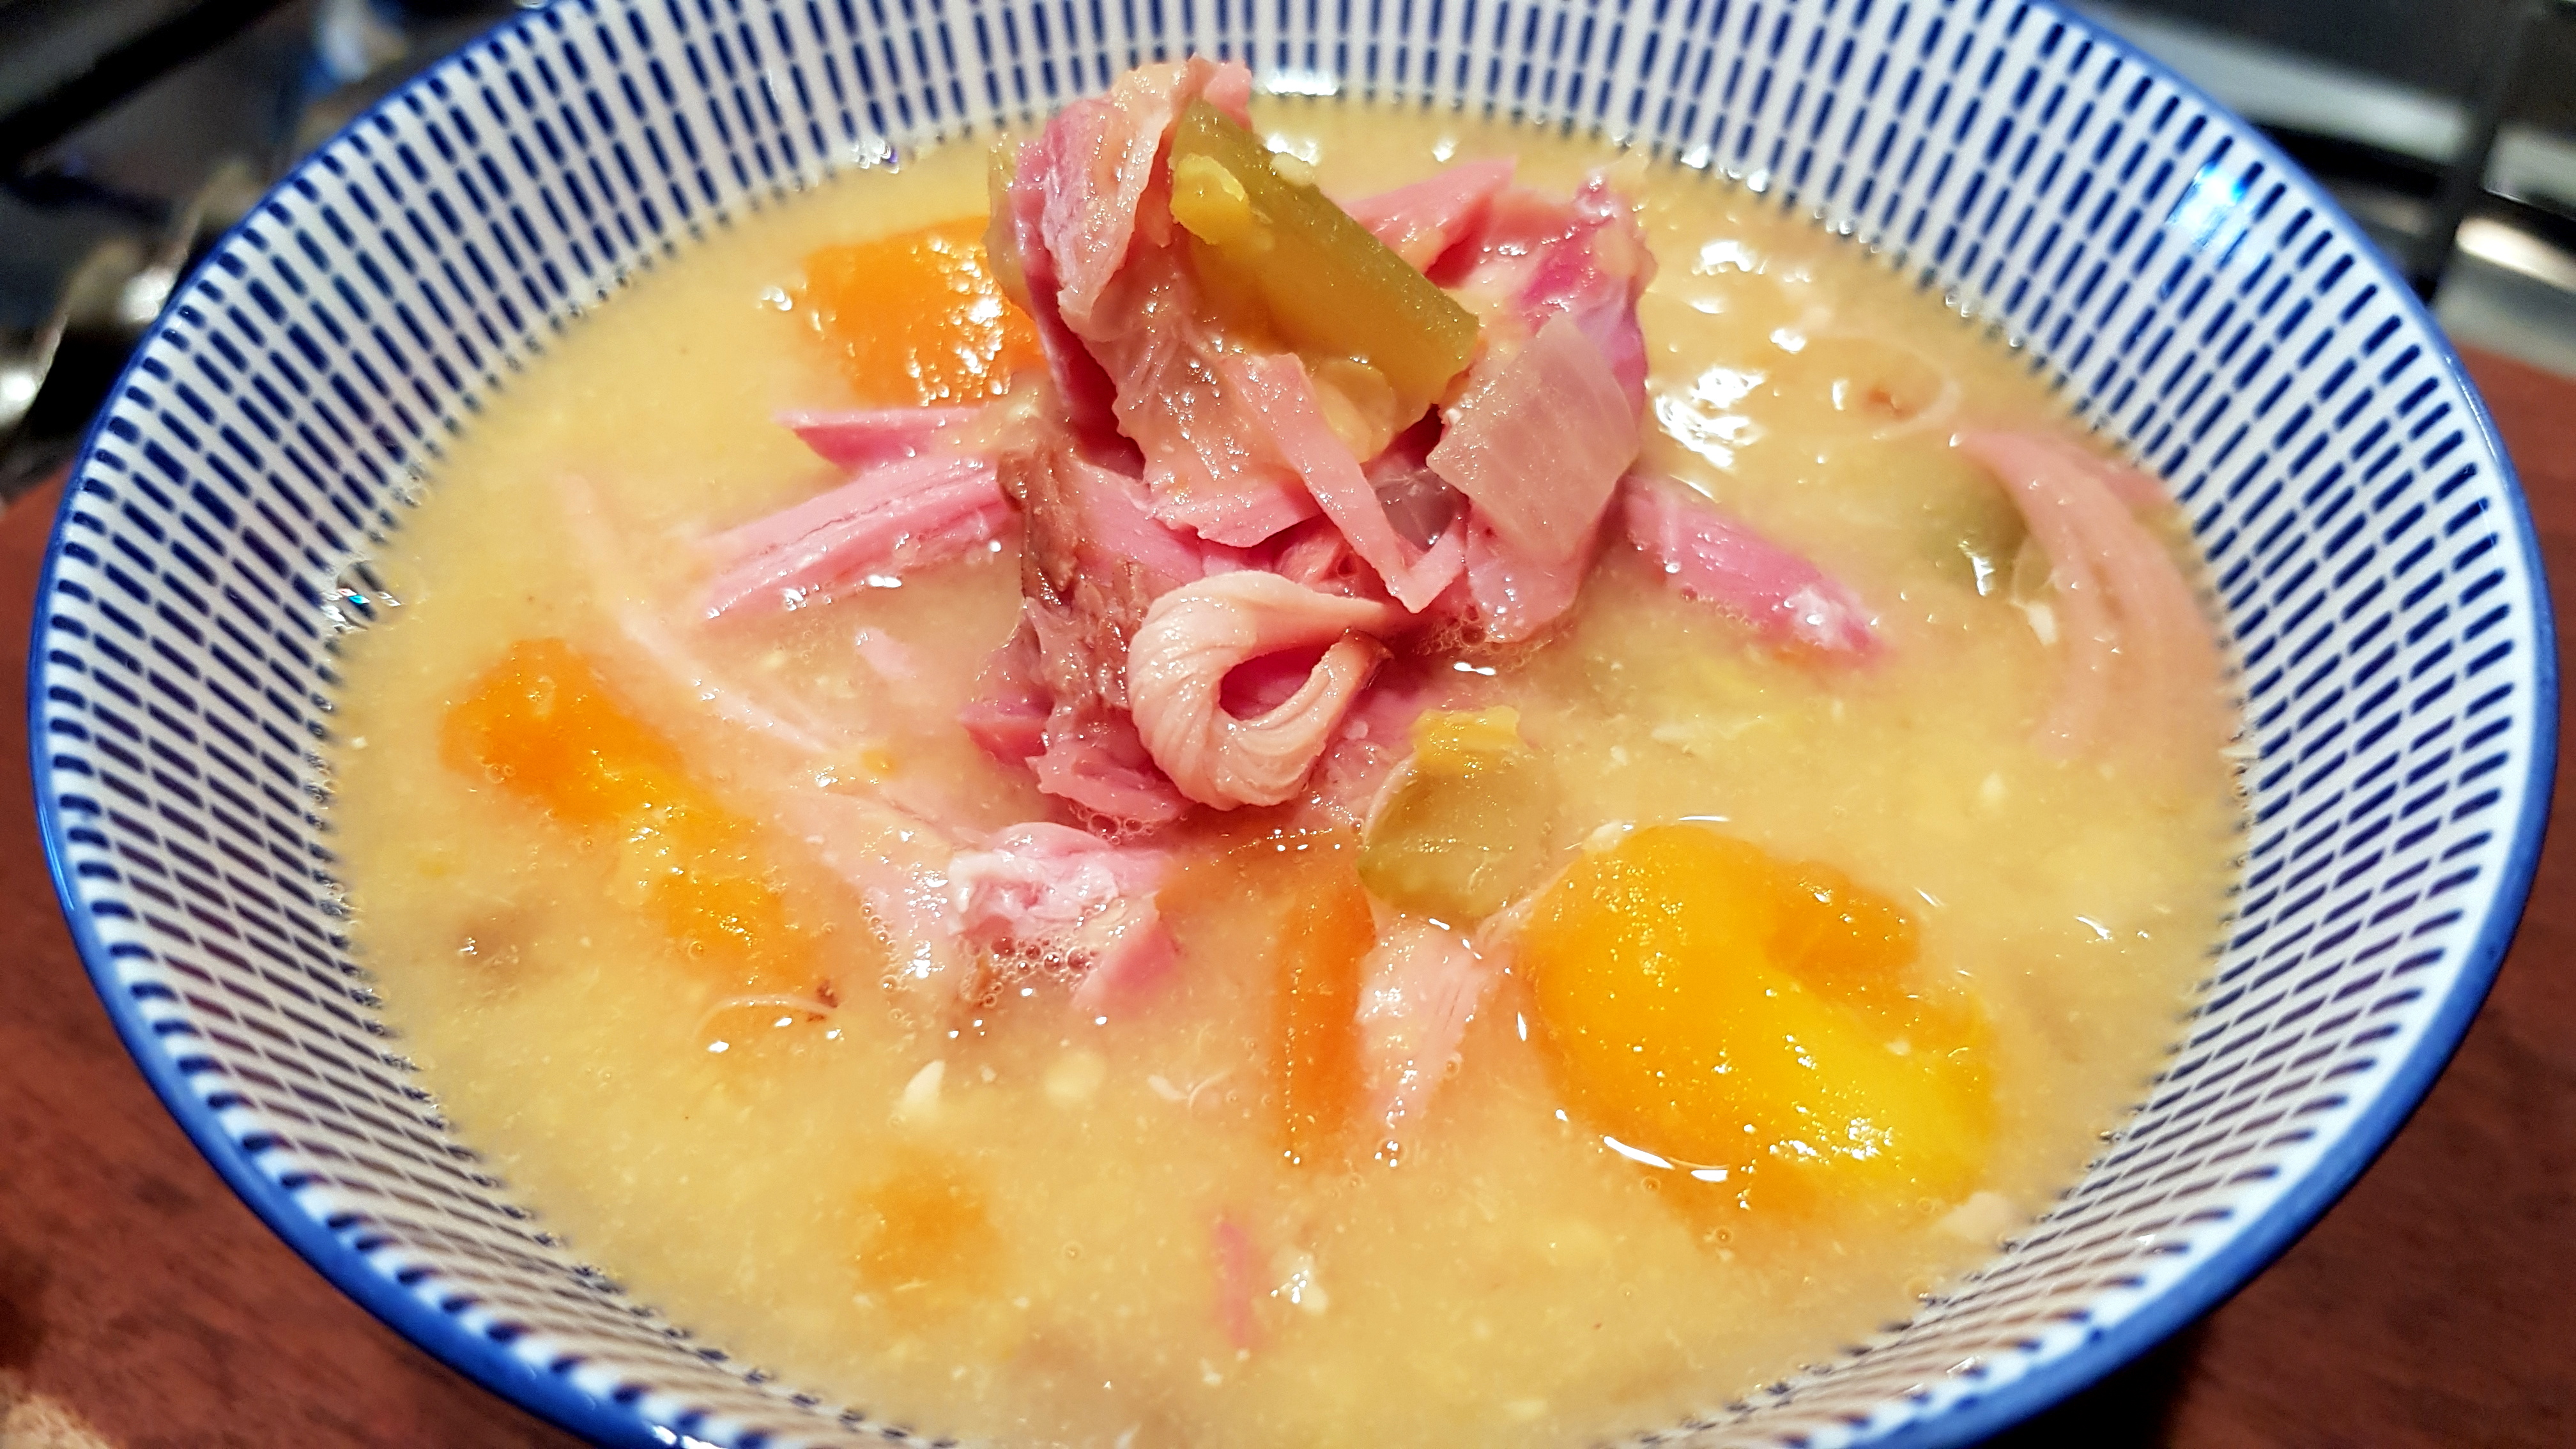
PK’s Pea And Ham Hock Soup
Talk about nostalgia. My mum used to make this for me as a kid and it brings back happy memories every time. I think I might have done my mum proud with my recipe and stayed true to the dish’s thriftiness to boot :). It also freezes well so I got a whole week’s worth of lunches.
You don’t have to cook pea and ham soup in a slow cooker but it is worth the low and slow cook for the extra depth of taste you will get. I will also leave the decision to blend or leave the soup chunky up to you. I did a halfway option, blended soup with some of the ham left chunky.
You will be:
- Preparing your ingredients
- Cooking low and slow
- Removing the bones
- Blending or not
- Serving.
You will need:
- Ingredients:
- 1.5 cups dried yellow split peas
- 2 celery sticks, rough chopped
- 2 carrots, rough chopped
- 1 brown onion, rough chopped
- 1 bay leaf
- 1 ham hock (mine was ~850g)
- 10 cups water
- Equipment:
- a long sharp knife
- a chopping board
- a slow cooker
- a pair of kitchen tongs
- a wooden spoon
- a stick mixer
Preparing your ingredients
- Thoroughly rinse the split peas under cold water until it runs clear.
- Place them at the bottom of your slow cooker, turn this on to low.
- Chop the:
- 2 celery sticks
- 2 carrots
- 1 brown onion
- Add them on top of the layer of split peas.
- Add the bay leaf.
- Add the ham hock after giving it a quick rinse.
- Add 10 cups of water and cover.


Cooking low and slow
Cook for about 6 to 8 hours (more if the meat is not falling off the bone) turning the hock over every now and again.

Removing the bones
Remove the main bones and then look carefully for any other little bones. This is important if you are going to blend the soup. You can use the bones to make Bone Meal for your garden.

Blending or not
Blend the soup now if you want to. I did but I kept some of the ham hock whole for serving purposes.
Serving
Some crusty bread and cracked black pepper would go a treat :).

Enjoy,
PK
Related Links:
Written by
·
-

MeatMatters: Bacon
In Australia, the most common types of bacon comes from a section along the side and back of the animal called ‘middle cut bacon’ or the back of pork only called ‘short cut bacon. Both are salt cured and require cooking before consumption.
Middle bacon has a bit more fat than the loin only short cut bacon. The pork loin is a lean cut.
Middle cut bacon:
The eye part (oval shape at the top of the rasher) is from the loin with the tail end running down the animal into the middle rib area. It is from further to rear of the animal than short cut bacon.

Short cut bacon:
Features just an eye from the loin area i.e. no tail (see the photo above) and is from closer towards the front of the animal than middle cut bacon. It costs more but many people buy it as a “healthier” option.
More Bacon Goodness
You might have heard about other types of bacon (such as gammon or speck) and wondered what they are. Bacon can also come from the pork belly and cheeks and there are many ways to cure it.
Streaky bacon
Is from the pork belly and is the most commonly consumed bacon in the United States.
Gammon
Is a hind leg joint that has been dry cured by packing it in salt. It may sometimes be smoked too.
Written by
·
-
Bacon
In Australia, the most common types of bacon comes from a section along the side and back of the animal called ‘middle cut bacon’ or the back of pork only called ‘short cut bacon. Both are salt cured and require cooking before consumption.
Middle bacon has a bit more fat than the loin only short cut bacon. The pork loin is a lean cut.
Middle cut bacon:
The eye part (oval shape at the top of the rasher) is from the loin with the tail end running down the animal into the middle rib area. It is from further to rear of the animal than short cut bacon.

Short cut bacon:
Features just an eye from the loin area i.e. no tail (see the photo above) and is from closer towards the front of the animal than middle cut bacon. It costs more but many people buy it as a “healthier” option.
More Bacon Goodness
You might have heard about other types of bacon (such as gammon or speck) and wondered what they are. Bacon can also come from the pork belly and cheeks and there are many ways to cure it.
Streaky bacon
Is from the pork belly and is the most commonly consumed bacon in the United States.
Gammon
Is a hind leg joint that has been dry cured by packing it in salt. It may sometimes be smoked too.
Related Links:
- see all recipes using bacon here
- see all ingredients here
- see pork posts here
- see all MeatMatters here
Written by
·
-

PK’s Creamy Cauliflower And Parmesan Soup With Pork Belly
I was day dreaming about a new dish for dinner and thought it would be cool to try pork belly with this soup instead of bacon.
Hope you like it.
You will be:
- Making the pork belly.
- Making the cauliflower soup.
- Serving.
You will need:
- Ingredients:
- a slice of pork belly for each serving (ingredients are here)
- a good slug of olive oil
- 1 celery stalk, rough chopped
- 1/2 onion, rough chopped
- 1 garlic clove, finely chopped
- 1 potato, rough chopped
- 3 cups PK’s Slow Cooker Chicken Stock
- 1 bay leaf
- 500g cauliflower florets
- 1/2 cup milk
- 1/2 cup parmesan cheese, grated
- water to taste, add in small portions if soup is too thick
- Equipment:
- a long sharp knife
- a chopping board
- kitchen shears
- a deep pan
- stick mixer
- wooden spoon
Making the pork belly
Make and then chill a strip of pork belly for each serve. Please see the recipe here.

Making the cauliflower soup
- Chuck a slug of olive oil into the pan and bring it to a medium low heat.
- Add and sweat the chopped:
- 1 celery stalk
- 1/2 brown onion
- 1 garlic clove
- Add the bay leaf.
- Add the 500g cauliflower florets and 1 potato and sweat for another minute or so.
- Add the three cups of chicken stock and bring to the boil.
- Reduce heat and simmer for about 15 minutes or the potato is cooked.
- Allow to cool and add the 1/2 cup of milk and blend with a stick mixer.
- Add small amounts of water if the soup is too thick for your liking (remember that we are about to add cheese which will thicken it further),
- Add the 1/2 cup parmesan cheese and mix with a wooden spoon or the like.
Serving
My original idea was to serve the soup with a piece of pork belly. I ended up doing so but chilled the soup and unlike the picture, chopped the pork belly into cubes. The pork belly’s skin was crisp enough to not be chewy but not be all about the crackling and the meat really complimented the soup’s gentle flavours.

Enjoy,
PK
Written by
·
-
PK’s Creamy Cauliflower And Parmesan Soup With Soft Pork Belly
I was day dreaming about a new dish for dinner and thought it would be cool to try pork belly with this soup instead of bacon.
Hope you like it.
Pork belly aside, the soup only takes about 30 minutes to cook and the hands on bit only takes 10 of them.
You will be:
- Making the pork belly
- Making the cauliflower soup
- Serving
You will need:
- Ingredients:
- A slice of pork belly for each serving (ingredients are here)
- A good slug of olive oil
- 1 celery stalk, rough chopped
- 1/2 onion, rough chopped
- 1 garlic clove, finely chopped
- 1 potato, rough chopped
- 3 cups PK’s Slow Cooker Chicken Stock
- 1 bay leaf
- 500g cauliflower florets
- 1/2 cup milk
- 1/2 cup Parmesan cheese, grated
- Water, add in small portions if soup is too thick
- Equipment:
- 1 chef’s knife
- 1 chopping board
- 1 soup pan
- 1 stick mixer
- 1 wooden spoon
Making the pork belly
Make and then chill a strip of pork belly for each serve. Please see the recipe here.
Making the cauliflower soup
- Chuck a slug of olive oil into the pan and bring it to a medium low heat.
- Add and sweat the chopped:
- 1 celery stalk
- 1/2 brown onion
- 1 garlic clove
- Add the bay leaf.
- Add the 500g cauliflower florets and 1 potato and sweat for another minute or so.
- Add the three cups of chicken stock and bring to the boil.
- Reduce heat and simmer for about 15 minutes or the potato is cooked.
- Pull out the bay leaf
- Allow to cool a little and add the 1/2 cup of milk and blend with a stick mixer.
- Add small amounts of water if the soup is too thick for your liking (remember that we are about to add cheese which will thicken it further),
- Add the 1/2 cup parmesan cheese and mix with a wooden spoon or the like.
Serving
My original idea was to serve the soup warm with a piece of pork belly. I ended up chilling the soup however. It was marvelous and the pork belly really complimented the soup’s gentle flavours.

Enjoy,
PK
YOU MIGHT ALSO LIKE
MORE SOUP RECIPES
PORK DISHES
Please consider subscribing to a weekly email summary of our posts or check us out on Facebook @growitcatchitcookit.
[mc4wp_form id=”15771″]
Written by
·
-

Welchy’s Wonton Noodle Soup
And so I’m back
From out of space
I just walked in to find you here with that sad look upon your face …the sad face I am referring to is that of my older brother’s. I have been a bit busy and whilst I have been taking lots of photos – I then never got around to writing the actual blog. So here goes…
My boyfriend loves Wonton Noodle Soup and will only eat it from one place (International Food Court in Morley if you ever get a chance). It’s divine – with slivers of pork, crunchy bok choy for texture, a gorgeous broth and then these silky full of flavour wontons… it’s basically Heaven in a bowl. And to top it all off they scatter crumbled pork crackling over the top.
I finally convinced him to let me have a go at cooking my own and suffice to say the results were amazing. Like most men (my younger and ‘opinionated about food even though he never cooks’ brother is one) if he goes for a second helping then you know you are onto a winner. It’s a little fiddly so unless you make it on a weekend, try and make the wontons ahead of time as they can sit in the fridge until you are ready 🙂
Ingredients:
For the Soup- 2½ cup chicken stock
- 2½ cup water
- 1 tsp. soy sauce
- 3 garlic cloves, smashed
- 3 to 4⅛-inch thin fresh ginger root slices (approximately 1 oz.)
- 2 green onions, cut in halves
- salt and pepper to taste
For the Wonton Filling- 4 oz. ground pork
- 1 tsp. soy sauce
- 1 tsp. Shaoxing wine (Chinese cooking wine, you can substitute with dry sherry)
- 1 tsp. cornstarch
- ¼ tsp. sugar
- ¼ tsp. sesame oil
- ¼ tsp. ground fresh ginger root
- 1 small garlic clove
- 1 green onion, finely chopped
- small pinch of black or white pepper
- 20 square wonton wrappers
For the Garnish- chopped green onion
- Cilantro leaves
Method
1. In a medium/large pot, add all ingredients for the soup. Cover, bring it to boil, reduce heat to low and simmer for 10 to 15 minutes. Turn off heat and let all the flavor come together. Meanwhile, let’s make wontons!
2. In a mixing bowl, combine all ingredients for the wonton filling and mix well with a spoon until cornstarch incorporated with other wet ingredients.
3. Take a wonton wrapper on your left hand(if you are right handed) and paint edges of square lightly with cold water using your finger tip. Put ½ teaspoon of filling in centre of wrapper. Fold in half, triangle shape and seal it tightly by pinching edges together with your fingers. Paint one of lower side corners of triangle with water and bring right and left corner together (water painted side down) and press well to make traditional curved wonton shape. Place wontons 1 to ½-inch apart on a parchment paper lined baking sheet. Repeat until you finish with wonton filling and wrappers.
4. When your wontons are ready, discard solid ingredients from soup base and bring it to boil.
5. Carefully add wontons and cook for 10 to 15 minutes. wontons will be fully cooked in 3 minutes, but cook it longer so all flavour from wontons will melt in to soup. Taste and add salt and pepper to your taste at this point.

6. Transfer to a serving bowl, garnish with green onion, cilantro and pepper to your taste.

And then…being super sneaky…I fried a couple of the wontons while the wontons were cooking in the soup. So totally worth it! Would be amazing on a cold night, but no matter the weather I’d eat this haha.

Katie
Related Links:
- see more Welchy posts here
Written by
·
-

Grochow’s BBQ Pulled Pork
Pulled pork is an excellent starting dish for cooks getting into proper barbecuing. The right cuts of meat are reasonably priced, the cooking process is relatively easy (almost foolproof), and the end result is delicious!
Grochow writes:
Below is my most recently used recipe; noting that I’ve never followed one particular recipe so my process is a bit different each time.
Steps:
- Go to a good butcher and buy a nice lump of pork shoulder. For this particular dish I used two pork collar butts weighing ~3 kg each.

- Sprinkle pork with salt and dry brine in fridge overnight (see here for further information on dry brining and other excellent barbecuing tips http://amazingribs.com/).
- After ~24 h, take pork out of fridge and crank BBQ up to ~107°
- I used my GMG Daniel Boone Pellet Grill this time, but have had equally good results in my Dragon Kamado.
- I like to place a full water pan in the BBQ at this stage.
- If you want (I did this time but don’t always), inject the pork with some combination of warm apple juice/dry rub/chicken stock/sugar/Worcestershire sauce/melted butter. See here for some tips on doing this http://amazingribs.com/)
- Rub generously with your favourite homemade or store-bought dry rub (one that does not contain salt, as we’ve already added a good amount during the dry brining process).

- Place pork directly on grill/on a rack (not a pan) in the BBQ.
- When using the Daniel Boone, I also add an A-MAZE-N tube smoker filled with smouldering apple wood pellets at this stage for supplemental smoke.

- Over the first two hours of the cook, spritz the pork every 20/30 minutes with a mixture similar to the injection marinade above. I’m not confident it actually does anything, but smoke adheres to cold/wet surfaces, so in my mind it will enhance the under-bark smoke ring as it wets and cools the surface of the meat.
- This is also why I put the pork in the BBQ cold rather let it rise to room temperature. The flavour will be no different had you not done this, but the smoke ring looks cool.
- Go and do something else for a while. You will have a bit of time before the pork is ready for pulling. For example, these butts took 16 hours…
- That said, don’t cook to time – cook to temperature. The pork is ready for pulling when the internal temperature reaches 88–95° Trial a few temperatures and see what works best for you. I took these off the BBQ when the internal temperature reached ~92°C. The meat should have a nice dark bark and probe like butter.

- Remove the pork and pull apart using forks.

- The rich bark and moist pork tastes pretty good on its own, but I like to drizzle with a homemade vinegar/mustard BBQ sauce
- Serve as you please! (e.g. with a side of homemade coleslaw, in sliders, on pizza, with nachos, etc.). Leftovers freeze well.

Give it a go guys,
Grochow
YOU MIGHT ALSO LIKE
PK’S SLOW COOKER PULLED PORK
MORE PORK
SLOW COOKER RECIPES
Please consider subscribing to a weekly email summary of our posts or check us out on Facebook @growitcatchitcookit.
[mc4wp_form id=”15771″]
Written by
·