Tag: Welchy
-
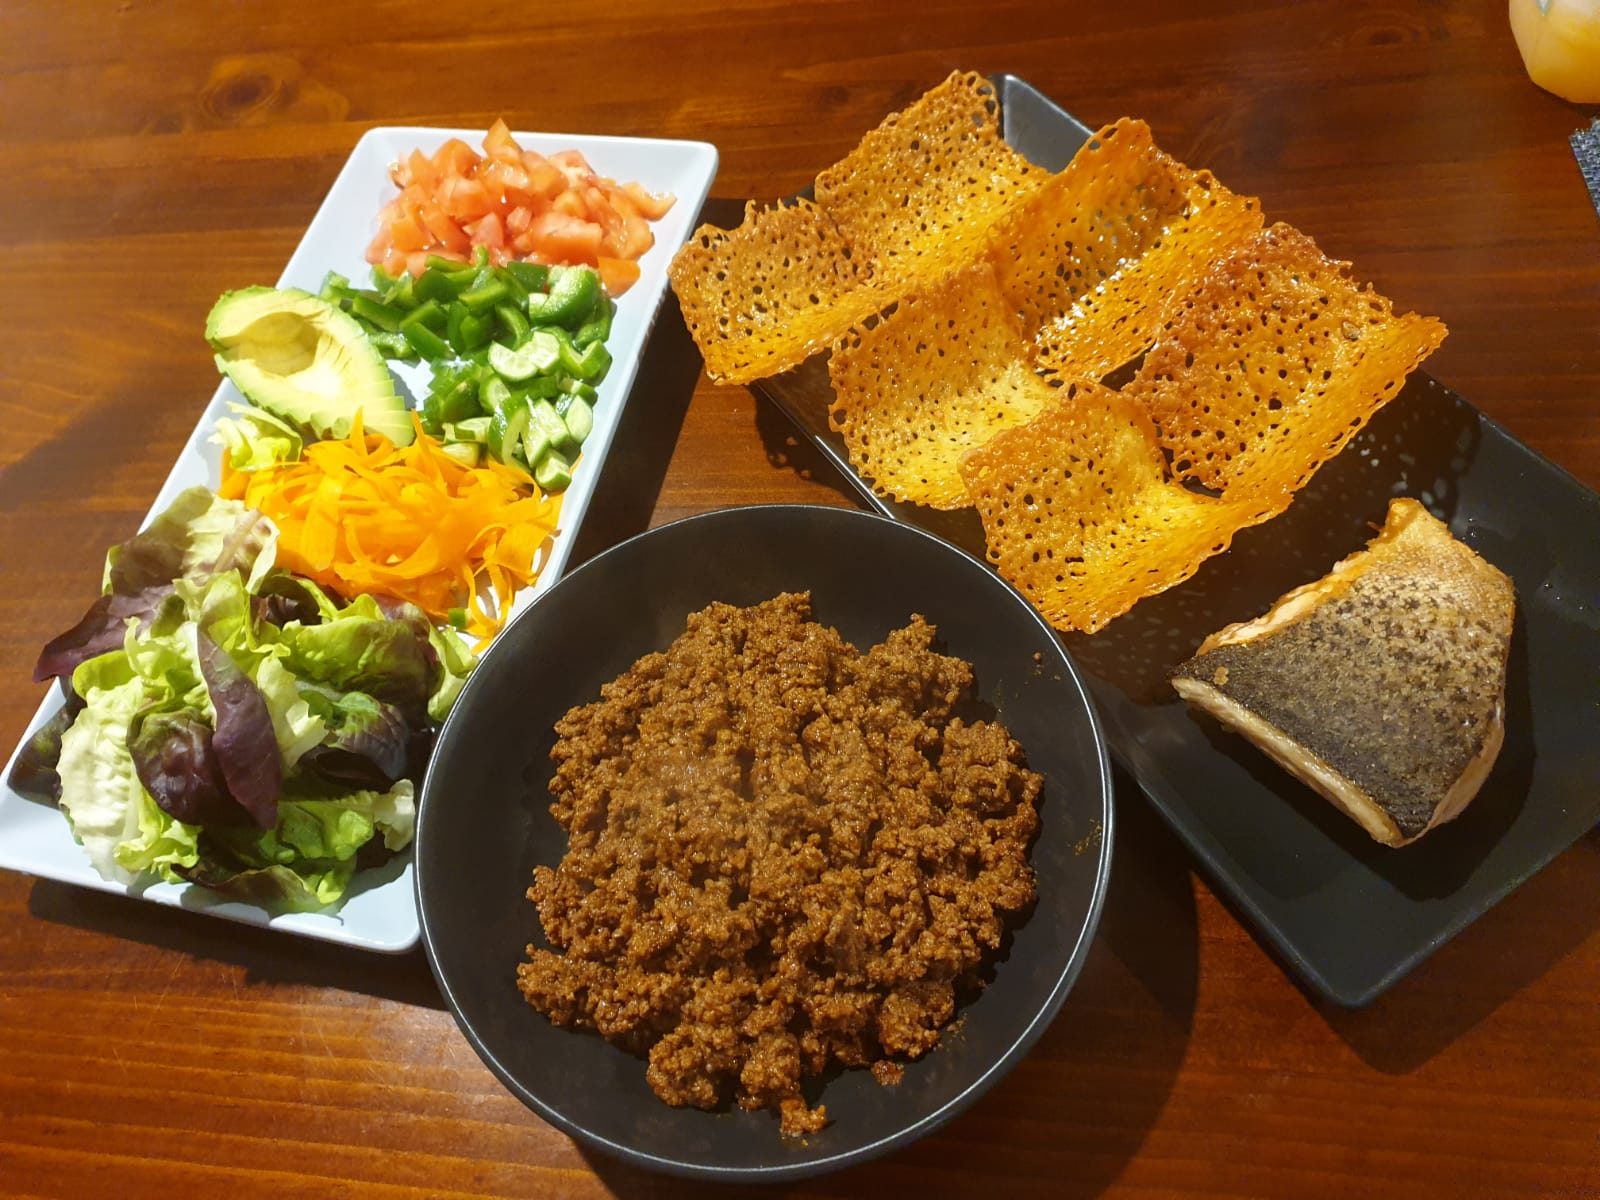
Welchy’s Low Carb Taco Alternative
When trying to keep to a low carb diet you’ll probably find yourself eliminating some of your favourite dishes.
Like tacos but not the carbs? Me too and by following this recipe you’ll be able to have your cake (or in this case taco haha) and eat it too.
Using cheese instead of processed taco shells keeps the carbs low while maintaining an incredible richness of flavour.
Simply
1. Place a square of cheese (I just used cheddar slices) or a sprinkling of grated cheese into a square shape on a lined baking tray.

2. Bake at 180° for 8-10 minutes but make sure to watch them as they can turn quickly and cooking times may vary.
3. Once they have browned slightly and bubbled remove from the oven. You must use extra care during the next stage as the cheese will be very hot. While they are still warm and pliable, remove from the baking paper and lay over either a pasta rack or makeshift rack using mugs and cooking utensils.
4. Allow them to cool on the rack to form a taco shape.


Serving
Serve with your favourite taco toppings. My favourite is lettuce first as this helps trap some of the juices (the cheese taco is holey so will make some mess) and then taco mince, cheese, avocado and sour cream.


Love,
Welchy
Here are some more of Welchy’s recipes and simple to prepare fare:
Written by
·
-

Welchy’s Tasting Plate Inspirations
This is a collection of my favourite tasting platters that were either made by Welchy or by others using her style.
I hope they give you a little bit of inspiration.


Enjoy,
PK
Here are some tasting plate ideas:
Written by
·
-

Welchy’s Potato and Corn Beef Fritters
Fritters…Hash Browns…Croquettes..whichever you choose to call these one thing is for sure – they are damn delicious.

My fiance loves corned beef and I prepped these ready to make him for is return last Saturday morning. It was a warm day and our nieces and nephews were bored so he called on his way home and said when he got in we were heading out (best laid plans am I right?) So I rolled them into balls, put them on a plate and shoved them into the fridge.
Now…I assure you there is a point to my oversharing of the course of my morning and it is this – these keep incredibly well in the fridge until needed. Mine were only in the fridge for approx 6-8 hours however they would keep well overnight. All that’s needed then is to flatten them and roll into some flour, and throw in the pan to crisp! That easy.
This is a perfect ‘Shoot I forgot to take something out for dinner’ or ‘Need something cheap and filling to make until payday/can get to the shop’ as no matter what stage of life you are in, we have all been there.
Ingredients:
- 1.2kg potatoes, peeled and diced
- 340g tin of corned beef (I used hampers but you can also use actual leftover corned beef if you have any in the fridge)
- 1 tablespoon wholegrain mustard
- 1 tablespoon normal or dijon mustard
- 2 eggs, lightly beaten
- 1 cup plain flour, for dusting
- 2 tablespoons oil
- 1 tablespoon butter
- 1/2 tablespoon salt
- 1/2 tablespoon pepper
Method:
- Line baking tray or plate with baking paper. Place potatoes in a large saucepan, cover with water and cook until tender. Drain and set aside for 10 minutes or until cool enough to handle.
- Roughly mash potatoes so that they are still slightly chunky.
- Add corned beef (diced up if using actual leftovers or broken up if using tinned), mustard, eggs and salt and pepper. Mix until combined. Roll
 into balls as even as possible to ensure even cooking time. This recipe will make approx 10 large fritters or 20 smaller ones depending on how you make them.
 - Set aside on your tray or plate for at least an hour or up to 24 hours.
- Lightly coat fritters in flour, squashing them into pattie shapes as you go.
- Heat oil and butter in a wok or frypan and once sizzling (flick a drop of water or pepper into the oil and if it bubbles it’s hot enough) add your fritters one by one. My wok fits around 5 smaller ones at a time so as not to crowd the pan and as the fritters are cold, you don’t want to add too many at the same time and reduce the heat of the oil as you’ll get a soggy result.

- Cook for 3 to 4 minutes each side or until golden. Transfer to a paper towel lined plate and continue with rest of batch. If doing a lot of fritters, line a tray with baking paper again and have the oven on ‘warm’ so the fritters stay hot while you continue.
- Serve on a bed of spinach leaves and drizzle with chili mayo for a kick, or eat just as they are!
- Enjoy!
Love Welchy.
Here are some more potatoes and of course, Welchy posts.
Written by
·
-

Welchy’s Roasted Tomato Soup
Welchy knows how to make soups that will warm any winter’s day. Her roasted tomato and garlic soup is a prime example and, of course, is so easy to make.
She writes:
Roast a good amount of tomatoes for about an hour, set aside.
Saute some diced garlic and onion, then add them and the tomatoes to a stock pot. Add enough vegetable stock to cover everything and simmer for 20 minutes.

Add some paprika, all spice, salt and pepper. Then blitz to the consistency you like.
Serve with what you love. In this case some cream topped with pork rind for a low carb option.

Love Welchy.
Here are some more soup and Welchy posts.
Written by
·
-
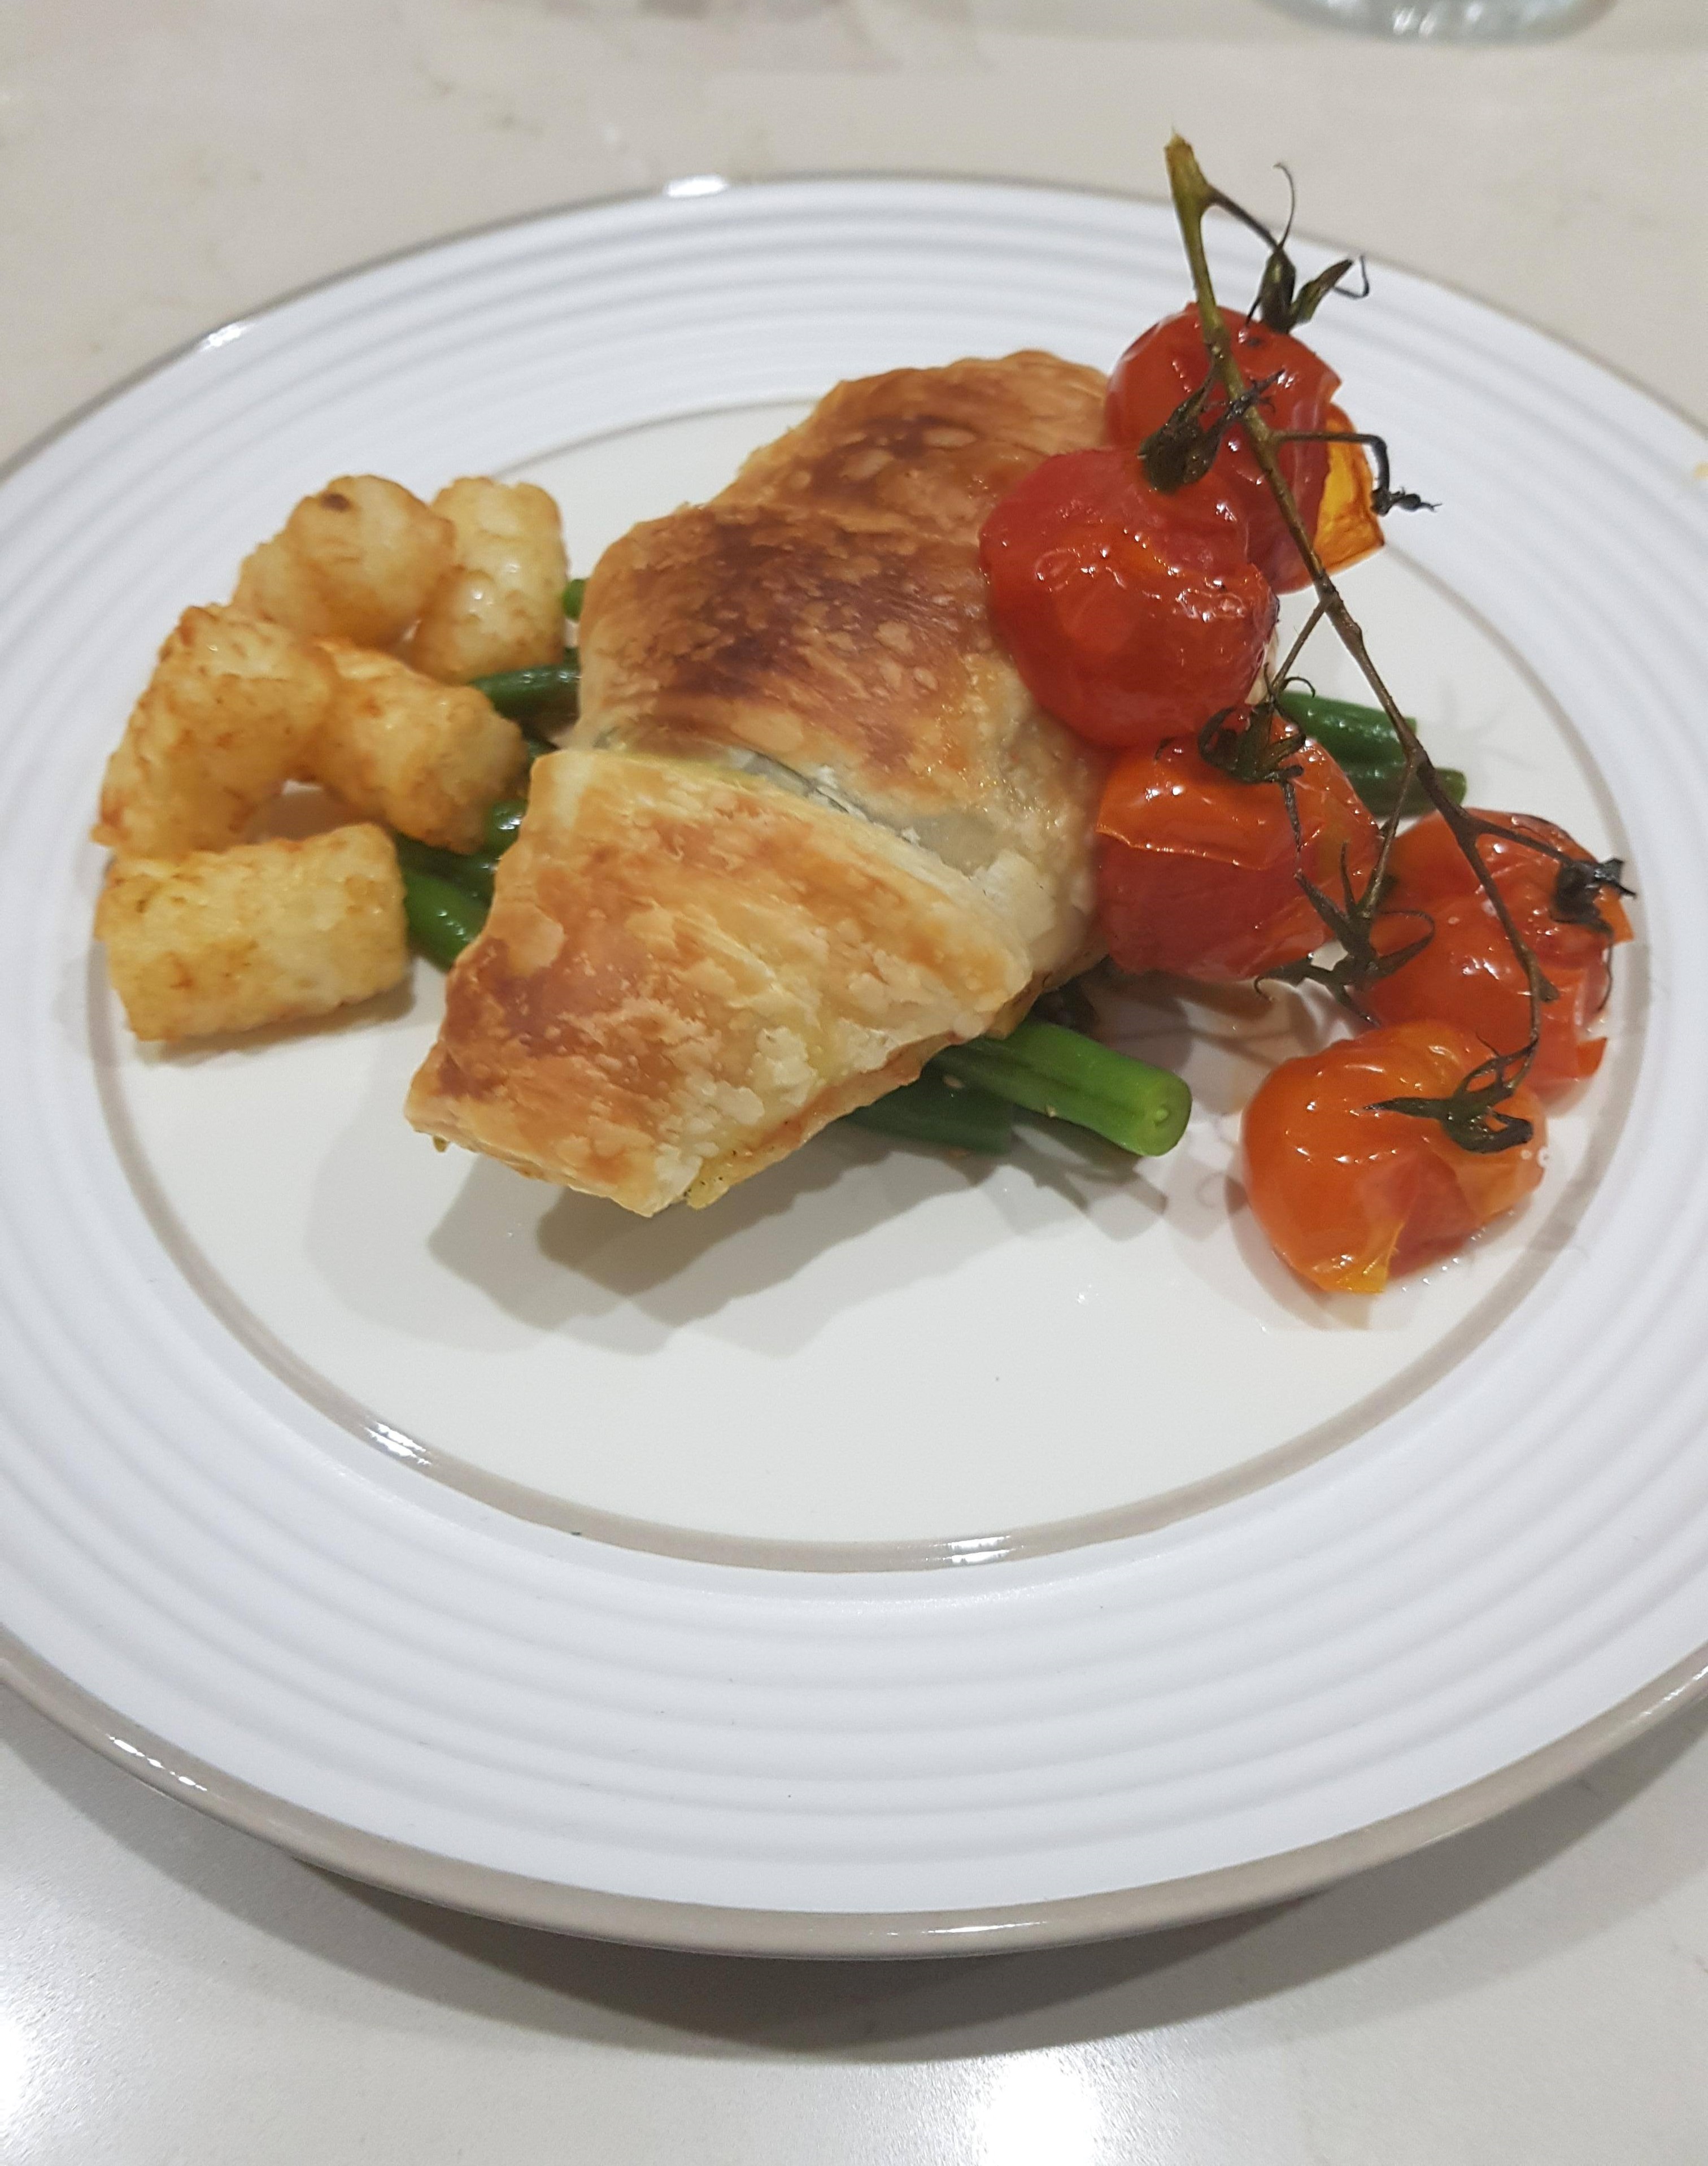
Welchy Makes Jamie Oliver’s Flaky Pastry Pesto Chicken
I watched Jamie Oliver’s 5 Ingredients show on TV last night and when I saw this dish I walked straight into the kitchen and wrote it on the shopping list for tonight.
Divine is all I can describe it as.
It’ll be hard to eat green beans any other way once you try this simple but deliciously sweet and tangy dressing…who knew a side dish could be such a star!

Ingredients
- 4 chicken breasts
- 400g beans
- 400g vine cherry tomatoes
- 2 sheets butter puff pastry
- 4 heaped teaspoons basil pesto (perhaps try Bish’s Basil Pesto)
Method
- Heat oven to 220 degrees fan forced.
- Trim chicken breasts and pound with your first (or a mallet) until the thick end is the same as the tail end.
- Place chicken breasts on a tray and top with a teaspoon each of basil pesto. Spread the pesto so it covers all of the chicken breast.
- Place each sheet of pastry on the board and cut into half lengthways, and then width ways into four strips about 1-2 inches wide.
- Drape the strips over the pesto chicken, overlapping the edges slightly, and then tuck the excess in underneath. Don’t go too far under as the pastry will just so soggy.
- Brush with oil and place in the oven on the top rack
- In another oven tray place the vine cherry tomatoes. Drizzle with oil, season with salt and pepper, and place in the oven on the bottom rack.
- Cook both the chicken and the tomatoes for 20 minutes.
- Meanwhile, trim the beans and add to boiling water. Cook for 7 minutes, drain and set aside.
- Remove the cherry tomatoes from the oven and transfer to a board to cool slightly.
- If the pastry hasn’t quite puffed/browned, turn oven to Grill for 5-10 minutes but be sure to watch so it doesn’t burn.
- Transfer half the tomatoes to a board and cut into servable portions (4-6 tomatoes per vine). With the other half, remove the vine and squash in the tray to release all the juices. Add a small splash of red wine vinegar, pinch of salt and pepper and stir to create a dressing.
- Toss the beans through the dressing and we are ready to serve!
- Place a bunch of the dressed beans on the plate and top with the pastry chicken. Balance the vine tomatoes off to the side and serve as is or with potato gems.
Hope you like it,
Welchy
YOU MIGHT ALSO LIKE
PASTRY DISHES
CHICKEN DISHES
MORE FROM WELCHY
Please consider subscribing to a weekly email summary of our posts or check us out on Facebook @growitcatchitcookit.
[mc4wp_form id=”15771″]
Written by
·
-

Welchy’s Smashed Avo’ and Bacon
Avocado… a common thought about Millennials is that we dip into our life savings to order lattes and smashed avo’ on toast…and whilst I do agree it tastes divine it can easily be made at home for a quarter of the price (you get to stay in your pyjamas too!)
I woke up this morning feeling like bacon (tbh who doesn’t) but didn’t have the enthusiasm to stand for ages cooking it. I was also craving a dish my mum makes so I thought why not combine the two and cut down on the cooking time while I’m at it – think crispy, buttery bacon with sautéed cherry tomatoes and spinach leaves …. perfection.
Serves 2
Ingredients
- 2 rashers bacon, chopped
- 6 cherry tomatoes, thinly sliced
- bunch of baby spinach leaves
- 1 tablespoons butter
- English Muffins, halved
- 1 Avocado, mashed
Method
- Melt butter in a saucepan on medium-high heat. Add bacon.
- Cook until browned and butter goes slightly sticky and caramelised.

- While the bacon is cooking, mash the avocado in a bowl and toast the English Muffins.
- Add baby spinach leaves to the saucepan and allow to wilt.
- Once spinach leaves have wilted add the cherry tomatoes and stir for 2 minutes. Turn off the heat and set aside.

- Spread mashed avocado across the muffins and sprinkle with salt and pepper.

- Spoon the bacon mixture over the top, season to taste and serve – Voilà !!
- P.S. best enjoyed with a coffee 😉

Katie
Related Links:
- see more Welchy posts here
Written by
·
-

Welchy’s Roasted Stuffed Capsicums
I’ve been out of action for quite some time…finishing studies and moving on with new adventures in my life meant that writing was pushed to the back burner – but cooking was still on the fore front of my mind!
Cooking for me is a release. Where some might read a book, go for a drive, gym, game, knit or garden…I cook. It’s a safe haven and an adventure all in one and it can be both disappointing and exhilarating depending on how game your ambition is.
Our grocer had bags of capsicums going out for $1.50 so I couldn’t pass up the opportunity to try out a recipe that’s been teasing me for some time. These are Greek style stuffed capsicums that can be eaten on their own or with salad and some delicious toasty bread.
Serves 4 10 minutes prep 1 hour cooking time
Ingredients:
- 4 large capsicums
- 1 large onion, finely chopped
- 2 garlic cloves, finely chopped
- 500g mince
- 1 tablespoon dried oregano
- 1/2 cup parsley, roughly chopped
- 400g can chopped/diced tomatoes
- 1/2 cup white long-grain rice
- Salad to serve (optional)
Method:
Step 1Preheat oven 180C fan-forced. Slice tops from each capsicum and put aside. Scoop out seeds and membrane and discard. Stand capsicums in a baking paper-lined roasting pan (if they don’t stand up thinly slice off the bottom until they stand – be careful not to cut through the capsicum so the filling falls out). Step 2Heat 1 tablespoon oil in a large non- stick frying pan over medium-high heat. Add onion. Cook, stirring, for 5 minutes or until softened. Add garlic. Cook for 1 minute or until fragrant. Add mince. Cook, stirring with a wooden spoon to break up mince, for 5 minutes or until browned.Step 3Add herbs, tomato, rice and 1/2 cup cold water. Season with salt and pepper. Bring to a simmer. Reduce heat to low. Simmer for 5 minutes or until sauce starts to thicken. Remove from heat.Step 4Divide mince mixture evenly between capsicums. Place 1 reserved top on each stuffed capsicum. Drizzle with remaining oil. Bake for 45 minutes or until capsicums have softened and skins start to darken. (If after 40 minutes the skins have only just blistered, turn the heat up high in the oven for the last 5 minutes but be sure to watch so they don’t burn).
 Step 5Serve immediately with a side salad, or enjoy on it’s own!Happy Eating xo
Written by
·
-

Welchy’s Wonton Noodle Soup
And so I’m back
From out of space
I just walked in to find you here with that sad look upon your face …the sad face I am referring to is that of my older brother’s. I have been a bit busy and whilst I have been taking lots of photos – I then never got around to writing the actual blog. So here goes…
My boyfriend loves Wonton Noodle Soup and will only eat it from one place (International Food Court in Morley if you ever get a chance). It’s divine – with slivers of pork, crunchy bok choy for texture, a gorgeous broth and then these silky full of flavour wontons… it’s basically Heaven in a bowl. And to top it all off they scatter crumbled pork crackling over the top.
I finally convinced him to let me have a go at cooking my own and suffice to say the results were amazing. Like most men (my younger and ‘opinionated about food even though he never cooks’ brother is one) if he goes for a second helping then you know you are onto a winner. It’s a little fiddly so unless you make it on a weekend, try and make the wontons ahead of time as they can sit in the fridge until you are ready 🙂
Ingredients:
For the Soup- 2½ cup chicken stock
- 2½ cup water
- 1 tsp. soy sauce
- 3 garlic cloves, smashed
- 3 to 4⅛-inch thin fresh ginger root slices (approximately 1 oz.)
- 2 green onions, cut in halves
- salt and pepper to taste
For the Wonton Filling- 4 oz. ground pork
- 1 tsp. soy sauce
- 1 tsp. Shaoxing wine (Chinese cooking wine, you can substitute with dry sherry)
- 1 tsp. cornstarch
- ¼ tsp. sugar
- ¼ tsp. sesame oil
- ¼ tsp. ground fresh ginger root
- 1 small garlic clove
- 1 green onion, finely chopped
- small pinch of black or white pepper
- 20 square wonton wrappers
For the Garnish- chopped green onion
- Cilantro leaves
Method
1. In a medium/large pot, add all ingredients for the soup. Cover, bring it to boil, reduce heat to low and simmer for 10 to 15 minutes. Turn off heat and let all the flavor come together. Meanwhile, let’s make wontons!
2. In a mixing bowl, combine all ingredients for the wonton filling and mix well with a spoon until cornstarch incorporated with other wet ingredients.
3. Take a wonton wrapper on your left hand(if you are right handed) and paint edges of square lightly with cold water using your finger tip. Put ½ teaspoon of filling in centre of wrapper. Fold in half, triangle shape and seal it tightly by pinching edges together with your fingers. Paint one of lower side corners of triangle with water and bring right and left corner together (water painted side down) and press well to make traditional curved wonton shape. Place wontons 1 to ½-inch apart on a parchment paper lined baking sheet. Repeat until you finish with wonton filling and wrappers.
4. When your wontons are ready, discard solid ingredients from soup base and bring it to boil.
5. Carefully add wontons and cook for 10 to 15 minutes. wontons will be fully cooked in 3 minutes, but cook it longer so all flavour from wontons will melt in to soup. Taste and add salt and pepper to your taste at this point.

6. Transfer to a serving bowl, garnish with green onion, cilantro and pepper to your taste.

And then…being super sneaky…I fried a couple of the wontons while the wontons were cooking in the soup. So totally worth it! Would be amazing on a cold night, but no matter the weather I’d eat this haha.

Katie
Related Links:
- see more Welchy posts here
Written by
·
-

Welchy’s Easy Mushroom Soup
There’s nothing better on a cold winter’s night than to sit down and tuck into something hot!
Whether it be a curry, casserole or soup…I love nothing more than eating a dish that warms you right down to your bones!
Mum has made soups all my life. As a kid, she may as well have put hearts and livers on a plate and put it in front of me. There was nothing worse than the idea of soup, let alone Mushroom soup. But as with most dishes, nostalgia tends to set in and I have a newfound appreciation of all things my mum cooked as a kid and how much I wish to be there again.
This dish is about 10 minutes of prep (if you are slightly mad and enjoy cracking the stem of the mushroom off and then peeling each..and every…single…mushroom). And then 20-30 minutes simmering.
Ingredients
- 1 kg mushrooms, stems removed if you wish and peeled
- 1 brown onion, chopped
- 2 garlic cloves, chopped
- 1 teaspoon butter
- 6 cups vegetable stock
- 1 cup thickened cream
Method
- Melt butter in a Crock pot or large saucepan. Cook the onion until partly softened. Add garlic and cook until onion is browned and softened.
- Now add in the mushrooms and cook until they are lightly browned, stirring often so they don’t stick to the pan.
- Add the vegetable stock and season with salt and pepper.
- Bring to the boil and then allow to simmer for 20 minutes.
- Once the mushrooms are tender and cooked through, remove from the heat and allow to cool slightly.
- Use an electric mixer to puree the soup (I personally like it to be slightly chunky, but puree a bit longer if you like a smooth soup).
- When ready to serve, stir in the cream and top with freshly chopped basil. And as always…enjoy!

Enjoy,
Welchy
Here are more soup posts and Welchy recipies:
Written by
·
-
Welchy’s Winter Warmers – Mushroom Soup!
There’s nothing better on a cold winter’s night that to sit down and tuck into something hot! Whether it be a curry, casserole or soup…I love nothing more than eating a dish that warms right down to your bones!
Mum has made soups all my life. As a kid, she may as well have put hearts and livers on a plate and put it in front of me. There was nothing worse than the idea of soup, let alone Mushroom soup. But as with most dishes, nostalgia tends to set in and I have a newfound appreciation of all things my mum cooked as a kid and how much I wish to be there again.
This dish is about 10 minutes of prep (if you are slightly mad and enjoy cracking the stem of the mushroom off and then peeling each..and every…single…mushroom). And then 20-30 minutes simmering.
Ingredients
- 1 kg mushrooms, stems removed if you wish and peeled
- 1 brown onion, chopped
- 2 garlic cloves, chopped
- 1 teaspoon butter
- 6 cups vegetable stock
- 1 cup thickened cream
Method
- Melt butter in a Crock pot or large saucepan. Cook onion until partly softened. Add garlic and cook until onion is browned and softened.
- Add mushrooms and cook until lightly browned, stirring often so they don’t stick to the pan.
- Add the vegetable stock and season with salt and pepper.
- Bring to the boil and then allow to simmer for 20 minutes.
- Once the mushrooms are tender and cooked through, remove from the heat and allow to cool slightly.
- Use an electric mixer to puree the soup (I personally like it to be slightly chunky, but puree a bit longer if you like a smooth soup).
- When ready to serve, stir in the cream and top with freshly chopped basil. And as always…enjoy!
Written by
·