Tag: roast
-
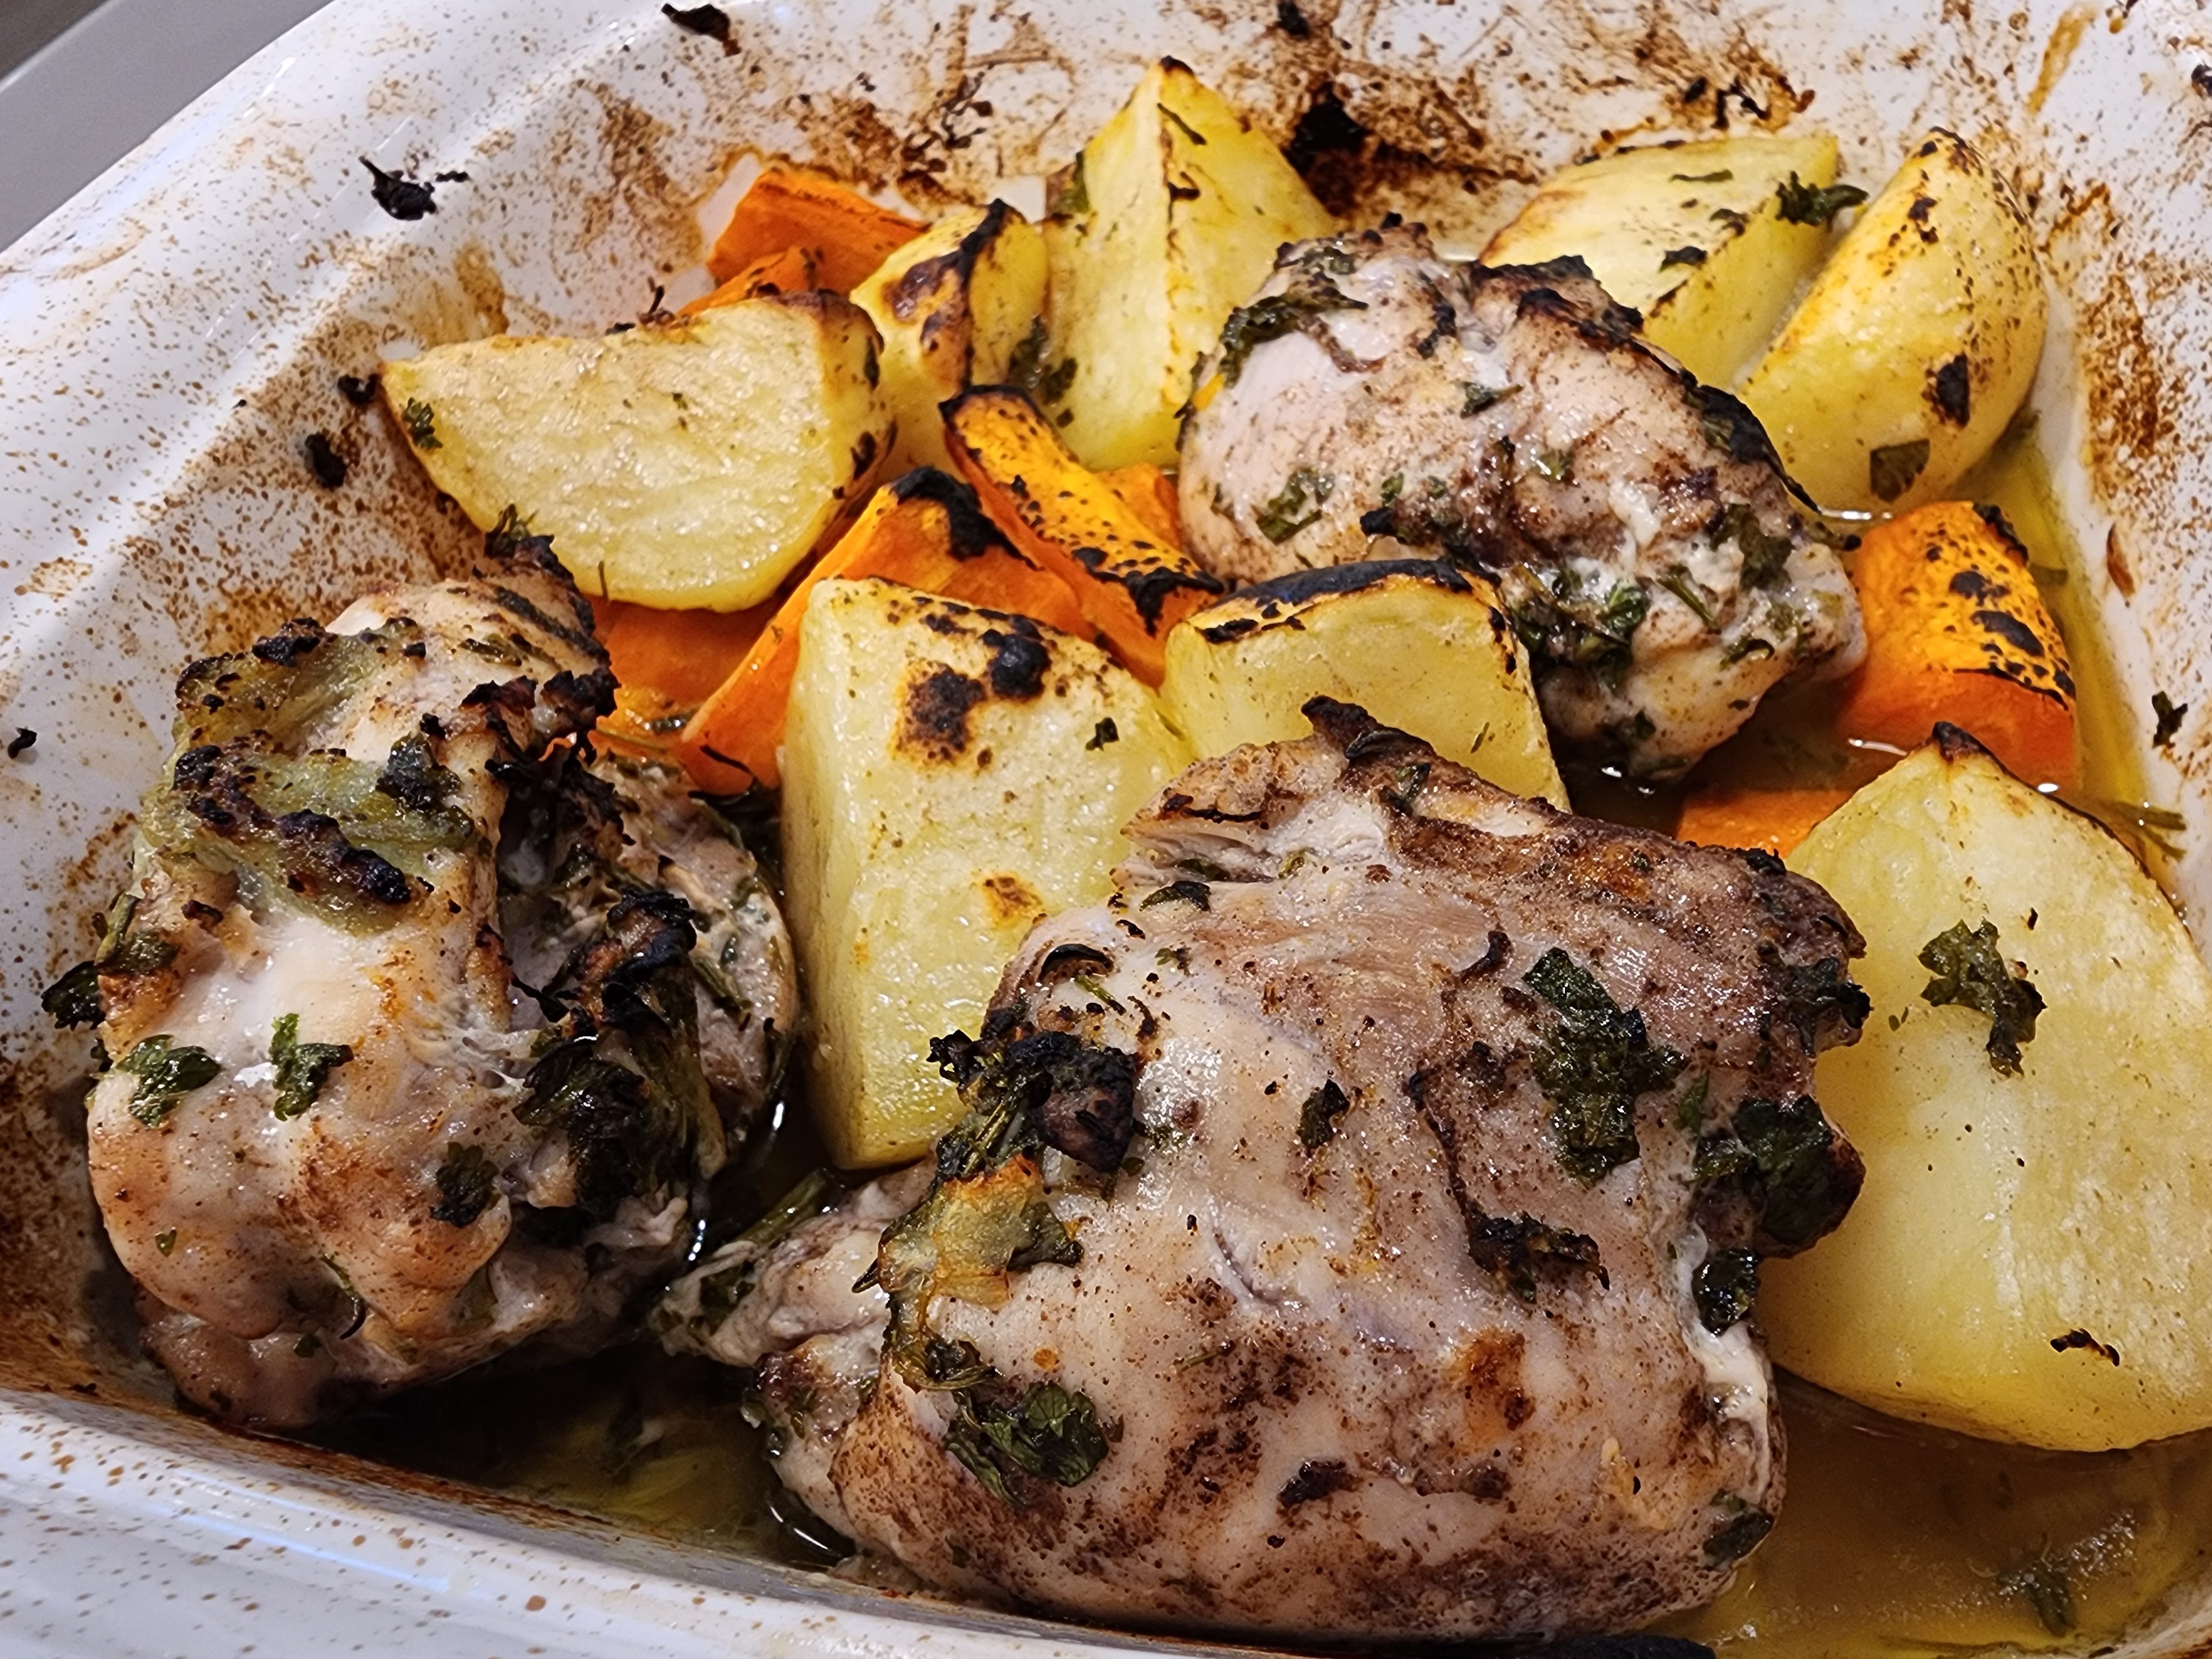
Easy Lime And Potato Roast Chicken Thighs
You won’t believe how simple this tangy roast chicken dish is to make.
All you need is lime juice, potatoes, chicken thighs and as much garlic as you can handle. Oh and a few readily available herbs and spices. 🙂

Simply
Put following ingredients into an oven dish:
- ~4 large chicken thighs, skinless (works with bone in or out)
- Peeled and chopped carrots and potatoes (see my ratio to chicken below)
- ~4 garlic cloves, finely diced
- The juice of 4 limes (or 2 lemons)
- Parsley leaves, chopped, to taste
- A good dash of a warm spice such as nutmeg or allspice
- Several slugs of olive oil (to coat everything)

Chuck the oven dish into a 180c preheated oven and cook for about an hour. Make sure the chicken is cooked through and the potatoes are not underdone.

Check out the bone in version:

Serve
I mainly serve it as is but it goes great with some steamed broccoli:

Enjoy,
PK
Here are more chicken dishes and roasts:
Written by
·
-
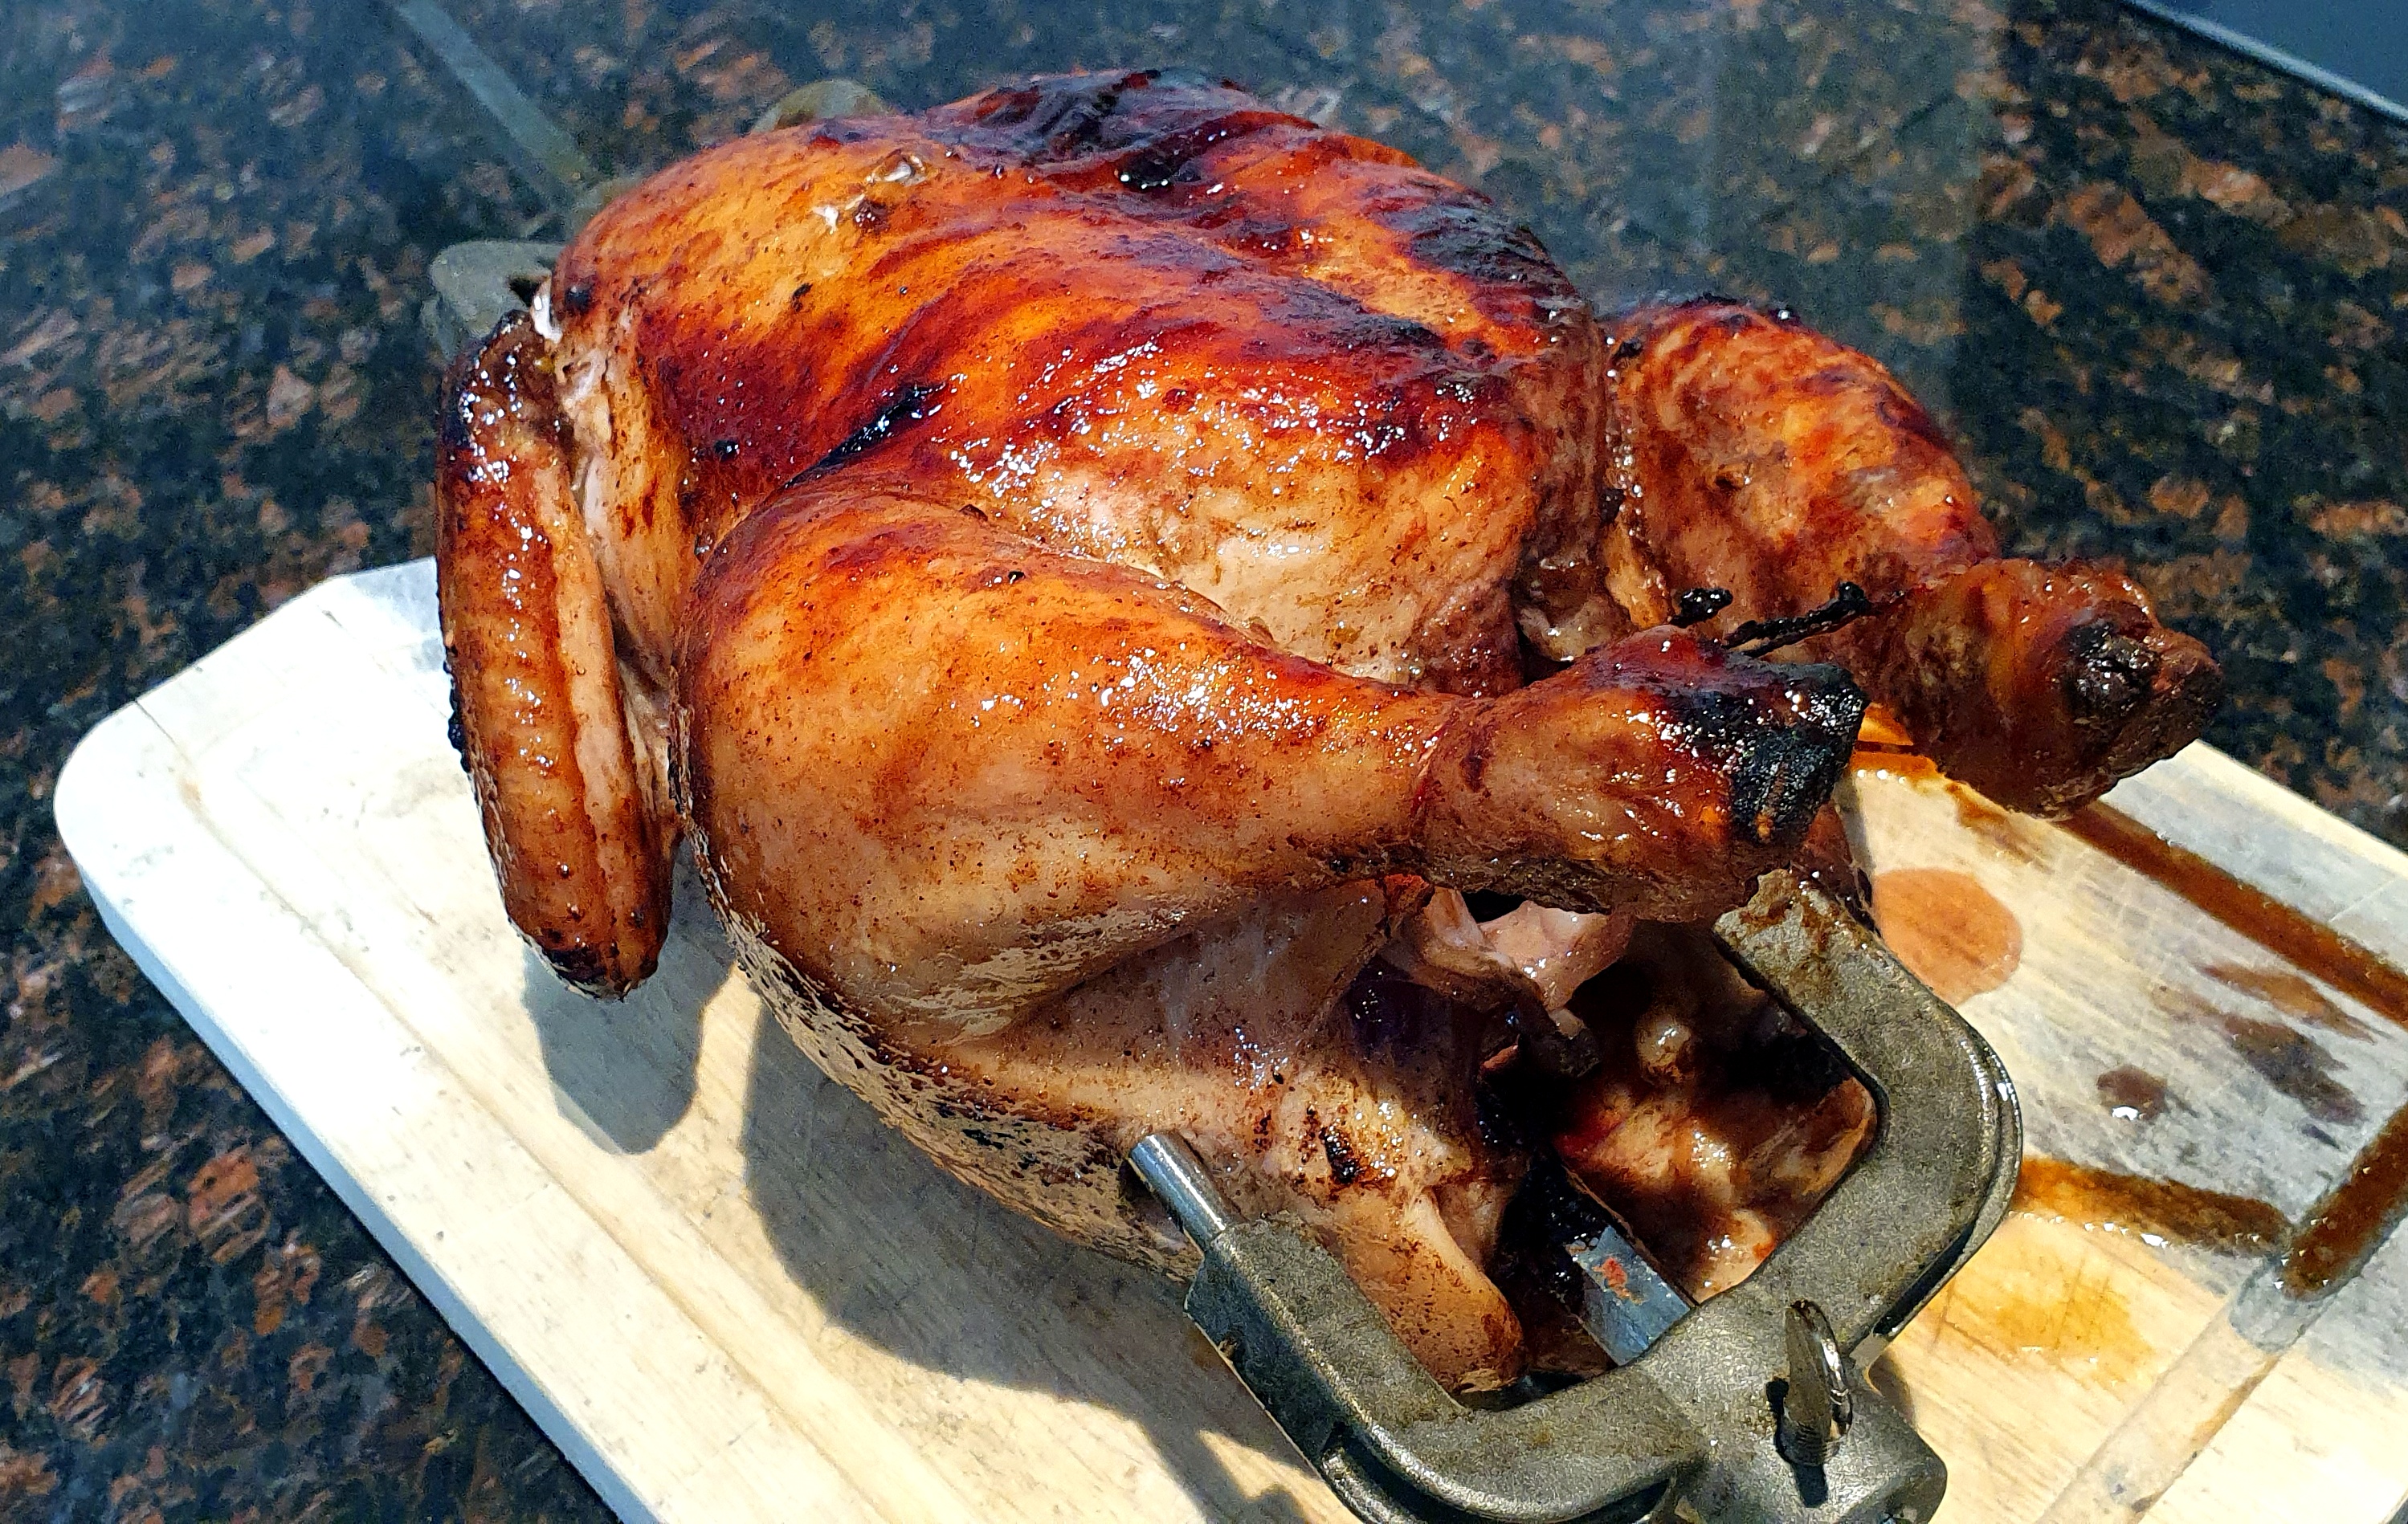
Chinese 5 Spice And Plum Wine Roast Chicken
This marinade is something special. The Chinese 5 spice and plum wine permeates the meat, giving it an amazing taste and aroma. The addition of sugar (or honey if you prefer) brings a lovely red glaze.
In this recipe I have slow cooked the marinaded chicken on my rotisserie but it works in an oven just as well:

Steps
Ingredients
Making the marinade
- In a mixing bowl add the:
- 1 cup of plum wine
- 2 Tbsp soy sauce
- 2 Tbsp oyster sauce
- 2 tsp Chinese 5 spice
- 0.5 cups of raw sugar
Cooking the chicken
If you are using your oven, set the temperature to 180c and cook for an hour or longer. You are chasing an internal temperature of 75c.
I like to use my charcoal Weber or rotisserie on a much lower burn but with the goal to achieve the same internal temperature for safe eating.

Every now and then, baste the chicken with the remaining marinade to get that nice red glaze:

Serving
Let the roast rest for about 15 minutes under foil if you can.
I like to serve it alongside rice, plum dipping sauce and steamed vegetables drizzled with soy sauce.
Note: the leftovers are great cold the next day in a salad and the like.
Enjoy,
PK
Here are some more chicken recipes and posts about seasonings and marinades:
Written by
·
- In a mixing bowl add the:
-

Honey Brined Roast Chicken
Brining a chicken before you roast it enhances and locks in flavours and keeps the meat tender and moist. We have some general brining tips here (Ben’s brining tips) and today I am going to be adding honey and cinnamon.

Steps
- Making the brine
- Brining the chicken
- Cooking the chicken
- Serving
Equipment
- 1 chefs knife
- 1 large mixing bowl (big enough to submerge the chicken)
- 1 oven roasting tray
- 1 roasting rack (preferable)
Ingredients
- 1 chicken
- 1 cup of table salt
- 4 Tbsp honey
- 1 sprig of rosemary
- 1 cinnamon stick
- Several pieces of fresh thyme
- Boiling water, to make a salt slurry
- Cold water, to submerse the chicken
Making the brine
- Add the 1 cup of salt and 4 Tbsp of honey to a large mixing bowl.
- Add boiling water to make a slurry, mix until the salt is dissolved.
- Add the cinnamon stick, rosemary and thyme.


Brining the chicken
- Add cold water (so we don’t start cooking the chicken in a hot brine) to the bowl and then submerse the chicken.
- Pop the bowl in the fridge over night or for at least 4 hours.

Cooking the chicken
Pre-heat your oven to 180C. Cook the chicken for ~1 hour.
Note: You can make it hotter for a shorter cook but the meat should be at 75C in the breast.

You can even chuck some spuds in. Go hotter earlier and then reduce to 180C towards the end, checking the temperature of the meat as you finish.

I am gob-smacked every time with the result. 🙂

Serving:
Let the roast rest for about 15 minutes while you make your gravy and serve the sides.
 Enjoy,
PK
Here are some more chicken recipes and roasting posts :
Written by
·
-
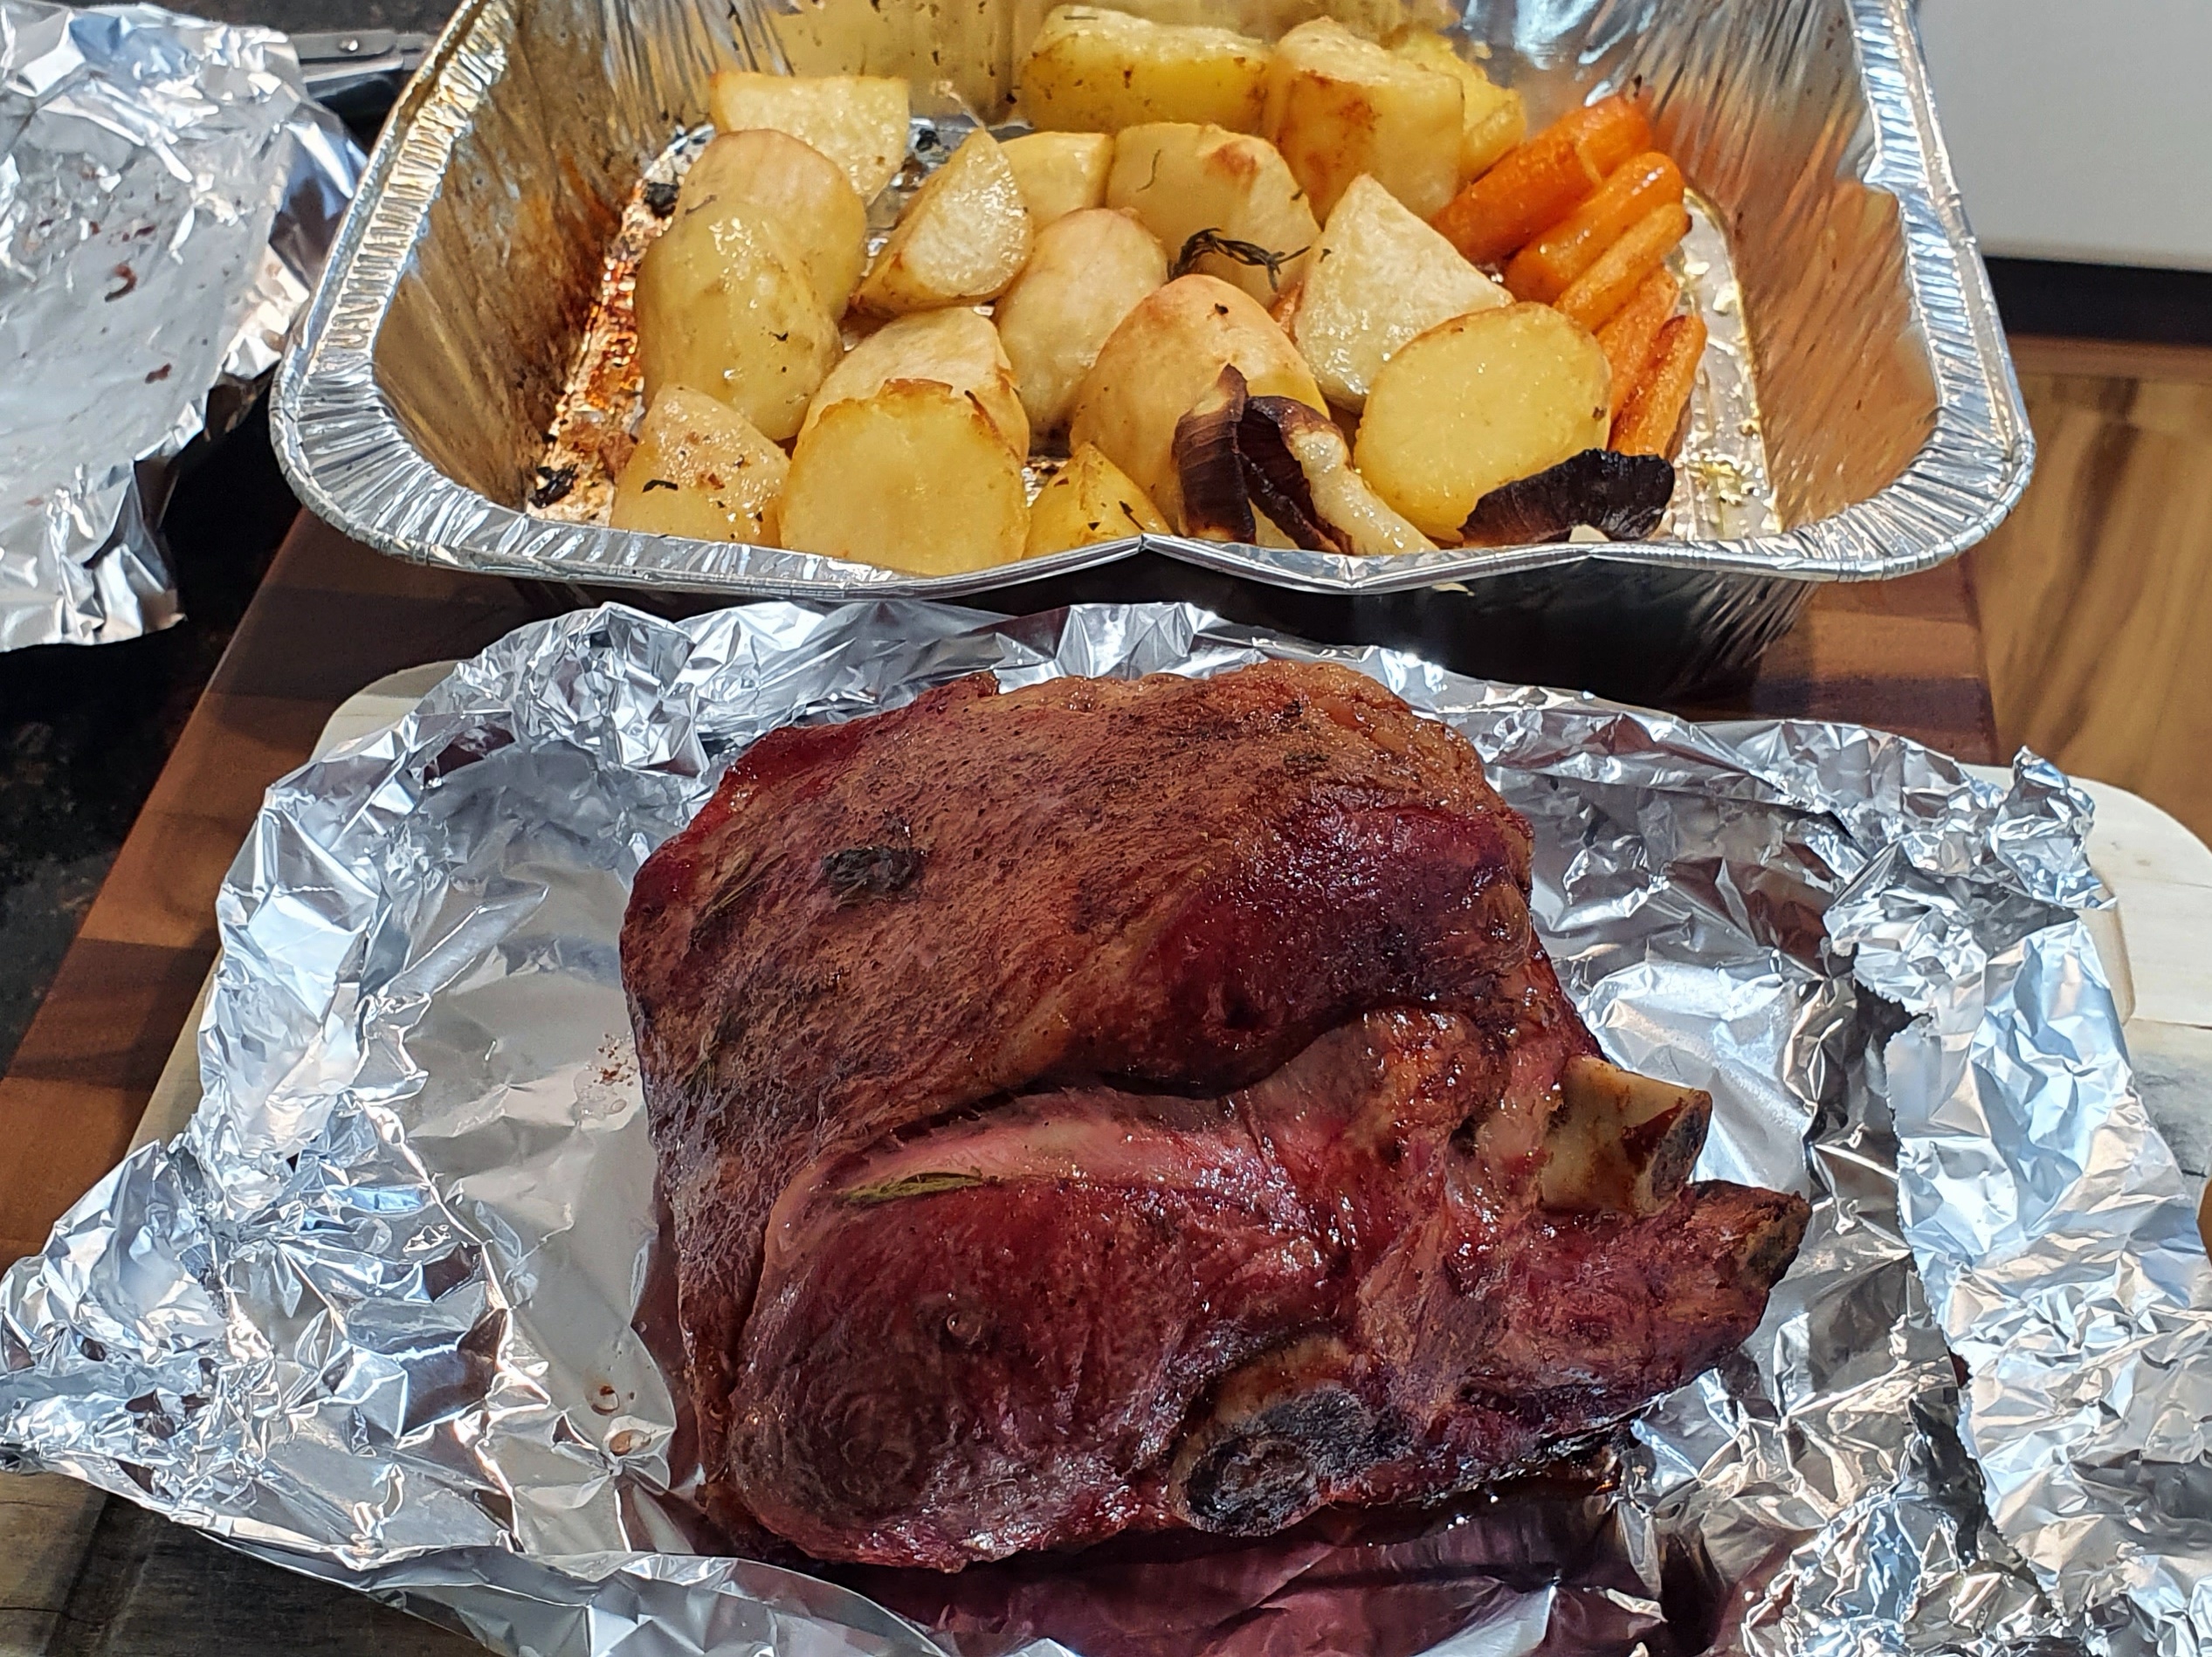
PK’s Slow Charcoal Weber Lamb Leg Roast
There are few meals more mouth-watering than the Aussie Sunday lamb roast.
My favourite is the mini lamb leg roast because it is so cheap yet it always turns out tender across a range of cooking methods. Here I have cooked the roast in my charcoal Weber for ~2.5 hrs using a lowish (130°C) indirect coal method. The spuds needed a finish off in a hot oven to get them crispy but that was the only time I had to do anything.
Bone in it came to 1.1kg and $12.50 for 4 people. Talk about thrifty easy cooking!

Simply
Put the lamb in a zip lock bag with garlic-infused olive oil, a handful of rosemary and oregano, salt and pepper at least 2 hours prior to cooking and refrigerate. Massage the bag every now and again to spread the oil around evenly.

Take the bag out of the fridge so it can approach room temperature just as it goes onto the Weber. Use your preferred coal technique (I described mine above and the coals are off to the side in a holder) so that your meat has an internal temperature of 70 C for medium-well.
Pop the potatoes alongside the lamb at the start, carrots and pumpkin etc in about an hour later. Transfer them to a piping hot oven about 30 minutes prior to serving to get them crispy.
When you get the meat to the temperature you want, transfer it to a chopping board and cover it with aluminium foil to let it rest for at least 10 – 15 minutes.
Serving
Serve hot with Dave’s Mint and Balsamic Sauce and lots of gravy. 🙂

Enjoy,
PK
Here are some more lamb dishes and previous roast posts:
Written by
·
-
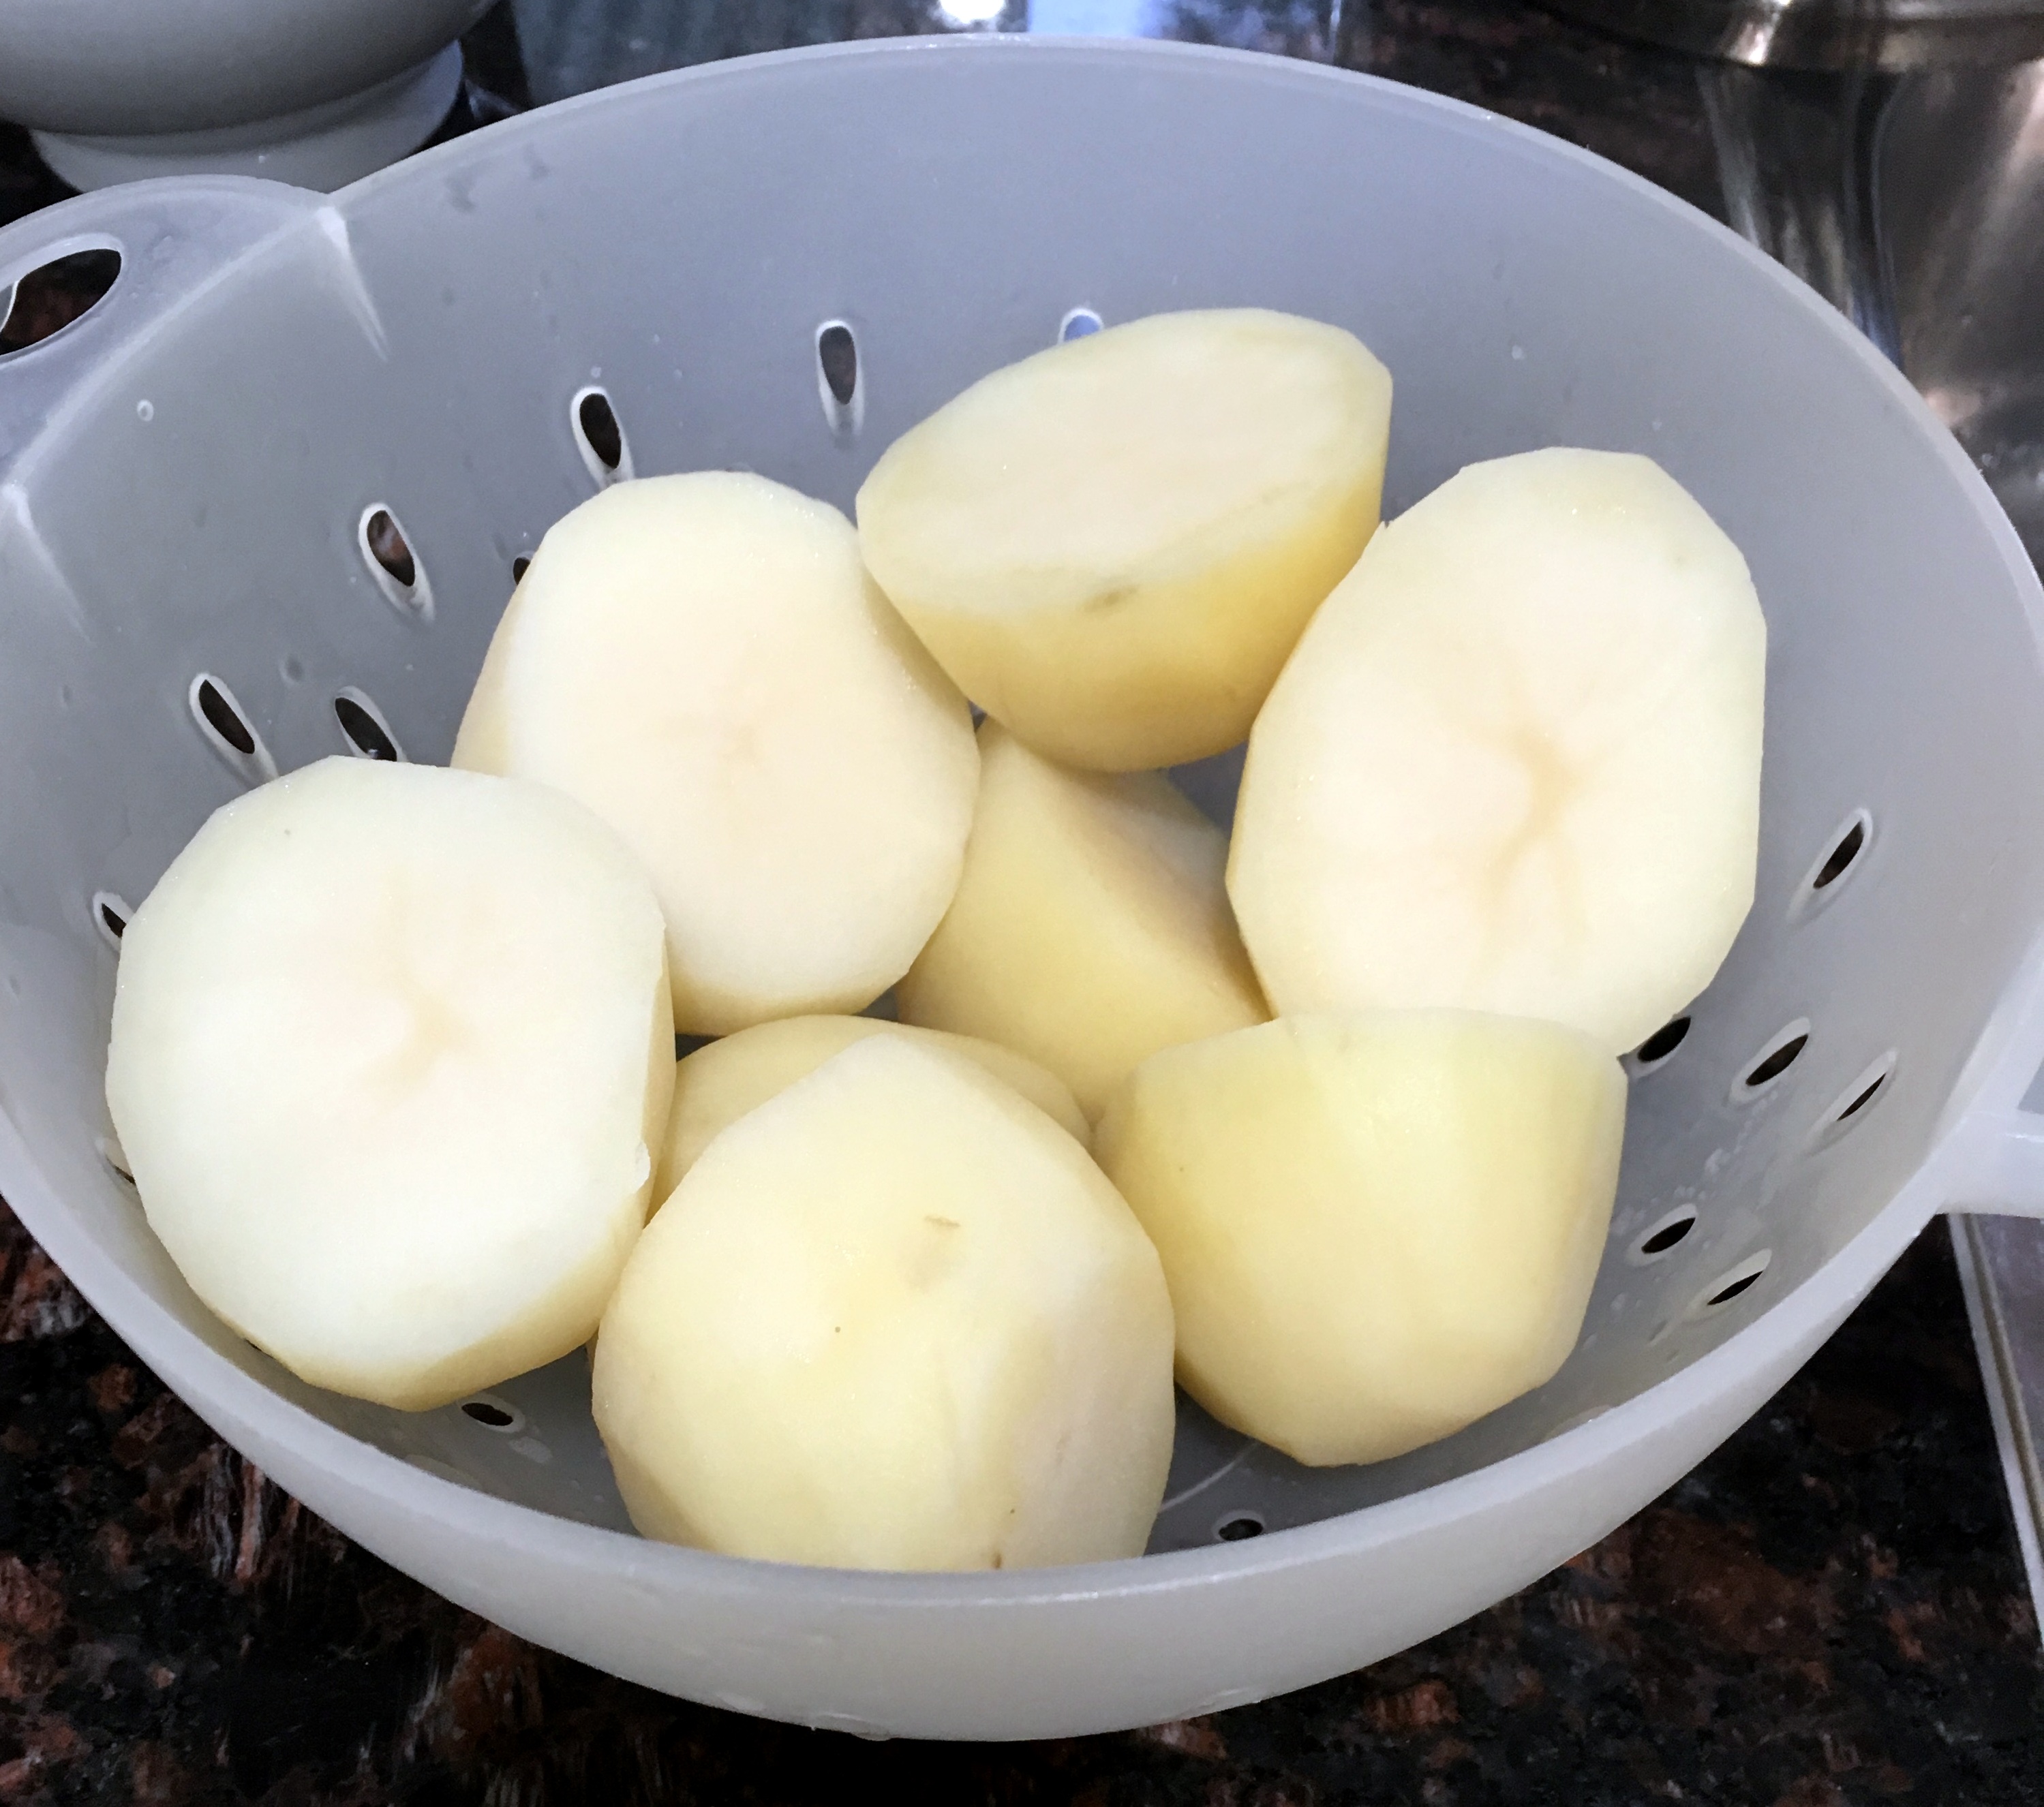
Parboiling Potatoes
Some dishes using potatoes, like roast potatoes, benefit greatly by first parboiling them.
Simply put, we put the potatoes in boiling water for 5 to 10 minutes so that their cores are partially cooked. Try and keep all the potato pieces the same size otherwise the smaller ones will be overdone by the time the larger are ready.

A quick drain and they are perfect for roasting using Jamie Oliver’s methods.

Enjoy,
PK
Here are a couple of potato posts to help you plan dinner. 🙂
[arpw thumbnail=”true” thumbnail_size=”arpw-thumbnail” tag=”95994″ limit=”5″]
Written by
·
-
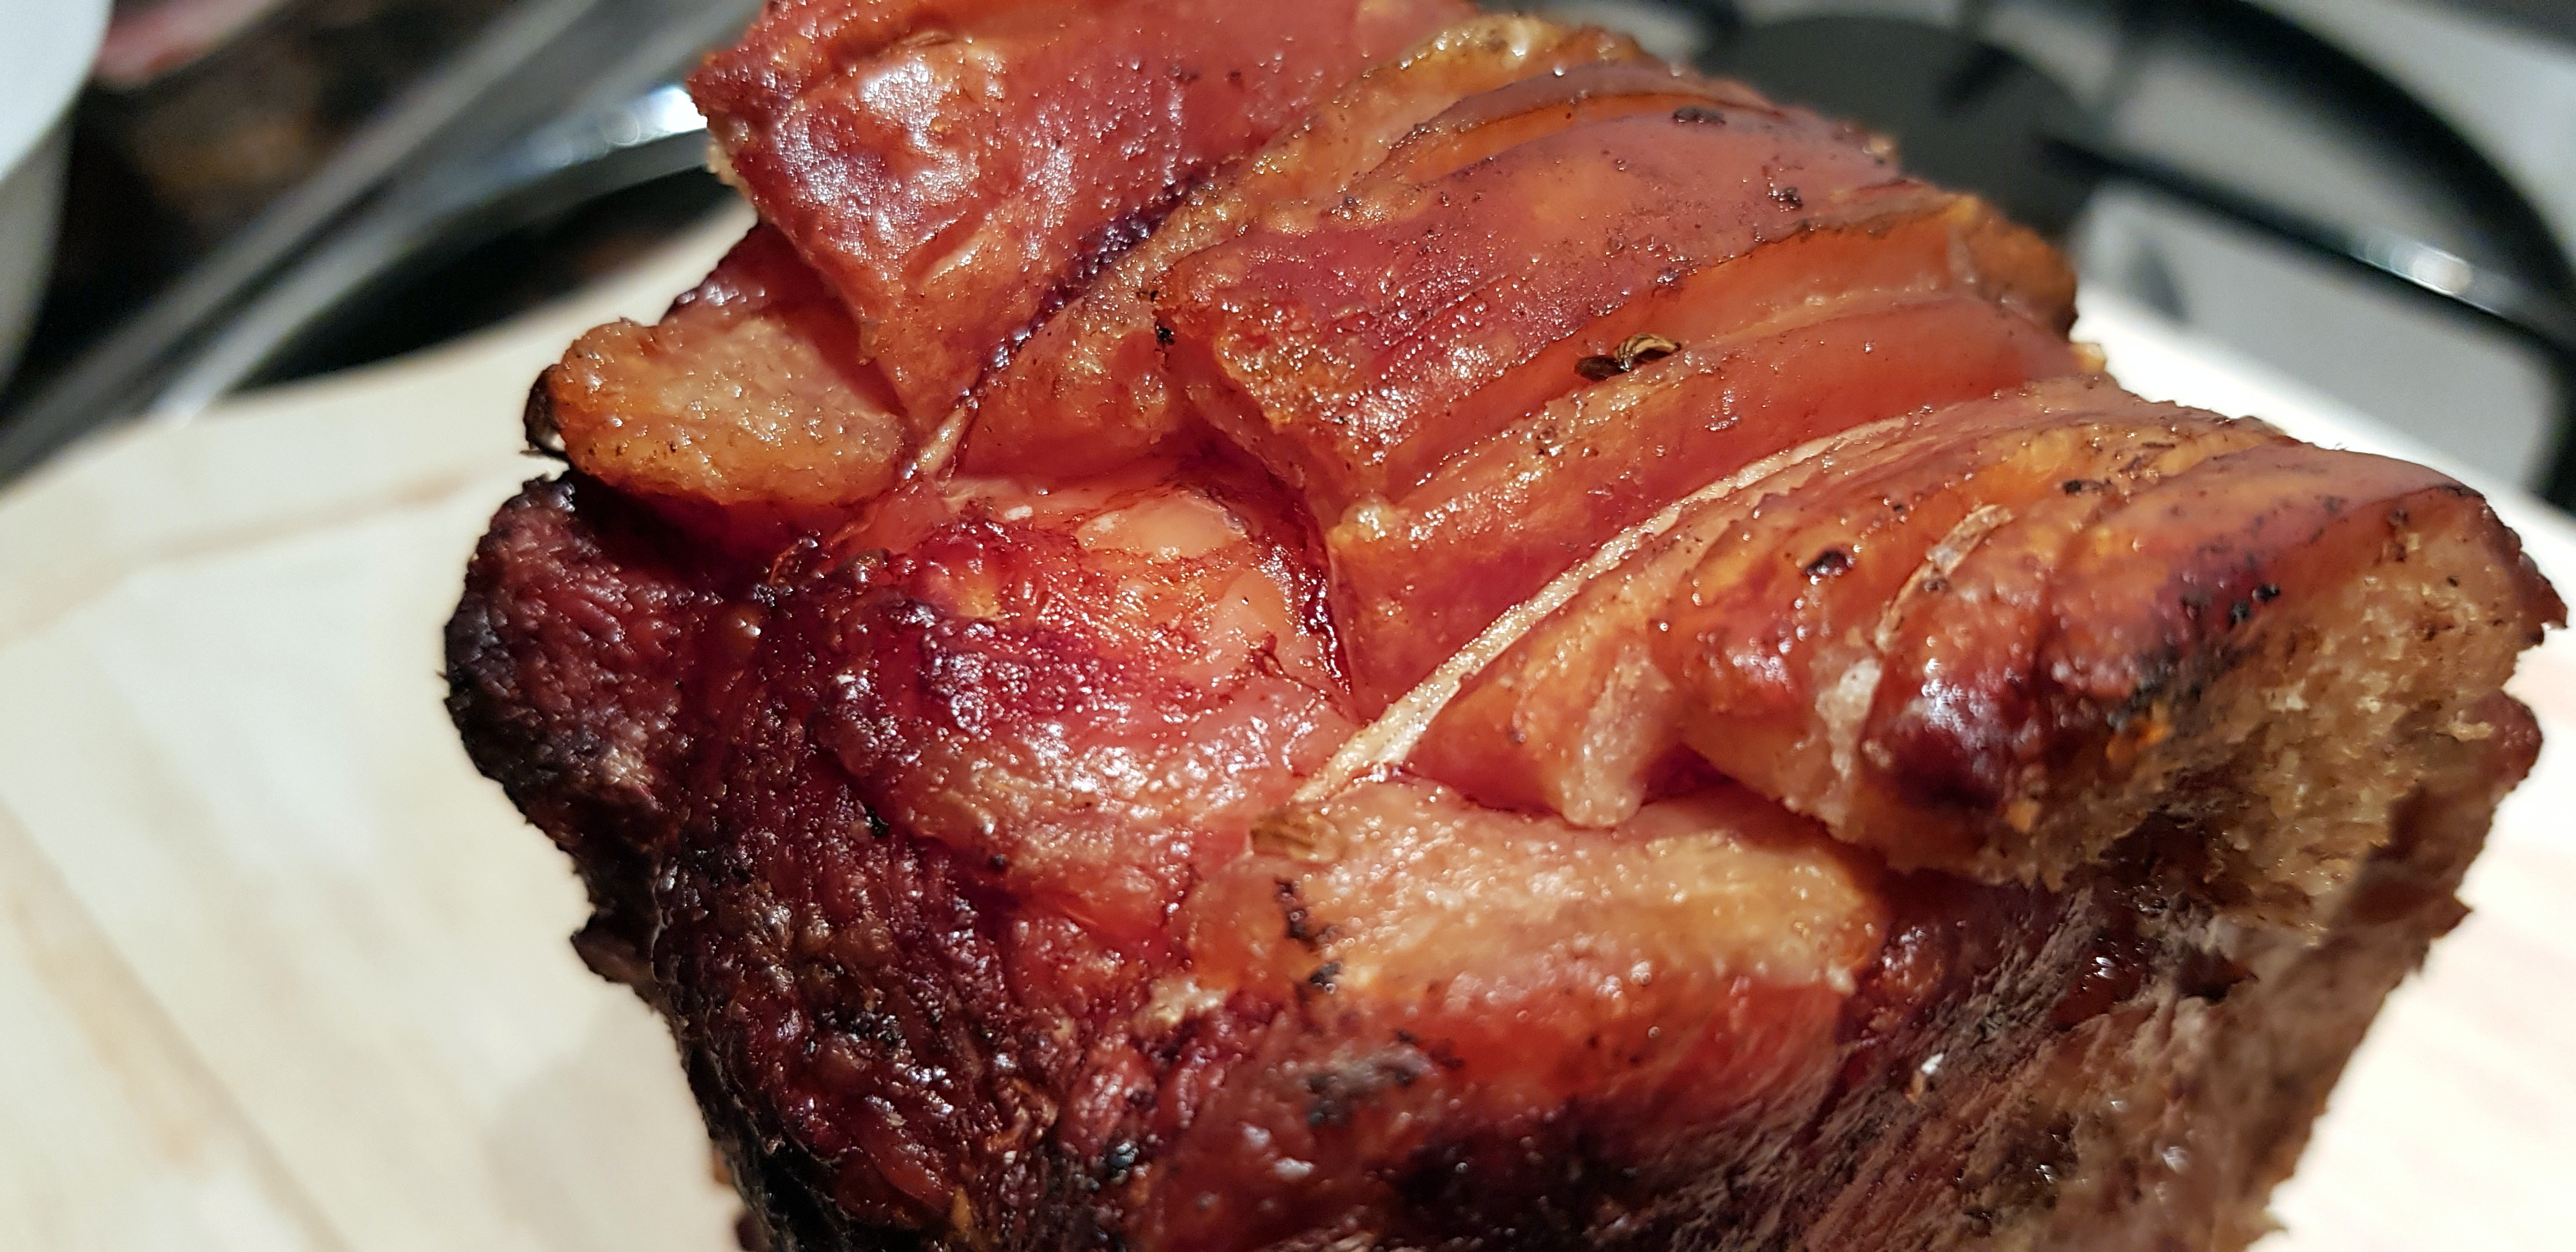
Scott Rea’s Roast Pork With Perfect Crackling
I have struggled to make roast pork with the perfect crackling forever and a day.
Until now!
Scott Rea guarantees perfect crackling if you follow his pork roast preparation and oven directions. They really do work and I have even tried to prove him wrong. He isn’t and I have linked to his video at the end of the post.
I know what you are thinking, surely it won’t work in a charcoal weber BBQ.
Scott’s Key Tips:
- The best tool for scoring the pork skin is a Stanely knife. Not only are the blades super sharp but you can set it to the right length to slice the fat but not the meat itself.
- Bring the joint out of the fridge at least an hour before cooking to bring it to room temperature. This time will vary depending on the climate.
- Don’t salt the pork fat until right before you cook it. Too early will make the fat moist and it won’t crackle properly.
The Day Before
- Buy your pork joint at least a day or two before you intend to roast it.
- Take it out of the vacuum pack, if that is how you got it, and pat it dry.
- Use a Stanley knife to score the fat of the pork cut you are using.
- Put the pork, uncovered, into the fridge overnight to let the fat dry out (don’t salt it at this point).
The Next Day
- Take the pork out a few hours prior to cooking to bring it to room temperature.
- Preheat your fan-forced oven to 240C.
- Rub salt into the fat’s cuts.
- Optionally get some fennel seeds and or black pepper into them too.
- Cut a bunch of onions or potatoes into slices and layer them in an oven tray to keep the pork off the bottom of the tray.
- Add some water to the tray to stop the vegetable bed from burning and also keep the meat moist.

COOKING TIME
Cook the pork at 240C for 30 minutes so that the crackling looks like this.

Then lower the oven temperature to 180C and cook the roast for another 45 minutes per 450g (~1lb). I also check that the meat’s core temperature is 77C (well done).
Let it rest for 15 minutes and then it will carve perfectly and the meat will melt in your mouth.


Serving
Apple sauce and gravy of course. You could even try Roasted Apples for that something different. 🙂


The Scott Rea Project’s Video
Drop Scott a line if like me, this has cured your crackling problems,
PK
YOU MIGHT ALSO LIKE
MOAR PORK GOODNESS
ROASTS
MORE SCOTT REA TIPS
Please consider subscribing to a weekly email summary of our posts or check us out on Facebook @growitcatchitcookit.
[mc4wp_form id=”15771″]
Written by
·
-
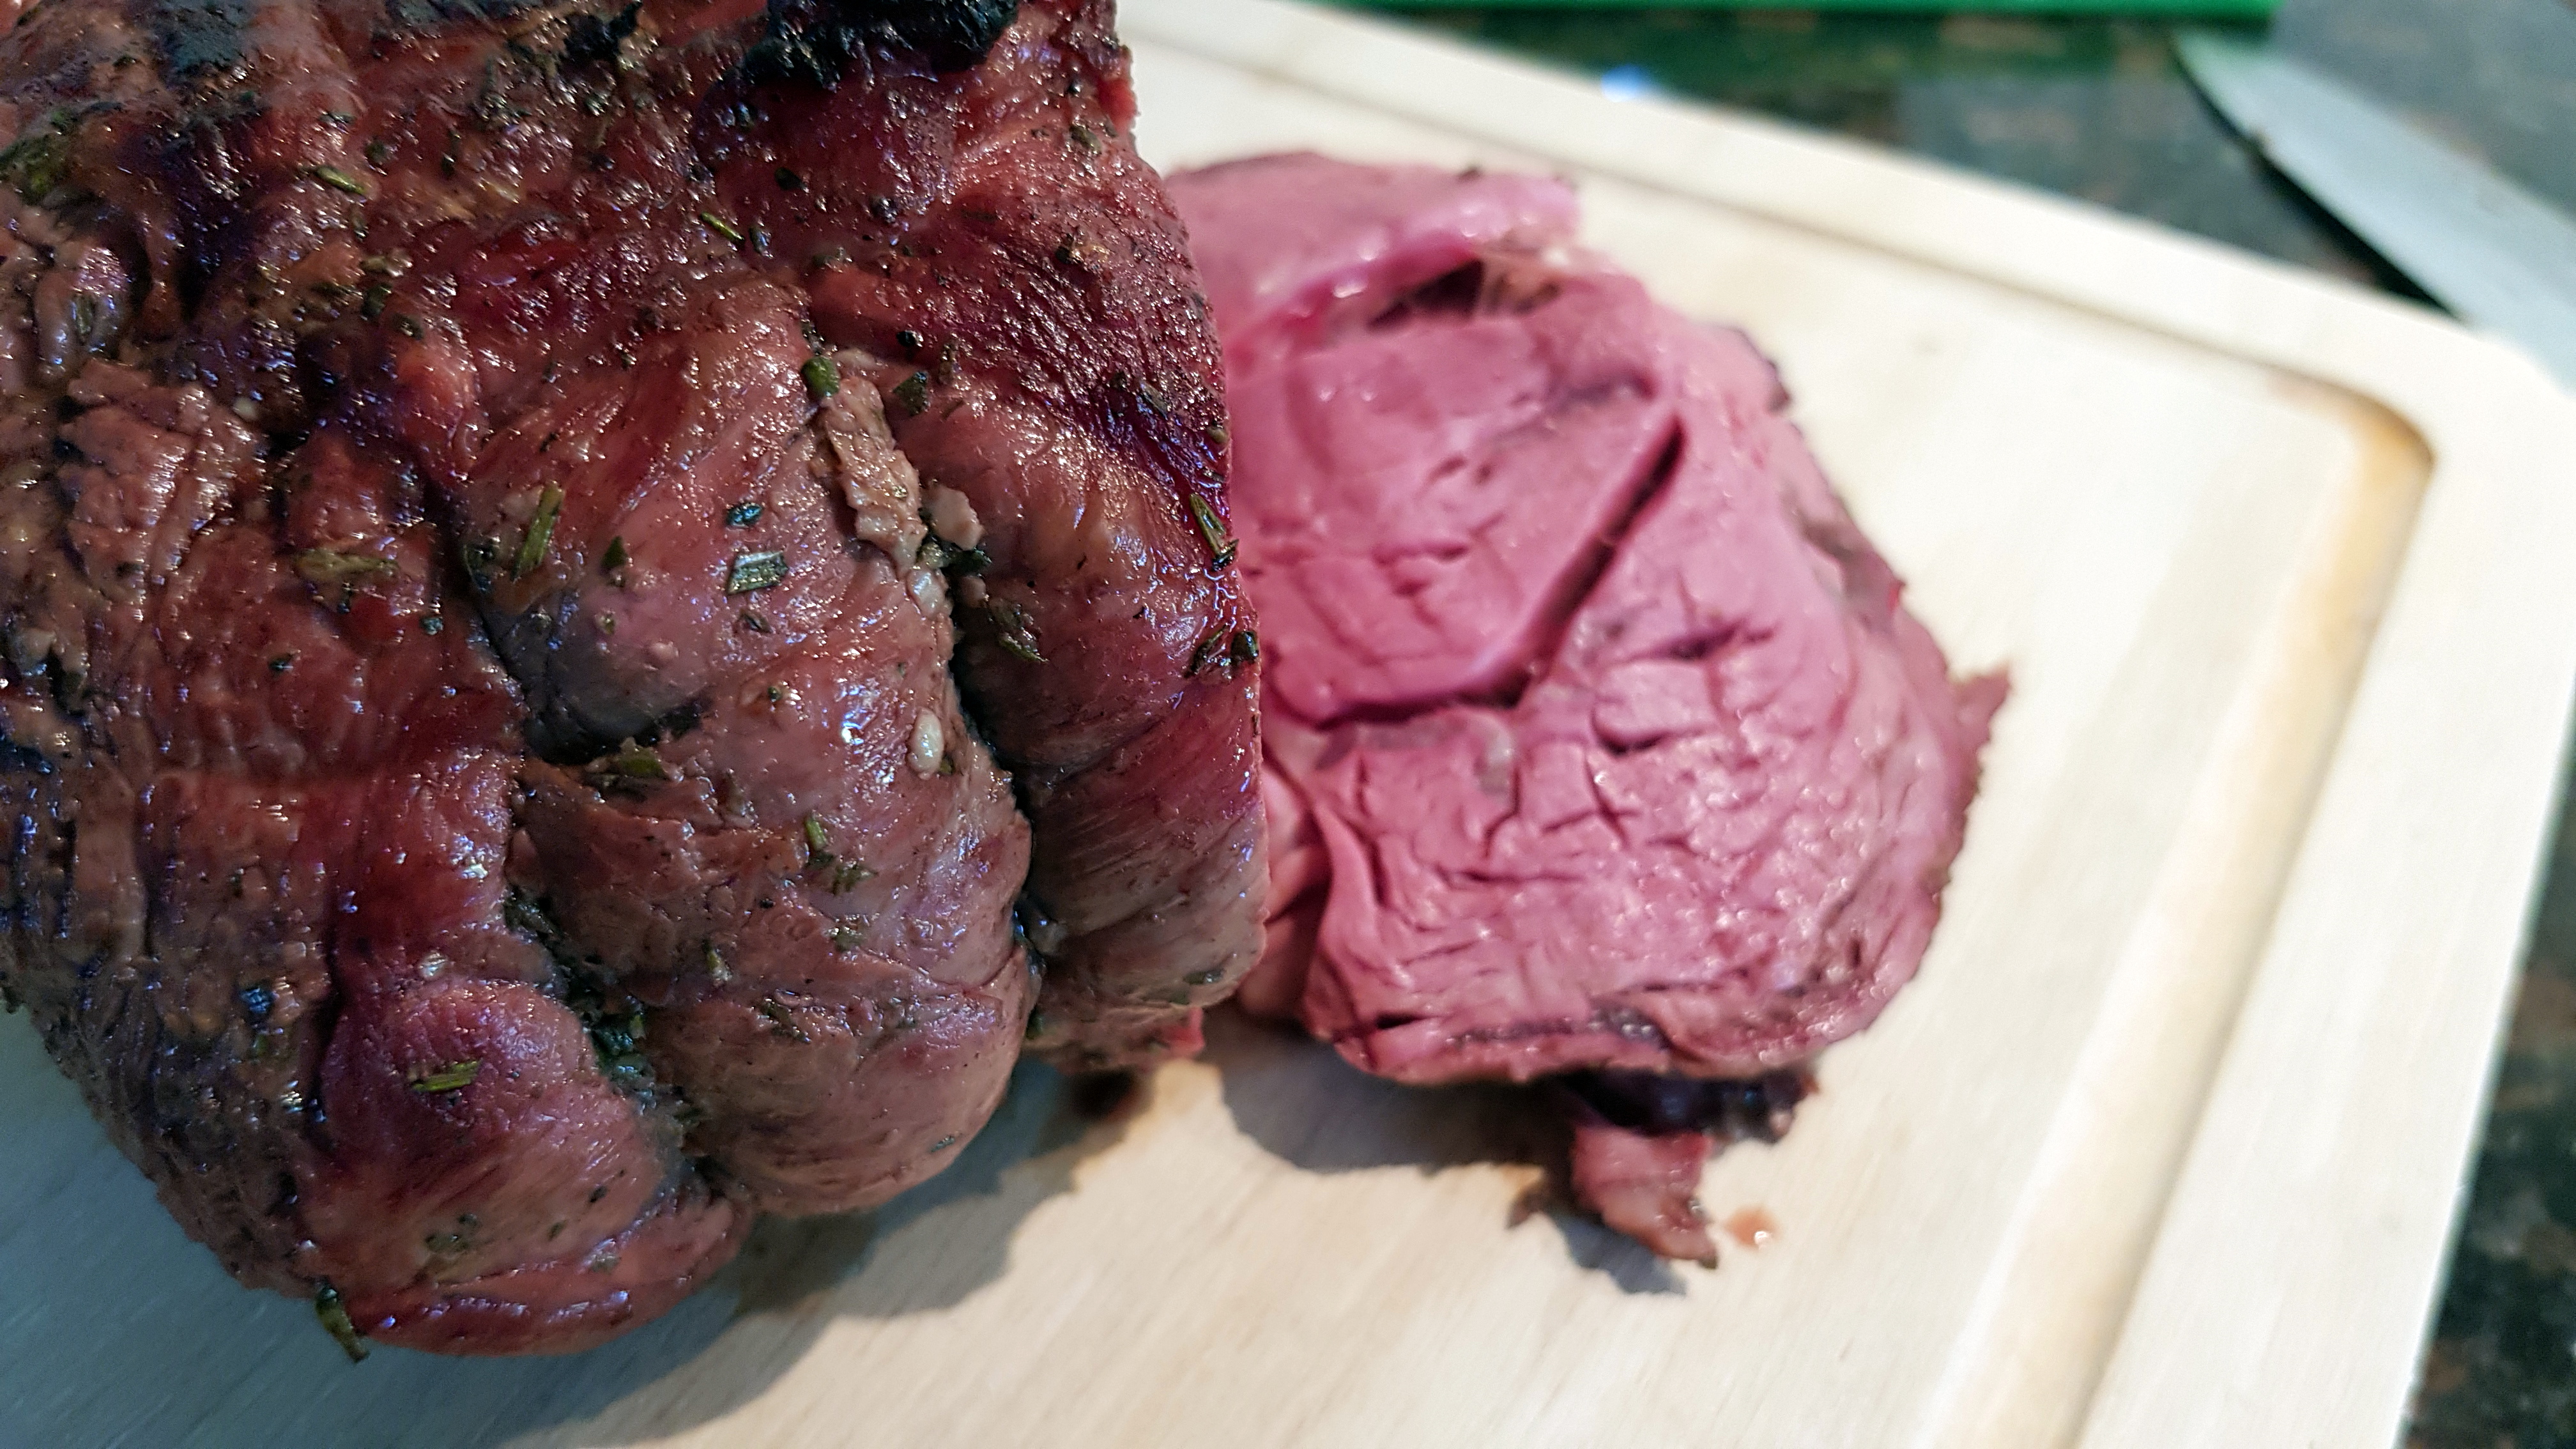
PK’s Rib Eye Roast: With Rosemary And Garlic
Here in Oz we call the boned out beef rib eye cut a ‘scotch fillet’ or a ‘cube roll’. The scotch fillet comes from rib area of the animal and has just the right amount of fat marbling (plus a lovely seam) and tenderness.
Today, I am roasting it in my Weber charcoal kettle BBQ after first coating it in a garlic, chopped rosemary and olive oil mix.
To lock in the flavour I gave it a quick sear before roasting it low and slow until the internal temperature was 60 degrees C. I then let it rest for 20 minutes before carving.
Happy sigh 🙂
Enjoy,
PK
YOU MIGHT ALSO LIKE
MO’AR BEEEEEEF
MORE ROAST POSTS
Please consider subscribing to a weekly email summary of our posts or check us out on Facebook @growitcatchitcookit.
[mc4wp_form id=”15771″]
Written by
·
-

PK’s NoRecipe Rump Pot Roast
This is another easy peasy slow cooker meal that turned a lovely side rump (eye) cut into a tender braised roast beef. It tasted and smelled amazing and the kids came back for seconds 🙂
Steps:
I simply browned the rump roast (~600g) in a fry pan before adding to the slow cooker that was on high. I then brought a bunch of vegetables (potatoes, carrots, brown onion, basil, celery sticks, a coriander root) and a good slug of Worcestershire sauce to the boil in 500mls of home-made beef stock until the potatoes had started to soften somewhat.
I added the vegetables and stock to the slow cooker and let it cook for about 4hrs on medium or until the meat is starting to break apart but still moist.
I always try to let the liquid reduce for gravy without letting anything burn. I check every now and then and add water if required.


Enjoy,
PK
Related Links:
Please consider subscribing to get a weekly email summary of our posts.
[mc4wp_form id=”15771″]
Written by
·
-
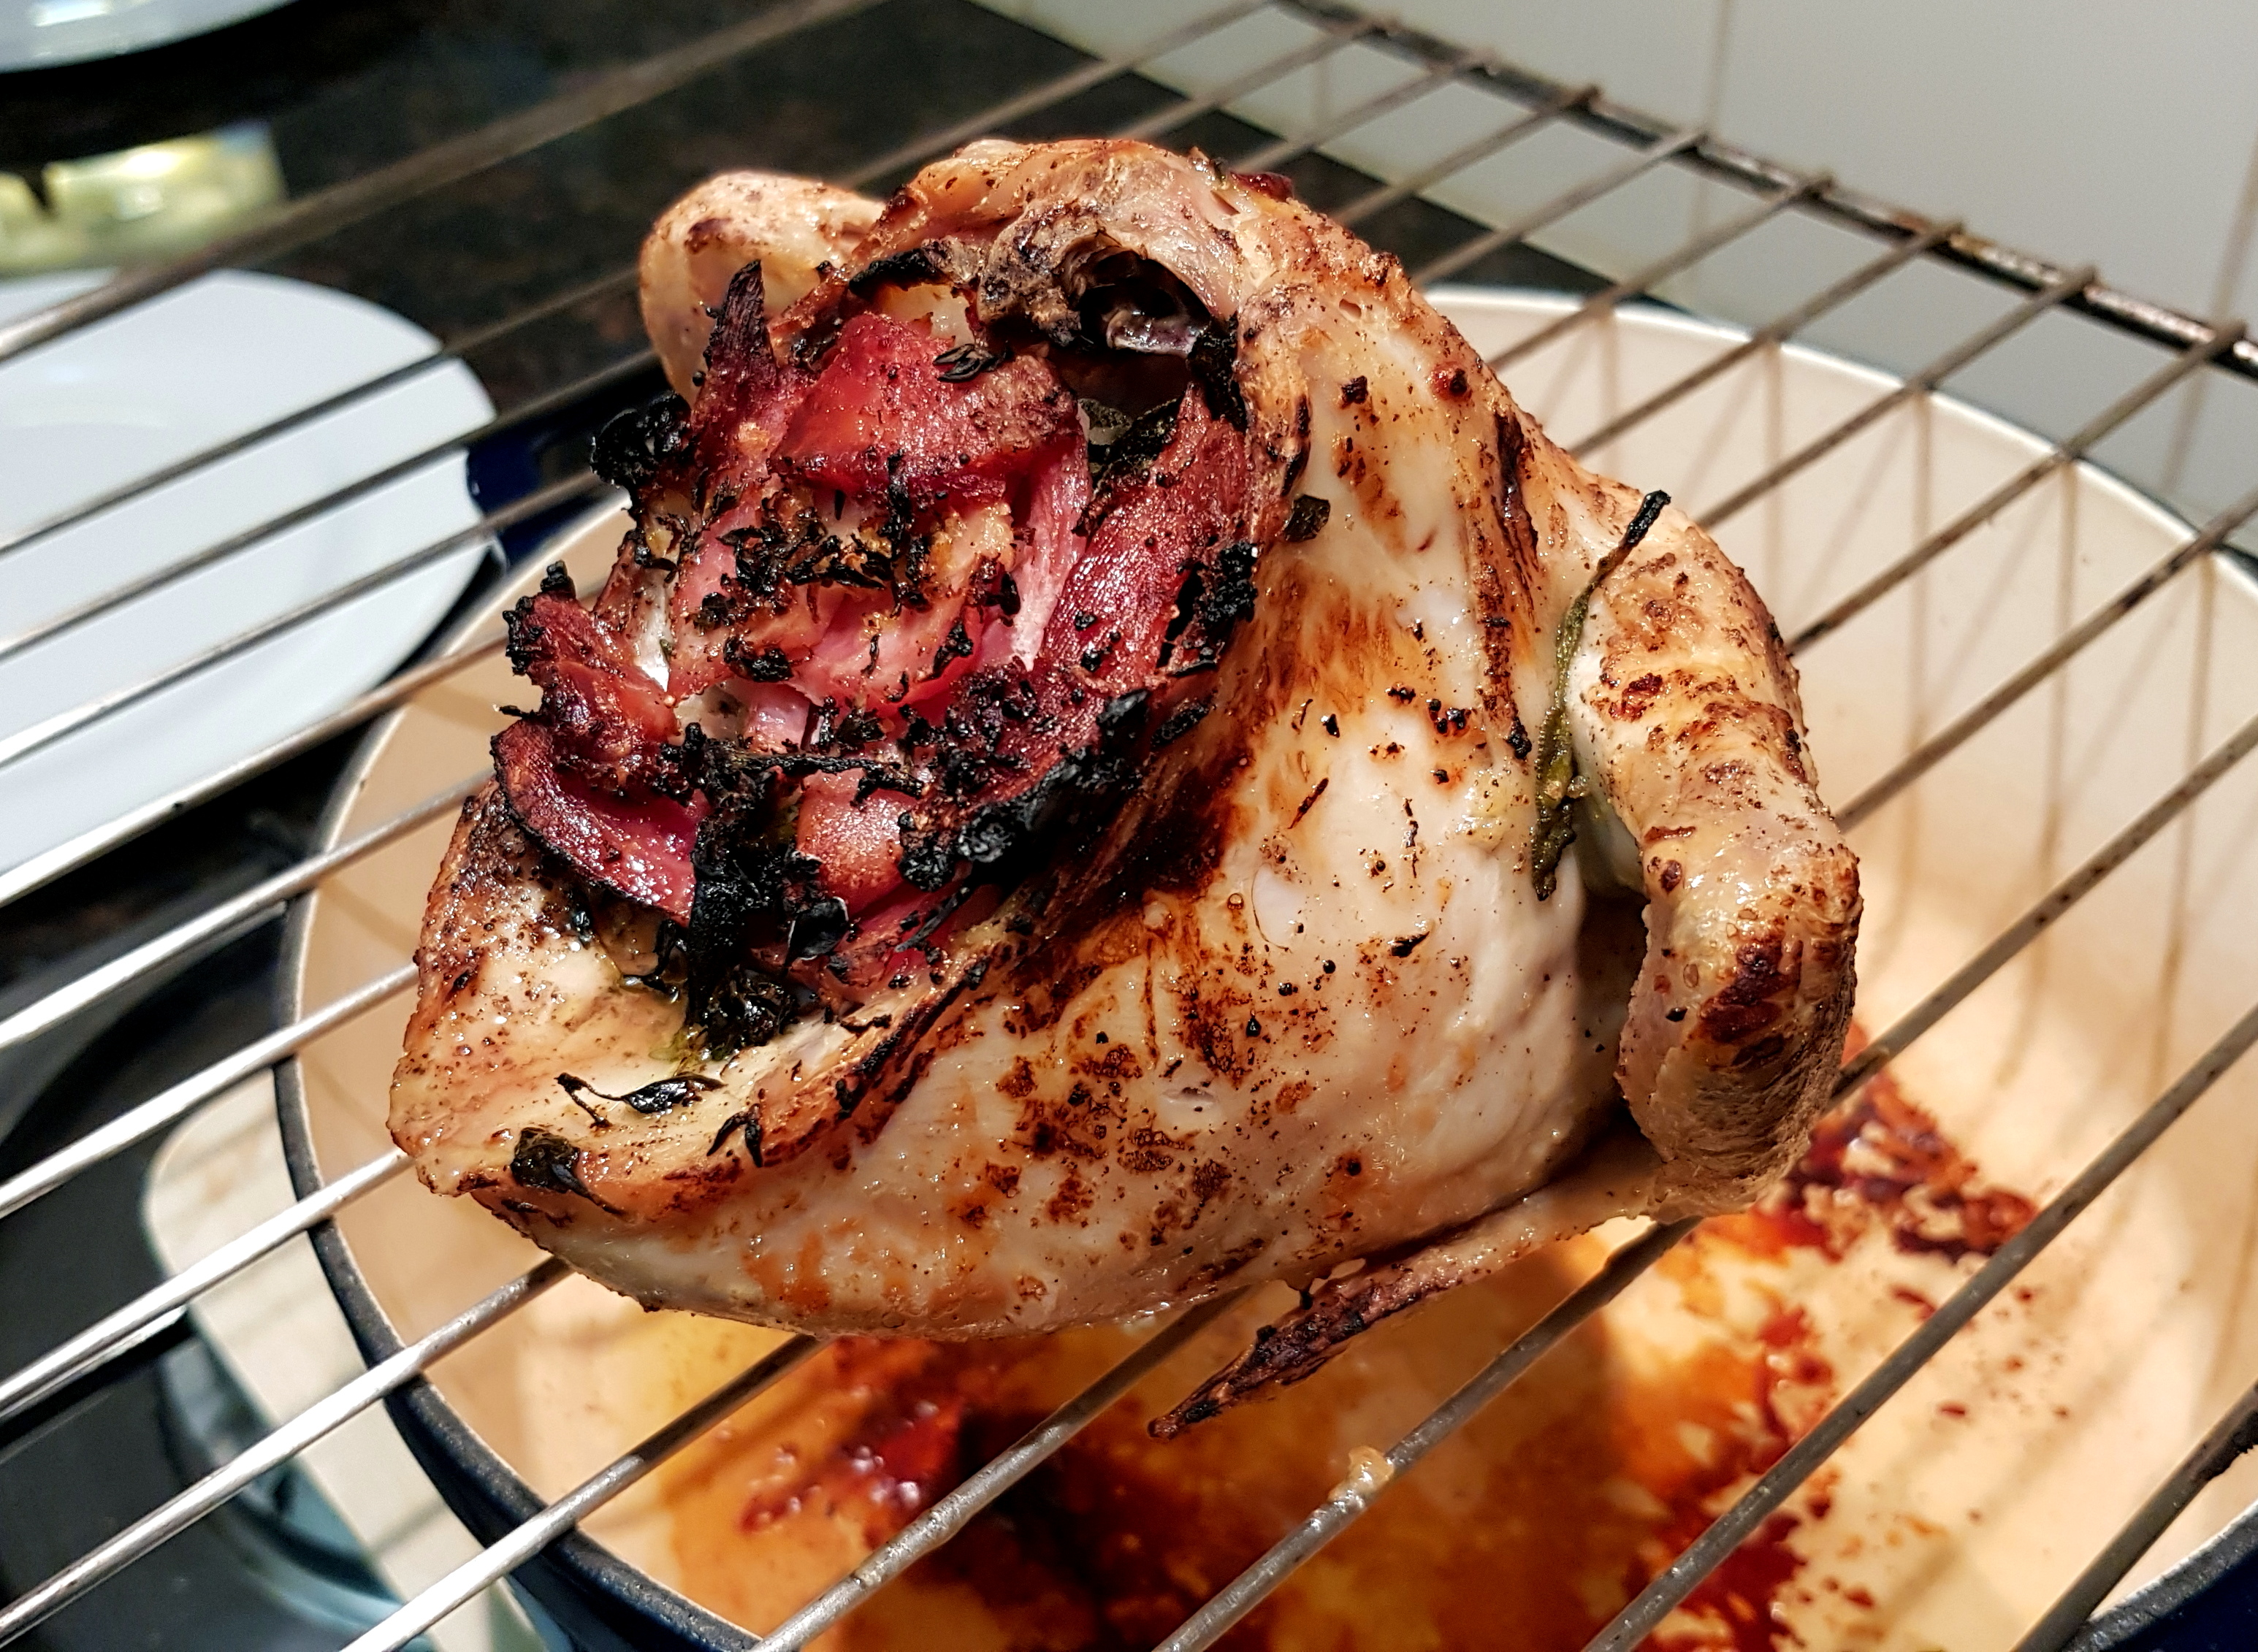
PK’s Chicken Crown Roast With Bacon
I stuffed this chicken crown joint with bacon, sage, thyme, key lime peel and onion. The skin was rubbed in olive oil, cracked black pepper and salt.
I roasted it (~ 1 hour: fan forced oven: 200C) in an upright position to let the stuffing drip and infuse through the roast as it cooked.


Enjoy,
PK
Related Links:
Please consider subscribing to get a weekly email summary of our posts.
[mc4wp_form id=”15771″]
Written by
·
-

Ben’s NoRecipe Yorkshire Puddings
Yorkies were traditionally served as a first course with gravy, to fill the diner with low-cost ingredients. This would mean that poorer families would make an expensive roast meal stretch further.
My grandparents often talked about having a large Yorkshire pudding to start a traditional Sunday roast.
Nowadays, the yorkie is a staple part of any roast in my house. My wife has the best recipe, and shares it below. Sometimes the simplest things are the best 🙂
Steps:
- Preheat oven to 200°C. Pour 1 tablespoon of oil into six 80ml (1/3 cup) capacity muffin pans. Place in preheated oven for 5 minutes or until oil is hot.
- Combine ¾ cup flour, ½ tsp salt into a bowl. Add 2 eggs and whisk until combined. Gradually add 300 mL milk in a thin steady stream and whisk until smooth.
- Pour batter among the hot muffin pans.
- Bake in oven for 20 minutes or until puffed and golden brown

Ben
Written by
·