Tag: black peppercorns
-
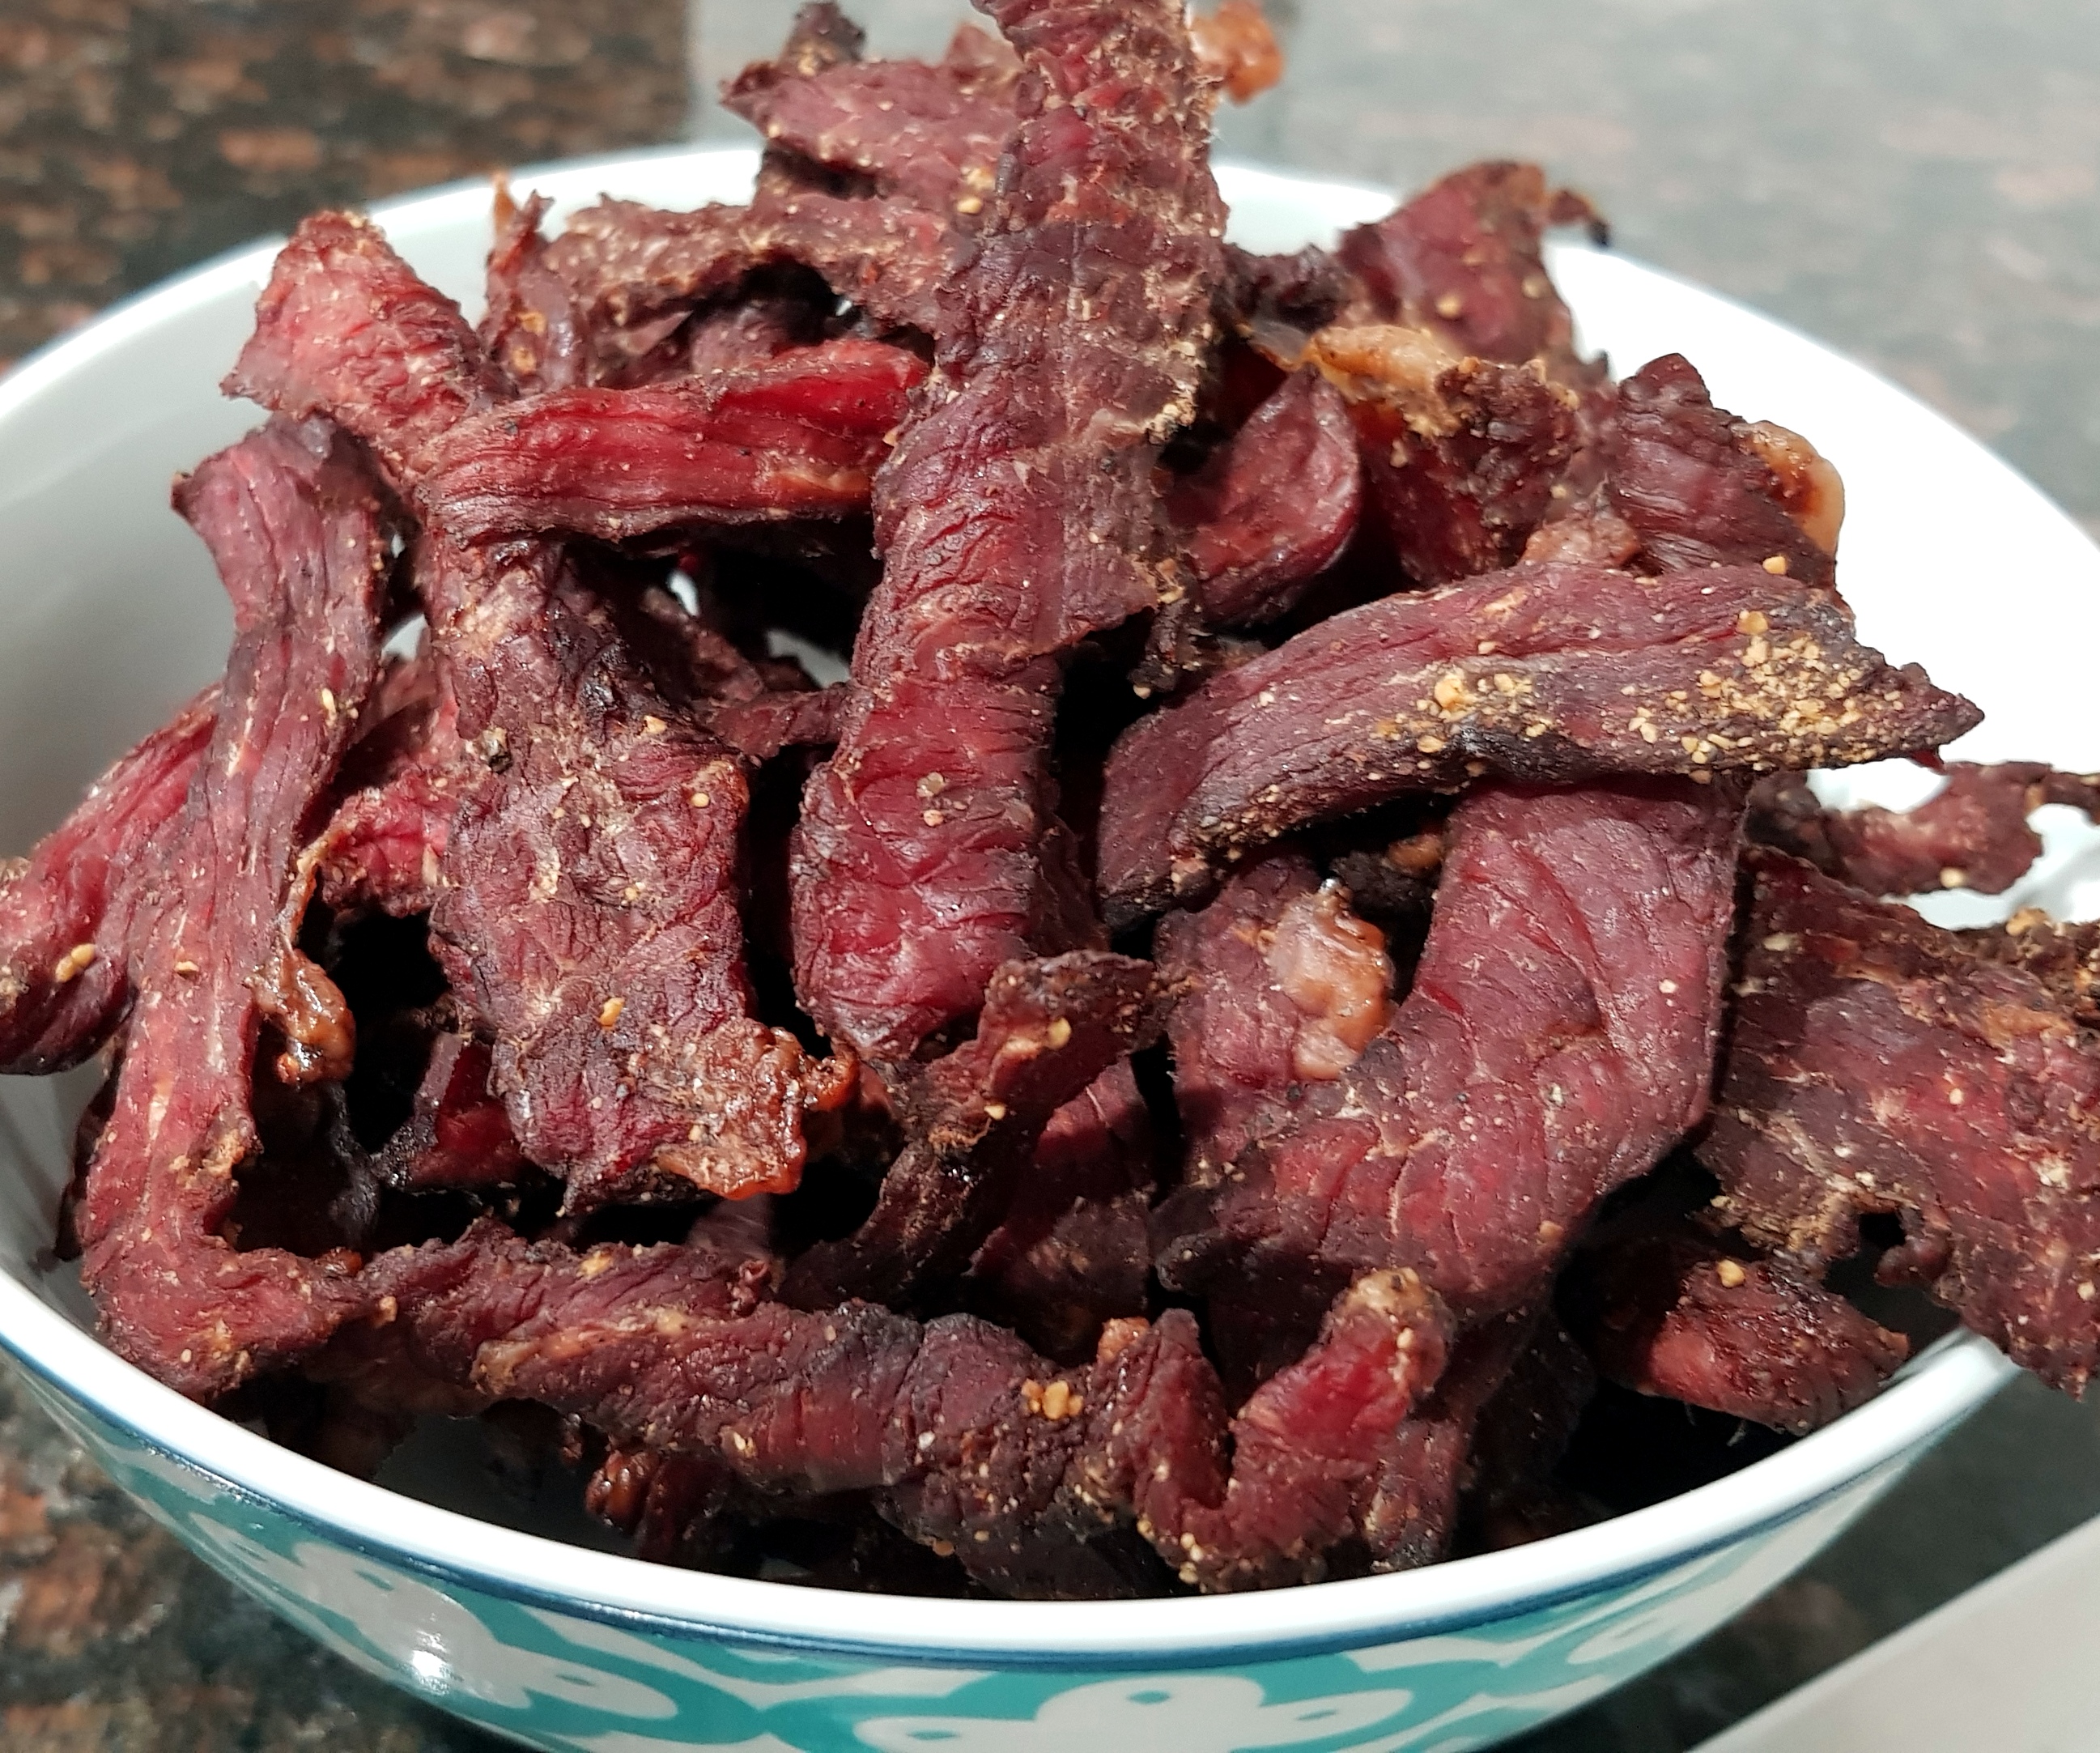
PK’s Beef Jerky #2
I use a couple of different recipes for making beef jerky. This is my second recipe and it uses the same marinading, drying and storing techniques as PK’s Beef Jerky Recipe #1. To that end I am only going to keep this post short.
I am already drooling 🙂
Note: I use corned beef and soy sauce and don’t use much in the way of additional salt. If you are using non-brined cured beef you will need to increase the salt content of the marinade.

Ingredients
- 1.5kg corned beef
- 1 Tbsp black peppercorns, coarsely cracked
- 1 Tbsp dried onion flakes (or onion powder), ground
- 1 tsp table salt
- 1 tsp dried garlic flakes (or garlic powder), ground
- 1/2 cup soy sauce
- 2 Tbsp Worcestershire sauce
- 1/4 tsp liquid smoke
Simply
Combine everything but the beef in a bowl and mix.
Cut the meat into hand length ribbons/strips and submerge in the marinade. Pop the whole lot into the fridge and marinade overnight.
Drain away the marinade, then arrange the strips in your dehydrator. On low or medium heat, thoroughly dry the meat.
I store my beef jerky uncovered in the fridge. This continues the drying process and lets me sneak a piece every time I go in there. 🙂

Enjoy,
PK
Here are some additional preserving food ideas and beef recipes:
Written by
·
-

PK Makes Spaghetti Cacio E Pepe (Cheese And Pepper)
Oh my goodness. This dish is well.. amazing. My head is spinning, I used to have a favourite pasta but now I can’t choose. 🙂
I posted about Spaghetti Aglio e Olio recently and said that upon tasting it ‘I had died and gone to heaven’. So my friend and fellow blogger, Gus, set me a new challenge in this dish.
I looked into many recipes online but you know I am a lazy cook, so I used a cheese that already had peppercorns in it. Meet Calcagno Pecorino With Black Peppercorns. The result is a moreish pasta in an emulsified sauce to die for with the peppercorns and cheese being the headline act.
You will be:
- Preparing the sauce and cheese
- Cooking the pasta
- Coating the pasta
- Serving
You will need:
- Ingredients (feeds 1 hungry adult but scales well):
- ~200g freshly made spaghetti
- 2/3 cup Calcagno Pecorino – You can any aged cheese that has whole black peppercorns added prior to the aging process.
- 1 Tbsp unsalted butter
- A good slug of olive oil
- Freshly cracked black peppercorns to taste
- Equipment:
- Cheese grater/planer
- Chopping board
- Sauce pan
- Fry pan
- Wooden spoon
- Tongs
Preparing the sauce and cheese
- Gently warm the butter and oil until the butter has melted.
- Turn off the hob, letting the remaining heat keep the butter melted but not hot.
- Add some oil to the pasta water and cook the pasta al dente,


Coating the pasta
- Drain the pasta but keep some of the water in the sauce pan.
- Move the spaghetti into the now almost cool fry pan (containing the oil/butter sauce) using the tongs in small batches.
- Add cheese, stir some and repeat.


Serving
This dish needs nothing but a plate and a fork. 🙂


Enjoy,
PK
YOU MIGHT ALSO LIKE
PASTA DISHES
MORE ITALIAN CUISINE
15 MINUTE MEALS
Please consider subscribing to a weekly email summary of our posts or check us out on Facebook @growitcatchitcookit.
[mc4wp_form id=”15771″]
Written by
·
-
PK’s NoRecipe Beef Marinade #1
I experimented with this marinade last weekend and it worked a treat. I hope you try it with different ratios of the ingredients 🙂
Mix together using a wet mixer:
- a slug of lemon juice
- a slug Worcestershire sauce
- a slug of soy sauce
- black peppercorns to taste.
Enjoy,
PK
Related Links:
Please consider subscribing to get a weekly email summary of our posts.
[mc4wp_form id=”15771″]
Written by
·
-
Black Pepper
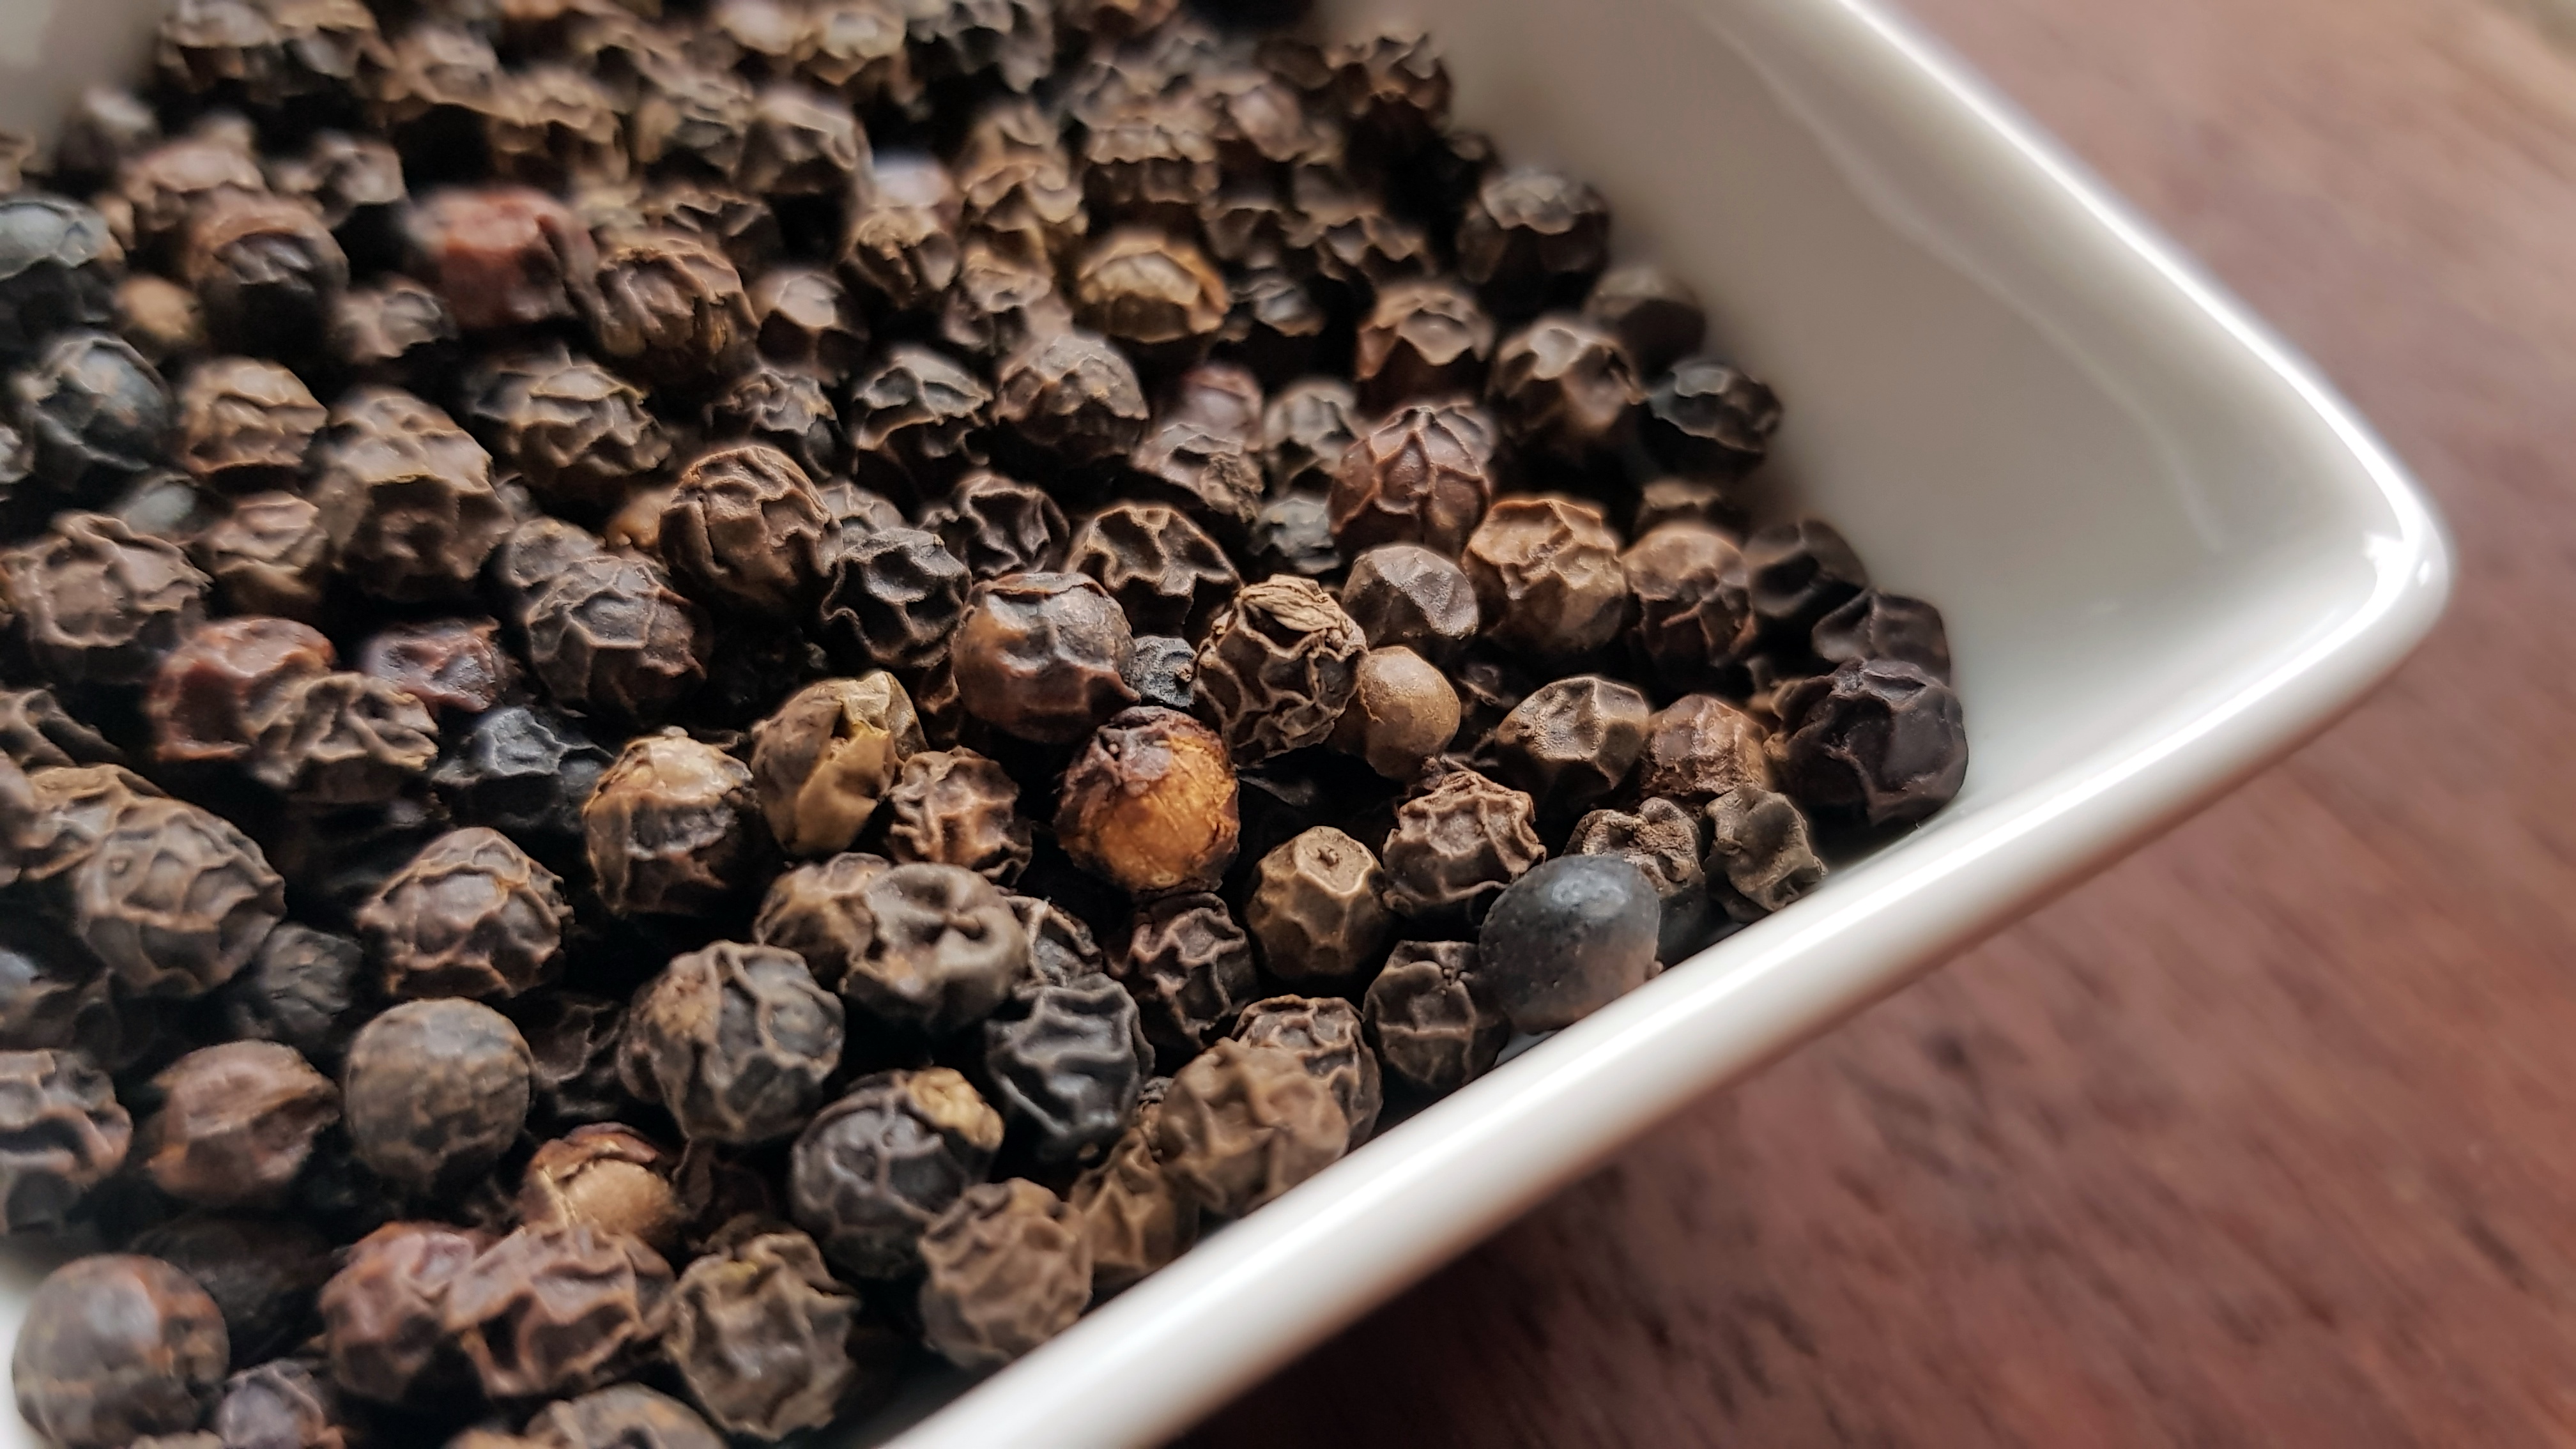
I still can’t believe that a vine grown tropical stone fruit (yes pepper is a stone fruit, who knew?) that built empires a few hundred years ago can now be bought for next to nothing at the local supermarket! Originally from India, this plant is now grown through out much of south east Asia,
The world’s most used spice is also my personal favourite, its sharp taste is different to that of chili but both are used add a spicy flavour to food. It is often paired with salt during cooking and both are commonly supplied alongside most meals.
I use three types of peppercorns (all from the same plant, see picture below, but prepared differently) but in this post I want to talk about black peppercorns as I cook with this the most.
Black peppercorns differ from green and white peppercorns in that they are harvested while still unripe and with their skins still on they are cooked and dried. Their smell is sharp and acrid as is their taste when eaten alone. I always grind my peppercorns as I go to maintain maximum flavour and pungency.
So why cook with black pepper? I am not going to pretend to know why or how but pepper reacts with the flavours in the food itself and also effects our ability to perceive said flavours. Pepper is also given credit for a raft of health benefits from being a digestive to increasing your metabolism and adding to your daily fiber needs.
Pepper vine with drupes still attached:
Related Links:
- see all recipes using black peppercorns here
- see all recipes using pepper here
- see all ingredients here
Written by
·
-

PK’s Mini Chicken Parcels
These little chicken parcels encourage variety and experimentation when it comes to their fillings. They especially lend themselves to using up leftover chicken and those limp vegetables at the back of the fridge.
Your kids are going to love them and I found them really easy to make even though I am a pastry novice :). I even eat them cold the next day at work for a snack.
One sheet of puff pastry makes four small rectangular parcels and you can scale the recipe up easy peasy. I show you how I generally make them below but as I said, mix it up.
You will be:
- Bringing together the ingredients.
- Making the parcels.
- Cooking the parcels.
- Serving.
You will need:
- Ingredients:
- PK’s NoRecipe Garlic Butter
- PK’s NoRecipe Pulled Chicken Breast
- 1 sheet of frozen puff pastry (makes 4 so scale as you need, I used Pampas brand)
- spinach leaves
- corn kernels
- coriander leaves
- ground black peppercorns
- 1 egg (beaten for the glazing and sealing)
- 2 Tbsp water (for the egg mix)
- Equipment:
- a chopping board
- a small sharp knife
- an oven tray or dish
- a basting brush
- a small whisk
- a bowl to beat the egg
Steps:
Bringing together the ingredients
- Defrost your frozen puff pastry sheet and cut it into 4 squares.
- Take the garlic butter out of the fridge.
- Take the pulled chicken out of the fridge.
- Wash and dry the spinach leaves and coriander leaves.
- Cook and cool the corn kernels.
- Whisk the single egg along with the 2 Tbsp water.
- Turn your fan forced oven on to 190°C.
Making the parcels
Now for the fun part but remember that with the fillings, less is more :).
- Spoon a little of the garlic butter into the middle lower half of the square.
- Build up the rest of the fillings in layers.
- Brush the egg mix on all four sides of the square to make it stick.
- Then fold the square over to make a pillow shape.
- Press the edges with you finger to seal the pillow and then brush more of the egg mixture over the whole thing.
- Add some air holes with your knife.
- Put the parcels in your oven tray and refrigerate if required by your meal’s timing.
Filling the parcels:
Add some air holes and and few slices with the knife to make them look nice:

Cooking the parcels:
- Put the oven tray into your preheated 190°C fan forced oven and cook until golden brown (approximately 40 minutes).
- Slice one and eat it before anyone else gets one. If you get caught say you are just making sure everything is cooked through :).

Serving
Here I simply served the parcels, about 4 per hungry adult, with some more greens and a glass of white wine.

Enjoy,
PK
Written by
·
-
PK’s Chicken Puff Pastry Parcels
These little chicken parcels encourage variety and experimentation when it comes to their fillings. They especially lend themselves to using up leftover chicken and those limp vegetables at the back of the fridge.
Your kids are going to love them and I found them really easy to make even though I am a pastry novice. I even eat them cold the next day at work for a snack.
One sheet of puff pastry makes four small rectangular parcels and you can scale the recipe up easy peasy. I’ll show you how I generally make them below but as I said, mix it up. 🙂
You will be:
- Bringing together the ingredients.
- Making the parcels.
- Cooking the parcels.
- Serving.
You will need:
- Ingredients (makes 4 small parcels):
- PK’s NoRecipe Garlic Butter
- PK’s Pulled Chicken Breast FoodHack
- 1 sheet of frozen puff pastry (I used Pampas brand)
- Small amounts of:
- spinach leaves
- corn kernels
- coriander leaves
- ground black peppercorns
- 1 chicken egg (beaten for the glazing and sealing)
- 2 Tbsp water (for the egg mix)
- Equipment:
- a chopping board
- a small sharp knife
- an oven tray or dish
- a basting brush
- a small whisk
- a bowl to beat the egg
Bringing together the ingredients
- Defrost your frozen puff pastry sheet and cut it into 4 squares.
- Take the garlic butter out of the fridge.
- Take the pulled chicken out of the fridge.
- Wash and dry the spinach leaves and coriander leaves.
- Cook and cool the corn kernels.
- Whisk the single egg along with the 2 Tbsp water.
- Turn your fan forced oven on to 190°C.
Making the parcels
Now for the fun part but remember that with the fillings, less is more :).
- Spoon a little of the garlic butter into the middle lower half of the square.
- Build up the rest of the fillings in layers.
- Brush the egg mix on all four sides of the square to make it stick.
- Then fold the square over to make a pillow shape.
- Press the edges with you finger to seal the pillow and then brush more of the egg mixture over the whole thing.
- Add some air holes with your knife.
- Put the parcels in your oven tray and refrigerate if required by your meal’s timing.
Filling the parcels:
Add some air holes and and few slices with the knife to make them look nice:

Cooking the parcels:
- Put the oven tray into your preheated 190°C fan forced oven and cook until golden brown (approximately 40 minutes).
- Slice one and eat it before anyone else gets one. If you get caught say you are just making sure everything is cooked through :).

Serving
Here I simply served the parcels, about 4 per hungry adult, with some more greens and a glass of white wine.

Enjoy,
PK
YOU MIGHT ALSO LIKE
MORE KID FRIENDLY MEALS
OUR OTHER RECIPES STARRING CHICKEN
Please consider subscribing to a weekly email summary of our posts or check us out on Facebook @growitcatchitcookit.
[mc4wp_form id=”15771″]
- see more kid friendly meals here
Written by
·
-

DryStuff: Chicken Dry Rub #1
I think a natural progression from making dry masalas to make curry pastes is making dry rubs for roasting meat. This is the first one I have ever made and I used on an oven roast chicken along with this basting sauce as inspired by http://noblepig.com/.
My hat off to the people over at noblepig.com you are doing amazing work :).
You will need:
- Ingredients:
- 1 Tbsp ground rock salt
- 1/4 tsp ground black peppercorns
- 1 tsp ground paprika (I used smoked)
- 1/4 tsp onion powder
- 1/4 tsp kashmiri chili powder
- 1/4 tsp tumeric powder
- 1/4 tsp cumin powder
- 1/4 tsp beetroot powder (for colour, I make my own here)
- 1/8 tsp garlic powder
- Equipment:
- a bowl for the dry rub
- a fork for mixing
Steps:
- Bring all the ingredients together.
- Get distracted by how amazing it looks and smells.
- Mix everything together.

Enjoy,
PK
Written by
·
- Ingredients:
-
Chicken Dry Rub #1
This is the first attempt at a dry rub for roast chicken.
I am pretty pleased with the taste and just look at the colours. 🙂
Please see PK’s Dry Rub Split Roast Chicken where I tested it out for the first time.

You will need:
- Ingredients:
- 1 Tbsp ground rock salt
- 1/4 tsp ground black peppercorns
- 1 tsp ground paprika (I used smoked)
- 1/4 tsp onion powder
- 1/4 tsp kashmiri chili powder
- 1/4 tsp tumeric powder
- 1/4 tsp cumin powder
- 1/4 tsp beetroot powder (for colour, I make my own here)
- 1/8 tsp garlic powder
Steps:
- Bring all the ingredients together.
- Get distracted by how amazing it looks and smells.
- Mix everything together.
- Rub it all over the chicken including the cavity.

Enjoy,
PK
Written by
·
- Ingredients:
-
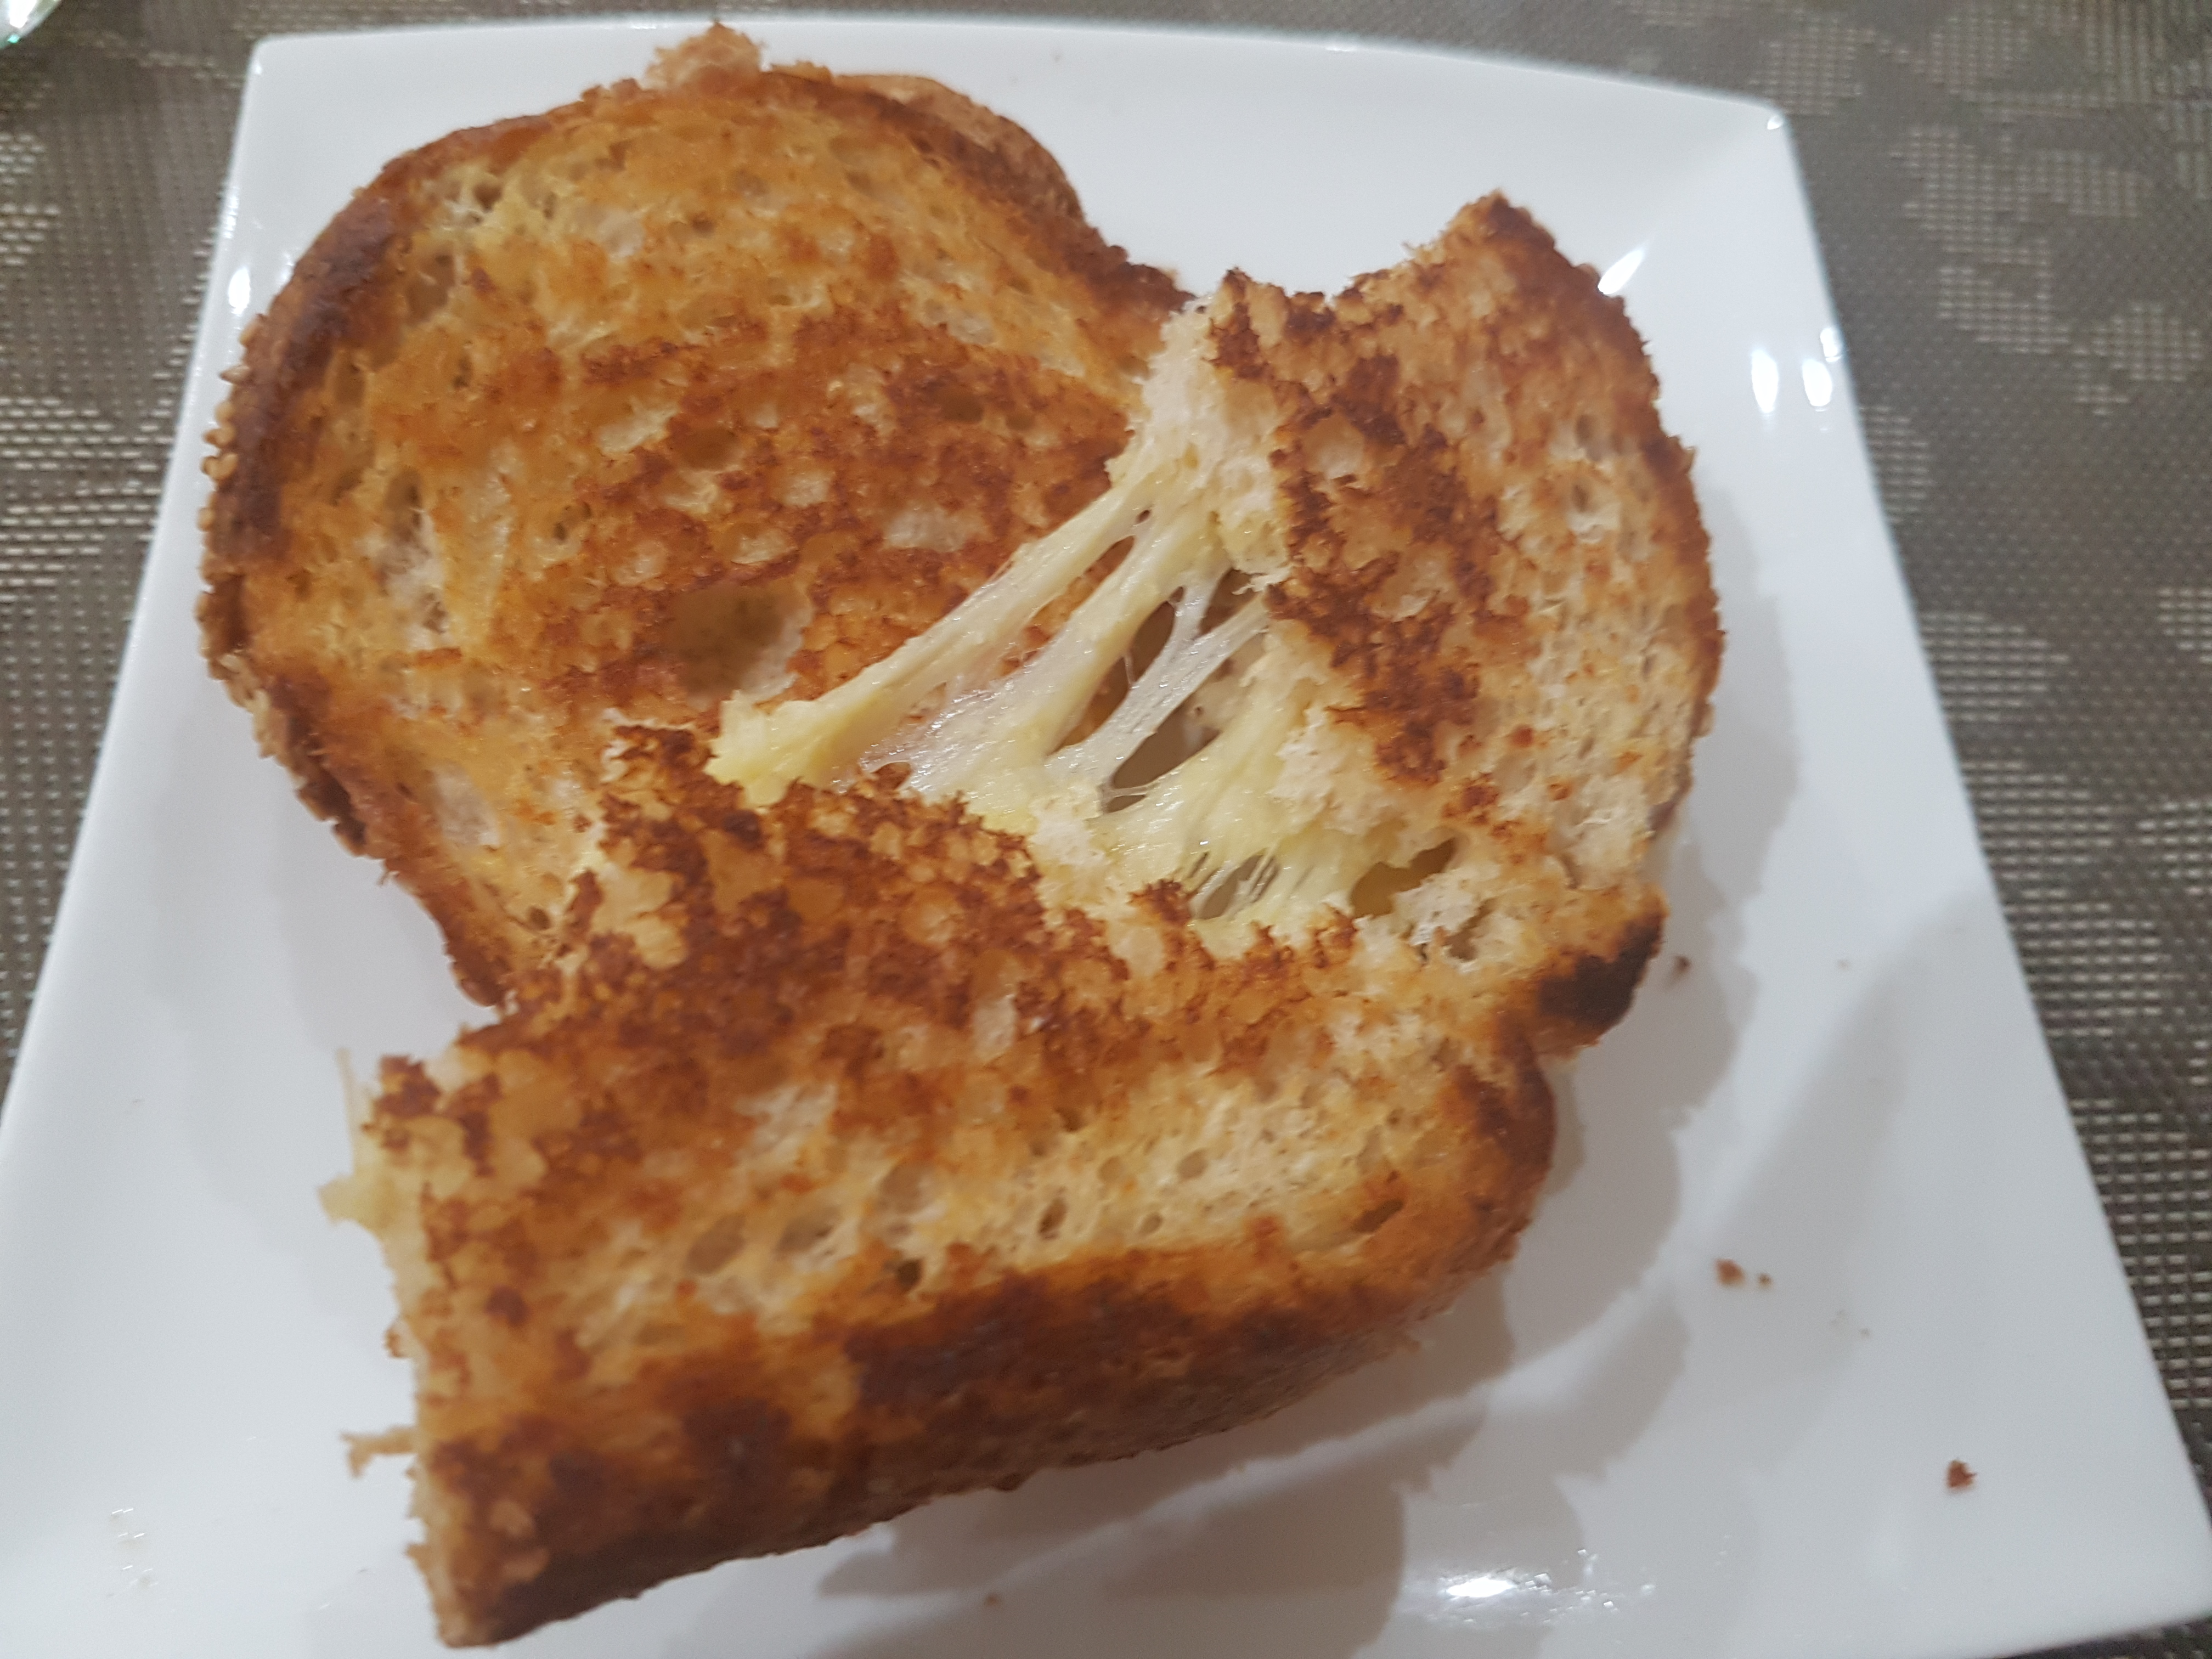
Welchy’s Ultimate Fry Pan Cheese Toastie
As a kid, the ultimate treat was one of Mum’s cheese toasted sandwiches. This wasn’t just your run of the mill, use-a-toaster type of toasted sandwich though. Mum perfected the Ultimate Cheese Toastie in the fry-pan! Buttery, toasted, crunchy goodness on the outside with superbly melted stringy cheese in the middle…served with you know…a heaping side of motherly love.
Look how simple the ingredient list is:

First off, I’d start with a blend of cheeses. I chose Cheddar, Kraft’s 4 cheese blend and Parmesan. Pick any cheeses you like though, Gruyere, Mozzerella, Havarti, anything that melts well. I cut up some fresh bread and butter and we’re ready to go!
Ingredients/Utensils
- Fresh bread
- Butter
- Cheeses (a few slices/enough for a sandwich) – Cheddar, American, Gruyere, Mozzarella, Parmesan, Four Cheese mix, whichever you prefer/have handy.
- Frying pan
Method
1. Butter both sides of the bread. Put a dollop of butter in the pan too for extra buttery crunch!

2. Place one side of the bread into the pan. Layer with your selected cheeses. Allow the bread to fry in the pan, usually about 30 seconds. Use a spatula to lift the corner and check if it’s browning. Once it starts to brown, add the lid of the sandwich and flip!

3. Fry the second side for 30 seconds to 1 minute, or until nicely browned.

And you are done!
This recipe isn’t much, it’s not difficult, and it can be made fairly quickly once you get the hang of it. Great to eat wrapped in some parchment paper as you race out the door, or as I prefer, at the table with a glass of ice cold milk.
Love Welchy,
Here are some more snacks and more Welchy posts”
Written by
·
-

Rick Stein’s Garam Masala
I use Rick Stein’s garam masala in so many dishes it isn’t funny. This uniquely south asian spice blend is earthy in taste and aroma. The blend is so verstile though and enhances the dishes of many cuisines.
Sure, you could buy a garam masala from the shops. MasterFoods makes a really good one that I grew up with but making your own means that the spices haven’t lost their aroma and you get to personalise the blend.
Rick Stein says “Even more important than the mix is having them freshly roasted and then ground” and of course, he’s right. It is a bit of extra effort but a pleasurable experience. The resulting spice mix lasts for months in an airtight container.
Steps:
You will need:
Roast the whole spices
Pop all the spices (except the nutmeg) in a hot pan and keep them moving the whole time. Safe to say that if the smoke alarm goes off, you have dry roasted them too long or too high :).
Experiment a bit, with the goal being more the release of the spices’ aromas in my opinion, rather than a change in their appearance.
Mill the spices
Once cooled, transfer everything to your blender or mortar. Grate the nutmeg (or like me use shop bought ground nutmeg, oops) separately and to the mill. Run the mill in quick bursts until you get the consistency you like. Then store in an airtight container.
For more Rick Stein recipes click here.
Enjoy,
PK
Written by
·