Tag: snacks
-

KT’s Potato Wedges
KT has a full proof method for making potato wedges and she is going to share it with us.
Simply:
Cut the potatoes into wedge shapes. Peel them or not 🙂
Preheat your oven to 240C.
Drizzle some olive oil (be as sparing as you like) and sprinkle with salt and pepper.

Cook for 45 minutes to an hour.

Serving
Wedges go with almost everything. Add them to meat and vegetables or simply serve them with dipping sauces.

KT
Here are some more potato dishes and posts by KT:
Written by
·
-

Home-made Tater Tots Or Potato Gems
I love making tater tots almost as much as I do eating them. They make for great party food along with your favourite home-made dipping sauces. 🙂

Make them at home (instead of frozen from the shops) with your choice of seasonings knowing they contain only the best of ingredients.
This is one of those recipes where you don’t measure anything. It really depends on how many potatoes you are using. These you finely grate (we are making round potato fritters really) into a bowl.
You then sprinkle some flour evenly over the surface of the potatoes and mix everything together. That is the base mix and if it feels too wet to form into small balls you can add a bit more flour.

Now you add seasoning. I like small amounts of sweet paprika, parsley, italian herbs and garlic powder. I wonder what mix you will use.
They freeze well by the way, so make them in batches.
When you are happy with the seasoning and consistency, take small amounts of the mix and roll them by hand in to small balls. Pop the trays into the fridge until you are ready to cook them.
Now is also a perfect time to freeze them for later.

Bring a pan of oil to a gentle rolling boil.
Add a few tater tots to the oil and fry until they are golden brown. Then remove them to some paper towel to drain.

Serving
Serve them hot with a selection of dipping sauces.

Enjoy,
PK
Here are some more potato recipes and easy to prepare meals.
Written by
·
-
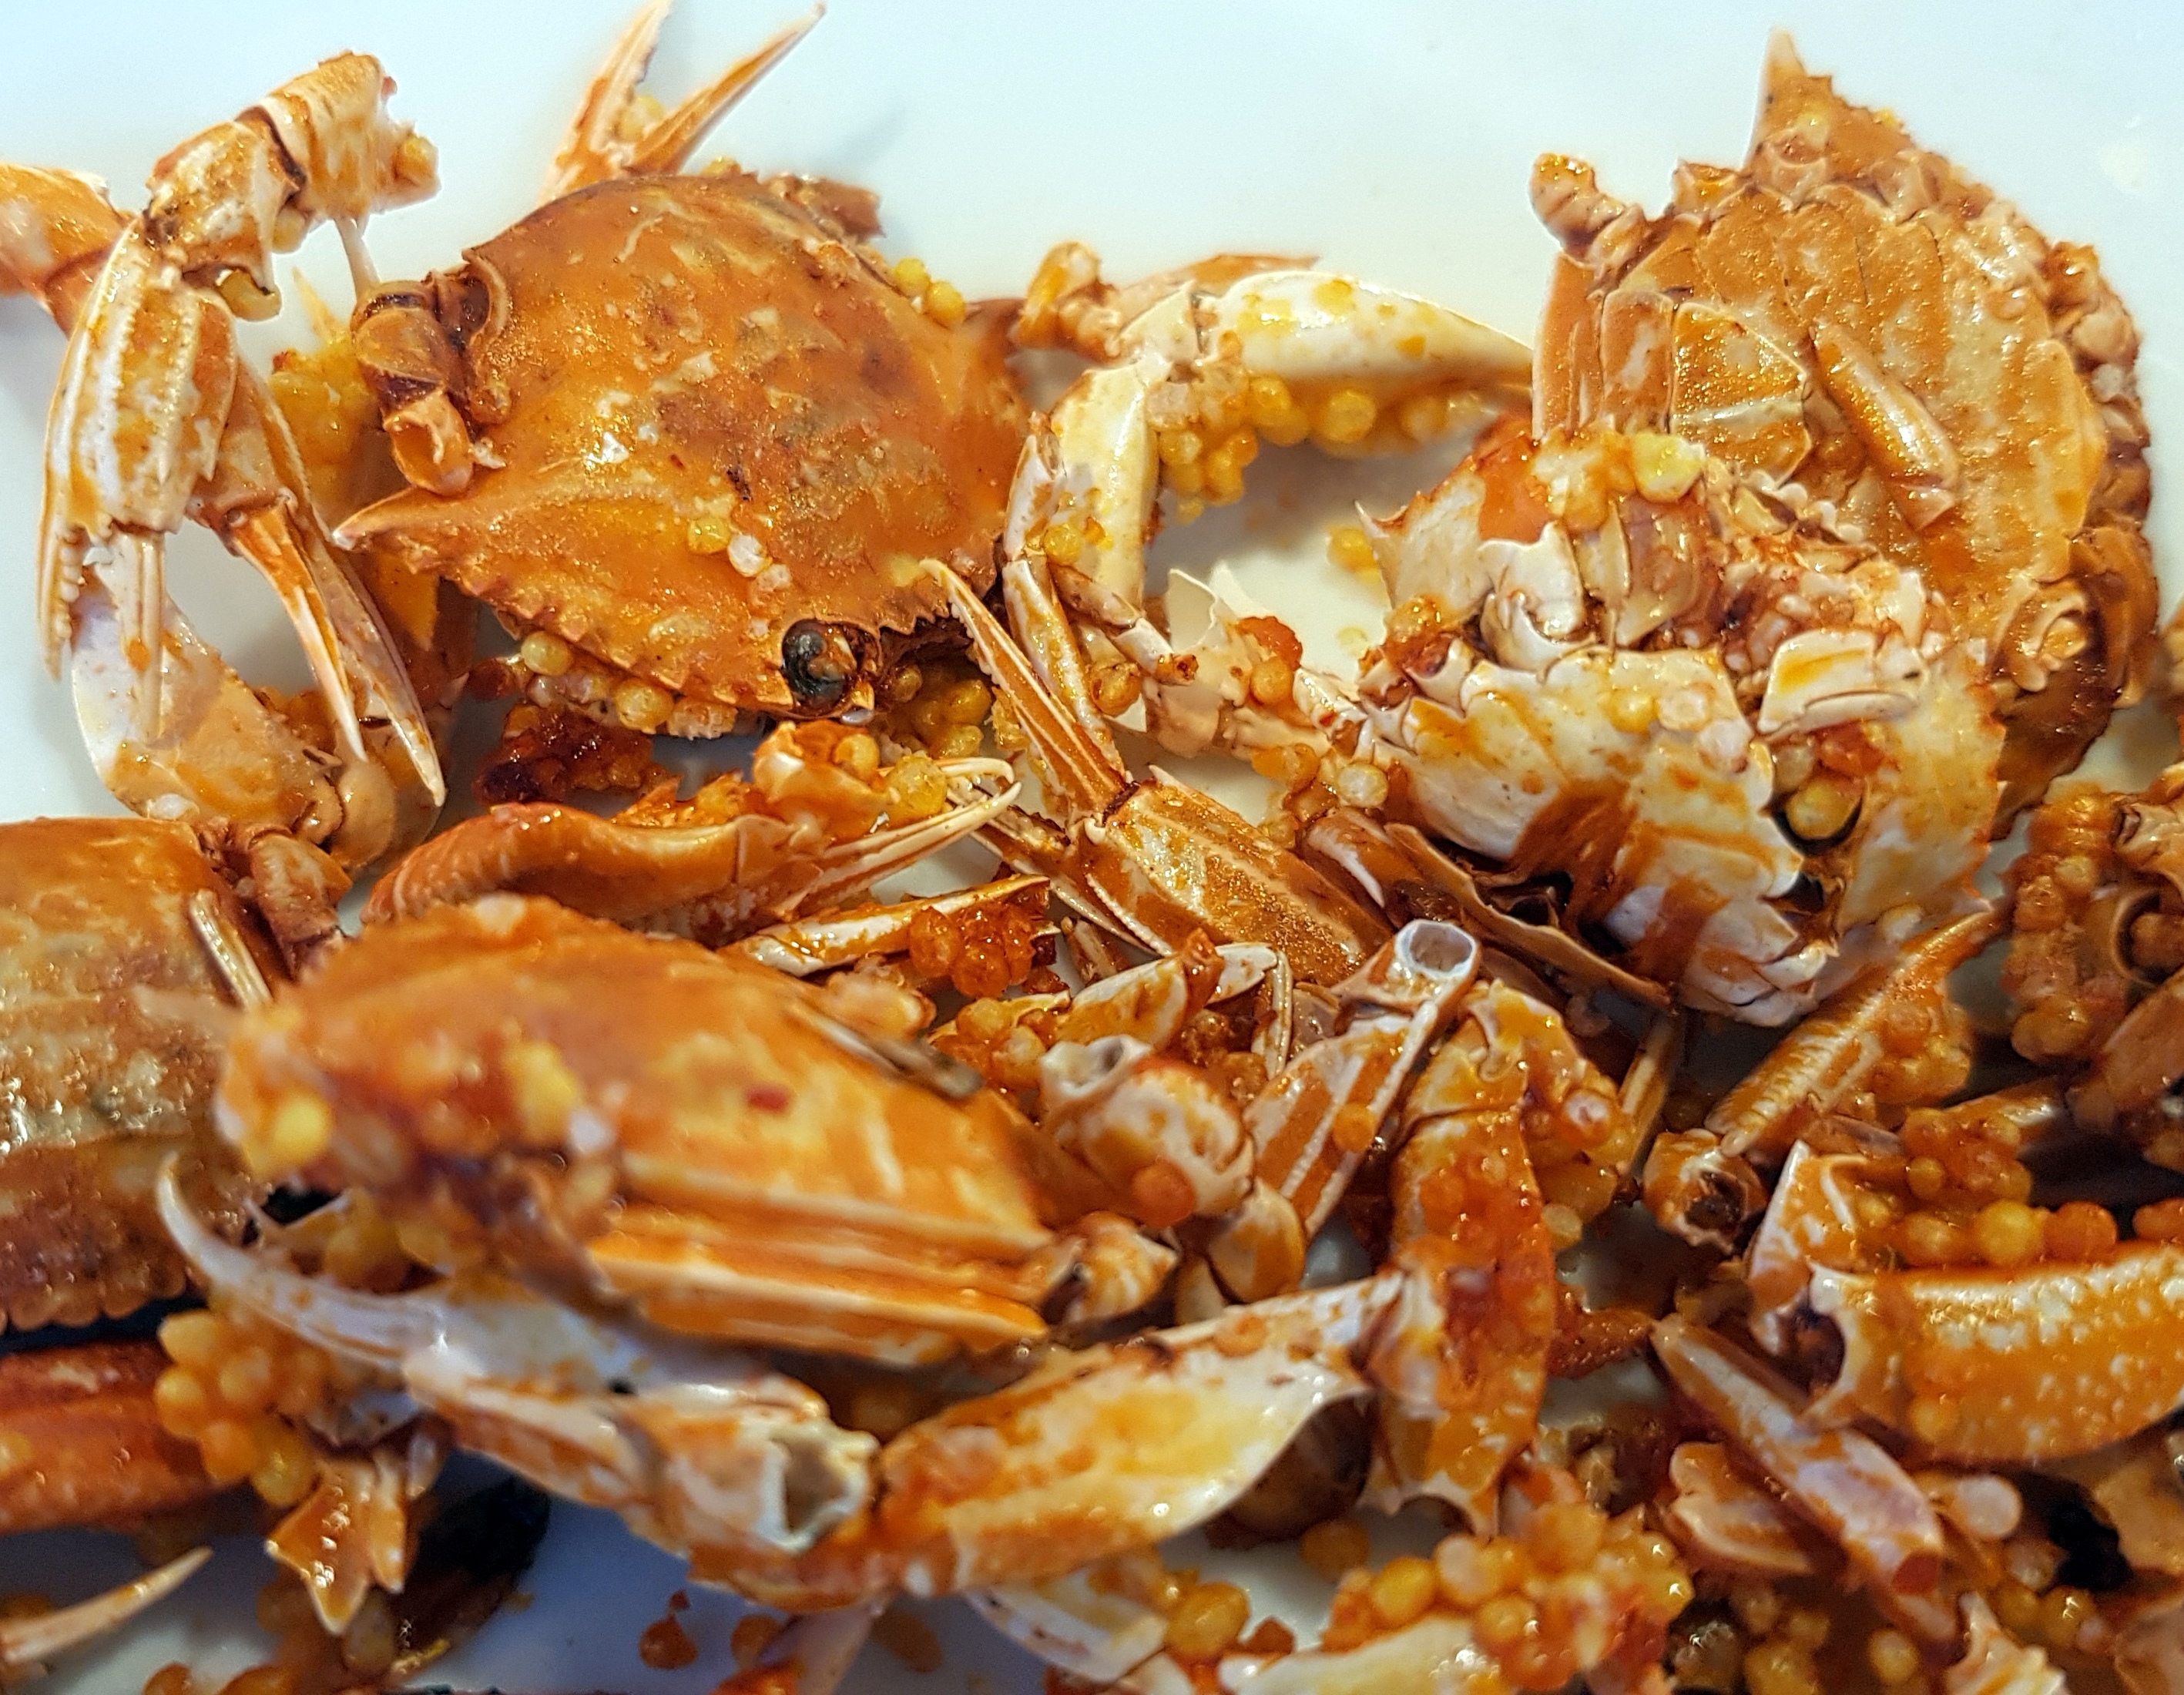
Dried Crab Snack: Tamagogani
Tamagogani, a popular Japanese snack, are dried and seasoned little hermit crabs.
You just know I had to try one when a friend of mine brought some back after being in Japan for a holiday. I found them overpowering fishy and with a curious sweet finish.

I have since read that the best way to eat these is by dipping them in soy sauce and then drinking them down with lots of beer.
Enjoy,
PK
YOU MIGHT ALSO LIKE
JAPANESE CUISINE
Please consider subscribing to a weekly email summary of our posts or check us out on Facebook @growitcatchitcookit.
[mc4wp_form id=”15771″]
Written by
·
-
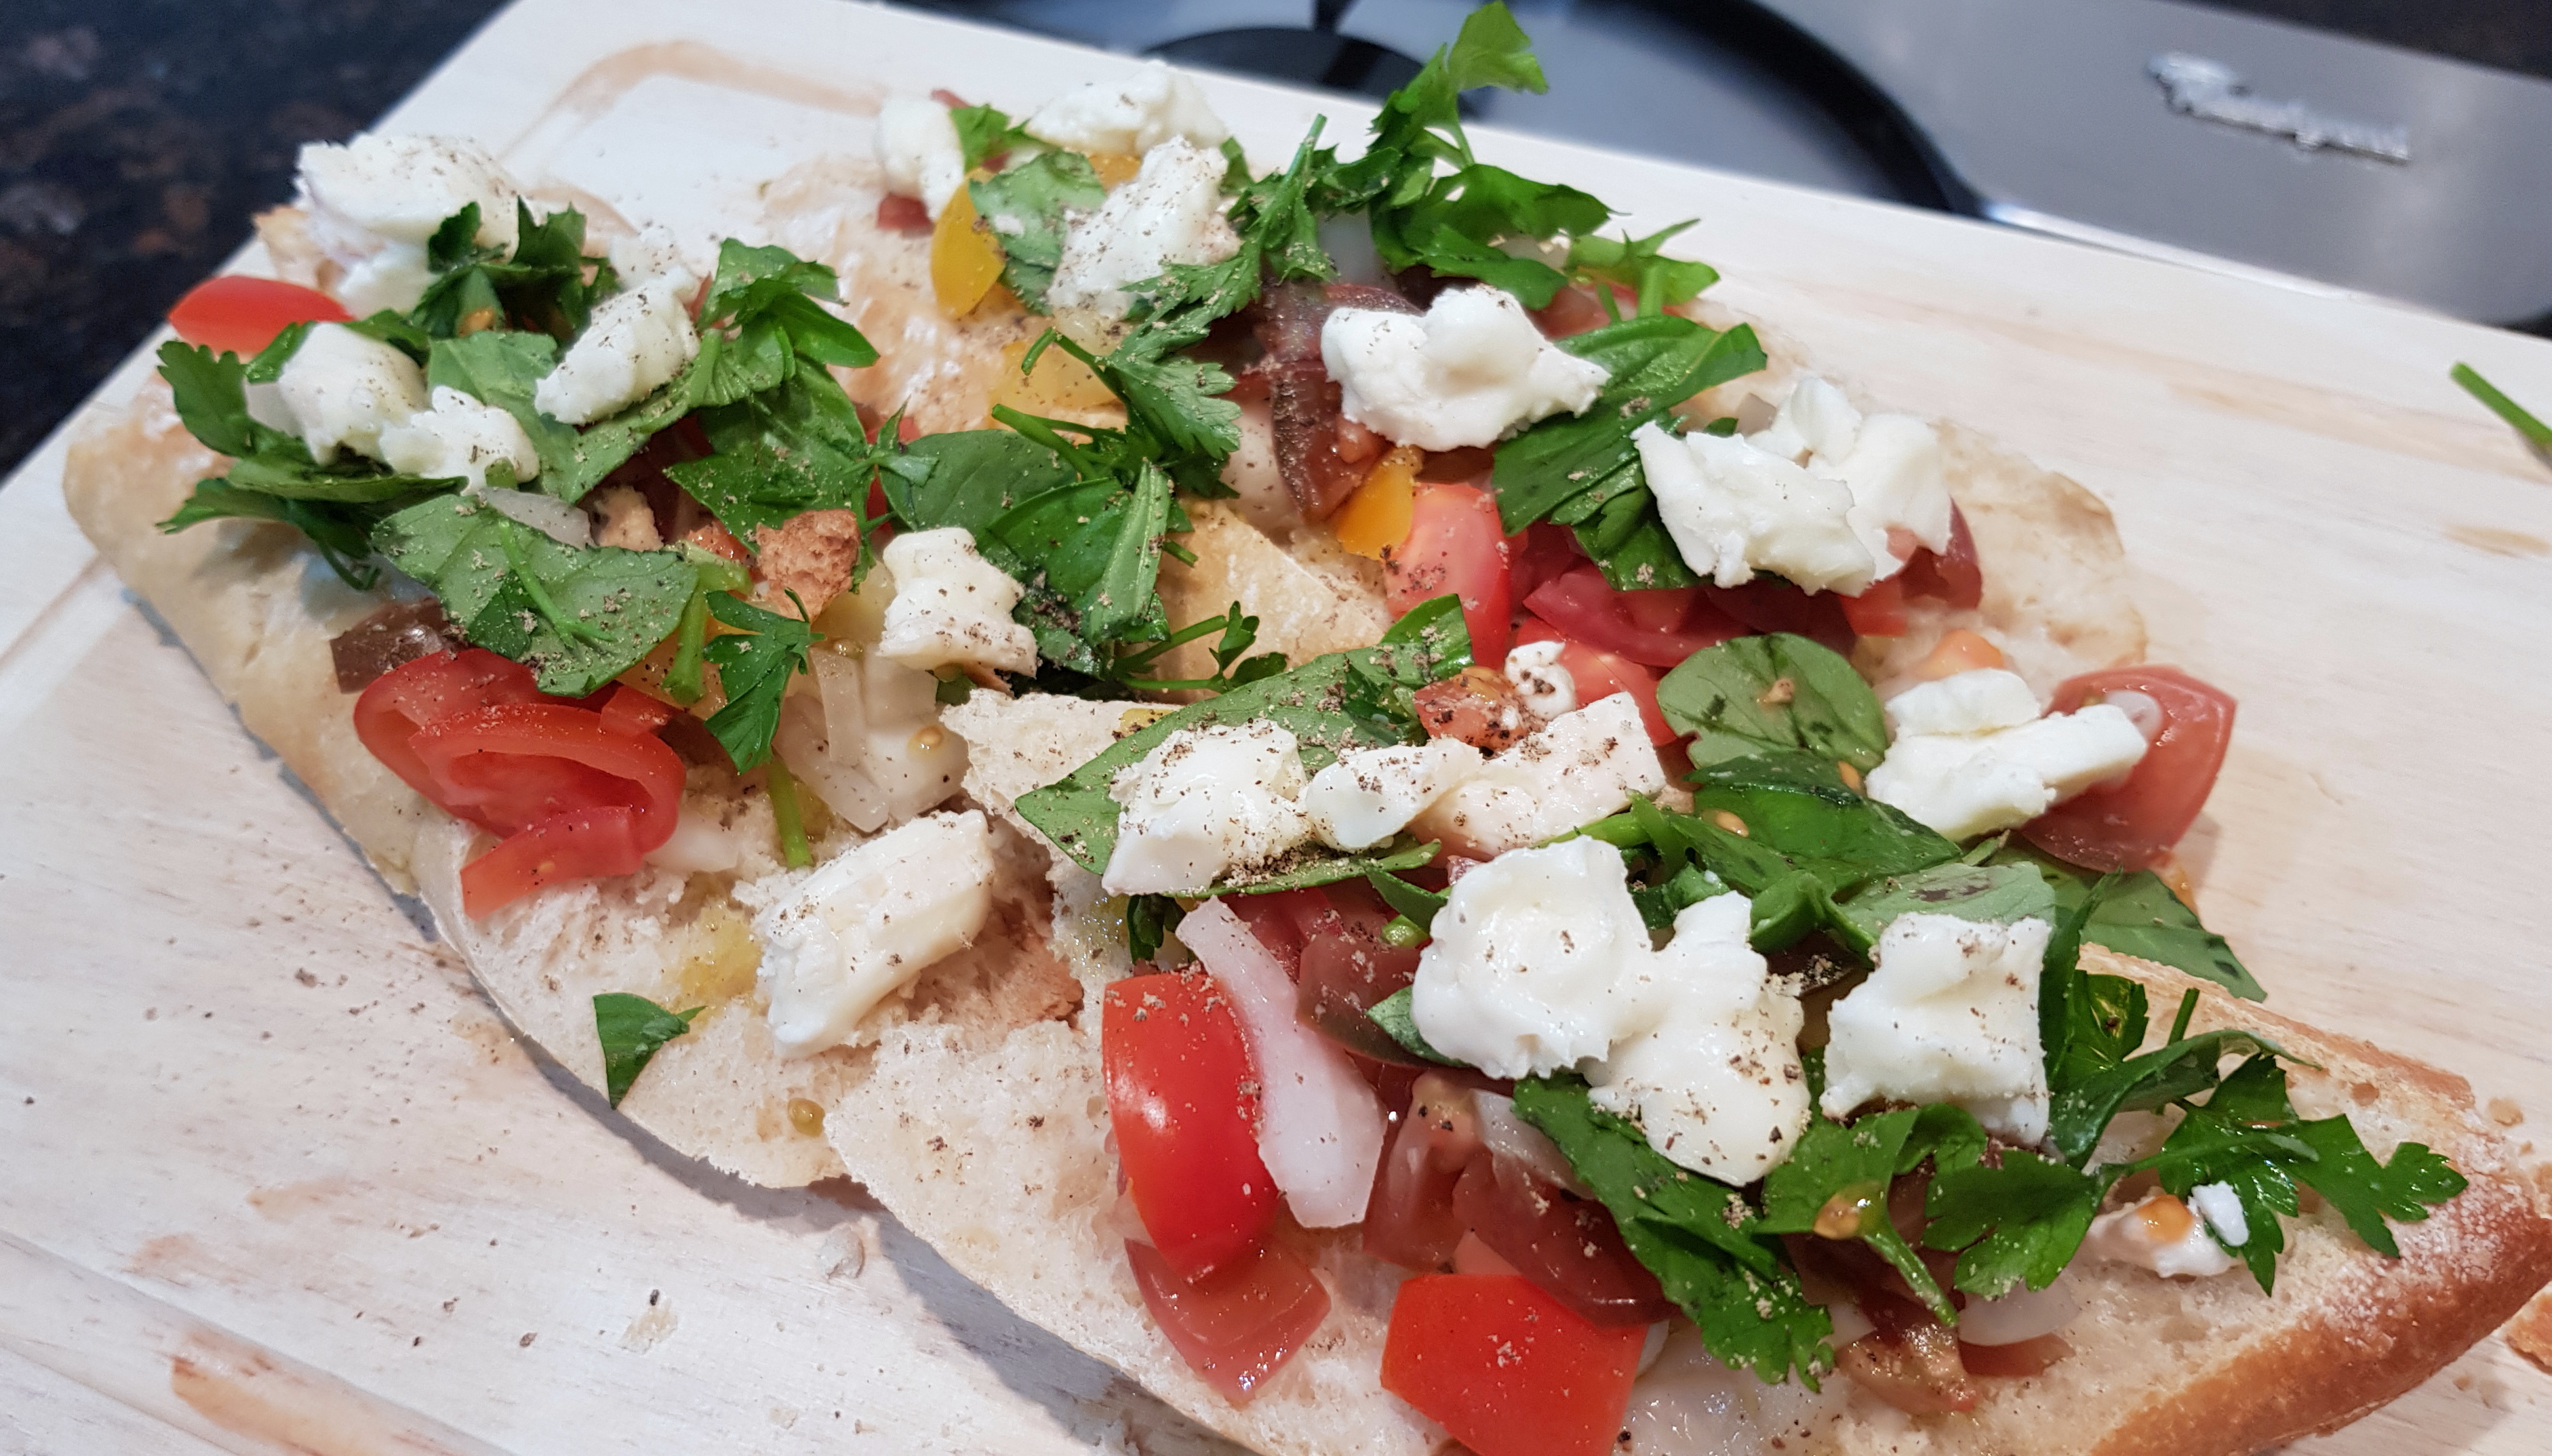
PK’S Bruschetta With Tomato And Cheese Antipasto
In Australia we tend to think of Bruschetta (an Italian antipasto) as being bread covered with tomatoes. Whilst tomatoes are often involved, Bruschetta is the garlic and olive oil rubbed grilled bread itself. You can then top it with a wide range of meats and vegetables.
This is my NoRecipe lazy way of making Bruschetta topped with tomatoes, basil, parsley, flash pickled onion and cheese. I have used an amazing Italian washed-rind soft cheese called Taleggio (Mozzarella di Bufala would go a treat too) and red, yellow and purple cherry tomatoes.
Simply
- Earlier in the day to give it time to work, dice the brown onion and put it in a bowl of vinegar (I used apple cider vinegar and the method is here).
- Rough chop the tomatoes, basil and parsley.
- Drain the onions and mix them into the chopped ingredients.
- Lightly grill the bread and smear with garlic infused olive oil.
- Cover the bread with the the chopped ingredients and slices of cheese.


Enjoy,
PK
YOU MIGHT ALSO LIKE
ITALIAN CUISINE
ANTIPASTO
MORE NORECIPE GOODNESS
Please consider subscribing to a weekly email summary of our posts or check us out on Facebook @growitcatchitcookit.
[mc4wp_form id=”15771″]
Written by
·
-
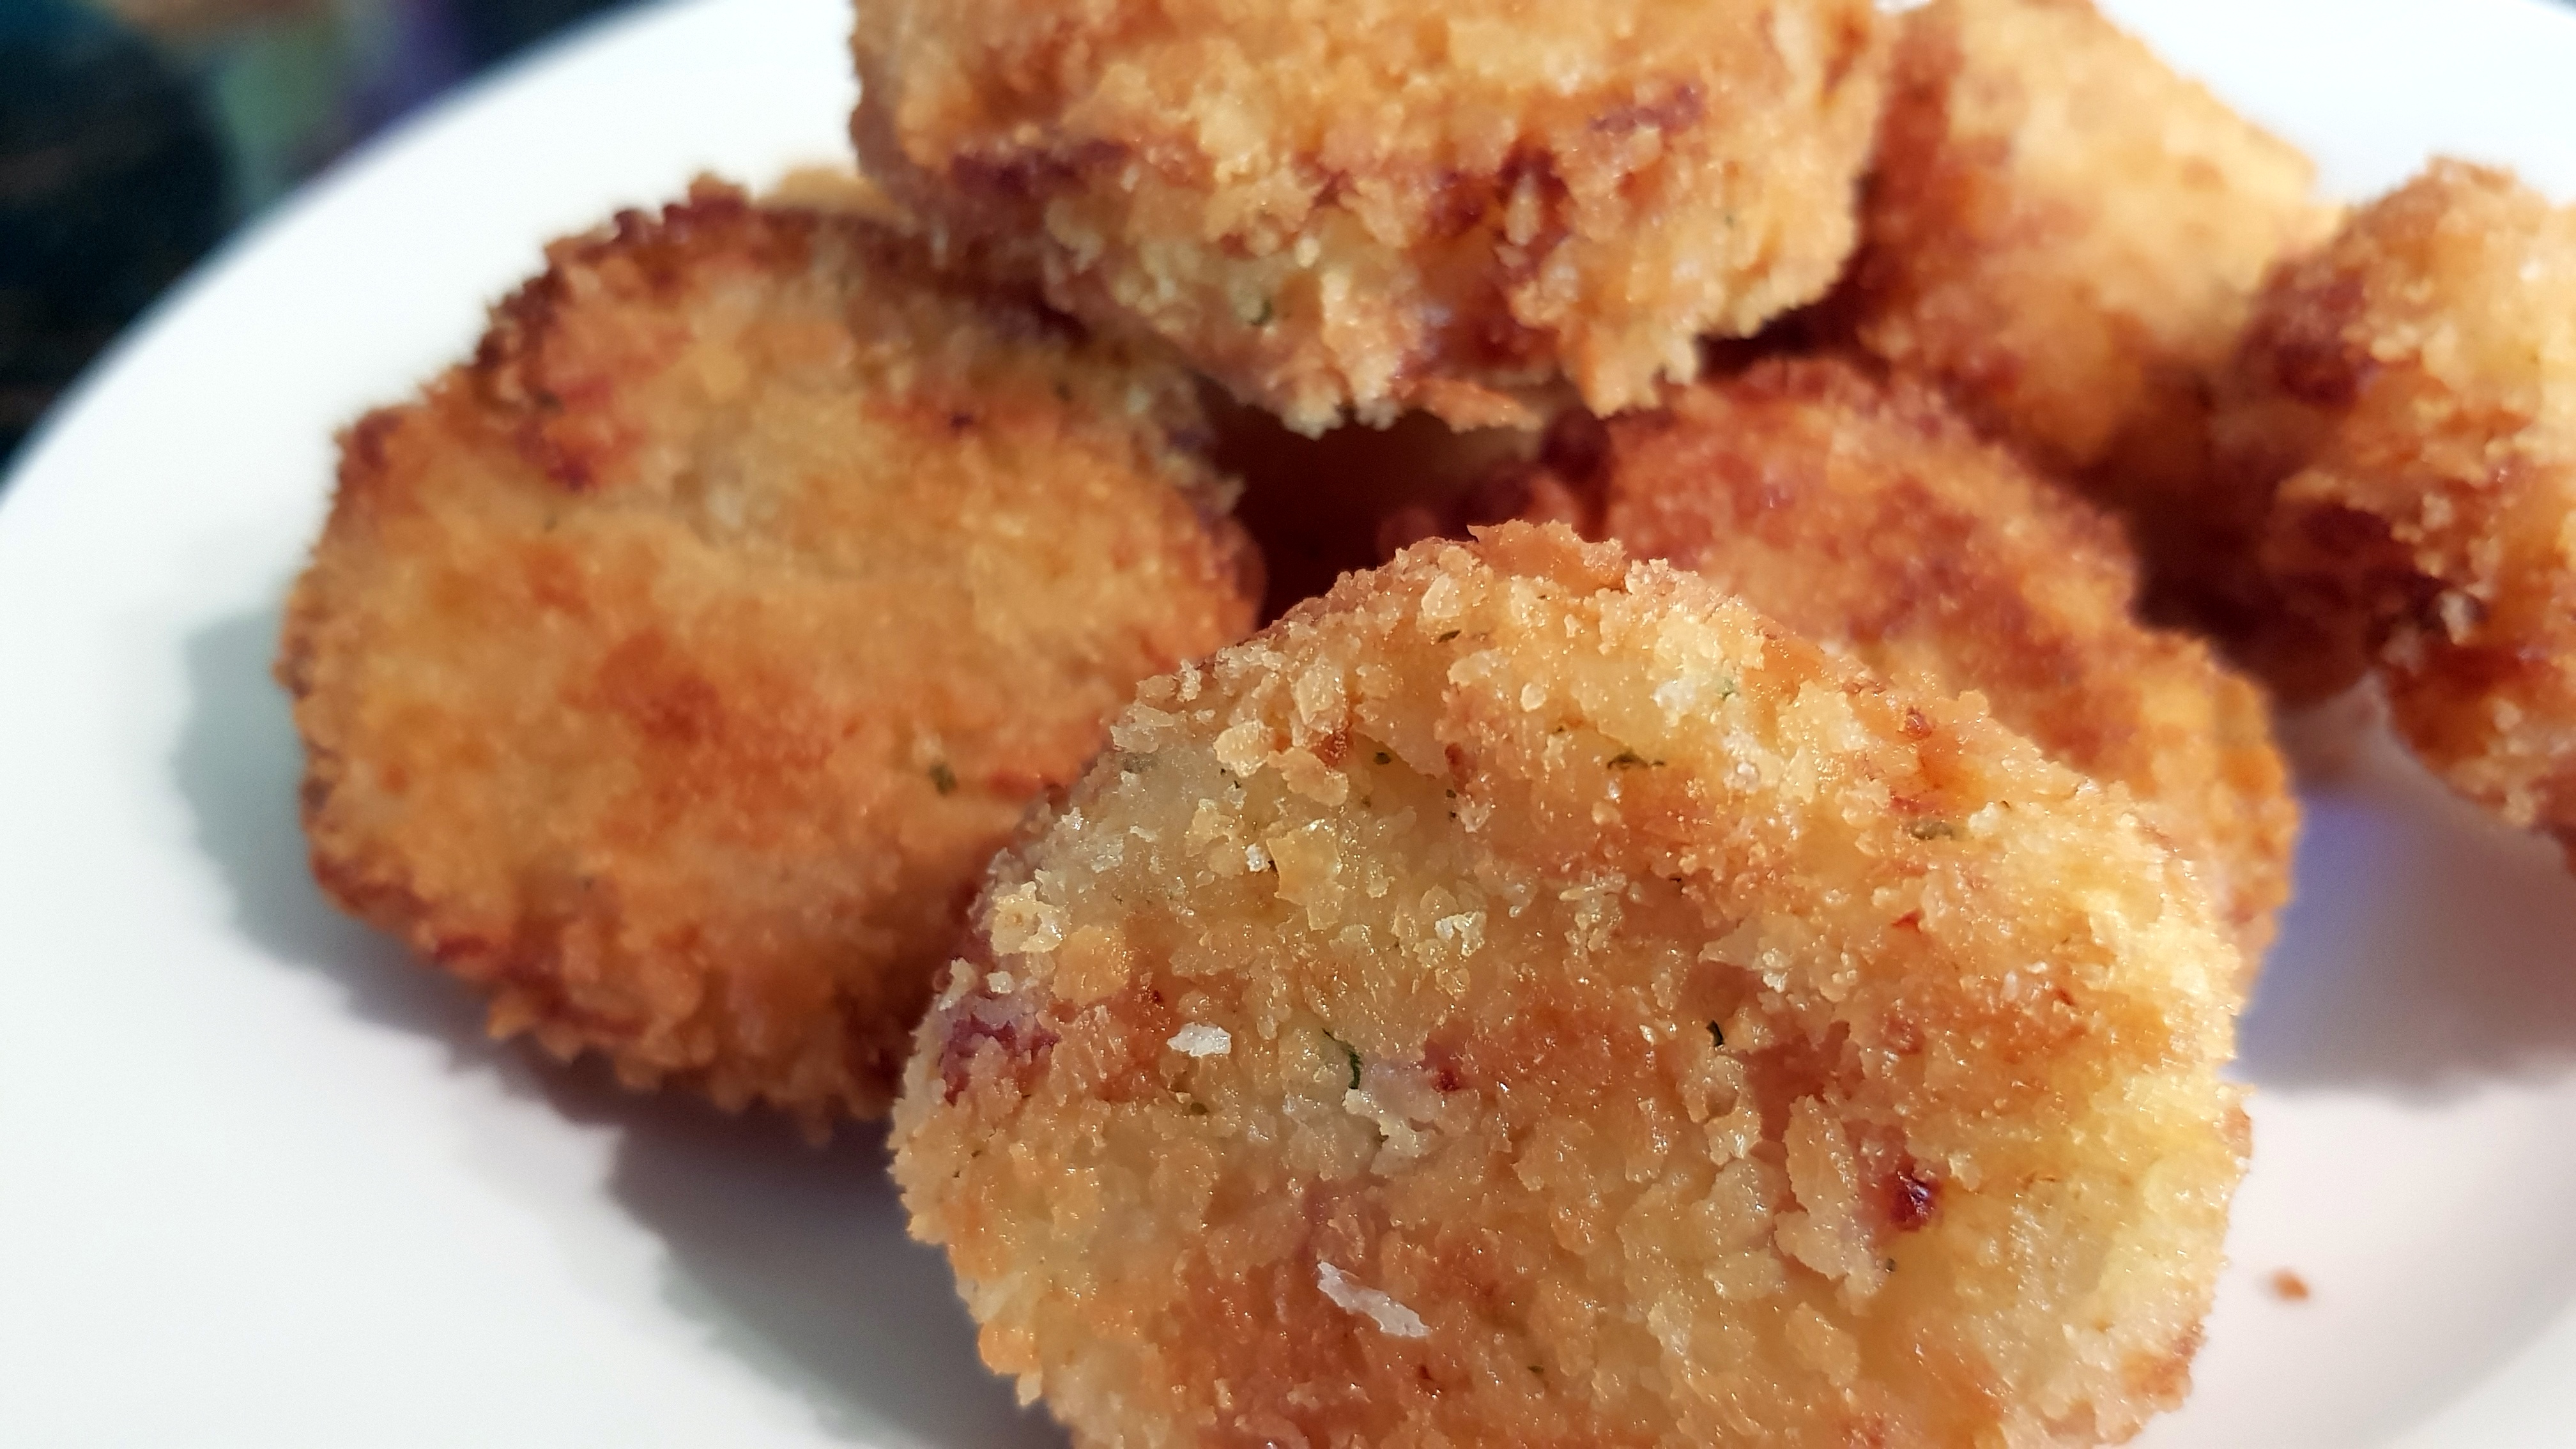
PK’s Potato And Bacon Tater Tots: Did Someone Say Panko?
I made these little bacon and potato tots for my young ones the other day and they demolished the lot. Not only was that a great testimonial but they are easy and fun to make too.

Hot Tips:
- Make them in multiple batches as they freeze very well.
- You can spray them sparingly with oil and bake them if you prefer.
You will be:
- Making the mash
- Making the tots
- Cooking the tots
- Serving
You will need:
- Ingredients:
- 4 cups potato and bacon mash
- 2 chicken eggs
- 1/2 cup plain white flour
- Enough panko flakes to coat the tots (bread crumbs will do but the result will not be as light and fluffy)
- herbs and spices to taste (I used some of my home-made Dried Garlic and cracked pepper)
- enough peanut oil for shallow frying
- Equipment:
- 1 chef’s knife
- 1 chopping board
- 1 potato peeler
- 1 potato masher
- 1 deep fry pan
Making the mash
- Make your mashed potato (sans any milk or butter), slice the bacon (I used short-cut bacon) and mix everything together (use your own ratios).


Making the tots
- Whisk the two chicken eggs and add to the mash.
- Add the 1/2 cup of plain white flour to the mash and gently but thoroughly mix.
- Make little round balls with the mash mix and then roll them in the panko crumbs.
- Store any surplus tots on baking paper and freeze for next time (I use a multi layered container for easy splitting and thawing of the right amount for dinner).

Cooking the tots
- Heat a shallow amount of peanut oil in a deep pan.
- Cook the tots in small batches, turning mid way, until golden brown and the drain them on paper towel or a rack.


Serving
Serve them anyway you or your young ones will eat them. Personally I like a bit of tomato sauce and sour cream. You might even like to try my Home-made Creamy Aioli.

Enjoy,
PK
YOU MIGHT ALSO LIKE
MORE POTATO DISHES
MORE KID FRIENDLY MEALS
Please consider subscribing to a weekly email summary of our posts or check us out on Facebook @growitcatchitcookit.
[mc4wp_form id=”15771″]
Written by
·
-

Beetroot Powder
I looked everywhere and couldn’t find the beetroot powder in the shops that I needed for a butter chicken. I was in my local grocery store looking for it and about to give up when on the way out I saw some fresh beetroot.
So I made my own dried beetroot to get the powder and along the way got lots of yummy beetroot crisps too.
Steps:
Take a fresh beetroot and peel it.
Cut it into really thin slices as this will aid the drying process.

I then used my oven, as it was already on from cooking the previous dish and cooling down, to slowly dry the slices out.
You can use a dehydrator if you have one.


Keep the crisps whole in an airtight bag. You can then munch or grind them as needed.
Enjoy,
PK
Links:
- see more beetroot posts here
- go to all ingredients
Written by
·
-

Super Quick Home-made Pizza Snacks
Winter is trying to get back at Perth at the moment and although the sun is out, we are getting cold winds and rain. This makes for chilly evenings, so my family fought back with these really easy pizzas.
Steps:
- Make or buy your pizza bases and sauces.
- Spread the sauce over the pizza bases.
- Layer your pizza with your favourite toppings. My secret is to put any leafy greens on top of the sauce but under the cheese. It stops them drying out but you didn’t hear it from me :).
- Whack them in the oven on hot and fast until golden brown.

Enjoy,
PK
Here are more pizza posts and thrifty cooking ideas:
Written by
·
-
PK’s No Recipe Pizza Warmers
Winter is trying to get back at Perth at the moment and although the sun is out, we are getting cold winds and rain. This makes for chilly evenings, so my family fought back with these really easy pizzas.
Steps:
- Make or buy your pizza bases (I did the latter).
- Make or buy pizza sauce (I did the former with some reduced tomato pasata and Italian herbs from the garden.
- Spread the sauce over the pizza bases.
- Layer your pizza with your favourite toppings. My secret is to put any leafy greens on top of the sauce but under the cheese. It stops them drying out but you didn’t hear it from me :).
- Whack them in the oven on ~180°C for about 15 minutes or until golden brown.
Enjoy,
PK
Written by
·
-

Kirsty’s Easy Omelette Muffins
Thanks to my good friend and super-mum Kirsty DeRoach (https://www.instagram.com/babyderoach), I now know another great use for vegetables and leftovers that are past their best.
I can add them to the worm farm and compost bins of course or I can give them a second chance in these amazingly good mini quiches.
Not only are they quick to make (everyone will love that especially parents and lazy cooks) but you also get the satisfaction of reducing the amount of food thrown away unused each week.
I haven’t listed any quantities for most of the ingredients as they will vary each time you make them. Experiment and have some fun. Kirsty is right though, mix up the combinations but don’t put too many different ingredients in any given muffin.
STEPS:
- Whisk the eggs and chop the fillings
- Load your muffin trays
- Serving
You will need:
- Ingredients:
- 12 eggs
- any old vegetables at the back of your fridge
- as much bacon or ham as you want
- your favourite cheese
- table salt to taste
- ground black pepper to taste
- Equipment
- a chopping board
- a long sharp knife
- a whisk
- several muffin tins
- a bowl for whisking the eggs
- a frypan if you are adding bacon.
Whisk the eggs and chop the fillings

Steps:
- Give the eggs a good whisk and set aside. Kirsty told me you can add some cream if it needs using up. Add salt and pepper to taste.
- Chop up your vegetables.
- Chop up your ham or cook and chop up your bacon.
- Grate the cheese.
Load your muffin trays
Steps:
- Pre-heat your oven to 180 degrees Celsius.
- Add some of the whisked eggs to the bottom of each hole of the muffin tins. You will have to experiment with how much.
- Add small quantities of your filling combinations to each hole and top each with the grated cheese so that each are about 3/4 full.
- Push most of the floating ingredients under the egg mixture.
- Cook about 10 minutes or until golden brown.
Serving
Once cool enough, pop them out of the muffin trays. They freeze really well but most of ours don’t get to the freezer :).

Thanks Kirsty,
PK
Written by
·
-
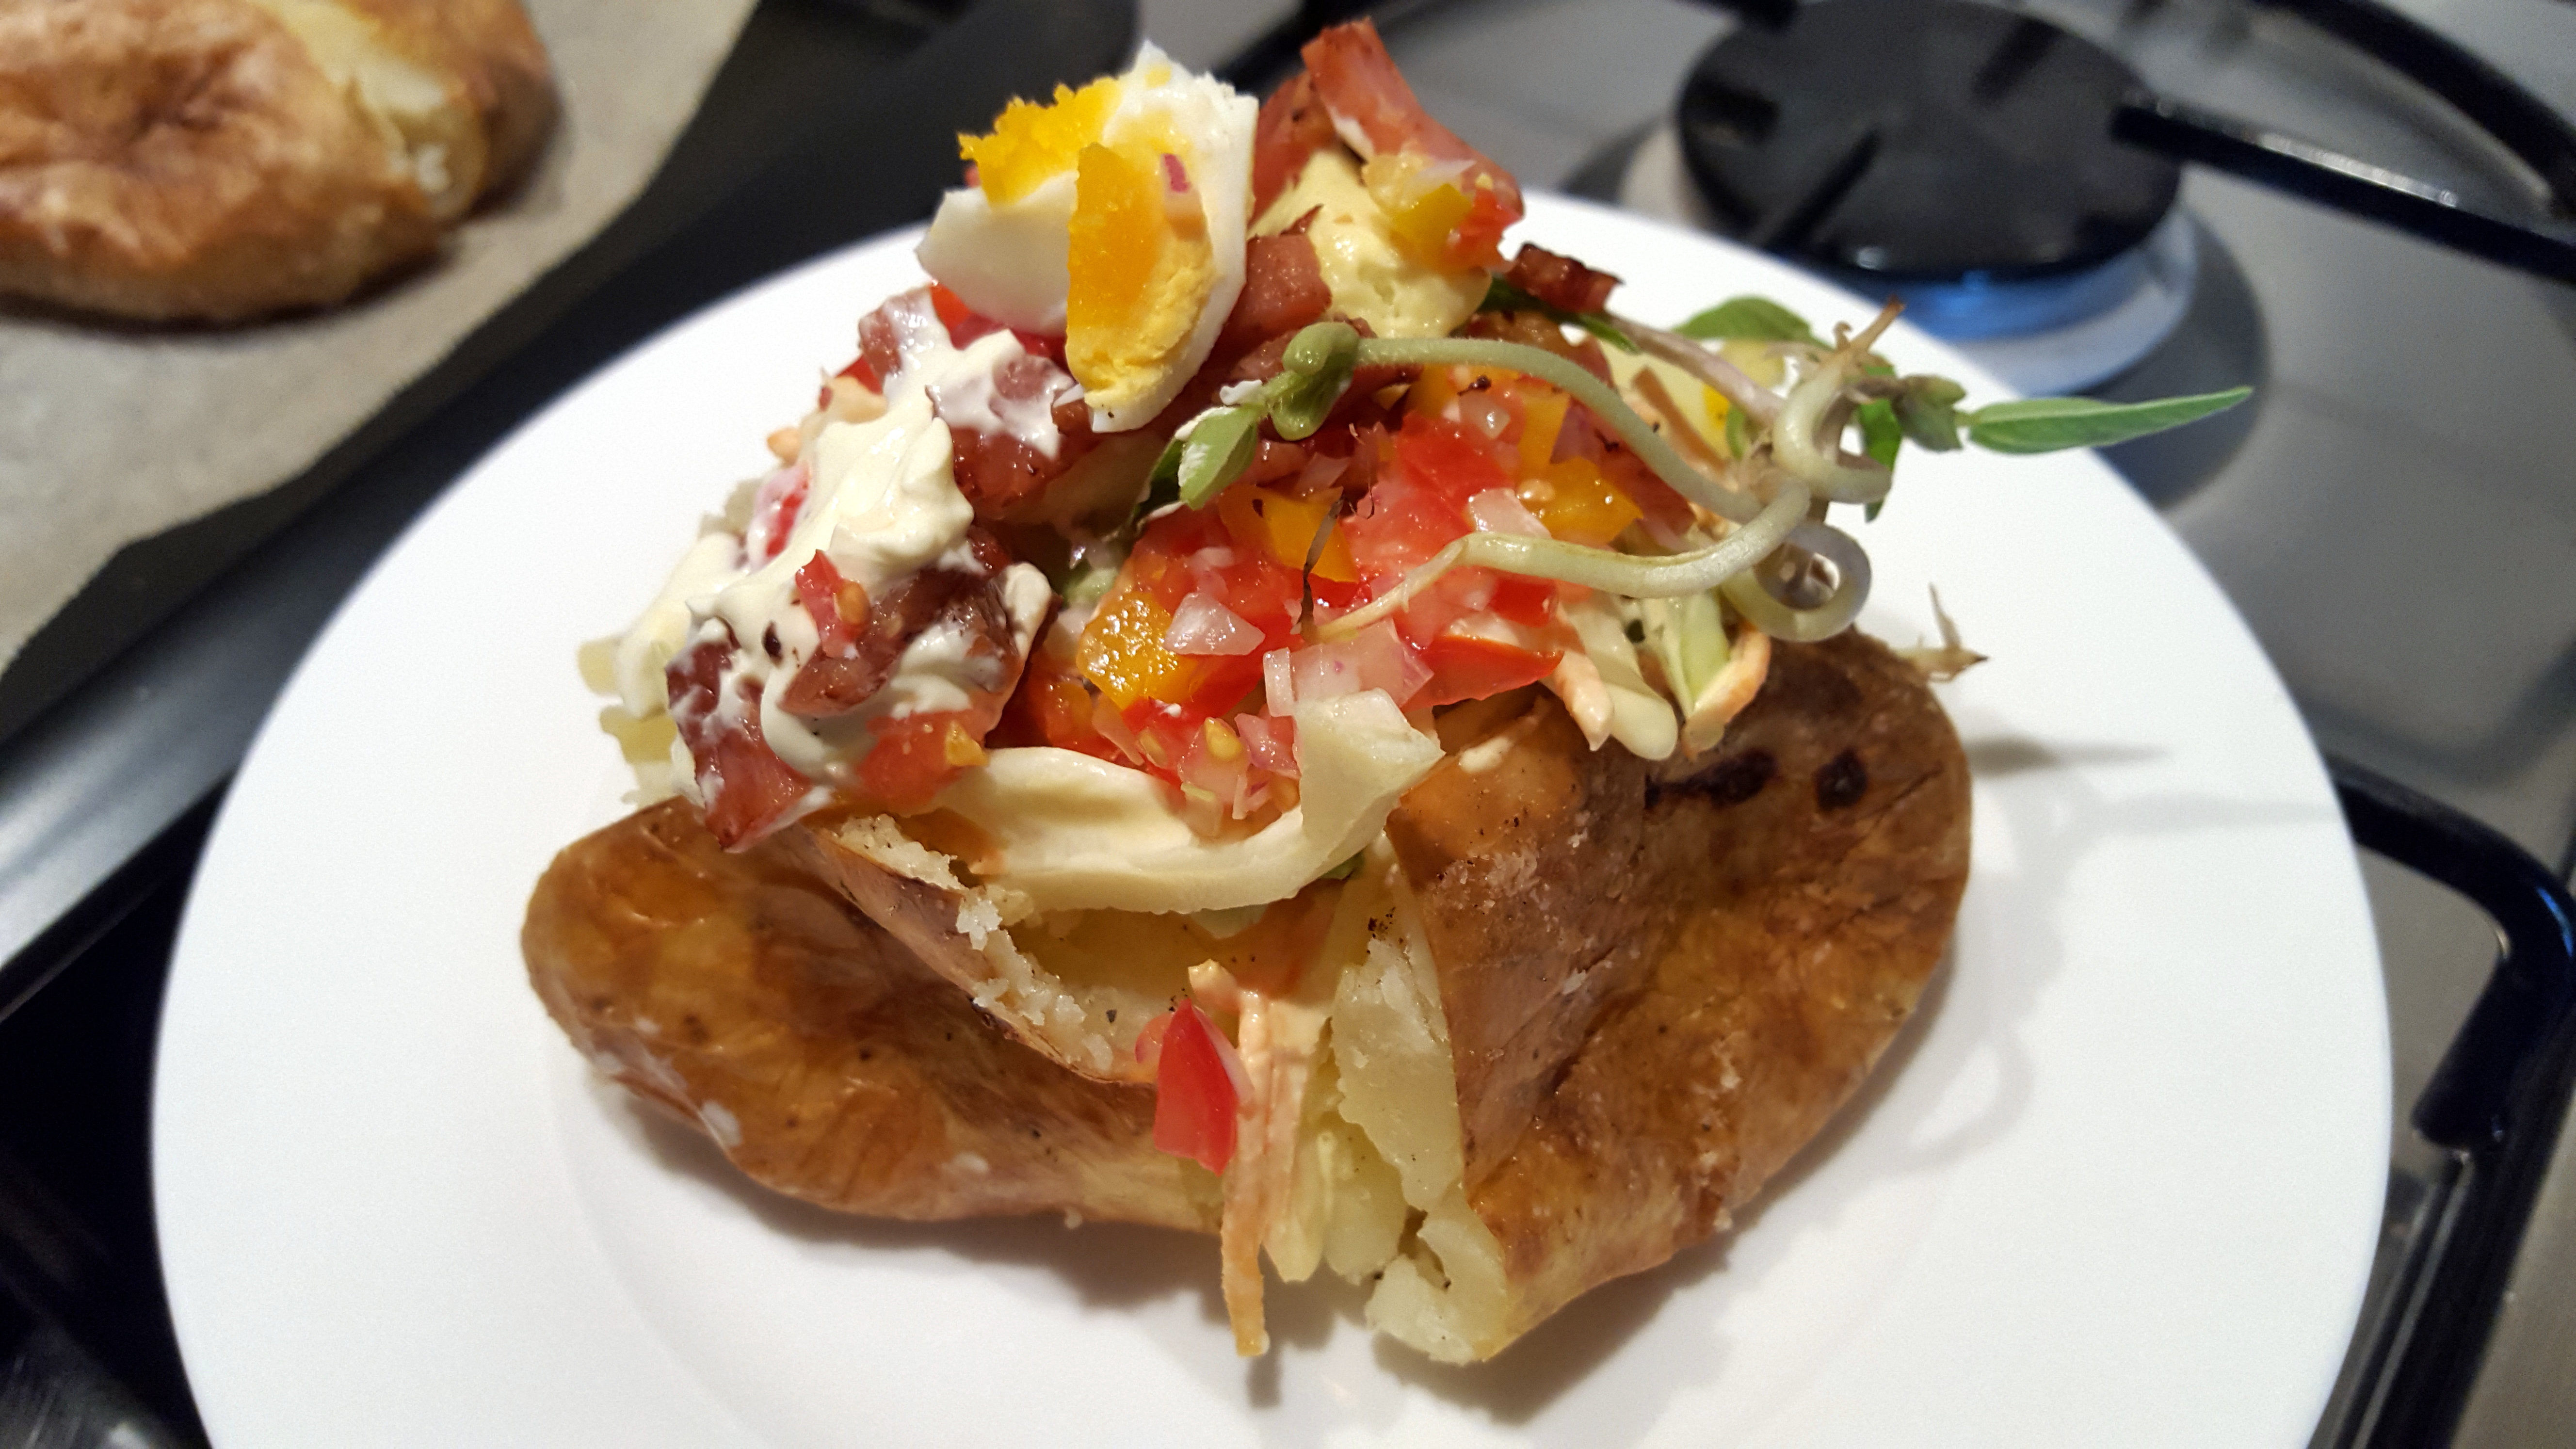
PK’S Easy Oven Baked Potatoes
Perfectly crisp on the outside, fluffy in the middle, baked potatoes are perfect for a Perth winter night. This is a great meal for enjoying with friends and family. You can build your own topping as you go so it is very family/guest friendly. There is nothing better than eating with your hands as you chat away.
I suggest 1.5 medium potatoes per adult and a few more for tomorrow’s lunch.
Everyone has their favourite potato variety that you must use for baked potatoes. However, I have found that you can make perfect oven baked potatoes from most varieties.
STEPS:
- Prepare and cook the potatoes
- Prepare your toppings
- Serving
You will need:
- Ingredients:
- your favourite potatoes
- table salt
- ground black pepper
- your favourite toppings, sauces and condiments.
- Equipment
- paper towel
- a chopping board
- a long sharp knife
- an oven dish or oven rack
- several plates to serve the toppings
Prepare and cook the potatoes
Steps:
- Pre-heat your oven to 200 degrees Celsius.
- Scrub each potato to remove dirt, eyes and deeper imperfections.
- Dry them thoroughly using the paper towel, this is important for the crispy finish.
- Spray each potato with olive oil spray and dust them liberally with salt and pepper.
- Pop them on the oven rack (or oven dish) making sure there is space between them.
- Cook for about 1 hour (longer depending on your oven or if you are using really big potatoes). I test the largest potato at this stage. If it is ready the others are too.
Before:

After:

Prepare your toppings
Steps:
- Harvest, chop, slice and gather your favourite toppings
- Put them on plates in the middle of the table so your guests can build their own potato.
Here is what I used. Sour cream, cheese and coleslaw are must-haves in my family:

Serving
I can’t remember where I read this but it is the most important part of the process.
Just before serving the potatoes, you need to first cut them, then squeeze them with your thumbs and forefingers (to break up the insides) and then flatten them out a bit. This will let the steam out and stop the potato skin from going soggy. You will also have a great base to load the toppings onto.
Here is a video of me doing just that whilst trying not to burn my fingers:
Here are a few of my favourite combinations:
They don’t freeze well but they do make a great lunch the following day:

Enjoy,
PK
Here are more potato dishes and winter warmers:
Written by
·