Tag: chilis
-
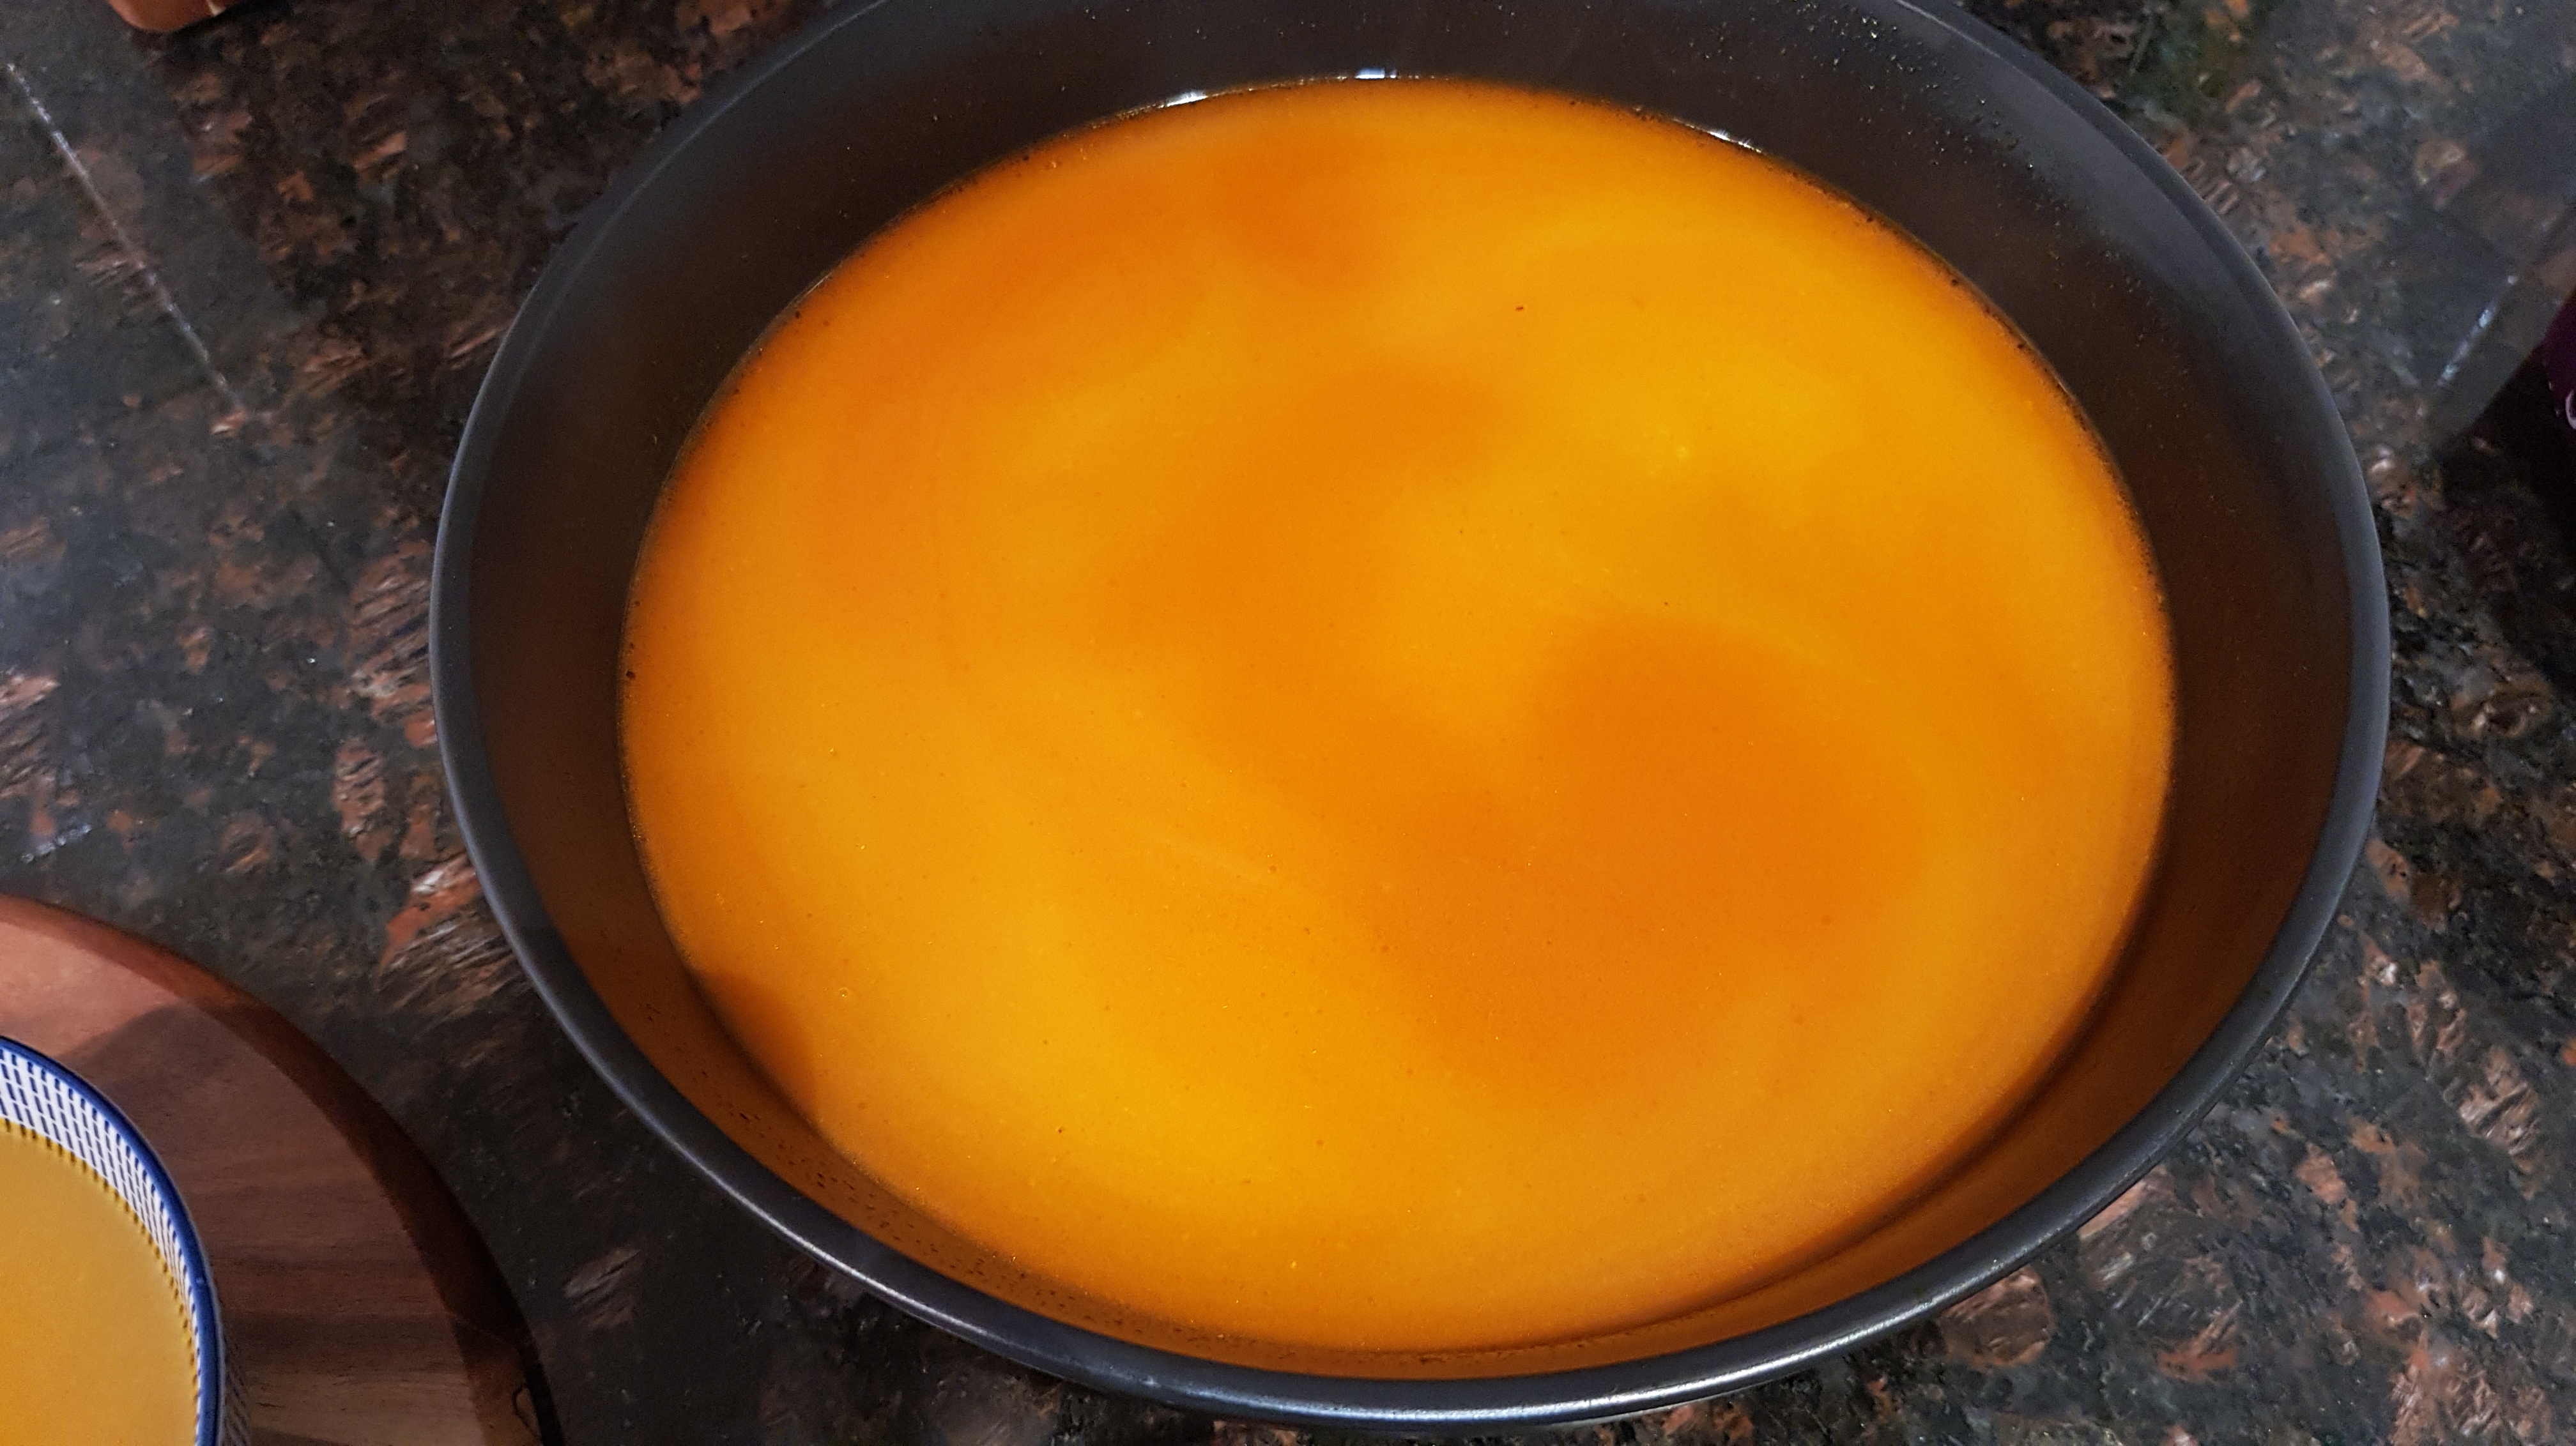
Bombay Brasserie’s Chicken Shorba Soup
Making this spicy Indian chicken soup was a labour of love. It was however very worth the effort.
The recipe comes from an collection called The Bombay Brasserie Cookbook. It tastes and smells amazing with a hearty but flavoursome kick to it.
I love the colours of the ingredients and also that it uses chicken frames to get the base flavour. Talk about thrifty!
From this.

To this heavenly result.

Steps
- Boiling the chicken frames
- Frying the ingredients for half an hour
- Simmering for 1 hour
- Thickening and straining the soup
- Serving
Ingredients
Halved from original recipe.
- 2 chicken frames
- a good slug of olive oil
- 1 brown onion, sliced
- 2 large tomatoes, diced
- 1/2 cup Greek yogurt
- 1 tsp minced ginger
- 6 garlic cloves, diced
- 3 small green chilies
- 2 sprigs coriander
- 1 sprig fresh mint
- 1/2 tsp coriander seeds
- 1/2 Tbsp Garam masala
- 1/2 Tbsp ground turmeric
- 1/2 tsp ground cumin
- 1 tsp Kashmiri chili powder
- table salt, to taste
- 2.5L water
- 1/2 Tbsp gram flour
- 1/2 tsp cumin seeds
Equipment
- 1 chef’s knife
- 1 chopping board
- 1 wooden spoon
- 1 saucepan
- 1 stockpot
- 1 sieve or fine strainer
Boiling the chicken frames
- Bring a sauce pan of water to the boil.
- Add your chopped up chicken frames.
- After a few minutes drain the water.

Frying the ingredients for half an hour
- Put a good slug of olive oil into your stockpot on medium heat.
- Add the 1 brown onion and fry until golden and soft.
- Add the:
- 1 brown onion
- 2 large tomatoes
- 1/2 cup Greek yogurt
- 1 tsp minced ginger
- 5 of the garlic cloves
- 3 small green chilies
- 2 sprigs coriander
- 1 sprig fresh mint
- 1/2 tsp coriander seeds
- 1/2 Tbsp Garam masala
- 1/2 Tbsp ground turmeric
- 1/2 tsp ground cumin
- 1 tsp Kashmiri chili powder
- Fry for another 15 minutes.
- Add the chicken bones and fry for another 15 minutes breaking the bones up as you go.


This is the consistency you want.

Simmering for 1 hour
- Add the 2.5L of water and bring everything to the boil.
- Simmer for about 1 hour.

Thickening and straining the soup
- We don’t want add room temperature flour to a hot stock so heat some more olive oil (about 1 Tbsp) in your saucepan.
- Add the:
- 1/2 Tbsp gram flour
- 1/2 tsp cumin seeds
- and 1 sliced garlic clove
- Fry until the flour is golden brown.
- Very carefully slowly add this to the soup, stirring as you go.
- Strain the soup back into the stockpot and briefly return to the boil.
- Season with salt to taste.


Serving
No spoon required, just lots of naan, coriander leaves and lots of slurping. 🙂

Enjoy,
PK
YOU MIGHT ALSO LIKE
INDIAN CUISINE
CHICKEN DISHES
SOUP
Please consider subscribing to a weekly email summary of our posts or check us out on Facebook @growitcatchitcookit.
[mc4wp_form id=”15771″]
Written by
·
-
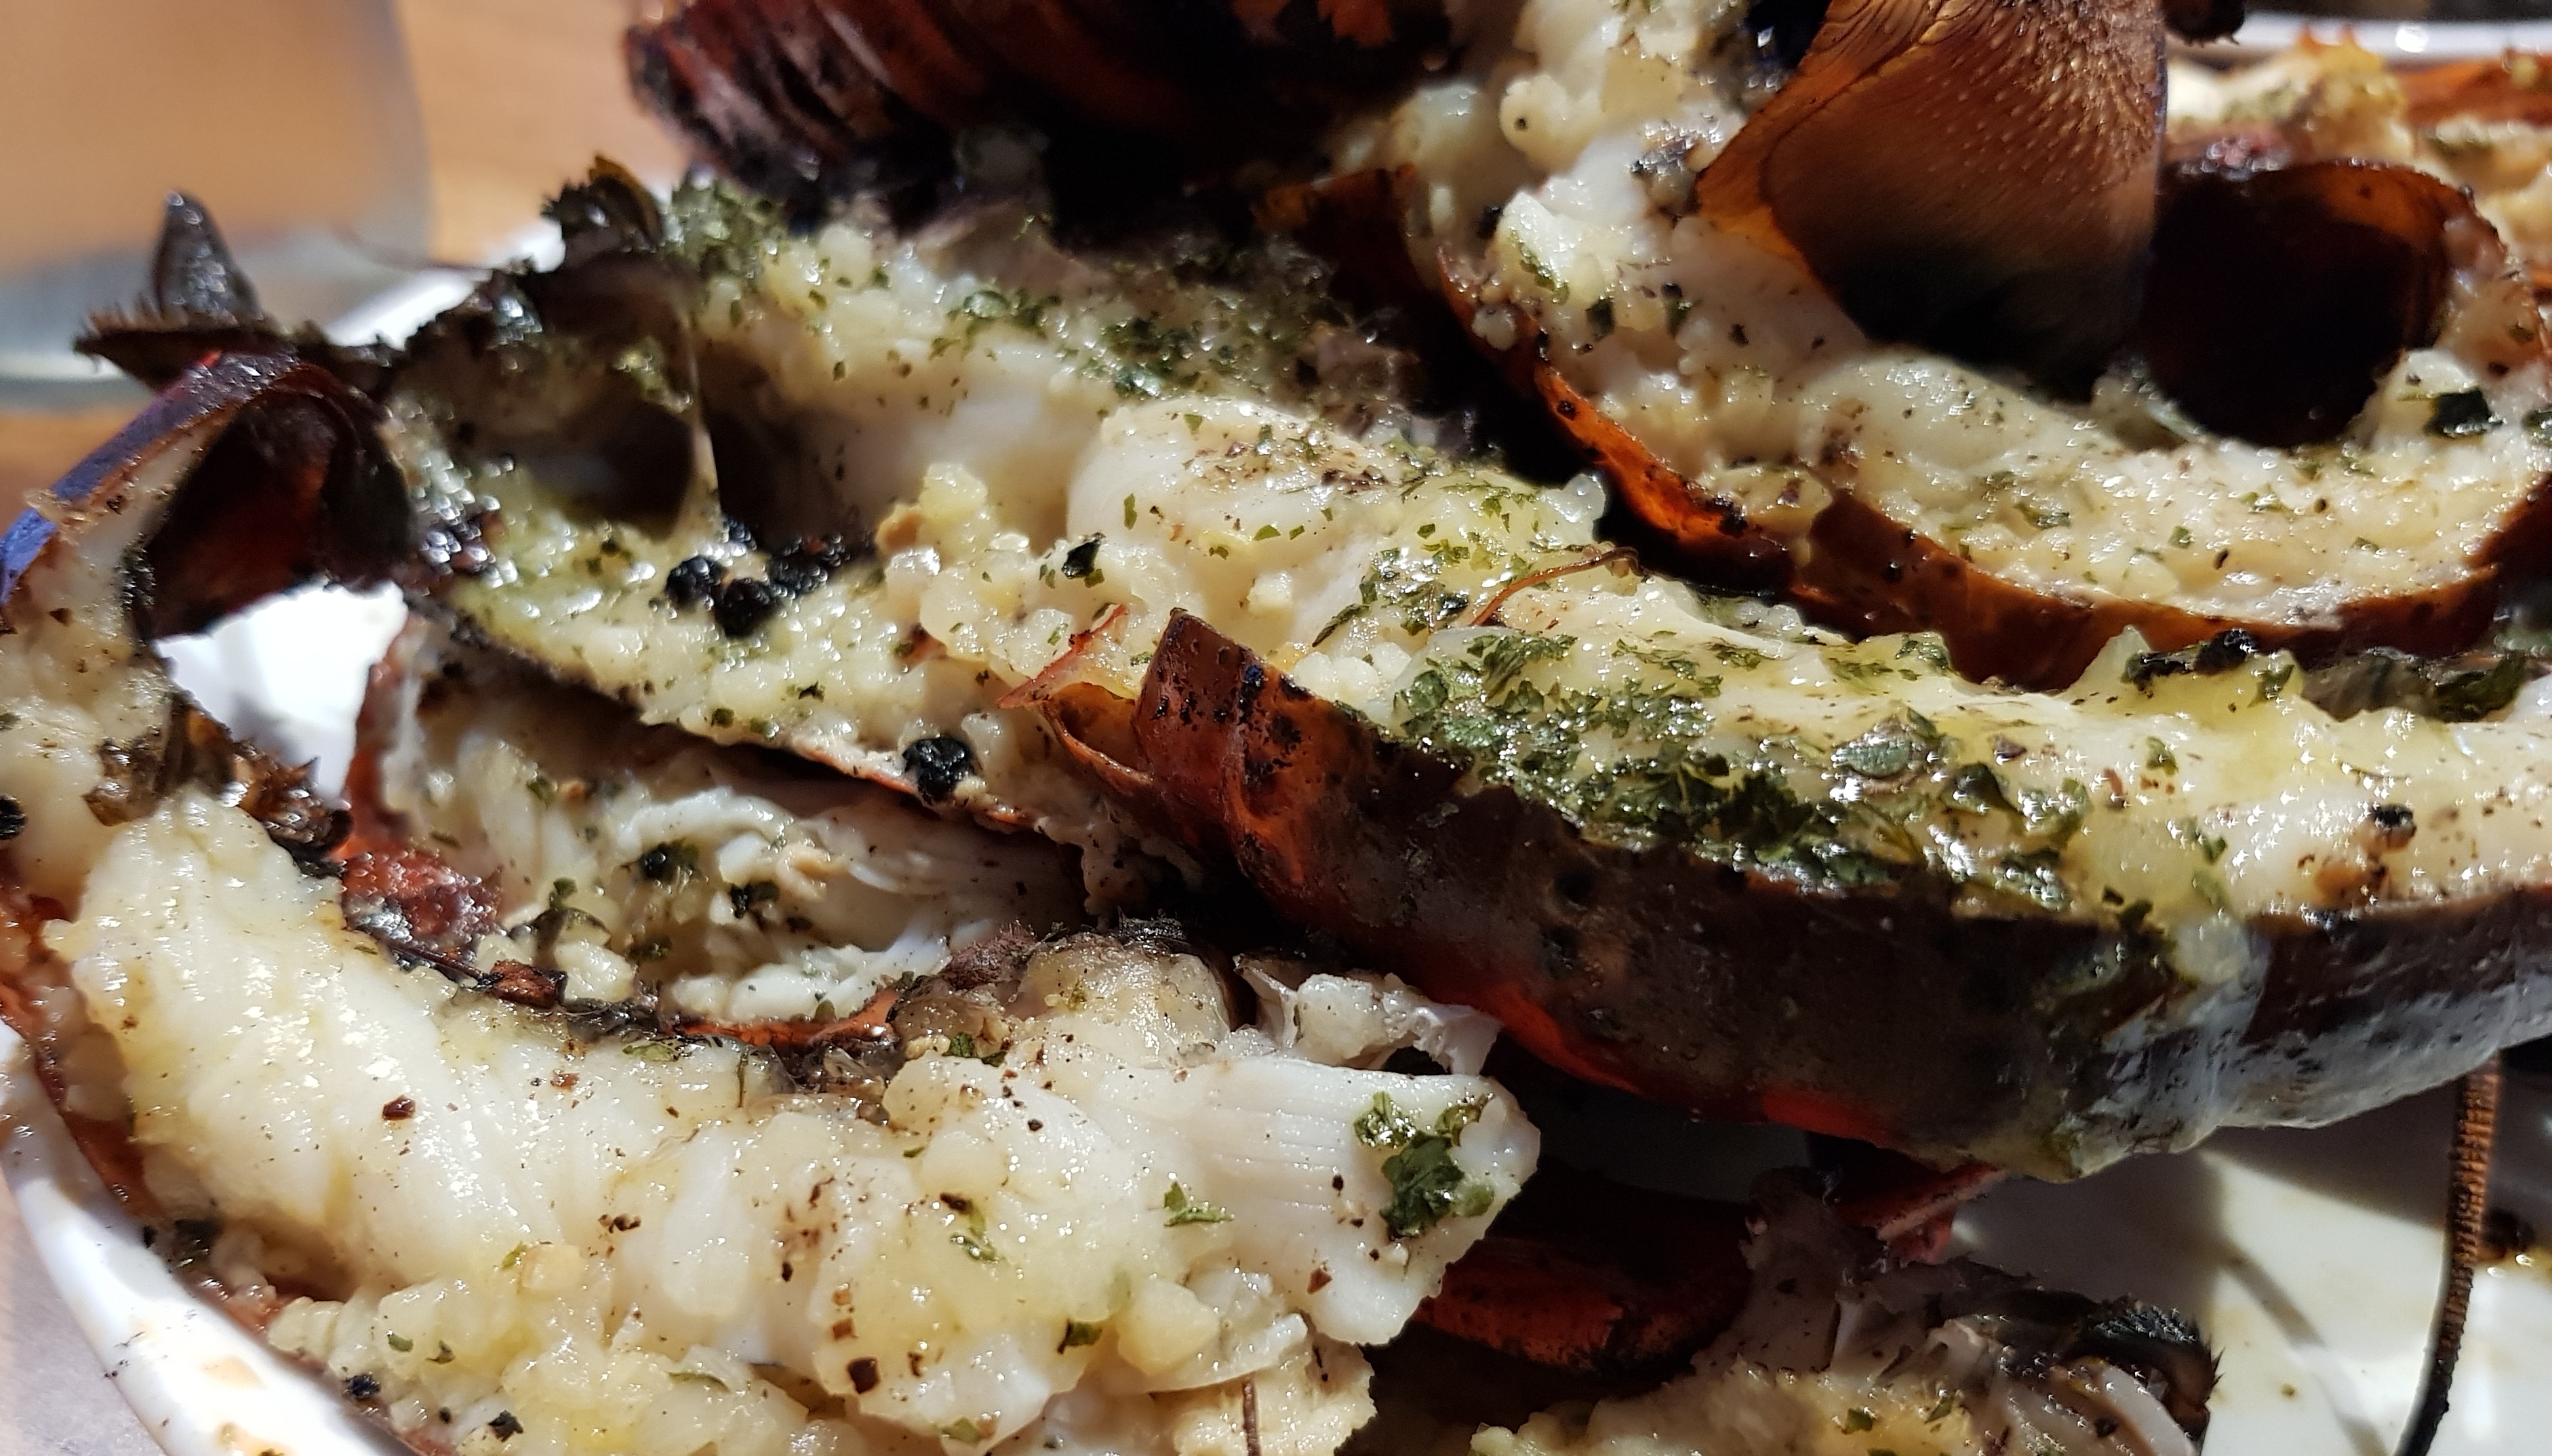
Craigo’s BBQ Marron With Lime, Chile And Sesame Oil
PK boiled his marron and it was amazing (see Marron In Browned Butter Sauce) but I prefer mine halved and cooked on the barbie.
It couldn’t be easier
Whip up a batch of Garlic Butter and halve your freshly caught marron (see marroning tips here and how to halve crayfish here).


Drizzle the halves with sesame oil and lime juice. Add slices of chili and lather the garlic butter all over.


Barbecue briefly until the meat turns opaque.

Serve with your favourite salads and give each guest wedges of limes.

Fish on,
Craigo
Related Links:
Please consider subscribing to get a weekly email summary of our posts.
[mc4wp_form id=”15771″]
Written by
·
-

PK’s Easy Pho Ga
When someone mentions Vietnamese cuisine I immediately think of the famous Vietnamese noodle dish called Pho.
Pho (pronounced like ‘fur’ but without the hard r) is a modern take on more traditional dishes. The Vietnamese people rapidly took to this healthy “fast food” and then spread it around the globe.
I imagine everyone has their own favourite style of Pho. Mine is a sweet and sour broth with some lightly poached chicken, lots of vegetables and tons of rice noodles. Simply multiply the ingredients below for each person you are serving.
I go light on the chili factor (even none at all for my family) and then I use Sriracha hot sauce in my bowl to add some heat.
Tip: Make the fried shallots ahead of time using my method here. They are an optional garnish but I feel they really “make” this dish.
You will be:
- Building the broth
- Poaching the chicken
- Serving.
You will need:
- Ingredients:
- Broth for one:
- 3 cups homemade chicken stock
- a splash of fresh lime juice
- 1.5 Tbsp fish sauce
- a small chunk galangal (galanga)
- a small chunk ginger
- 1/2 cinnamon stick
- 1 star anise
- 1 tsp raw sugar
- black peppercorns to taste, ground
- 1 coriander root
- Bowl for one:
- 250g chicken tenderloins, sliced
- 250g rice noodles, pre-softened in boiling water
- a handful of torn coriander leaves
- a handful of mung bean sprouts
- a few sprigs of vietnamese coriander
- 2 spring onions, white parts, sliced on an angle
- jalepenos , sliced, to taste
- 1/2 a lime (for people to adjust the fish sauce/lime juice balance)
- fried shallots and garlic slices
- A handful of chopped mushrooms like shitake or enoki
- Broth for one:
- Equipment:
- a long sharp knife
- a chopping board
- a grater
- a large saucepan
- a serving bowl
Building the broth
I use my home-made chicken stock because it starts you off with a broth that has been built up with chicken bones, vegetables and garlic.
Making a starter broth this way allows you to subsequently build dish specific flavours on top of it and this is what we will do now.
- Add the 3 cups of chicken stock to the saucepan.
- Peel a chunk of galangal and a chunk of ginger and throw them into the pan whole.
- Add the:
- splash of fresh lime juice
- 1.5 Tbsp fish sauce
- 1/2 cinnamon stick
- 1 star anise
- 1 tsp raw sugar
- ground black peppercorns
- 1 coriander root
- Let everything sit for 5 minutes, to infuse, if you have time.
- Put the saucepan on low heat and then gently simmer for about 10 minutes.
Poaching the chicken
- Add the 250g of sliced chicken tenderloins to the gently simmering pan of broth.
- Allow the chicken to cook for 5 minutes and then remove the pan from the heat (by this stage everything is cooked and you don’t want the chicken to overcook as it will go leathery).

Serving
Serve the broth over the rice noodles and vegetables. Garnish with slices of chili, fried shallots and even omelette and peanuts.
Have in easy reach extra fish sauce, lime wedges and of course Sriracha sauce so you and your guests can adjust the taste to suit.


Enjoy,
PK
YOU MIGHT ALSO LIKE
VIETNAMESE CUISINE
NOODLE DISHES
BROWSE INGREDIENTS POSTS
THE FULL GICICI INGREDIENTS LIST
Please consider subscribing to a weekly email summary of our posts or check us out on Facebook @growitcatchitcookit.
[mc4wp_form id=”15771″]
Written by
·
-

Bish’s Burning Mango Salsas
A long time ago I was in Darwin for work and had a few extra days to explore a place I now think of as one of my favourite Australian cities. One of my fondest memories was going to the markets and sampling food that was really unique – fusions of different cultures and tastes I’ve struggled to find anywhere else.
One of the strongest memories of taste was of some dried mango that was dusted with chilli and salt. I’ve not seen this for a while, and with my mother in law giving me a bag of mangoes the other day I decided to embrace my inner Top Ender and see what I can create.

Salsa 1: Mango Salsa with Chilli, Lime and Salt
Take your bounty of mangoes and remove all the flesh from the fruit – as much as you can! I cut the cheeks off and then score the flesh, invert the skin and slide the chunks off (make sure to let the juice dribble in as well, don’t lose that!). Then separately, take a mortar and pestle, and crush up some dried chillies (I still have some really hot birds eye ones from a crop a year or so ago, so I use two for about a small bowl of fruit), and chuck them into the mango chunks. The final two touches – salt (a pinch for a small bowl, but start light and add more if you need to), and some zest of a lime and the juice (about ½ a lime’s worth for a small bowl).


Salsa 2: Mango Salsa with Balachaung
The second one is a bit of a cheat. I am quite fond of a condiment called balachaung, which is a sort of dried relish of dried shallots, garlic, shrimp, salt and chilli. It is a super tasty, hot, salty topping that works a treat on leftovers like fried rice. I get mine from the local Asian supermarkets (pretty much my basket always has some “sweet meat”, a can of soy bean milk and a can of “grass jelly drink”. I’ll have to take PK shopping there sometime…

Repeat the steps above to get the fruit cut up and into a bowl, and then sprinkle the balauchaung on top of the mango. That’s pretty much it – but be careful that you don’t overdo this one.
Serving
Both of these salsas are pretty good by themselves (or on crackers or something), but they also are a pretty good accompaniment to seafood like prawns… which is how we’re going to eat these ones tonight!

Bish
PS pair this dish with Craigo’s NoRecipe BBQ Prawn Skewers
Here are more posts by Bish and uses of chillies:
Written by
·
-

PK Makes Nagi’s ‘Chinese Restaurant’ Chicken Satay
I love old school Anglicised ‘chinese restaurant’ chicken satay.
Perth is very lucky now to have cafes and restaurants that serve all manner of global cuisines from the cultural traditional through to really clever fusion. However, growing up in Perth we were not spoilt for choice eating out, there was only Pizza Hut, Red Rooster and the local ‘Chinese Restaurant’.
This dish is far from traditional chinese cuisine but it hits fond childhood food memories. It is quite frankly the best satay chicken I have ever had.
There are 3 main preparation steps that look a little daunting at first but the recipe is actually really easy. With all credit to Nagi of www.recipetineats.com for the way she created and laid the recipe out.
All I am trying to do is spread her amazing work :).
Note:
- I have converted the powdered ingredient quantities in the original recipe to use whole grains using my own crazy rule of thumb.
- I have gone heavy on the onions and garlic as per my childhood memories.
You will be:
- Prepping and tenderising the chicken
- Making the satay seasoning
- Making the satay cooking sauce
- Cooking the chicken
- Serving
You will need:
- Ingredients:
- Chicken:
- 2 chicken breasts (a little over 500g)
- 2 tsp baking soda
- Satay Seasoning:
- 1.5 tsp coriander seeds
- 1.5 tsp cumin seeds
- 3/4 tsp white peppercorns
- 0.5 tsp tumeric powder
- 0.5 tsp chili powder (I used store bought Kashmiri chili powder but you can make your own with this FoodHack.)
- 3 tsp curry powder (any will do and extra points for home-made)
- 1 tsp table salt
- Satay Sauce:
- 3 – 4 Tbsp Peanut Butter (I used http://kraftnuts.com.au/range/2/peanut-butter-smooth just to increase the trip down memory lane)
- 3 tsp raw sugar
- 2 tsp soy sauce (light or normal but not thick like ketjip manis)
- 3 tsp rice vinegar
- 2 tsp hot sauce (I used Eaglobe piment sriracha)
- 1 tsp fresh lemon grass (very finely diced)
- 2/3 cups coconut milk
- 1/2 cup water
- For the wok:
- A good slug of peanut oil
- 1 – 2 large brown onions
- 4 garlic cloves
- Chicken:
- Equipment:
- a chopping board
- a long sharp knife
- a bowl for the chicken to tenderise in
- a mortar and pestle
- a small bowl for the spices
- a small whisk or fork
- a small mixing bowl for the sauce
- a wok or deep fry pan
Steps:
Prepping and tenderising the chicken
- Slice the breasts in a long-wise fashion and then cut the flat slices in half.
- Pop the slices into a bowl and sprinkle them with the 2 tsp baking soda (Nagi says this tenderises them and I can confirm that it really works).
- Pop them back into the fridge while you make the seasoning and sauce.
Making the satay seasoning
- In a mortar and pestle grind the:
- 1.5 tsp coriander seeds
- 1.5 tsp cumin seeds
- 3/4 tsp white peppercorns
- When you have the your desired amount of grind add the ground spices to a bowl with the:
- 0.5 tsp tumeric powder
- 0.5 tsp chili powder
- 3 tsp curry powder
- 1 tsp table salt
- Give everything a quick mix.

Making the satay cooking sauce
- In a different mixing bowl mix until smooth the:
- 3 – 4 Tbsp Peanut Butter
- 3 tsp raw sugar
- 2 tsp soy sauce
- 3 tsp rice vinegar
- 2 tsp hot sauce
- 1 tsp fresh lemon grass (very finely diced)
- 2/3 cups coconut milk
- 1/2 cup water
- Add the satay seasoning and mix again.
- Refrigerate if you are not cooking the chicken until later in the day.
Cooking the chicken
- Bring the chicken and sauce out of the fridge.
- Chop up the 2 brown onions and mince the 4 garlic cloves.
- Add a slug of peanut oil to your pan and bring it to medium heat.
- Prepare any garnish (I went with some fresh sliced jalapenos and spring onions from my PK’s Working Garden).
- Add the onions and garlic to the hot oil and keep everything moving until they soften.
- Add the chicken slices and keep it moving until the chicken is beginning to brown.
- Add the satay sauce and stir fry until the sauce has reduced to your desired thickness (say a few minutes).
Serving
A bit of rice, some chilis, a side of asian greens in oyster sauce (e.g. Choy Sum) and I am in heaven.

Enjoy,
PK
Related Links:
- Recipes using chicken
- More Chinese cuisine
Please consider subscribing to a weekly email summary of our posts or check us out on Facebook @growitcatchitcookit.
[mc4wp_form id=”15771″]
Written by
·
-

Cooking with Super Hot Chili Peppers
A chili expert on Facebook gave me this great tip as I am afraid of cooking/eating any of the super hots that I am growing. See my chili post series here.
He said suggested that I dry any super hot chili whole and store them away.
You then add a whole dried chili to the oil (that you are going to cook with) once it is heated in a pan. Once the oil is infused you remove and dispose of the chili itself and get on making your dish as normal.
Enjoy,
PK
Related Links:
- See more FoodHacks here
Written by
·
-

FoodHacks: Jalapeno Chili Powder
Make your own chili powder using your home grown chilis. You can mix different chili types together to get the heat you like or stick with one type like I have here. I used a mixture of green and red jalapenos for a medium heat level.
Simply slice the chilis, pop them into a dehydrator and turn it on low. You will know they are ready when they loose all of their sponginess and feel brittle.
Then add everything to your dry mixer and pulse in short bursts until you get the consistency you like.

Stored in a glass jar or plastic container along with a silica sachet, it should last for quite sometime.

Enjoy,
PK
Related Links:
- See more FoodHacks here
Written by
·
-

PK’s Bacon Wrapped, Cheese Stuffed Jalapenos
As I mentioned in my last post, I am drowning in home-grown Jalapeños. I have decided to eat my way out one recipe at a time :).
These cheese stuffed Jalapeños, wrapped in bacon to make them irresistible, are so easy to make but not for the faint hearted.
Take a chili and cut it almost in half leaving a lip and the stalk attached to one side. Scoop out the pith and the seeds. Then stuff the cavity with your favourite cheese, I used a mix of mozzarella, parmesan and cheddar.
Next, put the lid back on and wrap the whole thing in a strip of bacon.
Pop them on an oven tray as you go and then into a fan-forced oven (pre-heated to 200C) for about 20 minutes or the bacon is crispy enough for your liking.

Served hot or chilled, your guests are going to love them.

Enjoy,
PK
Related Links:
- Dishes using Parmigiano-Reggiano (parmesan)
- Dishes using cheese
Please consider subscribing to get a weekly email summary of our posts.
[mc4wp_form id=”15771″]
Written by
·
-
PK’s NoRecipe Bacon Wrapped, Cheese Stuffed Jalapenos
As I mentioned in my last post, I am drowning in home-grown Jalapeños. I have decided to eat my way out one recipe at a time :).
These cheese stuffed Jalapeños, wrapped in bacon to make them irresistible, are so easy to make but not for the faint hearted.
Take a chili and cut it almost in half leaving a lip and the stalk attached to one side. Scoop out the pith and the seeds. Then stuff the cavity with your favourite cheese, I used a mix of mozzarella, parmesan and cheddar.
Next, put the lid back on and wrap the whole thing in a strip of bacon.
Pop them on an oven tray as you go and then into a fan-forced oven (pre-heated to 200C) for about 20 minutes or the bacon is crispy enough for your liking.
Served hot or chilled, your guests are going to love them.
Enjoy,
PK
Written by
·
-

PK’s Jalapeno, Cheese and Bacon Hot Pockets
A good friend of mine recently asked me where my inspiration comes from when I decide what to cook.
Well, there are a number of factors, sometimes I need to use something in the garden that is going gang busters :).
For example, I have so many home grown Jalapeños and I am always looking for ways to avoid wasting them. There are only so many frozen chilis this family needs and all my friends’ freezers are full of them too.
I came across a recipe called Bacon Jalapeno Cheese Bombs and I knew I had found a winner (see it here). I thought it was excellent but I wanted to use home-made bread dough as I am a dough making newbie.
The result is something that growing up (in Perth, Western Australia) we called ‘hot pockets’. Basically a small chewy bread product full of cheesy goodness.
Notes:
- I was experimenting so they all look a bit different. Next time I am going to glaze them more with the egg mix and also add chopped coriander and diced capsicum.
- My taste-testers also suggested the best ones had a higher ratio of filling to dough and that adding a bit of salt to the dough mix would be good.
You will be:
- Prepping the fillings.
- Making the bread dough.
- Making the hot pockets.
- Cooking the hot pockets.
- Serving them up hot.
You will need:
- Ingredients:
- 600g bread flour and yeast (about enough to make 1 large white loaf)
- extra plain white flour to knead the dough
- a large handful of chopped jalapeños
- 2 large handfuls of cooled chopped crispy bacon
- a large chunk of mozzarella (in brine or vacuum packed is best)
- a small cup of milk or a whisked egg for glazing
- Equipment:
- a chopping board
- a long sharp knife
- a rolling pin
- a large bowl for making dough
- a large bowl for proofing the dough
- an oven tray line with a sheet of baking paper
- a pastry brush
Steps:
Prepping the fillings
- Chop the bacon rashers, cook them on the barbecue (for that smoky taste) and then pop them into the fridge to cool (you need about 2 handfuls).
- Finely chop the jalapeños with the result being about a handful.
- Slice sections of mozzarella, I went for discs about the size of an Australian 20c coin.
Making the bread dough
- Follow the standard method of making bread dough to just after the first rising (making bread dough is so much fun!).
- Give the dough ball a quick kneading and then roll it out somewhat.

Making the hot pockets
- Take a small ball of dough and flatten it down with your hand.
- Pop a disc of mozzarella on it, followed by some crispy bacon bits and chopped jalapeños.
- Then fold the dough around the fillings, crimp and then mould a bit with your hands.
- Pop them on a baking paper lined oven tray as you go.
- When you are finished, glaze each ball with egg or milk and then sprinkle any filling leftovers on the tops :).
Balls of dough ready for fillings:
They see me rollin’ (albeit badly):
Cooking the hot pockets
- Pop the tray into a pre-heated fan forced oven set to 200C.
- Cook for about 15 minutes and or they look golden brown.
Serving them up hot
Even though they can be improved, the result looked, tasted and smelt amazing :).
They were even good the next day after a quick zap in the microwave.

Enjoy,
PK
Related Links:
- see more recipes using chilis here
Please consider subscribing to get a weekly email summary of our posts.
[mc4wp_form id=”15771″]
Written by
·