Category: growing
-

Chili Pepper: Black Pearl
This has to be the most attractive chili plant I have in my collection. Despite the fruit’s small size they pack a real punch and the plant is a heavy producer.
The fruit starts off as deep oxblood colour that ripens to a rich red.

So if you’re into landscaping with beautiful, unique plants, or you love chilies that are mid range on the pepper scale, this is plant is for you. The heat is more than a jalapeño but less than a cayenne.
Taste:
The heat creeps up on you, similar to the much hotter ghost pepper in that way. The initial bite provides a mild citrus-like taste, but that’s followed up within a minute with a building spiciness going from back of throat to tip of tongue. The heat peaks within a few minutes and slowly begins to dissipate.
Flower:

Fruit:
Small globes packed full of seeds. The skin is firm and has a crunch.
Plant:

Fruiting Months:
November to June
Planting/Care:
It took a while for the seedling I bought to fruit initially so don’t panic. Apparently this is a fickle variety of chili but I have not done anything special and have had great luck.
I use a middle range nitrogen and high potassium fertiliser regime during the summer months. Soil is improved with compost and manure and has a ~5-10% by weight of clay to sand ratio. Drainage is still good.
I usually spray my chili plants with Dipel and pyrethrum (my go to natural insecticide spray) if I notice any grub damage. The tomato grub in particular likes the larger fleshier chilis like the Trinidad Scorpion.
Enjoy,
PK
Check out GICICI’s Chili Collection for more info on chili growing.
Here are some more chili varieties and some examples of cooking with them:
Written by
·
-
Garden Auger Veggie Bed Makeover
Gardening in Perth means you are going to get acquainted with a quartz sand that repels water and is low in the good stuff most plants love.
You can add wetting agents and fertiliser as a short term fix for the water issue but without adding organic matter and some clay your vegetable beds won’t retain nutrients and water for long.
I have to admit that my normal soil improvement routine is sub par. I normally add a bit of compost, worm castings and manure to the very top of my beds and just under the roots of transplanted seedlings.
This is a step in the right direction but for new beds or tired old ones we want to get organic matter to more than just the top lens. I wanted to do better but didn’t want to have to dig the whole bed out and start again.
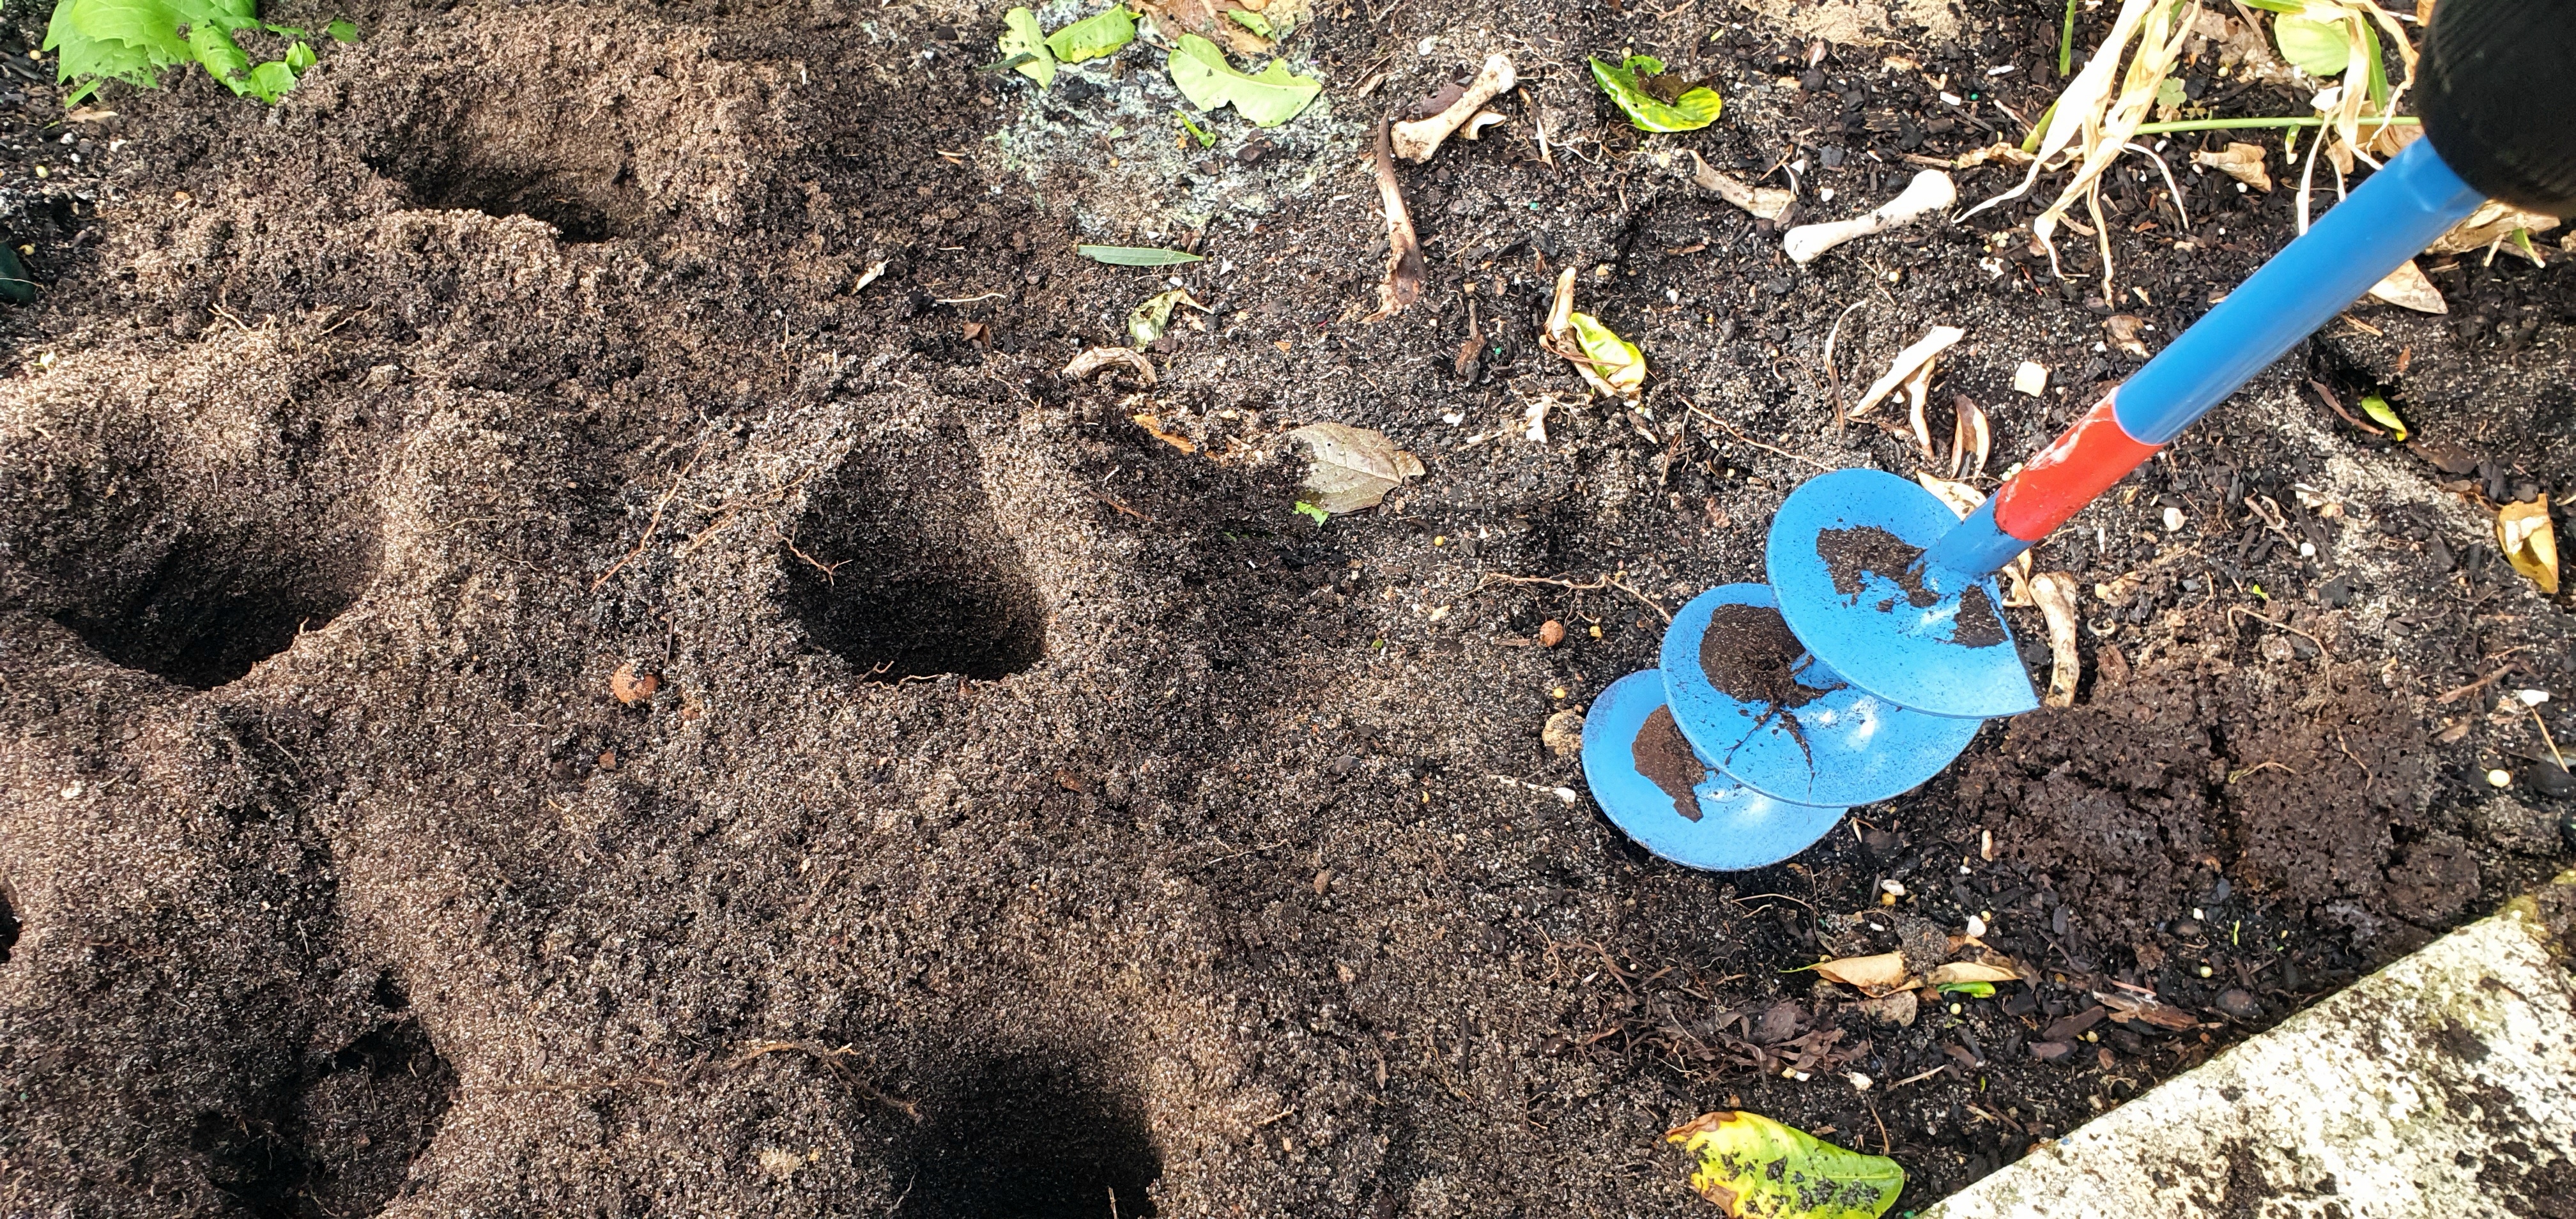
So I bought a garden auger drill bit (from Bunnings and made by Sutton Tools) for my cordless drill to get down to the bottom of the bed and break up compacted soil and old roots.
See the before and after:

The process is uncomplicated and surprisingly fun:
- Attach the bit
- Drill into the sand as far as the auger will go
- Pull the auger up and out
- Fill the resulting hole with organics (compost, manure etc), minerals ,(rock dust, egg shell, blood and bone etc) and a little bentonite clay
- Cover over with soil/sand
- Mix in compost and manure into the top layer
- Water the whole bed thoroughly to level it out
- Let the bed rest for a week or so.
Look at the sand (light grey color) that came up from the bottom of an established bed:

Neat little holes you can use to get nutrients down deep:

The holes are about 800 nn deeo and 50mm wide:

Mix in some more goodness to the top layer the deeper the better, with your pitchfork:

Now the soil is light and fluffy to a deep level and ready for planting:

Enjoy,
PK
Here are some more of my reviews:
Written by
·
-
Bish Grows Spring Onions The Thrifty Way
I’ll readily admit I heard about this from PK directly, and have been super happy with how it’s gone – I’ve not bought spring onions for over a year as a result.
The trick is to buy (your last!) bunch of spring onions from the supermarket, and make sure a few of the ends have roots on them. Then, cut off that part with a centimetre or two of stalk above the roots and stick them in a pot of well draining potting mix.
These were my first two, just chucked in a pot as a tester a long time ago (April, 2018). They quickly grew and grew, and I let them go to seed, so that I could collect the seeds and re-sow them.

I then sowed a few seeds here and there, but in the meantime, bought some more spring onions from the shops, and then started dropping the bases into larger pots… along with a few coming up from seed.

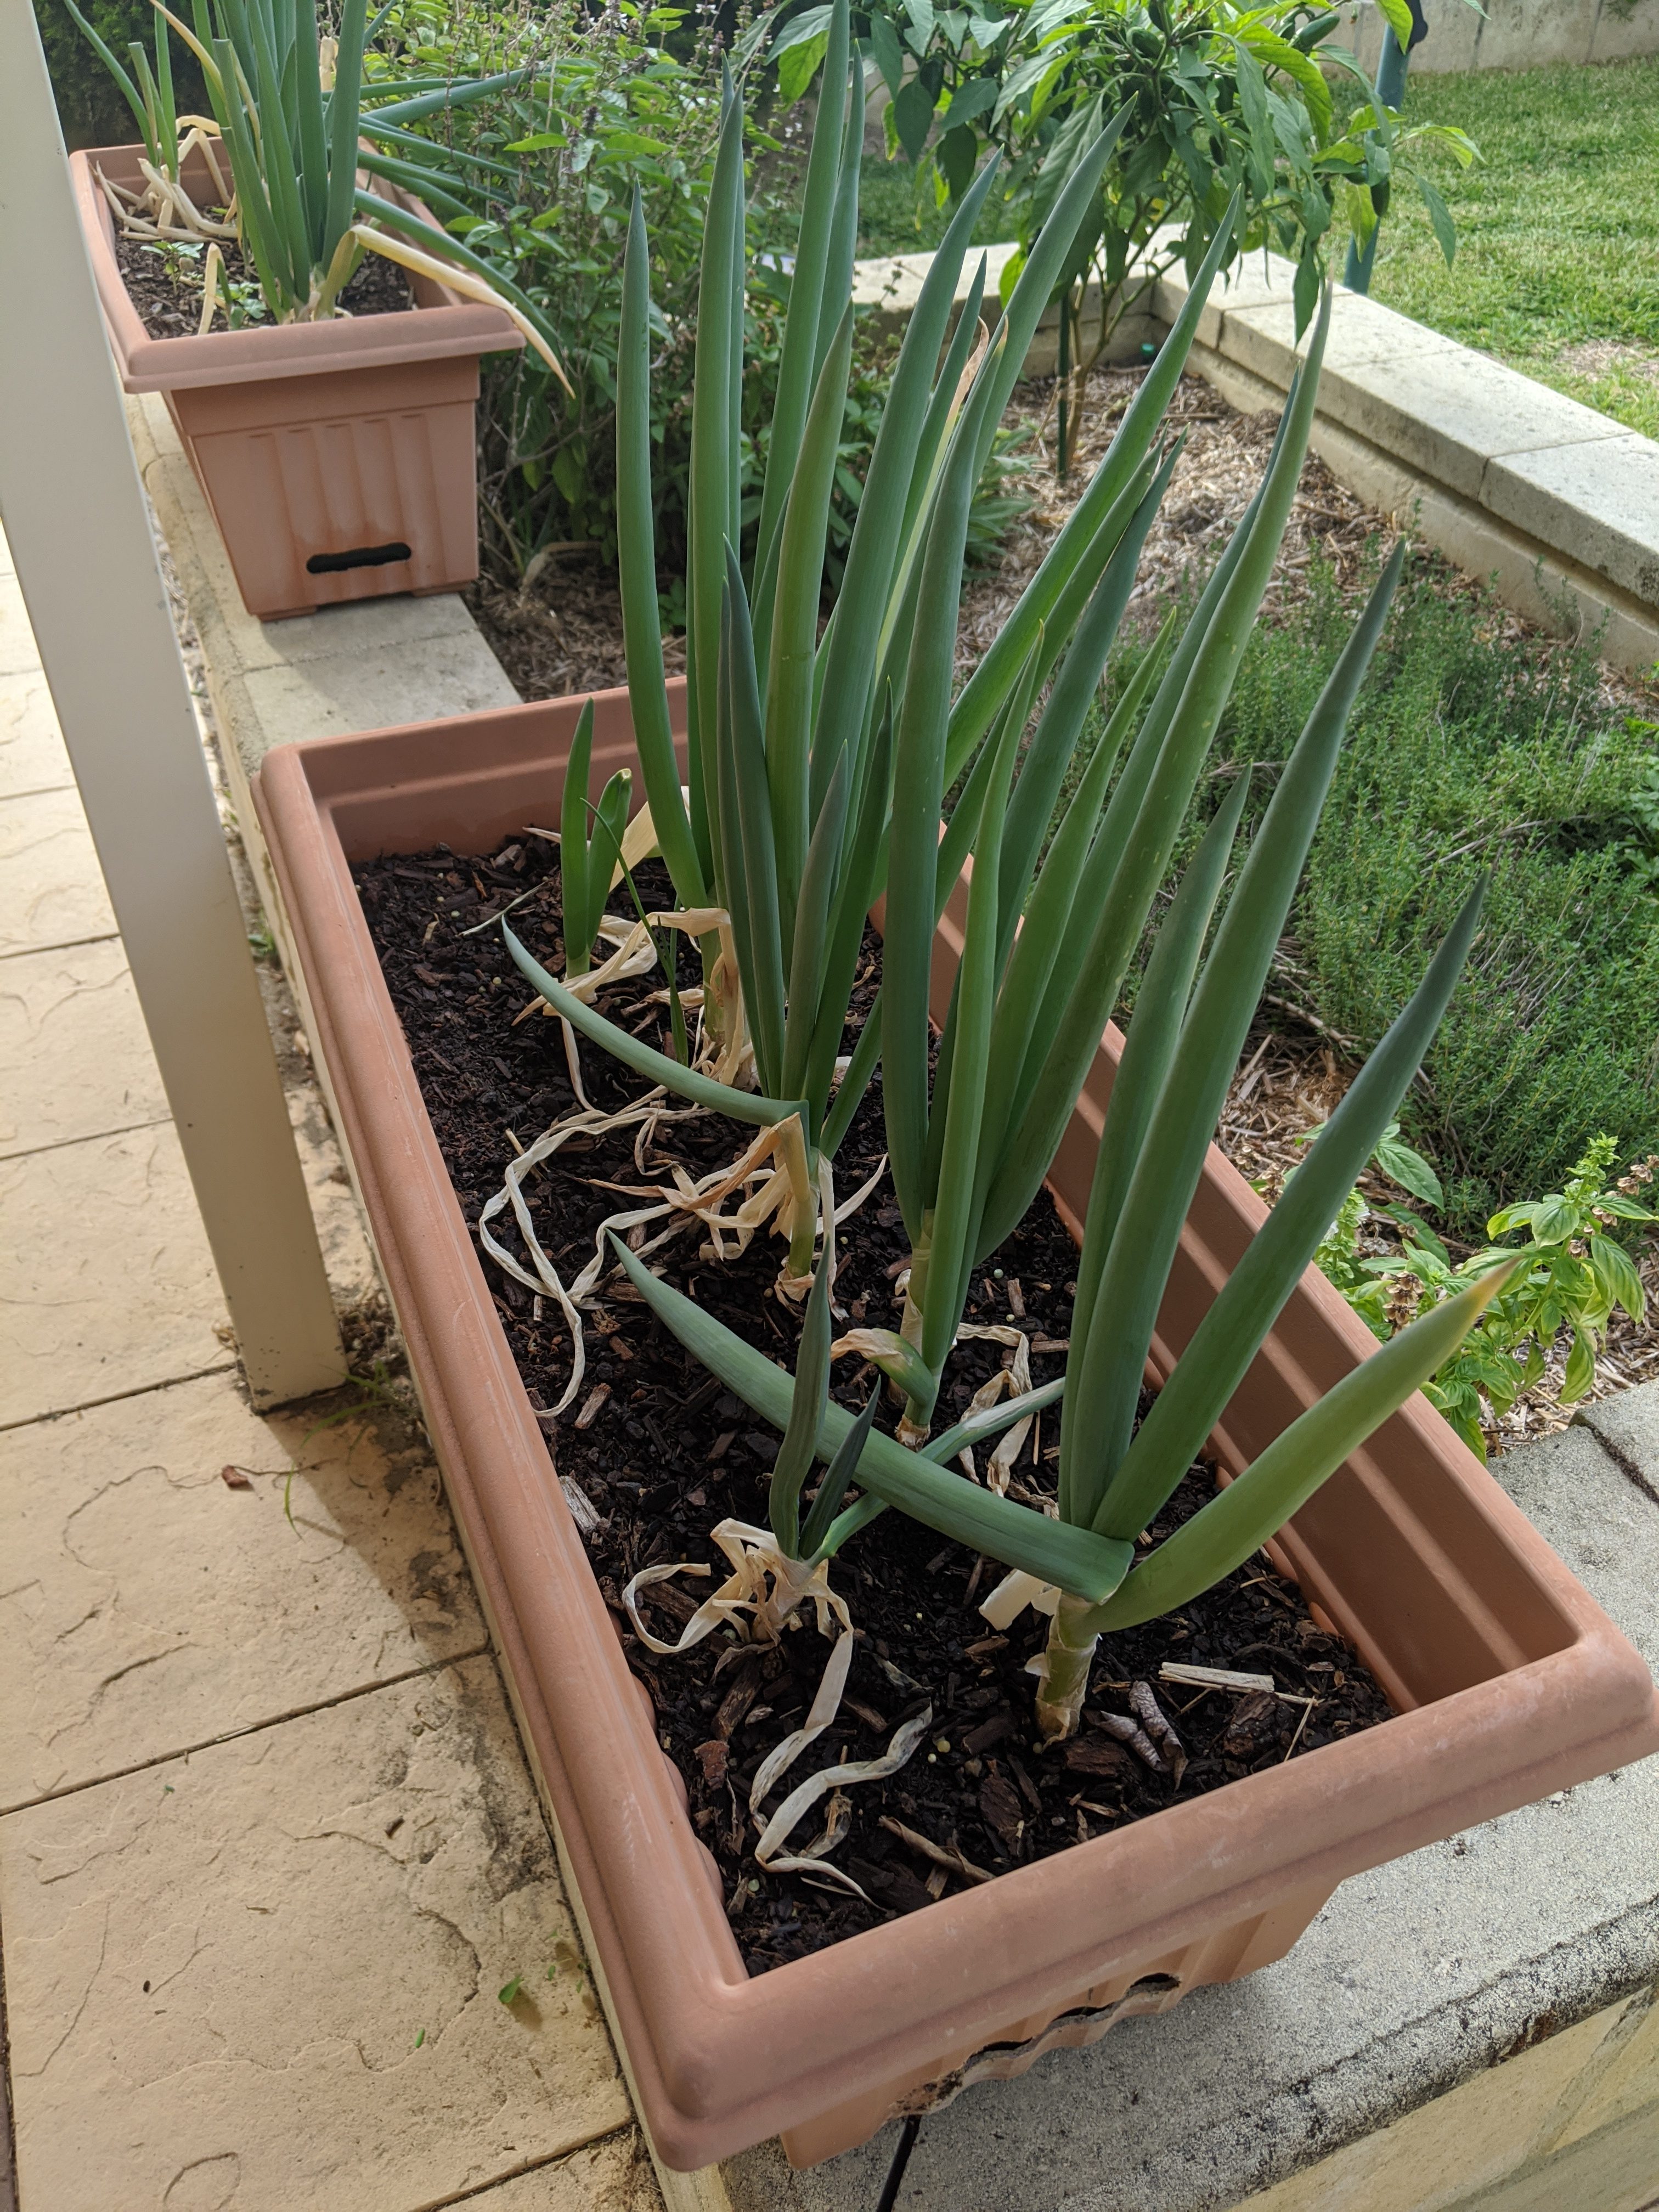
These grow really quite rapidly, in a matter of days you have spring onions growing rapidly (these ones in the picture below were planted around a day or two apart to get the gist of how quickly they grow).

Nowadays I have three of these longer pots with onions in them, so I can pretty much grab one or two whenever I want to – I just get a pair of scissors and cut them off just above the ground level, and then they reshoot.
Here they are today:

Last year, I let the whole lot go to seed at one point, and then completely ripped them all out of the pots and replaced all the potting mix. The soil was a tangled web of little white roots, and I simply shoved them into a back corner of the garden out of the way to see what would happen – they pretty much all kicked the bucket without the attention (i.e. water) they normally get in the pots (they’re on our herb bed edges, where we tend to water frequently).
I know this isn’t great for the farmers that grow the spring onions, but I hope that this can free them up to grow more difficult (and profitable?) vegetables for me – like leeks or other veggies that I can’t grow in the garden!
Anyway, this is such a simple thing to do, and it’s meant that we’ve saved a bit of money buying veggies, and can always get a fresh spring onion from the garden whenever we need one!
Enjoy the gardening in solitude,
Bish
Here are some more of Bish’s tips and kitchen ingredients:
Written by
·
-

Meat Dishes, Equipment And Ingredients
I love cooking with meat and strive to use as much of the animal as possible.
Here is a breakdown by animal grouping that lists dishes and methods of catching, preparing and cooking them. If you are looking for a particular cuisine try Browse By Theme.
CHICKEN

BEEF
Browse All Dishes or try some of my favourites by clicking these images:
Enjoy,
PK
Please consider subscribing to a weekly email summary of our posts or check us out on Facebook @growitcatchitcookit.
[mc4wp_form id=”15771″]
Written by
·
-

Ginger: Grow And Eat
Ginger root (originally from Southeast Asia) is one of the most common spices used in cooked dishes, baking, drinks and confectionery. It pops up in European, Indian and Asian cuisines having been traded and planted around the world.
It is easy to grow in warm climates. I simply buried a few roots about 10cm down in rich organic soil and waited for new stems to appear. Unlike galangal the leaves suffer a bit in the Perth summer sun and that might guide your choice of planting location.


Ginger flower – By Venkatx5 – Own work, CC BY-SA 3.0, https://commons.wikimedia.org/w/index.php?curid=20134351
You can wait for the stems to die and harvest the whole root but I just go out when I need fresh ginger and dig a bit up. You can then cut off what you need and replant the rest.

When cut it has a pungent smell that is both sweet and peppery.

If you would like to see recipes using ginger please click here.
Enjoy,
PK

Written by
·
-

How To Pickle Oyster Mushrooms
If I am not using my mushrooms super fresh I prefer to preserve them. One of my favourite ways is pickling them in apple cider vinegar.
Simply clean your mushrooms and put them in a sterilised jar. If you want to keep them down in the vinegar solution you can use a layer of apple slices. This works great if you dont have enough mushrooms for the jar.
I also added black peppercorns and a few cloves of garlic. Slices of chili would also go a treat.


I had these set aside for two and a half months and they are amazing. They have a subtle nutty apple flavour with a bit of a zing and soft texture.

Enjoy,
PK
YOU MIGHT ALSO LIKE
USING OYSTER MUSHROOMS
MUSHROOM DISHES
GROWING MUSHROOMS
PRESERVING YOUR HARVEST
Please consider subscribing to a weekly email summary of our posts or check us out on Facebook @growitcatchitcookit.
[mc4wp_form id=”15771″]
Written by
·
-
How To Dry Oyster Mushrooms
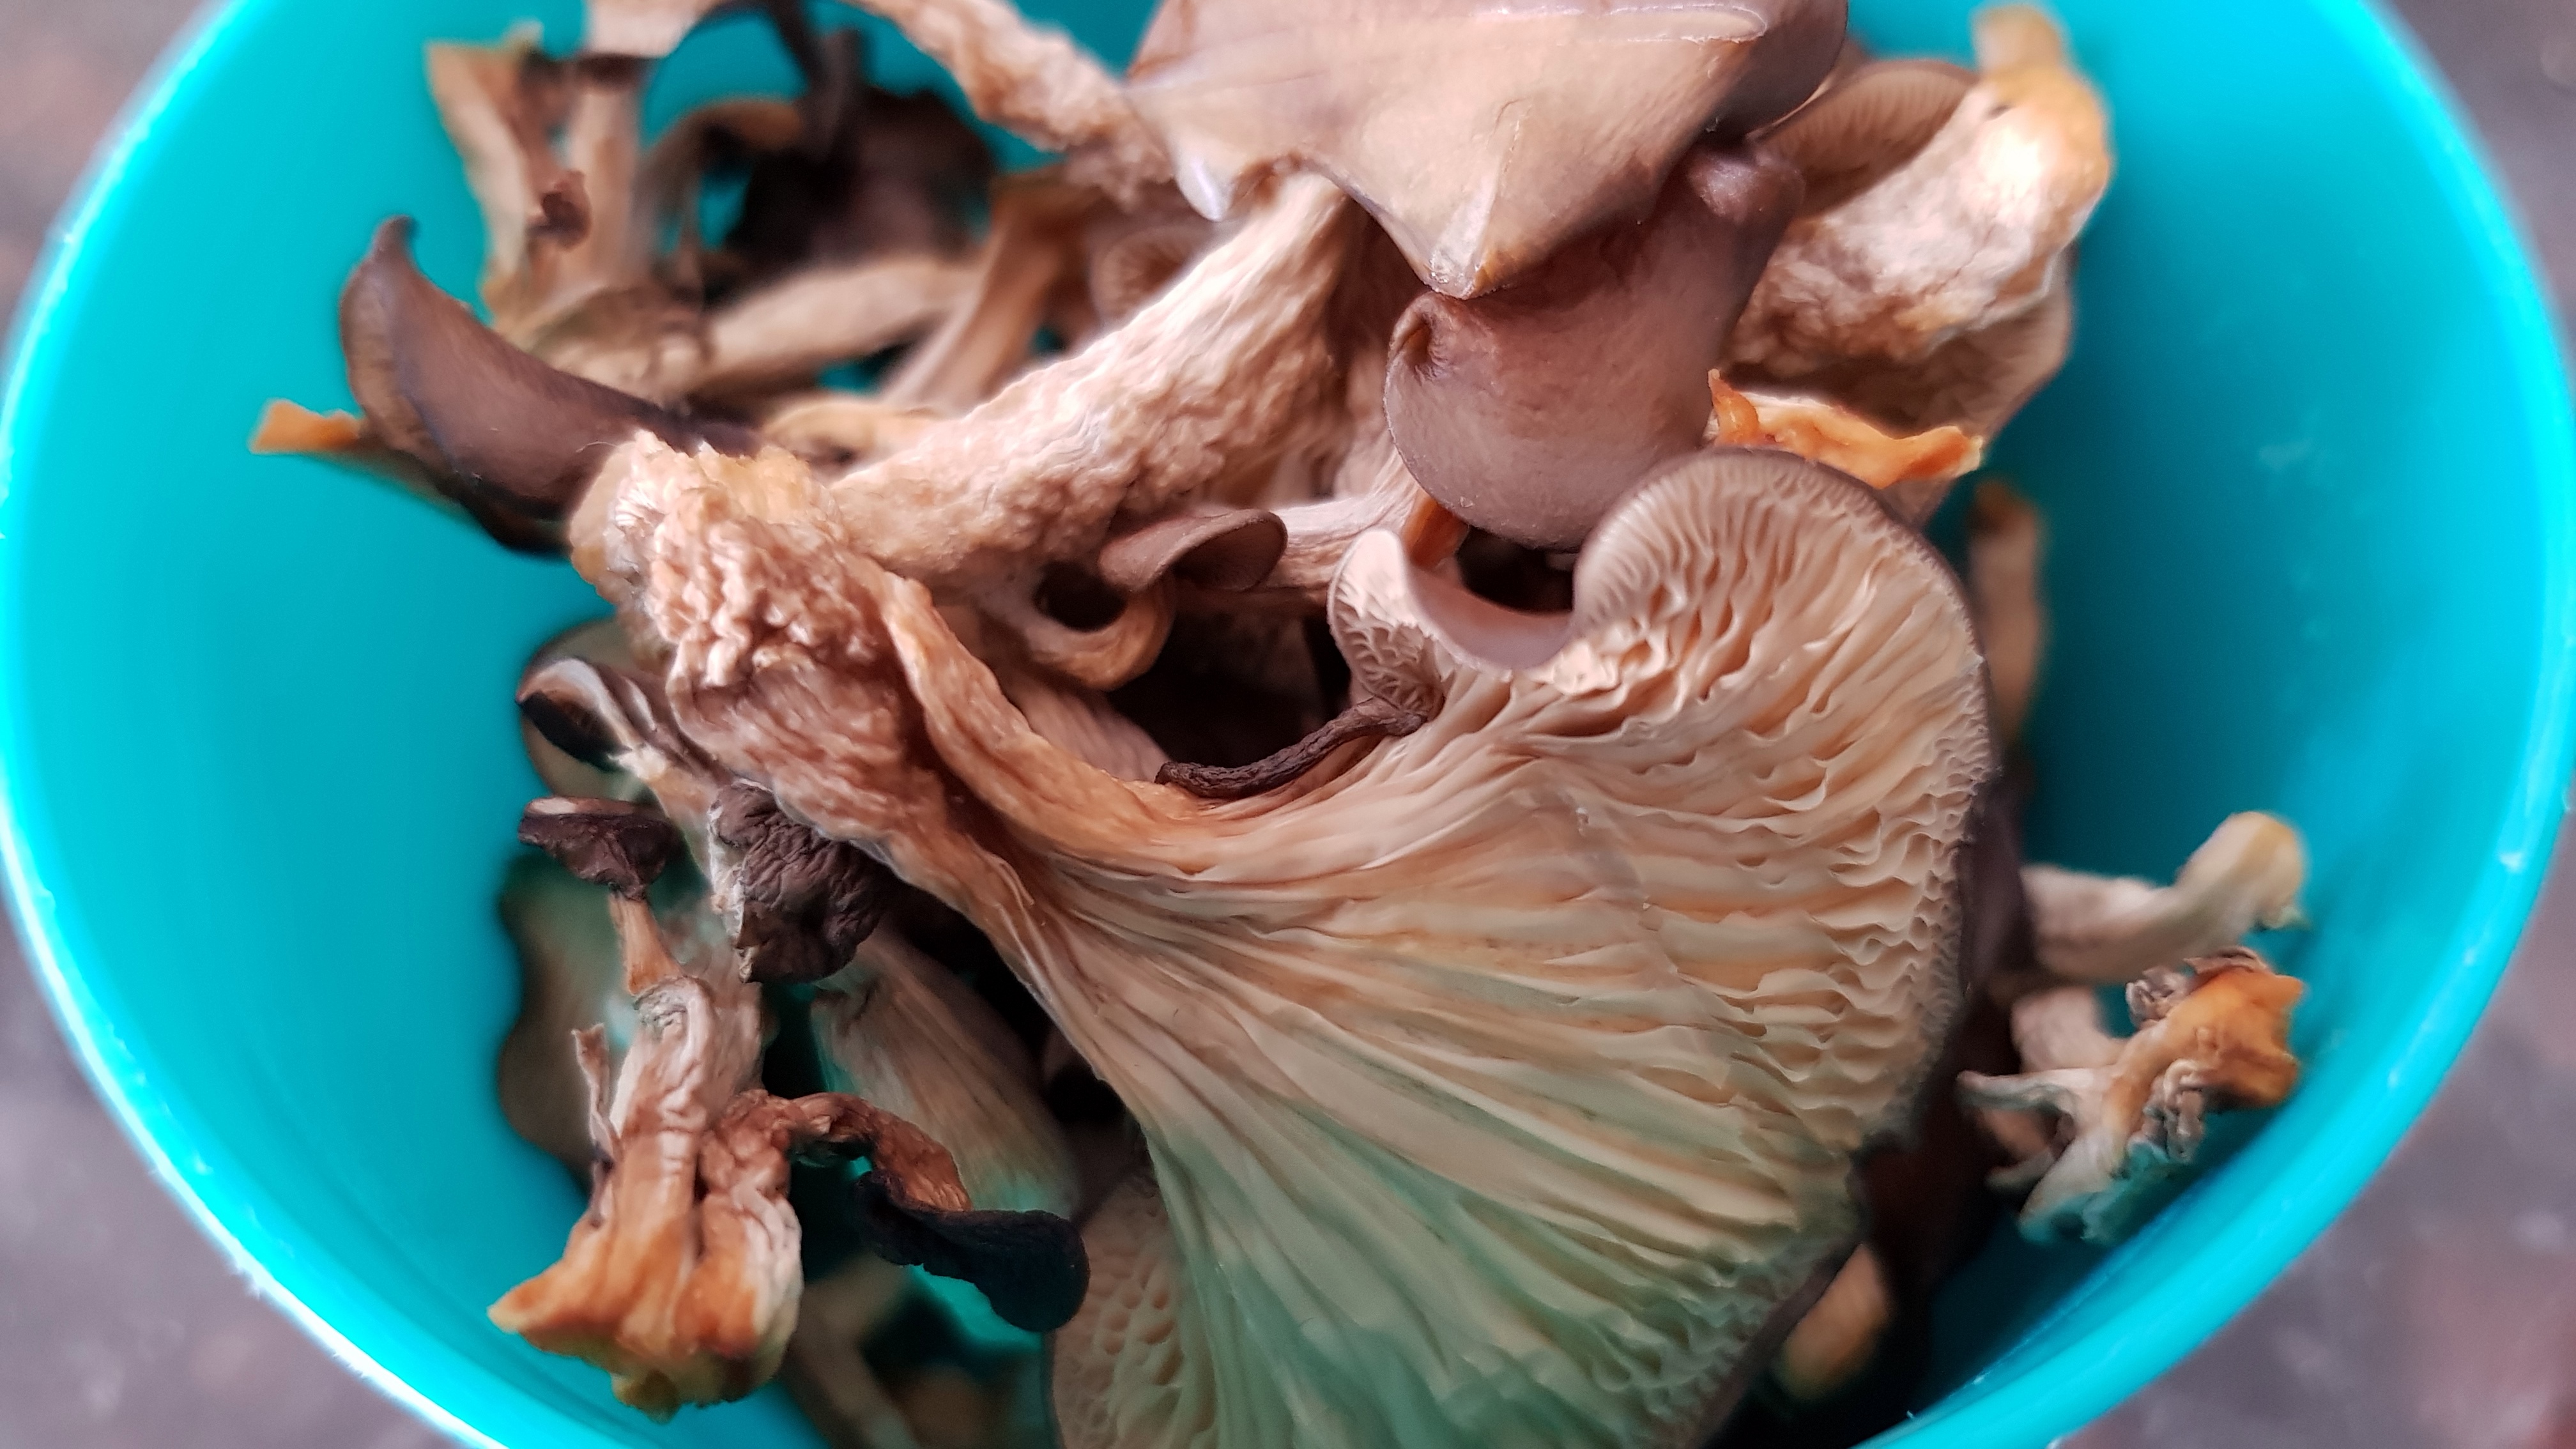
If I am not using my mushrooms super fresh I prefer to dry them. Dried they really transform slow cooked broths, stocks and casseroles.
I love Growing Oyster Mushrooms At Home but they go gangbusters from nothing to massive in no time. This means lots of mushrooms in a hurry.
If you want to see my fresh mushroom recipes click here but read on to see how I dry and store them.
Chuck the mushies on a cooling rack and set your fan forced oven to 50 degrees C.


Keep drying them until they feel dry to the touch. Then store them in an airtight container. They should last for several months this way.

Enjoy,
PK
YOU MIGHT ALSO LIKE
USING OYSTER MUSHROOMS
MUSHROOM DISHES
GROWING MUSHROOMS
PRESERVING YOUR HARVEST
Please consider subscribing to a weekly email summary of our posts or check us out on Facebook @growitcatchitcookit.
[mc4wp_form id=”15771″]
Written by
·
-

Simple Ramen Bowl: Make It Your Way
Recently, like the rest of the planet, I have become obsessed with making my own noodle bowls. I love them because although they are healthy and light, you can jam pack them full of vegetables to satisfy even the hungriest guests.
I build my bowls with meat or vegetable based broth and of course noodles (I love soba or udon the best). I then choose a selection of vegetables, meat, eggs, garnishes etc to fill up the rest of the bowl.
Note: You can make this meal vegan by using vegetable stock, tamari and stick to vegetables, mushrooms etc.

For the broth all you really need is chicken, beef or vegetable stock. You can of course build upon that basic stock.
I slowly bring 3 cups of stock up to a gentle boil. Then I add some garlic cloves, a small chunk of ginger (or galangal), several dried mushrooms and splashes of mirin seasoning and soy sauce. I find this makes enough broth for 2 bowls.

I add boiling water to a large bowl and add 2 serves of soba noodles. I let them soften over 8 minutes and then give them a good rinse.

Now this is the best bit, building the bowls. 🙂
Add noodles to each person’s serving bowl. Then pour enough broth to cover the noodles and then stack the bowls to the brim with everything else.


Serving
Now you just need to sit down with your guests and and provide lots of garnishes and condiments. I love a few dried onions and a healthy squirt of sriracha hot sauce.
Happy slurping,
PK
YOU MIGHT ALSO LIKE
JAPANESE CUISINE
NOODLE DISHES
MORE VEGAN MEALS
THE FULL GICICI INGREDIENTS LIST
Please consider subscribing to a weekly email summary of our posts or check us out on Facebook @growitcatchitcookit.
[mc4wp_form id=”15771″]
Written by
·
-

Growing Oyster Mushrooms At Home
If you have ever thought about growing your own mushrooms but thought it was too time consuming or difficult, rest assured. I bought an oyster mushroom grow bag from David Proudmore (Swan Valley Gourmet Fungi) when I was at the FarmersMarket: Manning – Perth.
I want to share how easy and fun it was. It is also exceptionally cheap!!
The only problem was working out what to do with all the mushrooms. I had to share a lot of them with my friends and family and see the bottom of the post for recipe ideas. 🙂
Their instruction sheet was simple to follow and the bag was already pinning (showing early signs the fungi was fruiting). They say you should get at least 2 and hopefully 3 blooms or flushes of mushrooms from the same bag.
I cut the bag where indicated and then put it in a plastic tub (no lid) lined with moist newspaper.
This is the first bloom:
I then changed the newspaper, cut off little bits of failed/stunted pins, put the bag back on and let the kit rest. During this time I didn’t mist but I did keep an eye out for bugs and mould.
So far I had harvest almost 1.3kg of mushrooms from 2 main bouquets and several smaller ones and was looking forward to the next bloom.
When on day 21 the bag started pinning again I started misting.
I will add to this post until the bag is finished and then I will compost it. I will also be posting how you can grow several types of mushroom on coffee grounds. The process starts by placing the bottom part of an mushroom stem in a jar of coffee grounds!
Enjoy,
PK
YOU MIGHT ALSO LIKE
USING OYSTER MUSHROOMS
MUSHROOM DISHES
GROWING MUSHROOMS
Please consider subscribing to a weekly email summary of our posts or check us out on Facebook @growitcatchitcookit.
[mc4wp_form id=”15771″]
Written by
·
-
Homemade Fruit Fly Traps
It is that time of year when the fruit flies are buzzing around my compost bins and worm farms in droves. This is despite me covering the top layer of kitchen scraps in both with a layer of newspaper to reduce the infestation.
So, this year I decided to try making homemade traps. I asked my crack team of little assistants to each make a different trap and then we trialed them out in my shed next to my mushrooms growing crates and with the door closed.
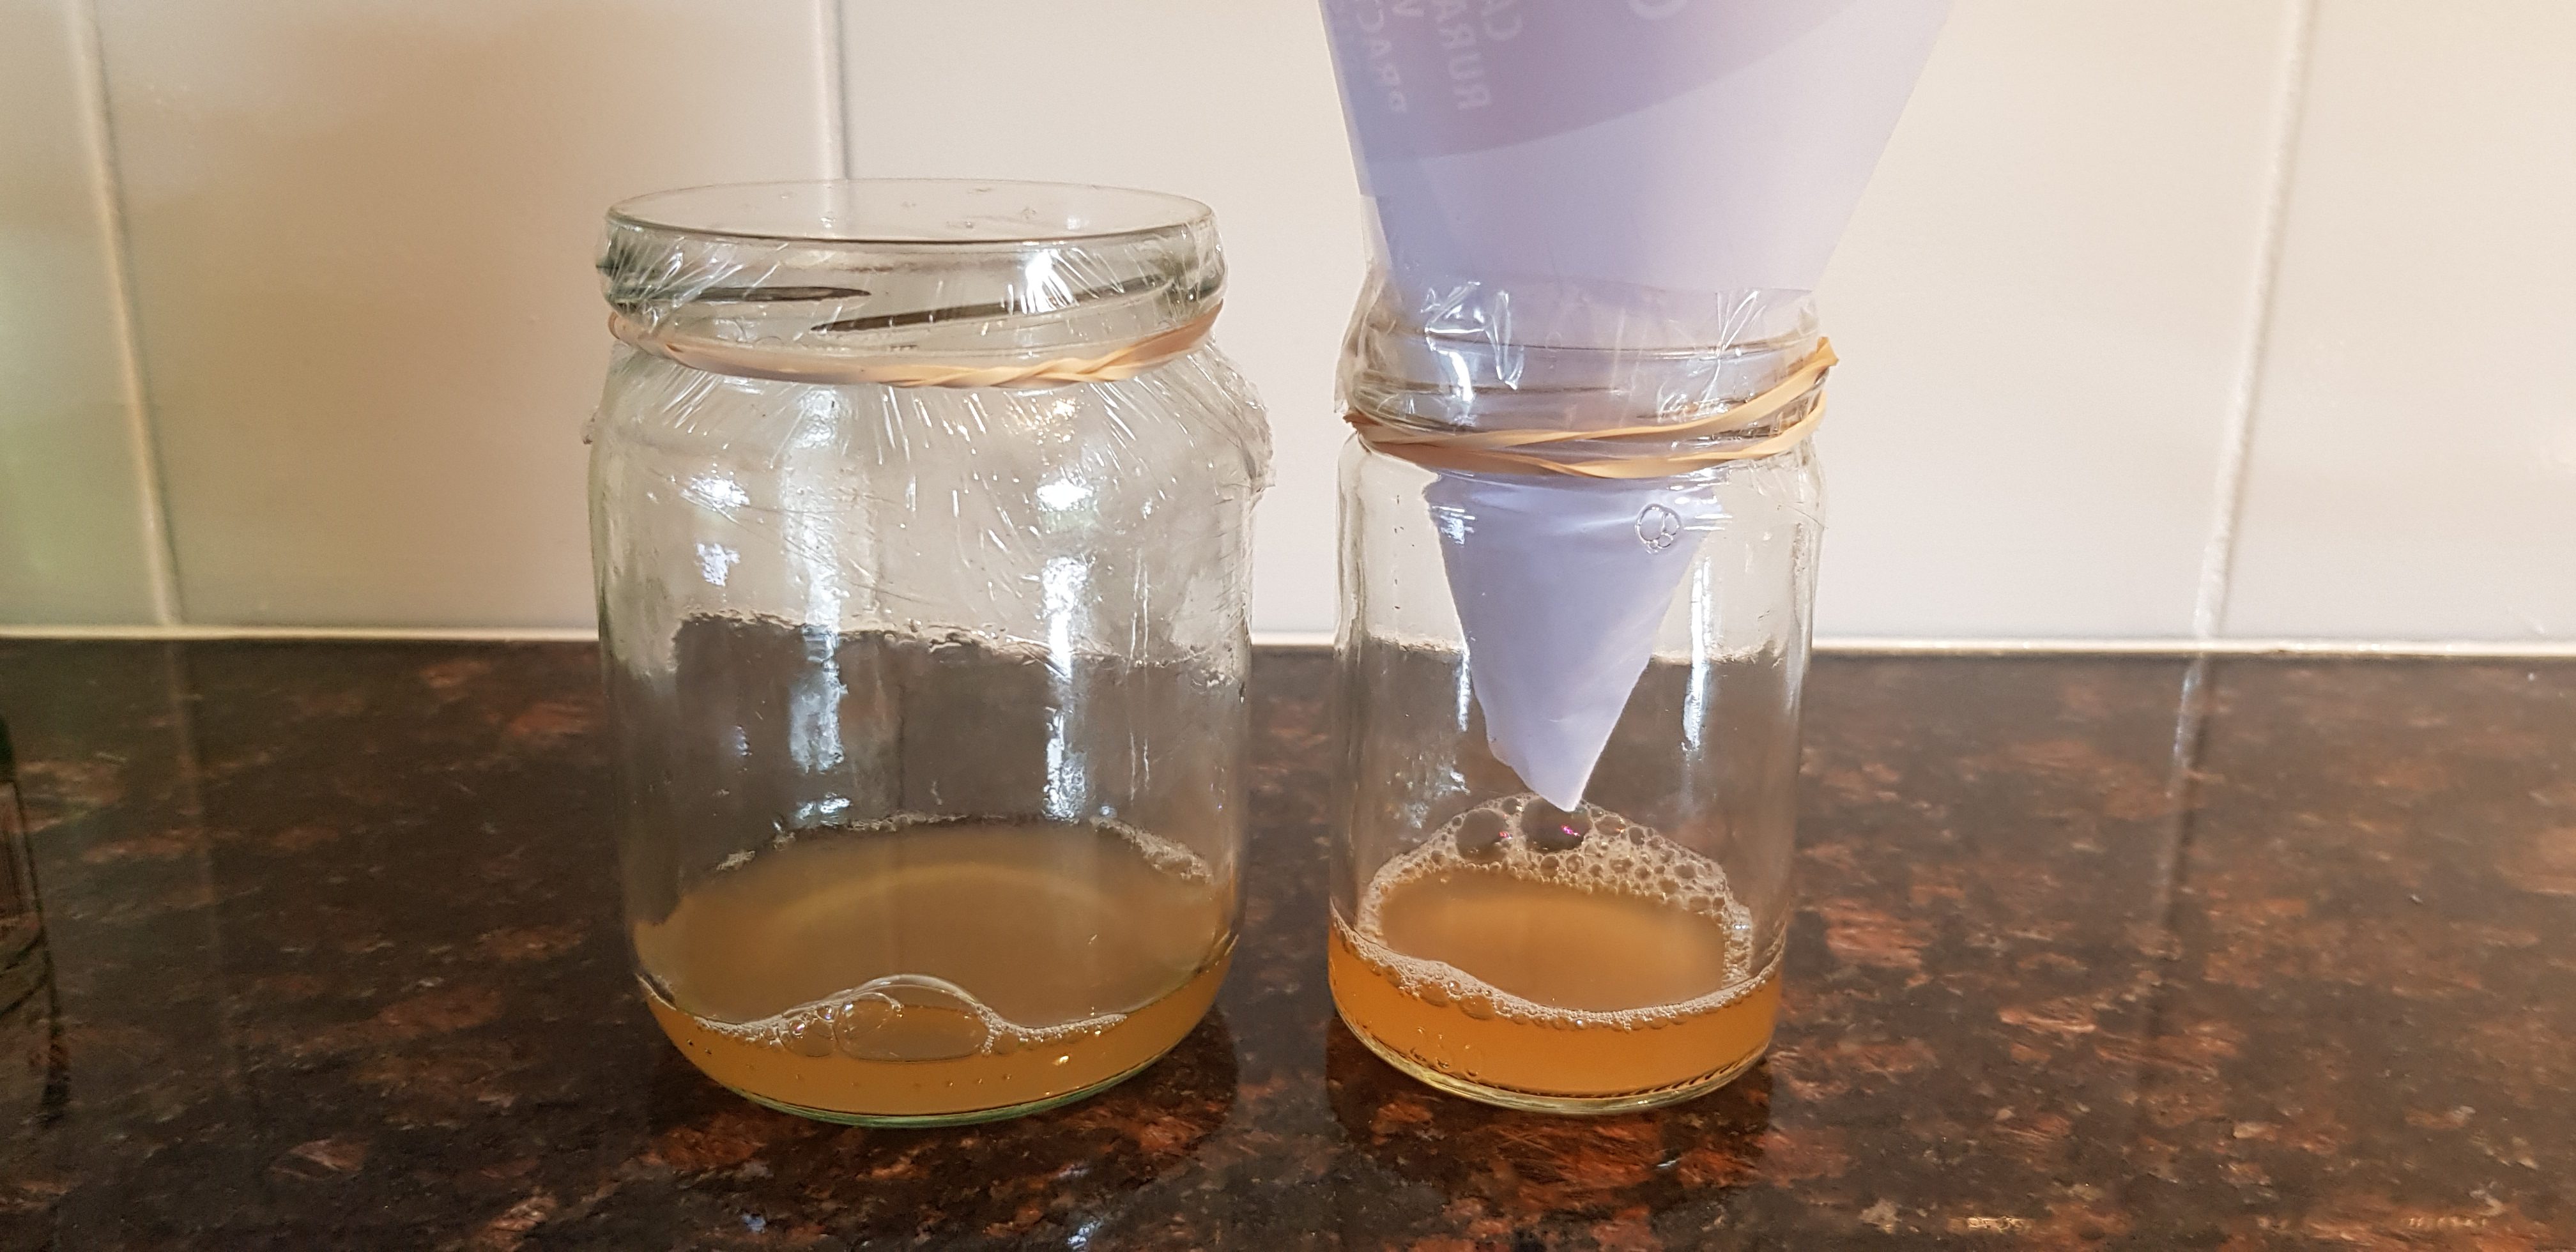
Both trap types consisted of a jar, liquid bait, a method of letting the flies in but not out and an elastic band. My assistants both made traps using cider vinegar and detergent (this stops the flies being able to sit on the liquid indefinitely).
However for the one way entrance, one lad used plastic film with some skewer holes in it, the other a cone made from some scrap paper. I made one of the former myself and put it next to my worm farm.
You can’t see in this photo but after 1 hour they both type of trap had several dead flies in them. Just as well as the competition to see who got the most flies had heated up. 🙂

This is my one in the same time frame but next to the worm farms.

So, both traps work really well. I would say though that the plastic film version holds up better outside if you are expecting rain. If you are careful you can reuse the film again and again. Indoors
Enjoy,
PK
YOU MIGHT ALSO LIKE
ENVIRONMENTALLY FRIENDLY BUG CONTROL
Please consider subscribing to a weekly email summary of our posts or check us out on Facebook @growitcatchitcookit.
[mc4wp_form id=”15771″]
Written by
·