Tag: cheese
-

PK’s Baked Mashed Potato, Bacon and Cheese Balls
I normally have enough leftovers for at least one lunch when I cook dinner for my family. So you can imagine how good these potato balls are if I had to buy lunch at work the next day :).
Really easy to make ahead of time and sort of healthy as they are baked and not shallow fried, you and your kids will love them.
Notes:
- Make more than you think you need, they are addictive
- You could work in mashed sweet potato and or pumpkin to get vegetables into picky eaters
- They will need to set in the fridge for a bit before cooking
You will be:
- Prepping the ingredients
- Making the potato balls and rolling in breadcrumbs
- Cooking the potato balls
- Serving them up hot
You will need:
- Ingredients:
- 2 cups cooled mashed potato
- 1/2 cup finely diced vegetables (I used celery and spring onions)
- 1/4 cup of cooled finely chopped crispy bacon
- 1/2 cup of breadcrumbs
- 3/4 cup of grated cheese (I used a mix of Parmigiano-Reggiano and cheddar)
- 1 egg (beaten)
- some spray olive oil
- Equipment:
- a chopping board
- a long sharp knife
- a saucepan for the mashed potatoes
- a potato masher
- a frypan for the bacon
- a fork or whisk to beat the egg
- a mixing bowl
- several plates
- an oven tray lined with baking paper
Prepping the ingredients
- Make your mashed potatoes, aiming for 2 cups worth, and pop it in the fridge to cool.
- Fine chop the bacon to end up with 1/4 cups worth, cook to your liking and then pop them in the fridge too.
- Chop the 1/2 cup of vegetables.
- Grate the 3/4 cup of cheese.
- Beat the single egg.
- Mix the above ingredients in a mixing bowl.
- Put the 1/2 cup of bread crumbs on a plate.


Making the potato balls and rolling in breadcrumbs
- Roll small balls of the potato mix and then roll those in flour.
- Pop them onto an oven tray and then into the fridge to set for at least 15 minutes.
They look pretty yummy already:

Ready for the oven:

Cooking the potato balls
- Give the top of the balls a quick spray with spray olive oil and pop the tray into a fan-forced oven (pre-heated to 200C).
- Cook for about 20 minutes or until golden brown.
Perfection:

Firm on the outside with a lovely soft cheesy texture inside:

Serving them up hot
Perfect with some fresh vegetables, sauerkraut and some dipping sauces (tomato and sour cream mixed with fresh coriander) or in a bowl by themselves as finger food :).

Enjoy,
PK
YOU MIGHT ALSO LIKE
MORE POTATO DISHES
MORE KID FRIENDLY MEALS
Please consider subscribing to a weekly email summary of our posts or check us out on Facebook @growitcatchitcookit.
[mc4wp_form id=”15771″]
Written by
·
-

PK’s Bacon Wrapped, Cheese Stuffed Jalapenos
As I mentioned in my last post, I am drowning in home-grown Jalapeños. I have decided to eat my way out one recipe at a time :).
These cheese stuffed Jalapeños, wrapped in bacon to make them irresistible, are so easy to make but not for the faint hearted.
Take a chili and cut it almost in half leaving a lip and the stalk attached to one side. Scoop out the pith and the seeds. Then stuff the cavity with your favourite cheese, I used a mix of mozzarella, parmesan and cheddar.
Next, put the lid back on and wrap the whole thing in a strip of bacon.
Pop them on an oven tray as you go and then into a fan-forced oven (pre-heated to 200C) for about 20 minutes or the bacon is crispy enough for your liking.

Served hot or chilled, your guests are going to love them.

Enjoy,
PK
Related Links:
- Dishes using Parmigiano-Reggiano (parmesan)
- Dishes using cheese
Please consider subscribing to get a weekly email summary of our posts.
[mc4wp_form id=”15771″]
Written by
·
-

PK’s Jalapeno, Cheese and Bacon Hot Pockets
A good friend of mine recently asked me where my inspiration comes from when I decide what to cook.
Well, there are a number of factors, sometimes I need to use something in the garden that is going gang busters :).
For example, I have so many home grown Jalapeños and I am always looking for ways to avoid wasting them. There are only so many frozen chilis this family needs and all my friends’ freezers are full of them too.
I came across a recipe called Bacon Jalapeno Cheese Bombs and I knew I had found a winner (see it here). I thought it was excellent but I wanted to use home-made bread dough as I am a dough making newbie.
The result is something that growing up (in Perth, Western Australia) we called ‘hot pockets’. Basically a small chewy bread product full of cheesy goodness.
Notes:
- I was experimenting so they all look a bit different. Next time I am going to glaze them more with the egg mix and also add chopped coriander and diced capsicum.
- My taste-testers also suggested the best ones had a higher ratio of filling to dough and that adding a bit of salt to the dough mix would be good.
You will be:
- Prepping the fillings.
- Making the bread dough.
- Making the hot pockets.
- Cooking the hot pockets.
- Serving them up hot.
You will need:
- Ingredients:
- 600g bread flour and yeast (about enough to make 1 large white loaf)
- extra plain white flour to knead the dough
- a large handful of chopped jalapeños
- 2 large handfuls of cooled chopped crispy bacon
- a large chunk of mozzarella (in brine or vacuum packed is best)
- a small cup of milk or a whisked egg for glazing
- Equipment:
- a chopping board
- a long sharp knife
- a rolling pin
- a large bowl for making dough
- a large bowl for proofing the dough
- an oven tray line with a sheet of baking paper
- a pastry brush
Steps:
Prepping the fillings
- Chop the bacon rashers, cook them on the barbecue (for that smoky taste) and then pop them into the fridge to cool (you need about 2 handfuls).
- Finely chop the jalapeños with the result being about a handful.
- Slice sections of mozzarella, I went for discs about the size of an Australian 20c coin.
Making the bread dough
- Follow the standard method of making bread dough to just after the first rising (making bread dough is so much fun!).
- Give the dough ball a quick kneading and then roll it out somewhat.

Making the hot pockets
- Take a small ball of dough and flatten it down with your hand.
- Pop a disc of mozzarella on it, followed by some crispy bacon bits and chopped jalapeños.
- Then fold the dough around the fillings, crimp and then mould a bit with your hands.
- Pop them on a baking paper lined oven tray as you go.
- When you are finished, glaze each ball with egg or milk and then sprinkle any filling leftovers on the tops :).
Balls of dough ready for fillings:
They see me rollin’ (albeit badly):
Cooking the hot pockets
- Pop the tray into a pre-heated fan forced oven set to 200C.
- Cook for about 15 minutes and or they look golden brown.
Serving them up hot
Even though they can be improved, the result looked, tasted and smelt amazing :).
They were even good the next day after a quick zap in the microwave.

Enjoy,
PK
Related Links:
- see more recipes using chilis here
Please consider subscribing to get a weekly email summary of our posts.
[mc4wp_form id=”15771″]
Written by
·
-
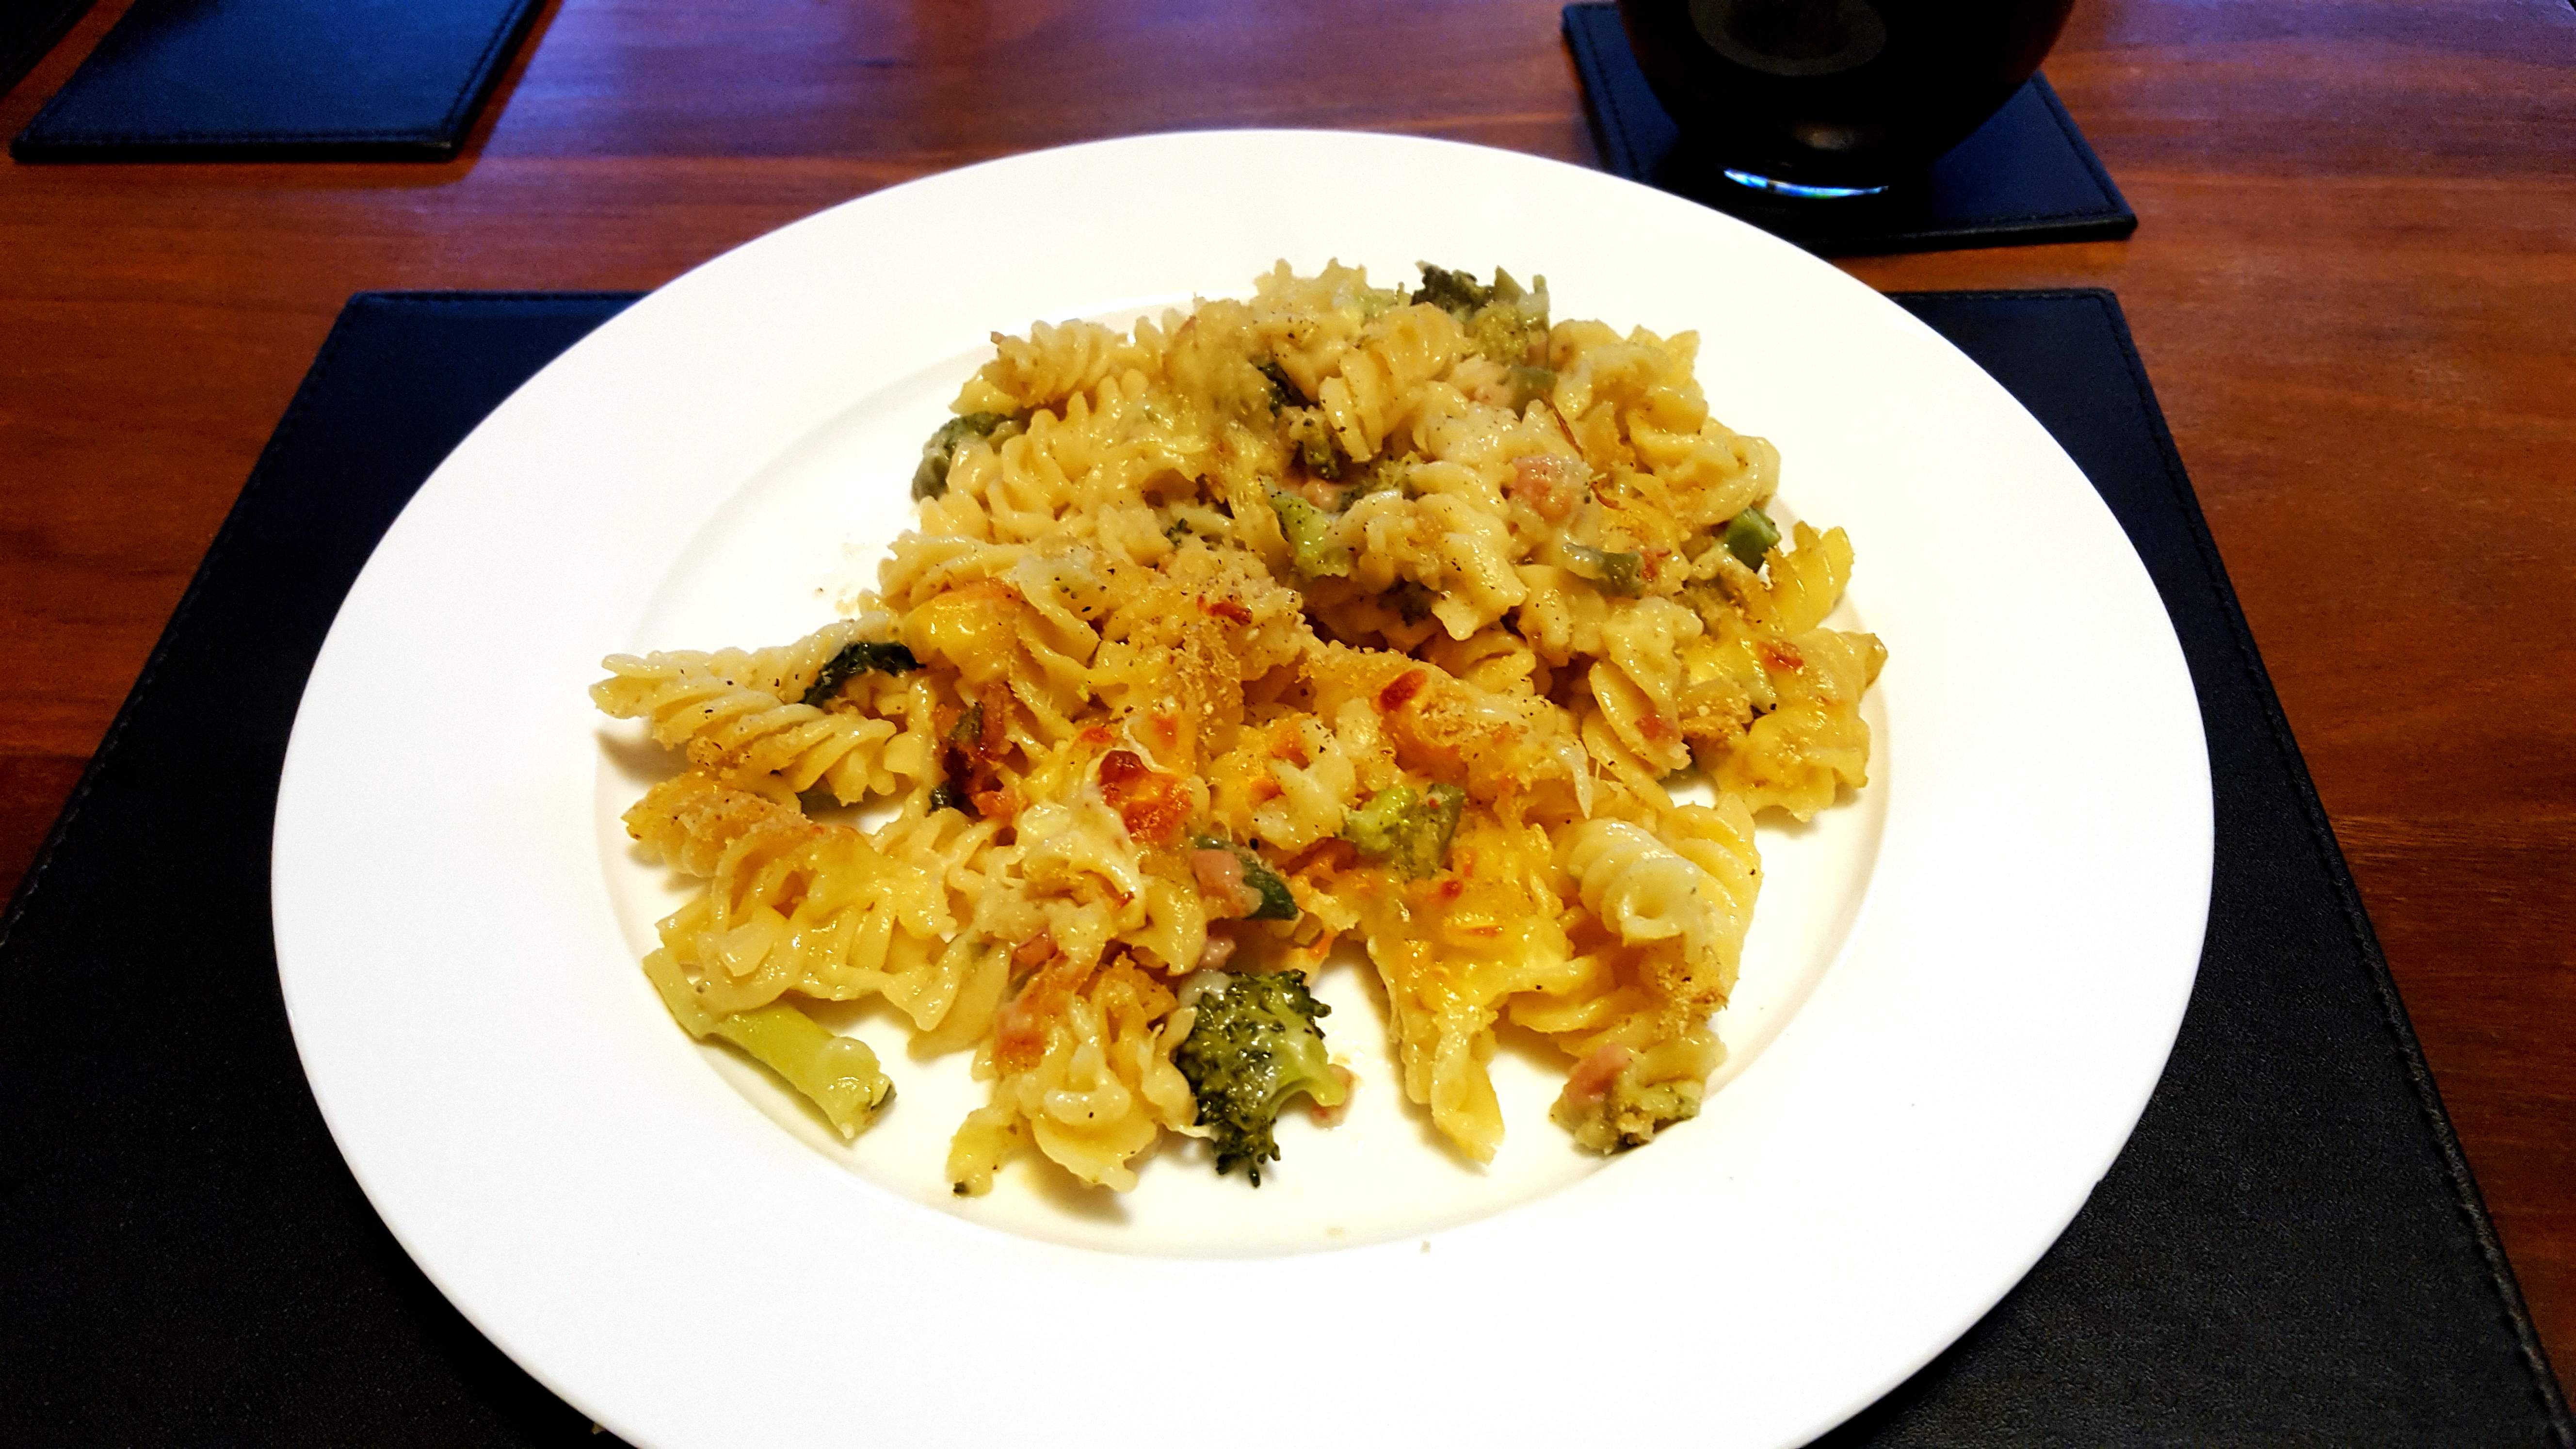
PK’s One Pan Cheddar, Bacon And Broccoli Pasta Bake
I have been cooking a really tasty cheese and broccoli pasta bake dish from http://www.sixsistersstuff.com/ for years and everyone in the family loves it.
However, recently my wife challenged me to make it using one pan. Let’s just say I am not usually economical when it comes to using plates, pans, knives etc :).
So this uber tasty, bacon enhanced, one pan pasta bake is the result. You and your guests are going to love it and in the unlikely event there is anything left, it freezes well so your bank account will love it too.
You will be:
- Getting everything ready.
- Cooking on the hob.
- Cooking in the oven.
- Serving.
You will need:
- Ingredients:
- 500g of your favourite dried pasta (I used fusilli) –
- 200g bacon rashers (chopped) –
- a large brown onion (finely chopped) –
- 1/2 cup green beans (chopped) –
- 300g broccoli florets (chopped) –
- 2 Tbsp salted butter or butter blend –
- 1/4 cup white plain flour –
- 2 cups milk (I used skim) –
- 1 cup PK’s Slow Cooker Chicken Stock –
- 2 cups cheddar cheese (grated) –
- a good handful of Parmigiano-Reggiano or parmesan cheese (shaved)
- 1/4 cup breadcrumbs
- ground rock salt to taste
- cracked black peppercorns to taste
- olive oil spray
- Equipment:
- a chopping board
- a long sharp knife
- a wooden spoon
- a large saucepan for the dried pasta
- a large oven dish that can also be used on the hob
Steps:
Getting everything ready
- Start cooking the 500g of dried pasta in a large pot of boiling water. I always add a slug of oil and a big dash of table salt to the pasta water. Hey, not a health blog :).
- Finely chop the large brown onion.
- Rough chop the:
- 200g bacon rashers.
- 1/2 cup green beans.
- 300g broccoli florets.
- Grate the 2 cups cheddar cheese.
The first time I cook something I like to get everything together first:

Cooking on the hob
- Spray a bit of oil in the oven dish, pop it over two of the hob’s burners and turn them on low.
- Add the 200g of chopped bacon and keep it moving around.
- After a few minutes add the 2 Tbsp of butter and the chopped brown onion.
- Keep everything moving until the butter is melted and the onion has started to soften.
- Add the 1/4 cup white plain flour and mix in.
- Add the 1 cup of chicken stock and bring to the boil. Keep cooking until the sauce has reduced a bit.
- Add in the:
- 2 cups milk
- 2 cups grated cheddar
- 1/2 cup chopped green beans
- 300g chopped broccoli florets
- Chuck in the now al dente pasta and mix everything.
- Sprinkle the top with the breadcrumbs and shaved Parmigiano-Reggiano.
Everything is better with bacon:

Mixing in the other ingredients.
Mix in the dairy and the greens:
Mix in the pasta, sprinkle the breadcrumbs, Parmigiano-Reggiano or parmesan cheese:
Cooking in the oven
- Put the oven tray into a preheated fan-forced oven set to 190C and cook for about 20 minutes.
- You can optionally then use a chef’s torch or the griller to brown the cheese a bit.
Perfection:

Serving
You don’t need anything else other than a glass of your favourite red :).

Enjoy,
PK
Written by
·
-

PK’s Chicken Puff Pastry Parcels
These little chicken parcels encourage variety and experimentation when it comes to their fillings. They especially lend themselves to using up leftover chicken and those limp vegetables at the back of the fridge.
Your kids are going to love them and I found them really easy to make even though I am a pastry novice. I even eat them cold the next day at work for a snack.
One sheet of puff pastry makes four small rectangular parcels and you can scale the recipe up easy peasy. I’ll show you how I generally make them below but as I said, mix it up. 🙂
You will be:
- Bringing together the ingredients.
- Making the parcels.
- Cooking the parcels.
- Serving.
You will need:
- Ingredients (makes 4 small parcels):
- PK’s NoRecipe Garlic Butter
- PK’s Pulled Chicken Breast FoodHack
- 1 sheet of frozen puff pastry (I used Pampas brand)
- Small amounts of:
- spinach leaves
- corn kernels
- coriander leaves
- ground black peppercorns
- 1 chicken egg (beaten for the glazing and sealing)
- 2 Tbsp water (for the egg mix)
- Equipment:
- a chopping board
- a small sharp knife
- an oven tray or dish
- a basting brush
- a small whisk
- a bowl to beat the egg
Bringing together the ingredients
- Defrost your frozen puff pastry sheet and cut it into 4 squares.
- Take the garlic butter out of the fridge.
- Take the pulled chicken out of the fridge.
- Wash and dry the spinach leaves and coriander leaves.
- Cook and cool the corn kernels.
- Whisk the single egg along with the 2 Tbsp water.
- Turn your fan forced oven on to 190°C.
Making the parcels
Now for the fun part but remember that with the fillings, less is more :).
- Spoon a little of the garlic butter into the middle lower half of the square.
- Build up the rest of the fillings in layers.
- Brush the egg mix on all four sides of the square to make it stick.
- Then fold the square over to make a pillow shape.
- Press the edges with you finger to seal the pillow and then brush more of the egg mixture over the whole thing.
- Add some air holes with your knife.
- Put the parcels in your oven tray and refrigerate if required by your meal’s timing.
Filling the parcels:
Add some air holes and and few slices with the knife to make them look nice:

Cooking the parcels:
- Put the oven tray into your preheated 190°C fan forced oven and cook until golden brown (approximately 40 minutes).
- Slice one and eat it before anyone else gets one. If you get caught say you are just making sure everything is cooked through :).

Serving
Here I simply served the parcels, about 4 per hungry adult, with some more greens and a glass of white wine.

Enjoy,
PK
YOU MIGHT ALSO LIKE
MORE KID FRIENDLY MEALS
OUR OTHER RECIPES STARRING CHICKEN
Please consider subscribing to a weekly email summary of our posts or check us out on Facebook @growitcatchitcookit.
[mc4wp_form id=”15771″]
- see more kid friendly meals here
Written by
·
-
PK’s Mini Chicken Parcels
These little chicken parcels encourage variety and experimentation when it comes to their fillings. They especially lend themselves to using up leftover chicken and those limp vegetables at the back of the fridge.
Your kids are going to love them and I found them really easy to make even though I am a pastry novice :). I even eat them cold the next day at work for a snack.
One sheet of puff pastry makes four small rectangular parcels and you can scale the recipe up easy peasy. I show you how I generally make them below but as I said, mix it up.
You will be:
- Bringing together the ingredients.
- Making the parcels.
- Cooking the parcels.
- Serving.
You will need:
- Ingredients:
- PK’s NoRecipe Garlic Butter
- PK’s NoRecipe Pulled Chicken Breast
- 1 sheet of frozen puff pastry (makes 4 so scale as you need, I used Pampas brand)
- spinach leaves
- corn kernels
- coriander leaves
- ground black peppercorns
- 1 egg (beaten for the glazing and sealing)
- 2 Tbsp water (for the egg mix)
- Equipment:
- a chopping board
- a small sharp knife
- an oven tray or dish
- a basting brush
- a small whisk
- a bowl to beat the egg
Steps:
Bringing together the ingredients
- Defrost your frozen puff pastry sheet and cut it into 4 squares.
- Take the garlic butter out of the fridge.
- Take the pulled chicken out of the fridge.
- Wash and dry the spinach leaves and coriander leaves.
- Cook and cool the corn kernels.
- Whisk the single egg along with the 2 Tbsp water.
- Turn your fan forced oven on to 190°C.
Making the parcels
Now for the fun part but remember that with the fillings, less is more :).
- Spoon a little of the garlic butter into the middle lower half of the square.
- Build up the rest of the fillings in layers.
- Brush the egg mix on all four sides of the square to make it stick.
- Then fold the square over to make a pillow shape.
- Press the edges with you finger to seal the pillow and then brush more of the egg mixture over the whole thing.
- Add some air holes with your knife.
- Put the parcels in your oven tray and refrigerate if required by your meal’s timing.
Filling the parcels:
Add some air holes and and few slices with the knife to make them look nice:

Cooking the parcels:
- Put the oven tray into your preheated 190°C fan forced oven and cook until golden brown (approximately 40 minutes).
- Slice one and eat it before anyone else gets one. If you get caught say you are just making sure everything is cooked through :).

Serving
Here I simply served the parcels, about 4 per hungry adult, with some more greens and a glass of white wine.

Enjoy,
PK
Written by
·
-

FoodHacks: Microwave Cheesy Eggs
Got a hankering for scrambled eggs but short on time or perhaps you only have a microwave and no hob?
Then this tip is for you :).
I think they come out just as good as the real deal. We will be microwaving a beaten egg in several short zaps, breaking up the curds each time. You have control over the result being well broken up or not and even how dry you like.
Steps:
Simply take an egg and whisk it in a bowl with a splash of milk. I then add a bit of shaved Parmesan, a sprinkle of ground black peppercorns and whisk again.

Now into the microwave. This step can be tricky to master and the timing is going to be particular to your microwave. In my microwave 30 seconds is right for the first zapping.
If you find that the egg has been over cooked then you need to reduce the zapping times.

This is what we want. A few curds that can be mixed around with a fork and not a solid mass of rubber nor the absence of curds. I then stir the curds and pop the bowl back into the microwave. Now I am using 20 seconds bursts between stirrings.
I will reduce the times if I think the egg is overcooking. This is how it looks over the next few cycles of zapping and stirring.


Perfect and ready for some toast 🙂

Enjoy,
PK
Related Links:
- more FoodHacks here
- Dishes using Parmigiano-Reggiano (parmesan)
- Dishes using cheese
Please consider subscribing to get a weekly email summary of our posts.
[mc4wp_form id=”15771″]
Written by
·
-

PK’s Fettuccine Chicken Alfredo
Fettuccine Alfredo is a pasta dish made from freshly made fettuccine tossed only with Parmigiano-Reggiano and butter.
This was my first attempt at making it and I wanted to make the sauce from scratch. I chose this ‘food network’ recipe as a base to experiment from and the results were simply amazing. The addition of 2 cups of heavy cream might have had something to do with this :).

I used an Australian made Parmesan rather than certified Parmigiano-Reggiano which is only made in one of several regions in northern France. I certainly will be using it next time for a comparison. [ edit – I did 🙂 ]
Similarly, although I used San Remo Brand’s Traditional Egg Fettuccine No 77 and thought it an excellent product, I am going to be making my own fettuccine next time. [ edit – I did 🙂 ]
You will be:
- Boiling the pasta.
- Cooking the bacon and chicken.
- Making the alfredo sauce.
- Combining everything and serving hot.
You will need:
- Ingredients:
- a couple slugs of olive oil
- 225g fettuccine
- 2 chicken breasts, skin off, cut into thin but wide slices (see photos below)
- a handful of bacon rashers, finely chopped
- 8 Tbsp butter
- 2 cups heavy cream
- ground rock salt and ground black peppercorns to taste
- ground nutmeg to taste
- a very small handful of oregano, chopped
- 1.5 cups Parmigiano-Reggiano or Parmesan, finely grated
- Equipment:
- a chopping board
- a long sharp knife
- a large saucepan for the pasta
- a frypan
- a bowl to put the cooked chicken and bacon in
- a colander to drain the pasta
Boiling the pasta
- You are going to need 15 minutes to get everything else ready so put the pasta into boiling water with a slug of olive oil and a generous amount of salt.
- Whilst doing the recipe’s other steps, cook the pasta until molto al dente (I chuck the odd bit onto the kitchen tiles to test it, if it sticks it is ready) and remember that the last step in this recipe is to mix everything together and serve quickly.

Cooking the bacon and chicken
- Cook a good handful of chopped bacon in some olive oil until crispy, putting it aside and cleaning the frypan with paper towel. Return it to the heat.
- Melt 2 Tbsp of the butter in the frypan and cook the 2 chicken breasts worth of slices over medium heat. Remember that the slices won’t take long each side to cook through and the chicken will go chewy if you over cook it.
- Add the bacon back to the frypan and give everything a gentle toss.
- Put the chicken and bacon aside in a bowl and wipe clean the bottom of the frypan.
Bacon goodness:
Cook the chicken and combine the with the bacon:
Making the alfredo sauce
- Bring the frypan back to the heat and melt 6 Tbsp of butter.
- Whisk the 2 cups of heavy cream into the butter.
- Add the very small handful of chopped oregano, salt, pepper and at least one pinch of ground nutmeg.
- Keep stirring gently for several minutes and then fold the 1.5 cups of finely grated Parmigiano-Reggiano or Parmesan into the sauce.

Combining everything and serving hot
- Chuck the drained pasta, the chicken and the bacon into the sauce and gently mix everything together.
- Add large portions to the serving bowls and serve with cracked black peppercorns and grated Parmigiano-Reggiano.

Enjoy,
PK
YOU MIGHT ALSO LIKE
PASTA DISHES
MORE ITALIAN CUISINE
Please consider subscribing to a weekly email summary of our posts or check us out on Facebook @growitcatchitcookit.
[mc4wp_form id=”15771″]
Written by
·
-

KT’s NoFuss Mini Quiches
Thankfully these are as easy to make as they are to eat. In our house they have a habit of disappearing when my wife isn’t looking :).
I didn’t even get to take a photo of the finished products cooling on the racks.
Oh wait here is one from last time she made them:

You will be:
- Preparing the filling.
- Cutting and pressing puff pastry into baking tins to make the bases.
- Spooning the mixture to bases and cooking.
You will need:
- Ingredients:
- 2 sheets of puff pastry
- 125g cheddar cheese, grated (use your favourite hard cheese)
- 125g ham slices, finely chopped
- 3 Tbsp heavy cream (whipping cream)
- 0.5 Tbsp whole grain mustard
- 1 egg
- ground black peppercorns to taste
- ground rock salt to taste (I don’t use any as the cheese and bacon are salty enough)
- Equipment
- a chopping board
- a long sharp knife
- a mixing bowl
- 7cm diameter biscuit cutter
- 2 shallow mini pie/bun trays (12 depressions per tray)
Steps:
Prepare the filling
- In a mixing bowl add the:
- 125g grated cheddar cheese
- 125g finely chopped ham
- 3 Tbsp heavy cream
- 0.5 Tbsp whole grain mustard
- 1 egg
- ground black peppercorns to taste
- Mix everything thoroughly but gently.

Cutting and pressing puff pastry into baking tins to make the bases
- Lay the sheets of puff pastry out.
- Cut 24 circles out of them using the cookie cutter and press these into the trays.

Spooning the mixture to bases and cooking
- Spoon a small amount of the filling into each base.

- Cook for 15 minutes at 200°C in a fan forced oven.

Eat them hot or freeze them. Personally I like them cold and think they make a great lunch box snack.
If they last that long :).
Enjoy,
PK
Written by
·
-
KT’s Easy Mini Quiches
Thankfully these are as easy to make as they are to eat. In our house, they have a habit of disappearing when my wife isn’t looking :).
I didn’t even get to take a photo of the finished products cooling on the racks.

You will be:
- Preparing the filling.
- Cutting and pressing puff pastry into baking tins to make the bases.
- Spooning the mixture to bases and cooking.
You will need:
- Ingredients:
- 2 sheets of puff pastry
- 125g cheddar cheese, grated (use your favourite hard cheese)
- 125g ham slices, finely chopped
- 3 Tbsp heavy cream (whipping cream)
- 0.5 Tbsp whole grain mustard
- 1 egg
- ground black peppercorns to taste
- ground rock salt to taste (I don’t use any as the cheese and bacon are salty enough)
- Equipment
- a chopping board
- a long sharp knife
- a mixing bowl
- 7cm diameter biscuit cutter
- 2 shallow mini pie/bun trays (12 depressions per tray)
Steps:
Prepare the filling
- In a mixing bowl add the:
- 125g grated cheddar cheese
- 125g finely chopped ham
- 3 Tbsp heavy cream
- 0.5 Tbsp whole grain mustard
- 1 egg
- ground black peppercorns to taste
- Mix everything thoroughly but gently.
Cutting and pressing puff pastry into baking tins to make the bases
- Lay the sheets of puff pastry out.
- Cut 24 circles out of them using the cookie cutter.
- Press the circles gently into the trays.
Spooning the mixture to bases and cooking
- Spoon a small amount of the filling into each base.
- Cook for 15 minutes at 200°C in a fan forced oven.
Serving
Eat them hot or freeze them. Personally I like them cold and think they make a great lunch box snack.
If they last that long :).
Enjoy,
PK for KT
Here are some more egg dishes and posts by KT:
Written by
·