Tag: cheese
-
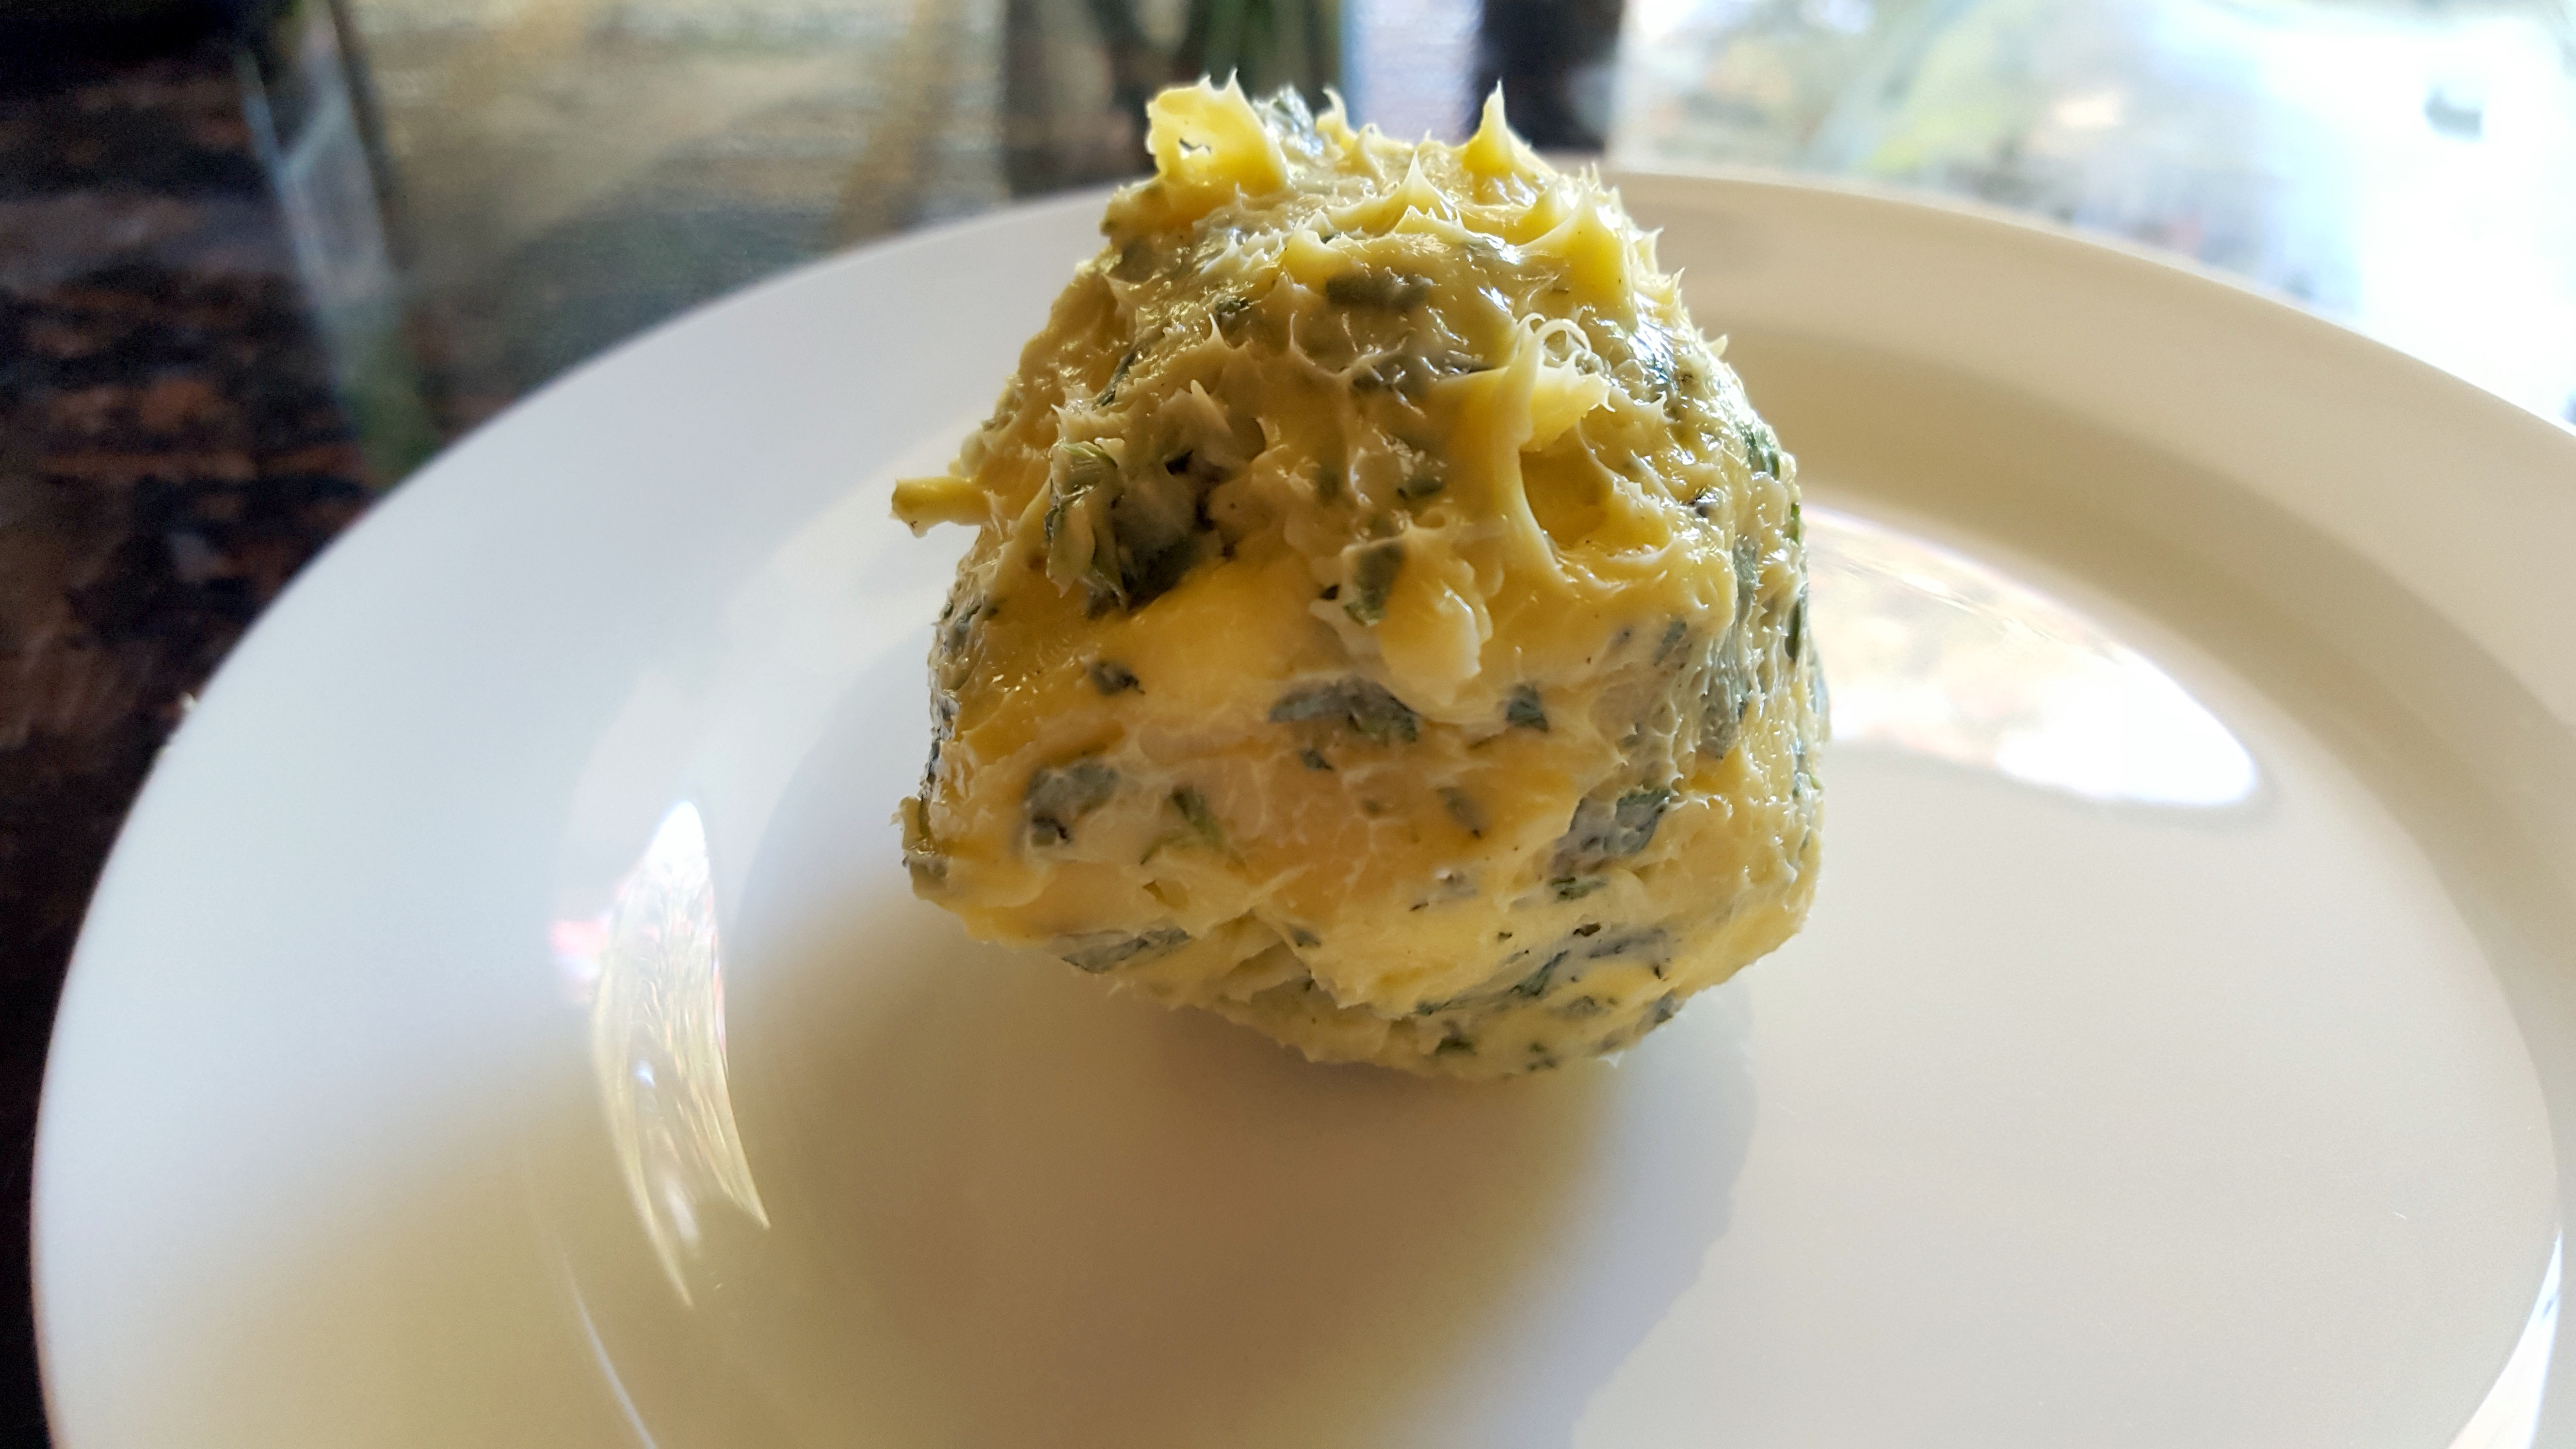
PK’s NoRecipe Sage and Thyme Butter
A really simple sage, thyme and parmesan flavoured butter that goes well with anything, especially chicken and seafood. I suppose it would probably keep for a while in the fridge but I have only ever made enough to use straight away.
Bring together your desired amount of butter or margarine or butter blend (perhaps 60 – 100g) and then add to taste:
- sage
- thyme
- pepper
- parmesan cheese (better yet Parmigiano-Reggiano)
I bring the butter to room temperature, in Australia that will make it pretty soft and workable very quickly during summer.
Finely chop the rest of the ingredients and fold them in.


Once I folded it all in, gently, I went all Baskin-Robbins style on it by mixing it some more on a clean counter top.

I then rolled it into a ball and chilled the whole lot again.

My serving suggestion 🙂

Enjoy,
PK
Written by
·
-
PK’s Sage and Thyme Butter
A really simple sage, thyme and parmesan flavoured butter that goes well with anything, especially chicken and seafood. I suppose it would probably keep for a while in the fridge but I have only ever made enough to use straight away.
Bring together your desired amount of butter or margarine or butter blend (perhaps 60 – 100g) and then add to taste:
- sage
- thyme
- pepper
- parmesan cheese (better yet Parmigiano-Reggiano)
I bring the butter to room temperature, in Australia that will make it pretty soft and workable very quickly during summer.
Finely chop the rest of the ingredients and fold them in.


Once I had folded it in I went all Baskin-Robbins style on it by mixing it some more on a clean counter top.

I then rolled it into a ball and chilled the whole lot again.

My serving suggestion 🙂

Enjoy,
PK
Related Links:
Written by
·
-
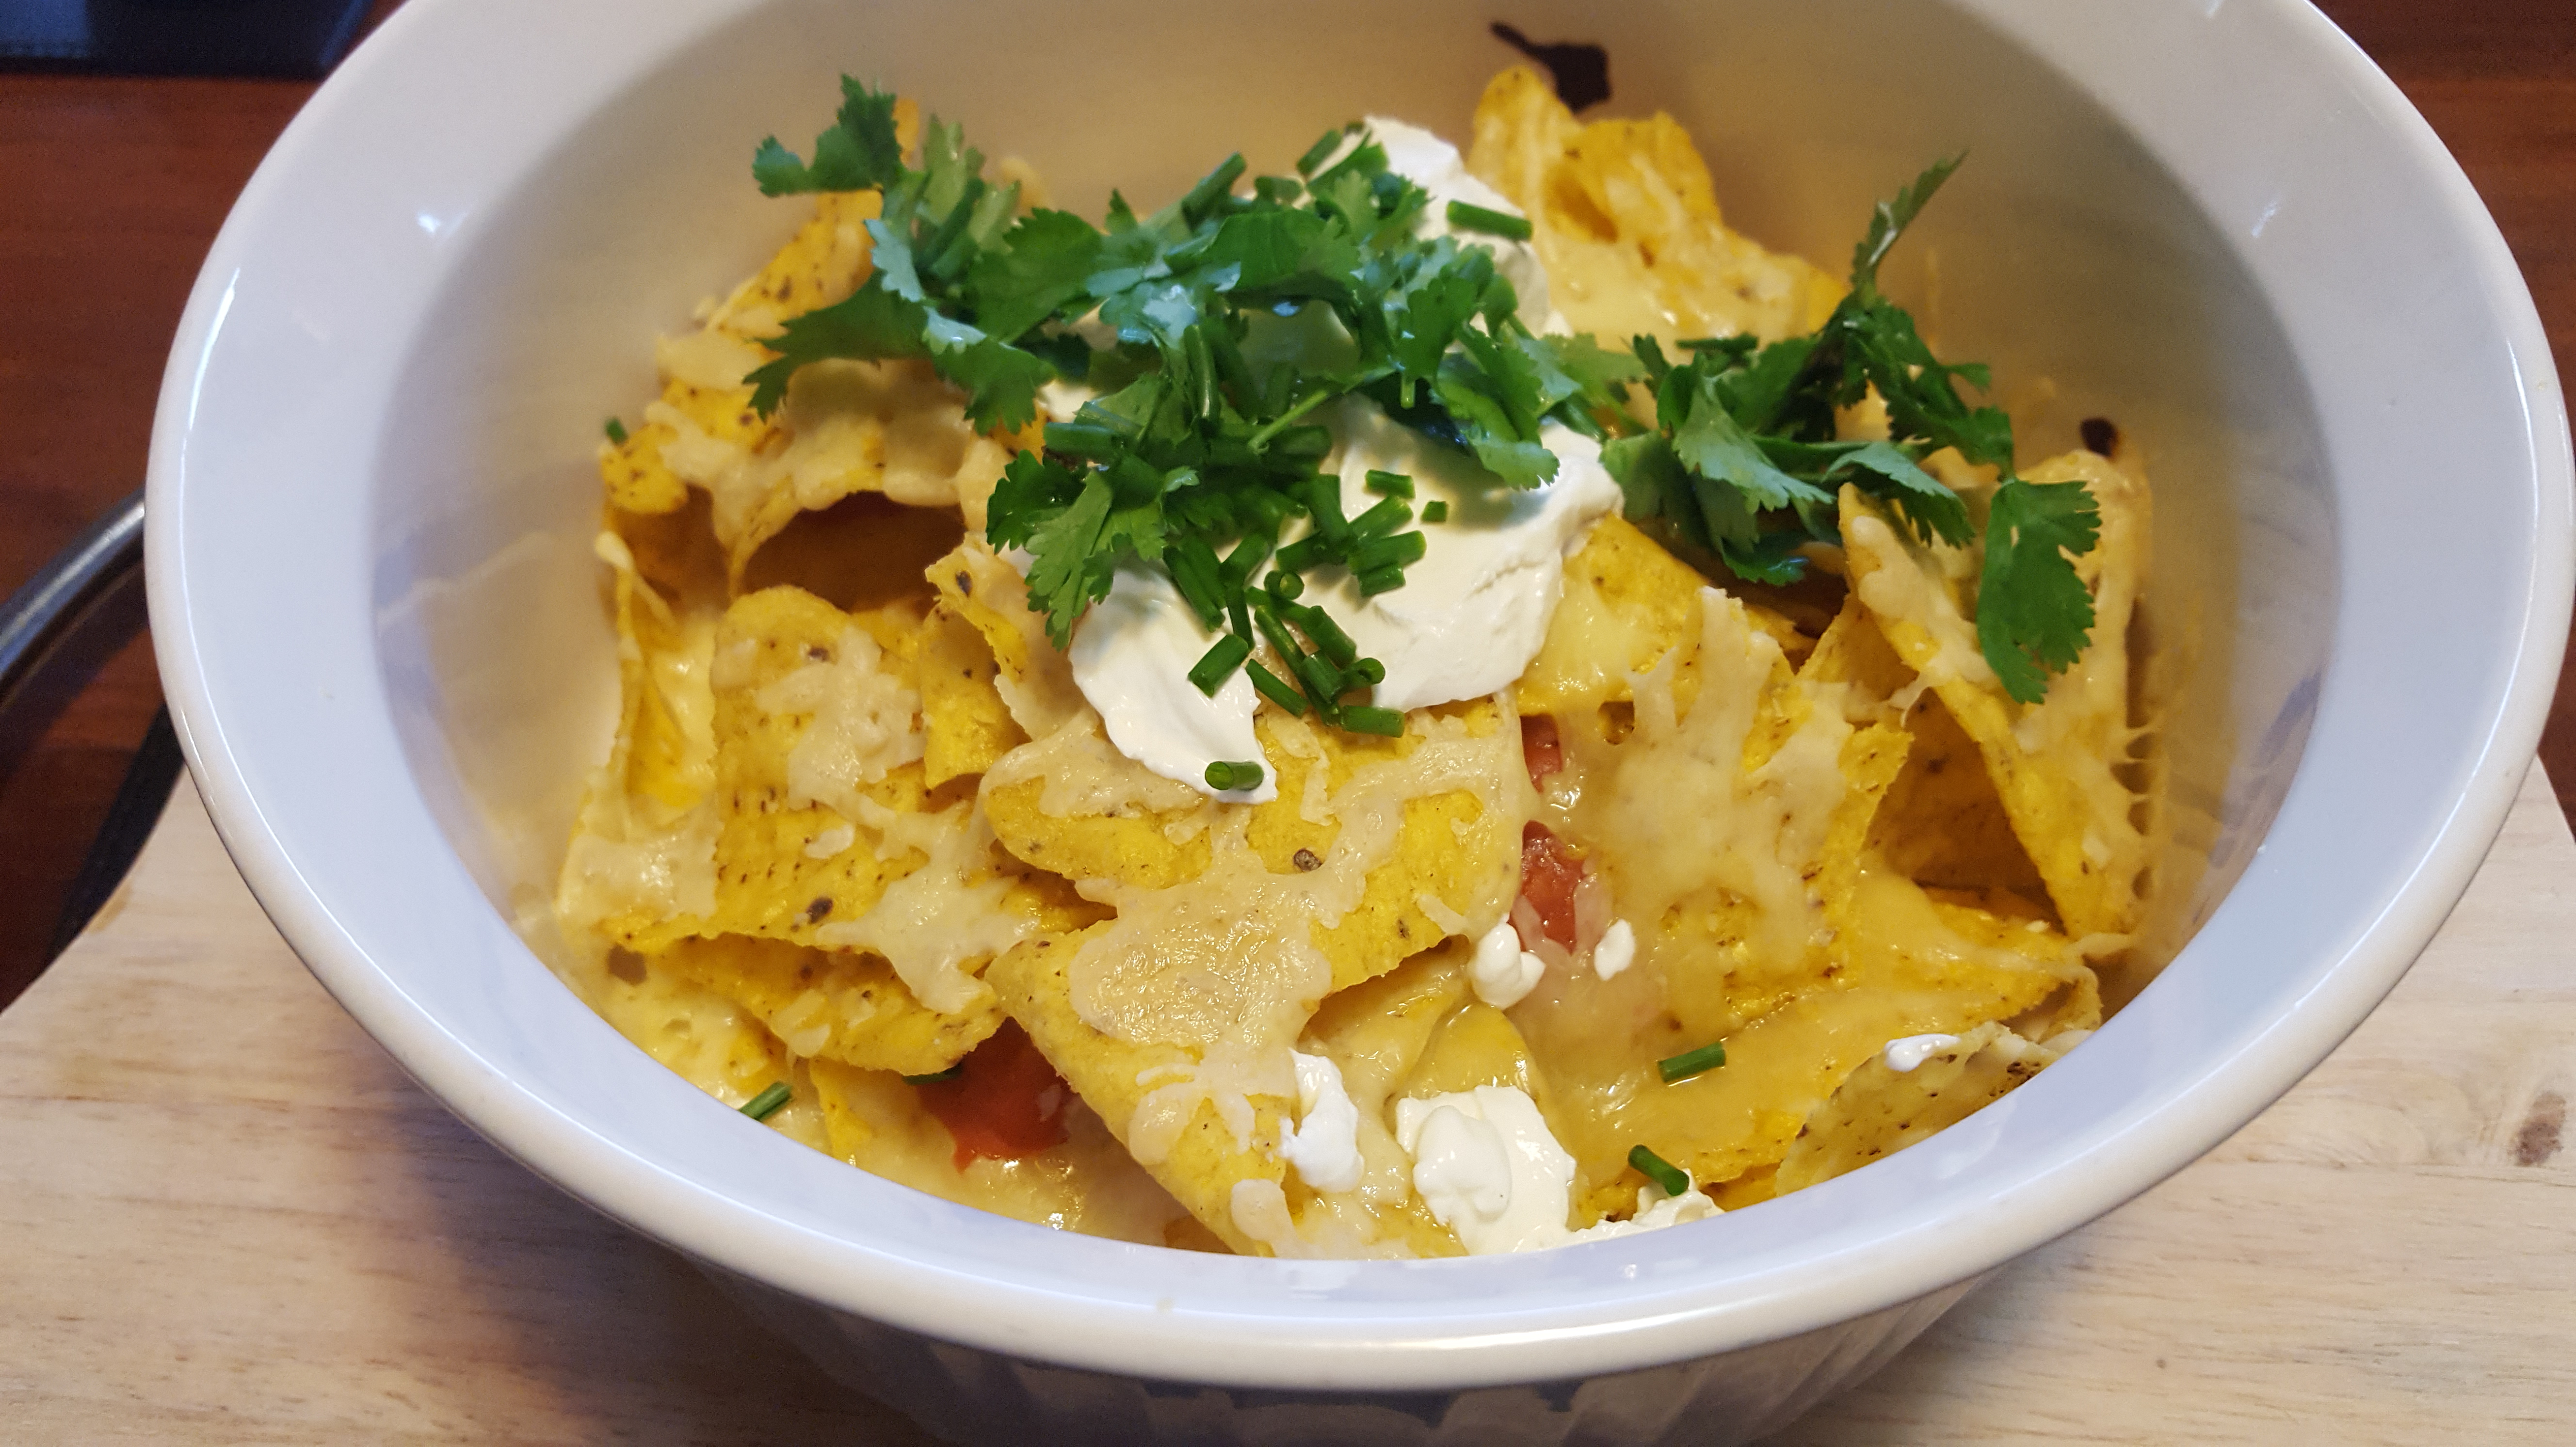
PK’s Simple Nachos
This is one of my favourite family meals. Everyone gets their own dish of the nacho base and once these come out of the oven, we put our favourite toppings on.
The secret to making awesome nachos is to layer the corn chips then some nacho sauce then some cheddar cheese and repeat. Pop them in a say 180 °C until the cheese has melted and that is it.
There is only one other rule to making awesome nachos: Sour Cream!
Magic 🙂


Enjoy,
PK
Pair this with my guacamole (see PK’s You..Can’t.. Handle..The..Gwock).
Written by
·
-
PK’s NoRecipe Nachos
This is one of my favourite family meals. Everyone gets their own dish of the nacho base and once these come out of the oven, we put our favourite toppings on.
The secret to making awesome nachos is to layer the corn chips then some nacho sauce then some cheddar cheese and repeat. Pop them in a say 180 °C until the cheese has melted and that is it.
There is only one other rule to making awesome nachos: Sour Cream!
Magic 🙂
Enjoy,
PK
Pair this with my guacamole (see PK’s You..Can’t.. Handle..The..Gwock).
Written by
·
-

Super Quick Home-made Pizza Snacks
Winter is trying to get back at Perth at the moment and although the sun is out, we are getting cold winds and rain. This makes for chilly evenings, so my family fought back with these really easy pizzas.
Steps:
- Make or buy your pizza bases and sauces.
- Spread the sauce over the pizza bases.
- Layer your pizza with your favourite toppings. My secret is to put any leafy greens on top of the sauce but under the cheese. It stops them drying out but you didn’t hear it from me :).
- Whack them in the oven on hot and fast until golden brown.

Enjoy,
PK
Here are more pizza posts and thrifty cooking ideas:
Written by
·
-
PK’s No Recipe Pizza Warmers
Winter is trying to get back at Perth at the moment and although the sun is out, we are getting cold winds and rain. This makes for chilly evenings, so my family fought back with these really easy pizzas.
Steps:
- Make or buy your pizza bases (I did the latter).
- Make or buy pizza sauce (I did the former with some reduced tomato pasata and Italian herbs from the garden.
- Spread the sauce over the pizza bases.
- Layer your pizza with your favourite toppings. My secret is to put any leafy greens on top of the sauce but under the cheese. It stops them drying out but you didn’t hear it from me :).
- Whack them in the oven on ~180°C for about 15 minutes or until golden brown.
Enjoy,
PK
Written by
·
-

Lorelle B’s Stuffed Mushrooms
This reader submitted mushroom recipe is so good. Lorelle recommends changing the stuffing each time to keep it exciting. I love it and your guests will too. 🙂 – PK
Ingredients:
- 4 large portabello mushrooms
- 8 slices of stale bread
- 2 Tbsp of plain flour
- 2 Tbsp of garlic chives
- 1/2 cup of grated parmesan
- 1 egg
- 1/2 cup grated cheese
- 1/2 tsp minced garlic
- pinch of onion salt
- squirt of lemon juice
- oil for frying
- 2 Tbsp of butter
- milk for the rue
Steps:
- Clean mushroom cups with damp paper towels, remove stalks, set aside.
- Blitz bread crumbs with chives and Parmesan, put in bowl.
- Whisk egg with garlic and lemon juice.
- Dip mushrooms in egg mix then crumbs.
- Deep fry till golden, set aside.
- Melt butter in saucepan, then add flour, whisk until a rue has formed.
- Add some milk and continue to whisk till desired thickness, add cheese, let cool.
- Then fill mushrooms with sauce, add whatever ingredient you want to sauce, eg: prawns or chicken, place mushrooms on baking tray and grill till golden
- Serve hot with a crunchy salad or fries, yum.
Thanks,
Lorelle B.
YOU MIGHT ALSO LIKE
MORE MUSHROOM DISHES
Please consider subscribing to a weekly email summary of our posts or check us out on Facebook @growitcatchitcookit.
[mc4wp_form id=”15771″]
Written by
·
-

Kirsty’s Easy Omelette Muffins
Thanks to my good friend and super-mum Kirsty DeRoach (https://www.instagram.com/babyderoach), I now know another great use for vegetables and leftovers that are past their best.
I can add them to the worm farm and compost bins of course or I can give them a second chance in these amazingly good mini quiches.
Not only are they quick to make (everyone will love that especially parents and lazy cooks) but you also get the satisfaction of reducing the amount of food thrown away unused each week.
I haven’t listed any quantities for most of the ingredients as they will vary each time you make them. Experiment and have some fun. Kirsty is right though, mix up the combinations but don’t put too many different ingredients in any given muffin.
STEPS:
- Whisk the eggs and chop the fillings
- Load your muffin trays
- Serving
You will need:
- Ingredients:
- 12 eggs
- any old vegetables at the back of your fridge
- as much bacon or ham as you want
- your favourite cheese
- table salt to taste
- ground black pepper to taste
- Equipment
- a chopping board
- a long sharp knife
- a whisk
- several muffin tins
- a bowl for whisking the eggs
- a frypan if you are adding bacon.
Whisk the eggs and chop the fillings

Steps:
- Give the eggs a good whisk and set aside. Kirsty told me you can add some cream if it needs using up. Add salt and pepper to taste.
- Chop up your vegetables.
- Chop up your ham or cook and chop up your bacon.
- Grate the cheese.
Load your muffin trays
Steps:
- Pre-heat your oven to 180 degrees Celsius.
- Add some of the whisked eggs to the bottom of each hole of the muffin tins. You will have to experiment with how much.
- Add small quantities of your filling combinations to each hole and top each with the grated cheese so that each are about 3/4 full.
- Push most of the floating ingredients under the egg mixture.
- Cook about 10 minutes or until golden brown.
Serving
Once cool enough, pop them out of the muffin trays. They freeze really well but most of ours don’t get to the freezer :).

Thanks Kirsty,
PK
Written by
·
-
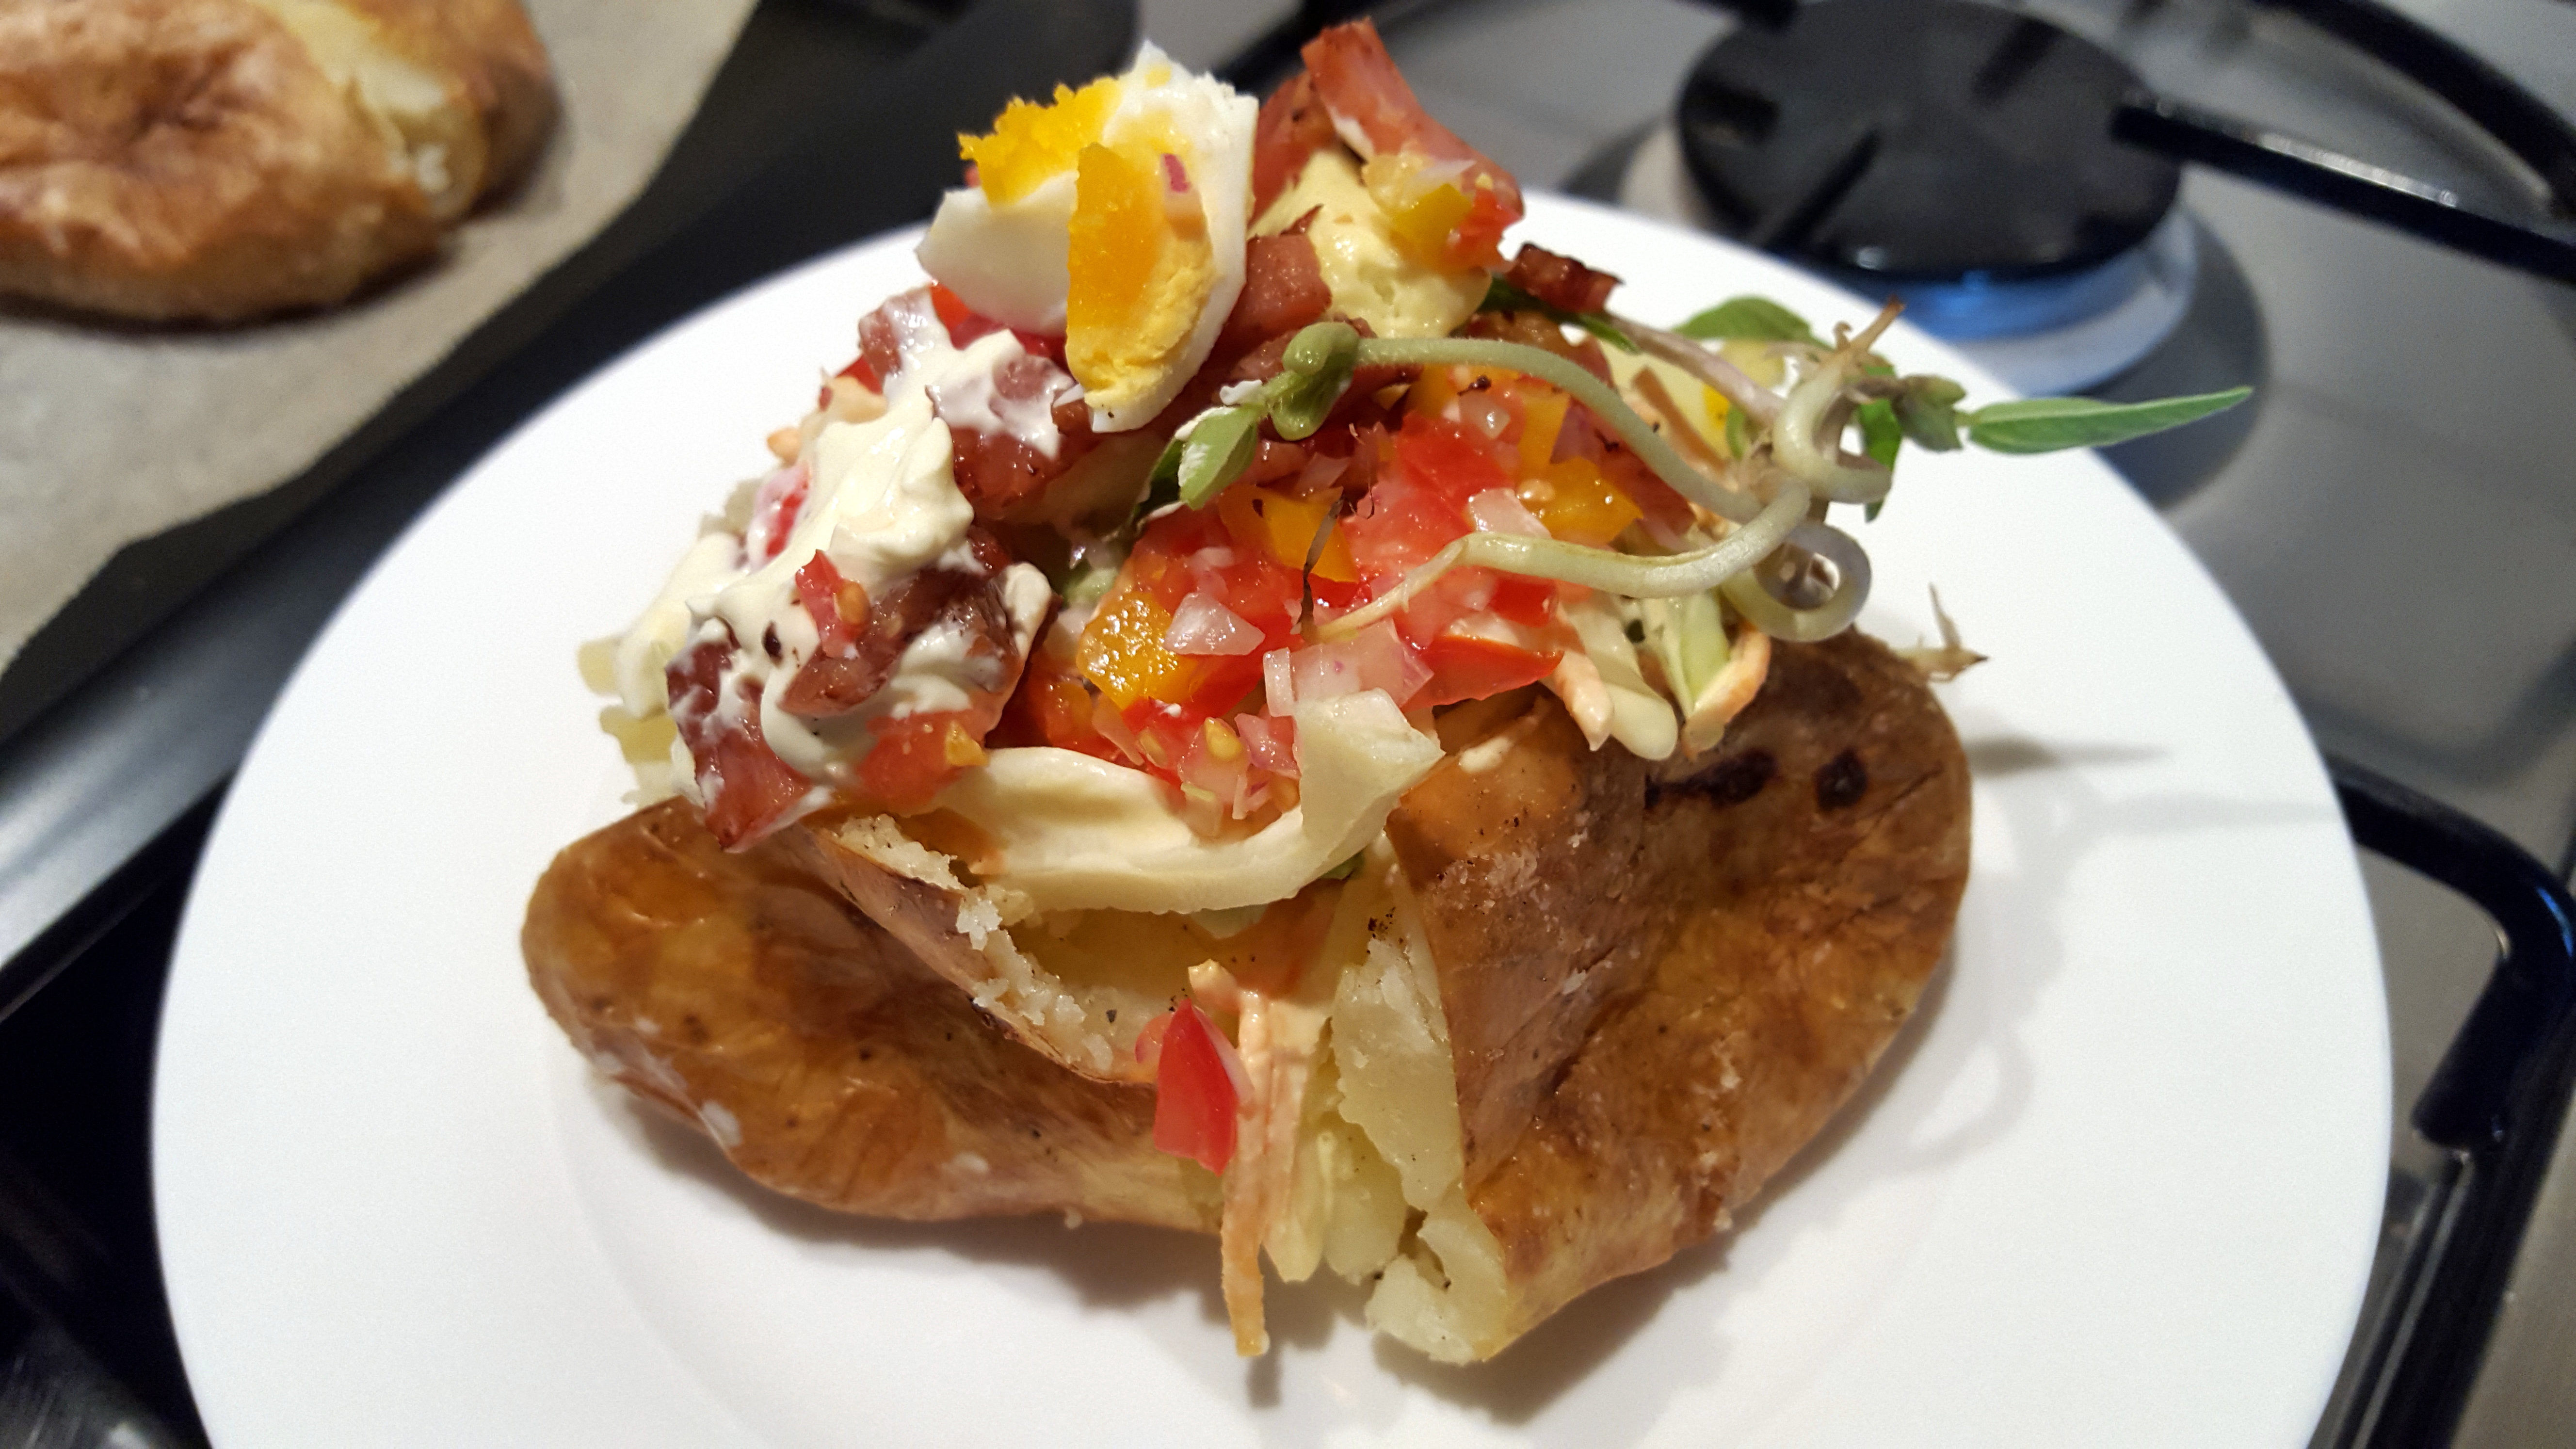
PK’S Easy Oven Baked Potatoes
Perfectly crisp on the outside, fluffy in the middle, baked potatoes are perfect for a Perth winter night. This is a great meal for enjoying with friends and family. You can build your own topping as you go so it is very family/guest friendly. There is nothing better than eating with your hands as you chat away.
I suggest 1.5 medium potatoes per adult and a few more for tomorrow’s lunch.
Everyone has their favourite potato variety that you must use for baked potatoes. However, I have found that you can make perfect oven baked potatoes from most varieties.
STEPS:
- Prepare and cook the potatoes
- Prepare your toppings
- Serving
You will need:
- Ingredients:
- your favourite potatoes
- table salt
- ground black pepper
- your favourite toppings, sauces and condiments.
- Equipment
- paper towel
- a chopping board
- a long sharp knife
- an oven dish or oven rack
- several plates to serve the toppings
Prepare and cook the potatoes
Steps:
- Pre-heat your oven to 200 degrees Celsius.
- Scrub each potato to remove dirt, eyes and deeper imperfections.
- Dry them thoroughly using the paper towel, this is important for the crispy finish.
- Spray each potato with olive oil spray and dust them liberally with salt and pepper.
- Pop them on the oven rack (or oven dish) making sure there is space between them.
- Cook for about 1 hour (longer depending on your oven or if you are using really big potatoes). I test the largest potato at this stage. If it is ready the others are too.
Before:

After:

Prepare your toppings
Steps:
- Harvest, chop, slice and gather your favourite toppings
- Put them on plates in the middle of the table so your guests can build their own potato.
Here is what I used. Sour cream, cheese and coleslaw are must-haves in my family:

Serving
I can’t remember where I read this but it is the most important part of the process.
Just before serving the potatoes, you need to first cut them, then squeeze them with your thumbs and forefingers (to break up the insides) and then flatten them out a bit. This will let the steam out and stop the potato skin from going soggy. You will also have a great base to load the toppings onto.
Here is a video of me doing just that whilst trying not to burn my fingers:
Here are a few of my favourite combinations:
They don’t freeze well but they do make a great lunch the following day:

Enjoy,
PK
Here are more potato dishes and winter warmers:
Written by
·