Author: PK
-

PK’s NoRecipe Sesame and Cumin Lamb Chops
I was amazed at how well the sesame seeds and cumin seeds paired with the lamb. So easy to prepare ahead of time and then cook them on the barbecue :).
Take your lamb chops, I used forequarter chops, and rub or spray them with some olive oil. I bet peanut oil would work a treat too.
Grind over them some pepper and salt to taste and then sprinkle equal amounts of sesame seeds and cumin seeds.
I left them in the fridge while I went to my day job :).


I got home and while they were grilling on the barbecue I made a quick salad.

Enjoy,
PK
Written by
·
-
Easy Sesame and Cumin Lamb Chops
This lamb chop recipe is so easy to prepare. All you need are sesame and cumin seeds, a splash of oil and your choice of lamb cut.
Simply take your lamb chops (I like to use forequarter chops) and rub with olive oil. Peanut oil works a treat too.
Then on each side, coat in ground pepper, salt and an equal ratio of sesame seeds and cumin seeds.
Pop them in the fridge the day before if you can.


Then bake, grill or barbeque them.

Enjoy,
PK
Here are some more lamb posts and other simple to prepare meals:
Written by
·
-
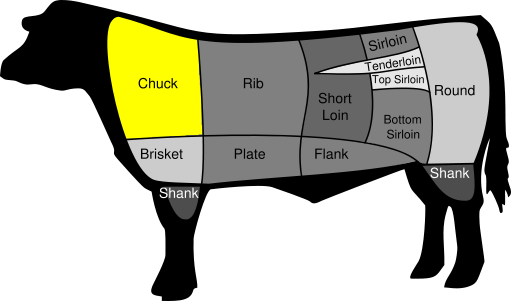
Beef – Chuck Section

The Chuck (Blade) Section:
To go back to the main post please click here.
Blade Roast
Characteristics:
- value for money
An example with fat left on:

Serving Suggestions:
Roasted for 4 hours, in a charcoal barbecue, at low temperature and with a final internal temp of 78°C:
Written by
·
-
Beef – Tenderloin Section

The Tenderloin Section:
To go back to the main post please click here.
Fillet Steaks
An example of fillet steaks:

Written by
·
-
PK’s NoRecipe Creamy Mash
I am afraid that I am of the firm belief that you can have tasty mashed potato or healthy mashed potato but not both. Luckily for me my stomach and brain both like the tasty option :).
The not so secret key to a good mash is in just under cooking the potatoes (in salty water) and then adding copious quantities of butter and a dash of milk. If I want to add a bit of variety I will also add some parsnip and or carrot to the boiling water too.
My personal guilty vice is cheese so in goes a handful of cheese too.
Prep your favourite potatoes:
Boil them in water until just underdone (more than parboiled but not soggy):

Drain, making sure you remove most of the water and then add butter and milk:

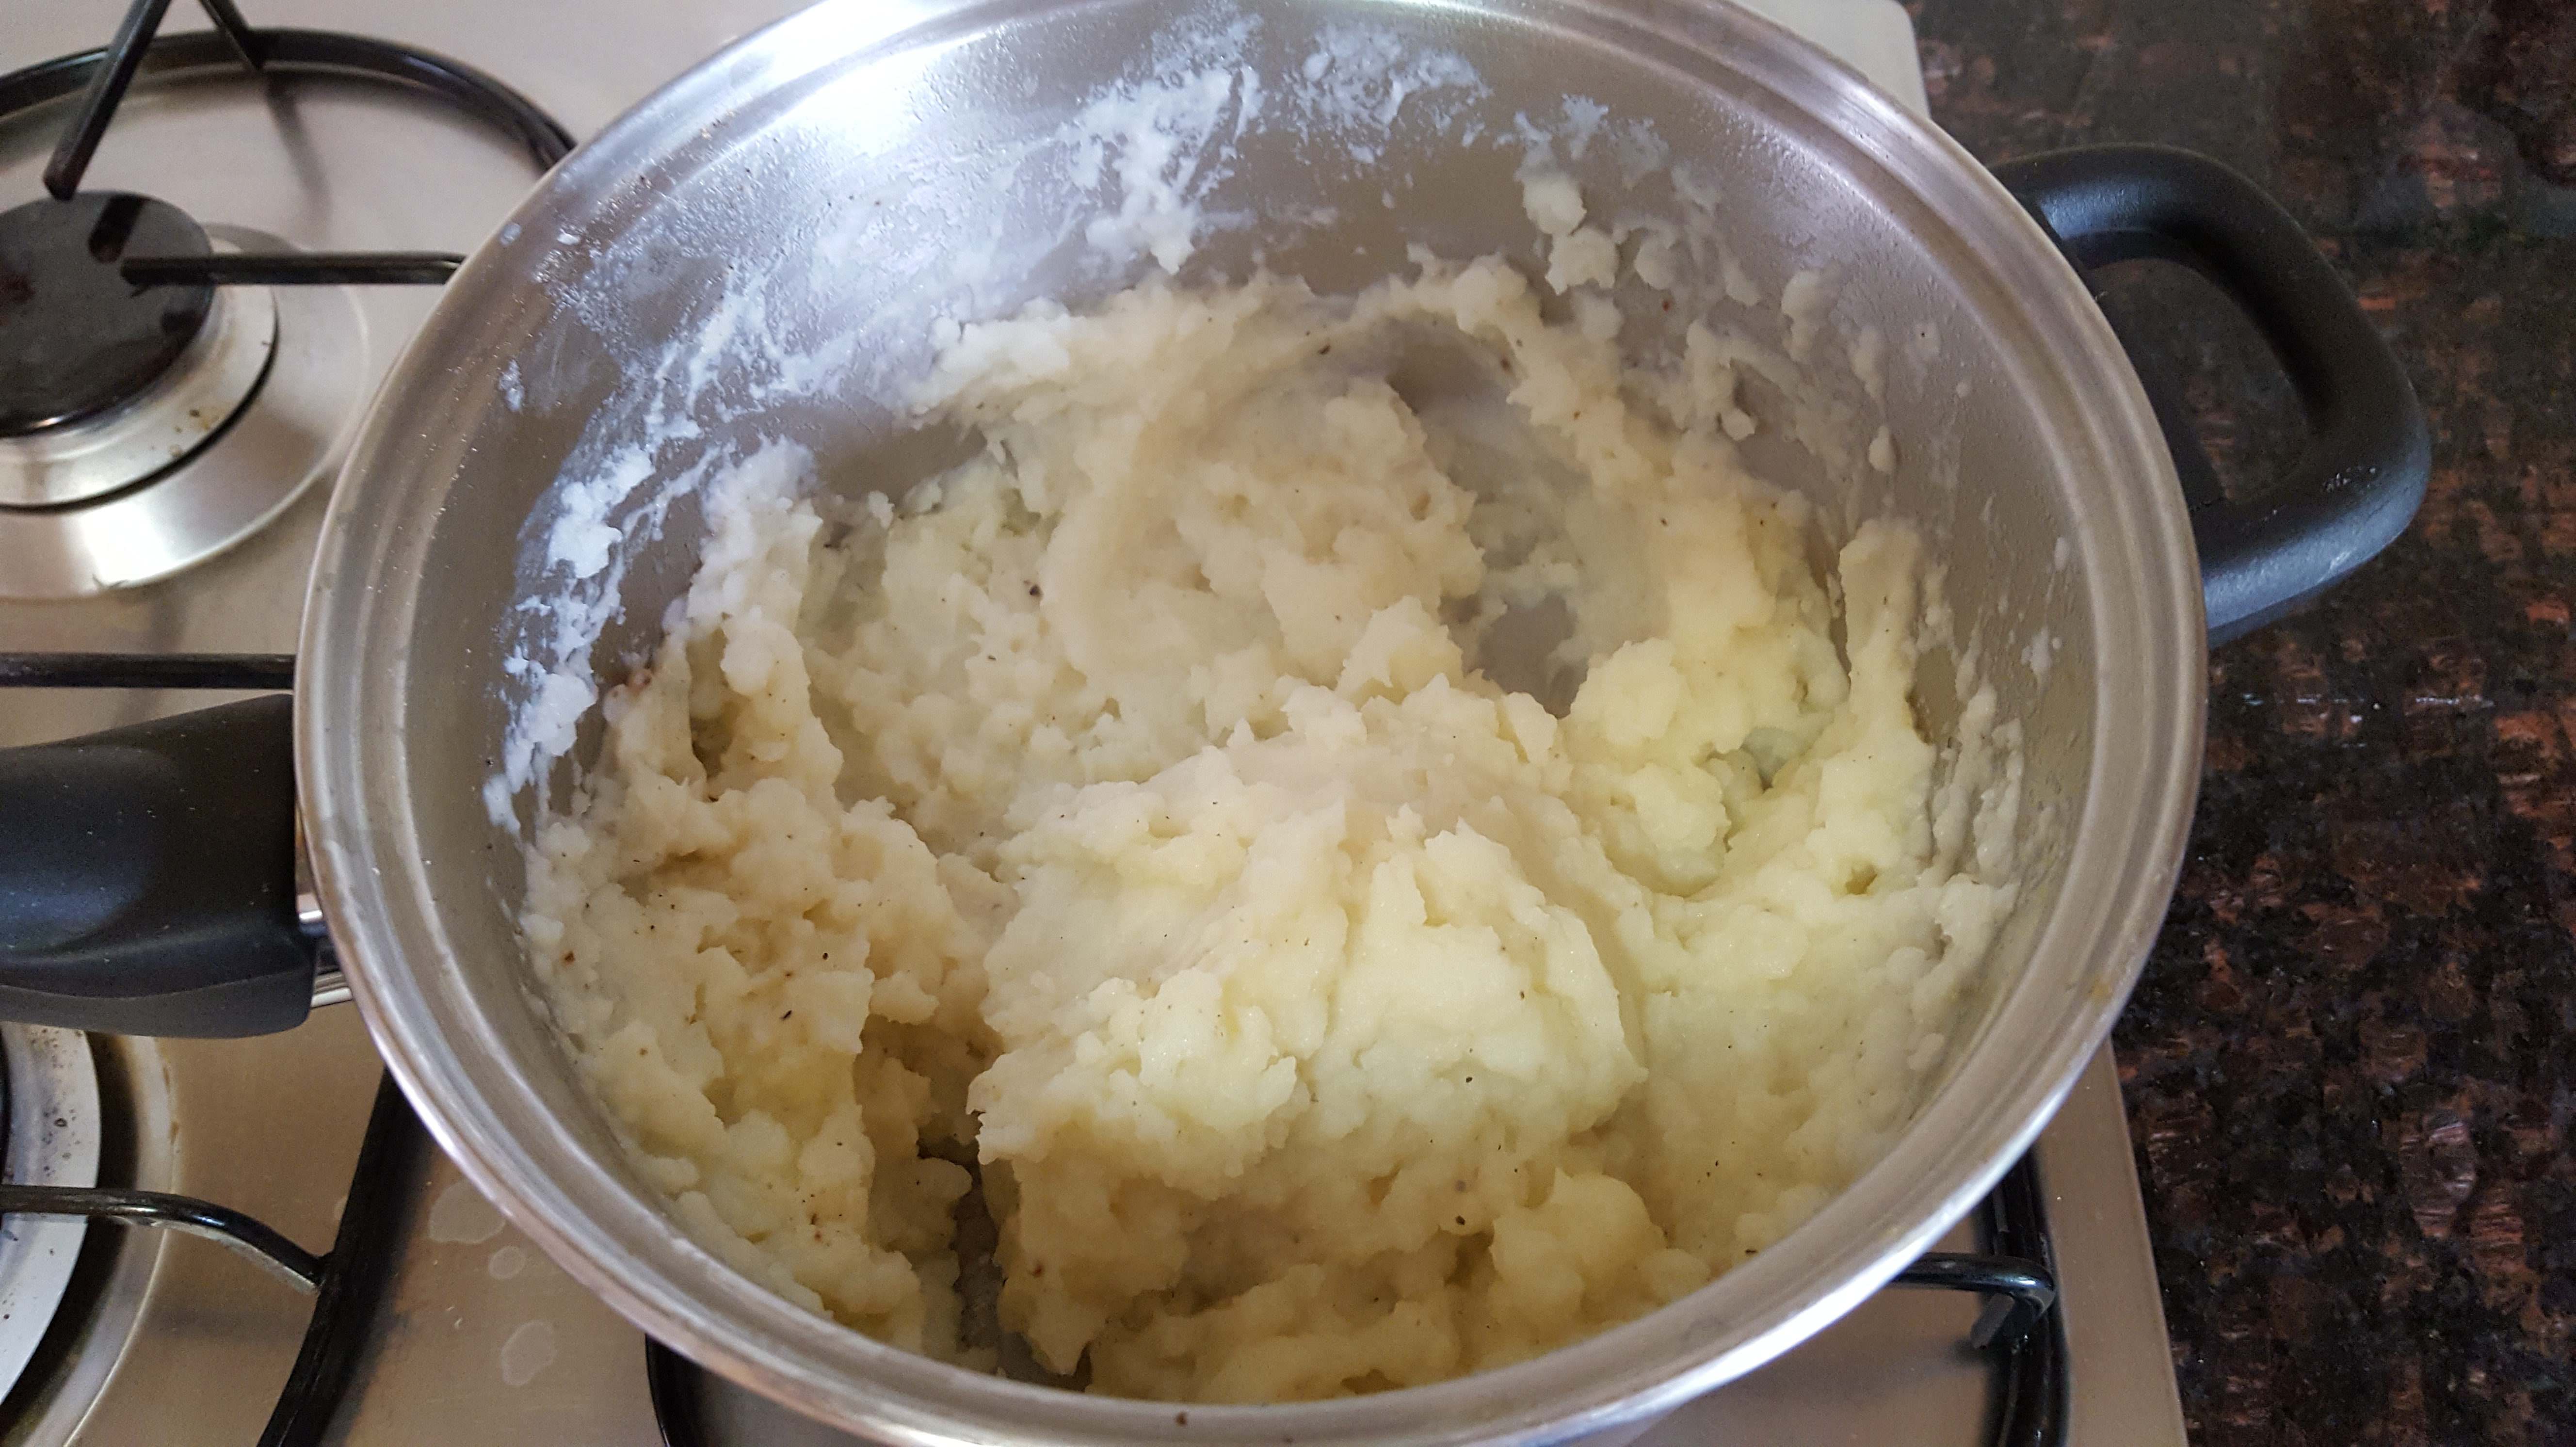
Give the whole lot a good mashing in the same saucepan:

Take a large spoonful and eat it in the name of taste testing 🙂
I love a good mash with something slow-cooked and saucy:

Hope you like it,
PK
Written by
·
-
PK’s Creamy Potato Mash
I am afraid that I am of the firm belief that you can have tasty mashed potato or healthy mashed potato but not both. Luckily for me my stomach and brain both like the tasty option :).
The not so secret key to a good mash is in just under cooking the potatoes (in salty water) and then adding copious quantities of butter and a dash of milk. If I want to add a bit of variety I will also add some parsnip and or carrot to the boiling water too.
My personal guilty vice is cheese so in goes a handful of cheese too.
Prep your favourite potatoes:
Boil them in water until just underdone (more than parboiled but not soggy):
Drain, making sure you remove most of the water and then add butter and milk:
Give the whole lot a good mashing in the same saucepan:
Take a large spoonful and eat it in the name of taste testing 🙂
I love a good mash with something slow-cooked and saucy:
Hope you like it,
PK
Written by
·
-
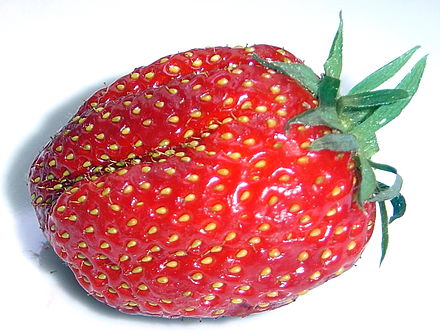
Strawberry (Fragaria ananassa)
I thought this plant was hard to grow. I could not be more wrong :).
Well sort of…… easy to grow but very tempting to humans, birds and insects alike.Wikipeida writes: ‘The first garden strawberry was grown in Brittany, France during the late 18th century.[3] Prior to this, wild strawberries and cultivated selections from wild strawberry species were the common source of the fruit.’
Common Garden Strawberry flowers:

I will add more soon.
Cheers,
PK
Links:
- see more strawberry posts here.
- go to all ingredients
Written by
·
-

Josh’s Weber Q Baby Review
Weber has been around since the 1950’s and we have seen the shape change ever so slightly over the years, with each new model keeping the “round” kettle shape.
In 2004 a new model (and shape) was released, known as the “Weber Q” Series. A couple of years later, a “Weber Q Baby” was released, and it’s as it sounds, a smaller version of the Weber Q.
Here are the differences – the Baby Q is on the right:

I acquired the Baby Q Q1000 from Myer when they had a special on a few weeks back for $289, normally they are around the $320-$330 price range. The Baby Q was purchased for camping mainly, and events where a small BBQ would come in handy. My old man has a Q2000 (The big guy) and it’s a great BBQ to use, whether it be for smoking meats, or just simply grilling them.
Once it was home, it was an easy assembly and you simply need a Philips Screw Driver. The new grill and flat plate, being cast iron, was then lightly oiled with Extra Virgin Olive Oil and then with low heat, was left running for 15 minutes, to burn the new BBQ in. Once this was completed, a quick wipe down and it was boxed back up.
If you purchase one of these, based on this or any other review, the Baby Q only comes with the grill on each side, and I would recommend getting the flat plat for the right hand side (around $60) as its definitely worth having a flat plate!
It uses a normal LPG gas bottle, with the POL fitting. BCF sells a 4kg bottle which is more than enough gas for a week away, with it being used for dinner and breakfast.
For those who wish to be prepared, it would be about 30-45mins a day burn time, 5 days total usage and we have about 2kg left of the 4kg of GAS we left with.
A week ago, my partner and I left for Bremer Bay and Albany. A week later and we absolutely LOVE the Baby Q and it’s the perfect size for portability! We cooked multiple types of food, being: bacon, eggs, toast, tomatoes, burgers, steak, corn and chorizo sausage. None of the times, did the food come out undercooked and was flavoursome.


Like with any review, there are a few things worth noting that would make the unit better.
I also have a few tips that will help you get the most out of your Baby Q:
- The hose requires a bit of stretching. It took a couple of days cooking to get the LPG hose to the right movability to connect to the gas bottle.
- A hook to hang your cooking utensils on would be welcomed. This is an easy fix by getting the stand. Depending on size of course!
- Get a couple of spare drip tray’s, or have some spare alfoil (aluminum foil) around. We used the alfoil to make a drip tray and it worked just as good as the Weber branded ones.
- Keep the lid down while cooking, there is a lot of heat loss when it’s up. Remember it’s more like a portable oven than a BBQ.
- When you have finished with it, wash it and keep it clean. A well cleaned BBQ is easier to cook with and will produce a better taste. Also ensure a light oil coating is applied before storing it away long team to protect from rust on the Cast Iron.
Would I recommend this?
YES I WOULD 🙂
Josh
Written by
·
-
Weber Q Baby: Josh Reviews
Weber has been around since the 1950’s and we have seen the shape change ever so slightly over the years, with each new model keeping the “round” kettle shape.
In 2004 a new model (and shape) was released, known as the “Weber Q” Series. A couple of years later, a “Weber Q Baby” was released, and it’s as it sounds, a smaller version of the Weber Q.
Here are the differences – the Baby Q is on the right:
I acquired the Baby Q Q1000 from Myer when they had a special on a few weeks back for $289, normally they are around the $320-$330 price range. The Baby Q was purchased for camping mainly, and events where a small BBQ would come in handy. My old man has a Q2000 (The big guy) and it’s a great BBQ to use, whether it be for smoking meats, or just simply grilling them.
Once it was home it was an easy assembly, you just need a Philips Screw Driver. The new grill and flat plate, being cast iron, was then lightly oiled with Extra Virgin Olive Oil and then with low heat, was left running for 15 minutes, to burn the new BBQ in. Once this was completed, a quick wipe down and it was boxed back up.
If you purchase one of these, based on this or any other review, the Baby Q only comes with the grill on each side, and I would recommend getting the flat plate for the right hand side (around $60) as its definitely worth having a flat plate!
It uses a normal LPG gas bottle, with the POL fitting. BCF sells a 4kg bottle which is more than enough gas for a week away, with it being used for dinner and breakfast.
For those who wish to be prepared, it would be about 30-45mins a day burn time, 5 days total usage and we have about 2kg left of the 4kg of GAS we left with.
A week ago, my partner and I left for Bremer Bay and Albany. A week later and we absolutely LOVE the Baby Q and it’s the perfect size for portability! We cooked multiple types of food, being: bacon, eggs, toast, tomatoes, burgers, steak, corn and chorizo sausage.
Like with any review, there are a few things worth noting that would make the unit better.
I also have a few tips that will help you get the most out of your Baby Q:
- The hose requires a bit of stretching. It took a couple of days cooking to get the LPG hose to the right movability to connect to the gas bottle.
- A hook to hang your cooking utensils on would be welcomed. This is an easy fix by getting the stand. Depending on size of course!
- Get a couple of spare drip tray’s, or have some spare alfoil (aluminum foil) around. We used the alfoil to make a drip tray and it worked just as good as the Weber branded ones.
- Keep the lid down while cooking, there is a lot of heat loss when it’s up. Remember it’s more like a portable oven than a BBQ.
- When you have finished with it, wash it and keep it clean. A well cleaned BBQ is easier to cook with and will produce a better taste. Also ensure a light oil coating is applied before storing it away long team to protect from rust on the Cast Iron.
Would I recommend this?
YES I WOULD 🙂
Josh
Related Links:
Please consider subscribing to get a weekly email summary of our posts.
[mc4wp_form id=”15771″]
Written by
·
-

Alfalfa Sprouts
I love growing these little sprouts and use them in salads whenever I can. They are popular everywhere but especially favoured in certain regions of India.
The adult plants have very attractive foliage and the flowers attract those most welcome of visitors, bees. When planted for animal feed it tends to be known as as Lucerne, especially in Australia.
Taste/Aroma:
Very mild taste and with a nice texture. They even smell healthy :).
Sprouts:

Plant:
Left to germinate and grow into a mature plant, Alfalfa looks like this:
(source http://en.wikipedia.org/wiki/Alfalfa#/media/File:Luzerne-600.jpg)
Planting/Care:
Germination time is about a day in a sprouter. You should put a new batch in accordingly if you want to keep them available.
As a plant they are great nitrogen fixers so till the roots back into the soil when rotating your plantings.
Enjoy,
PK
Here are some more posts you will love:
Written by
·
