Tag: weber
-
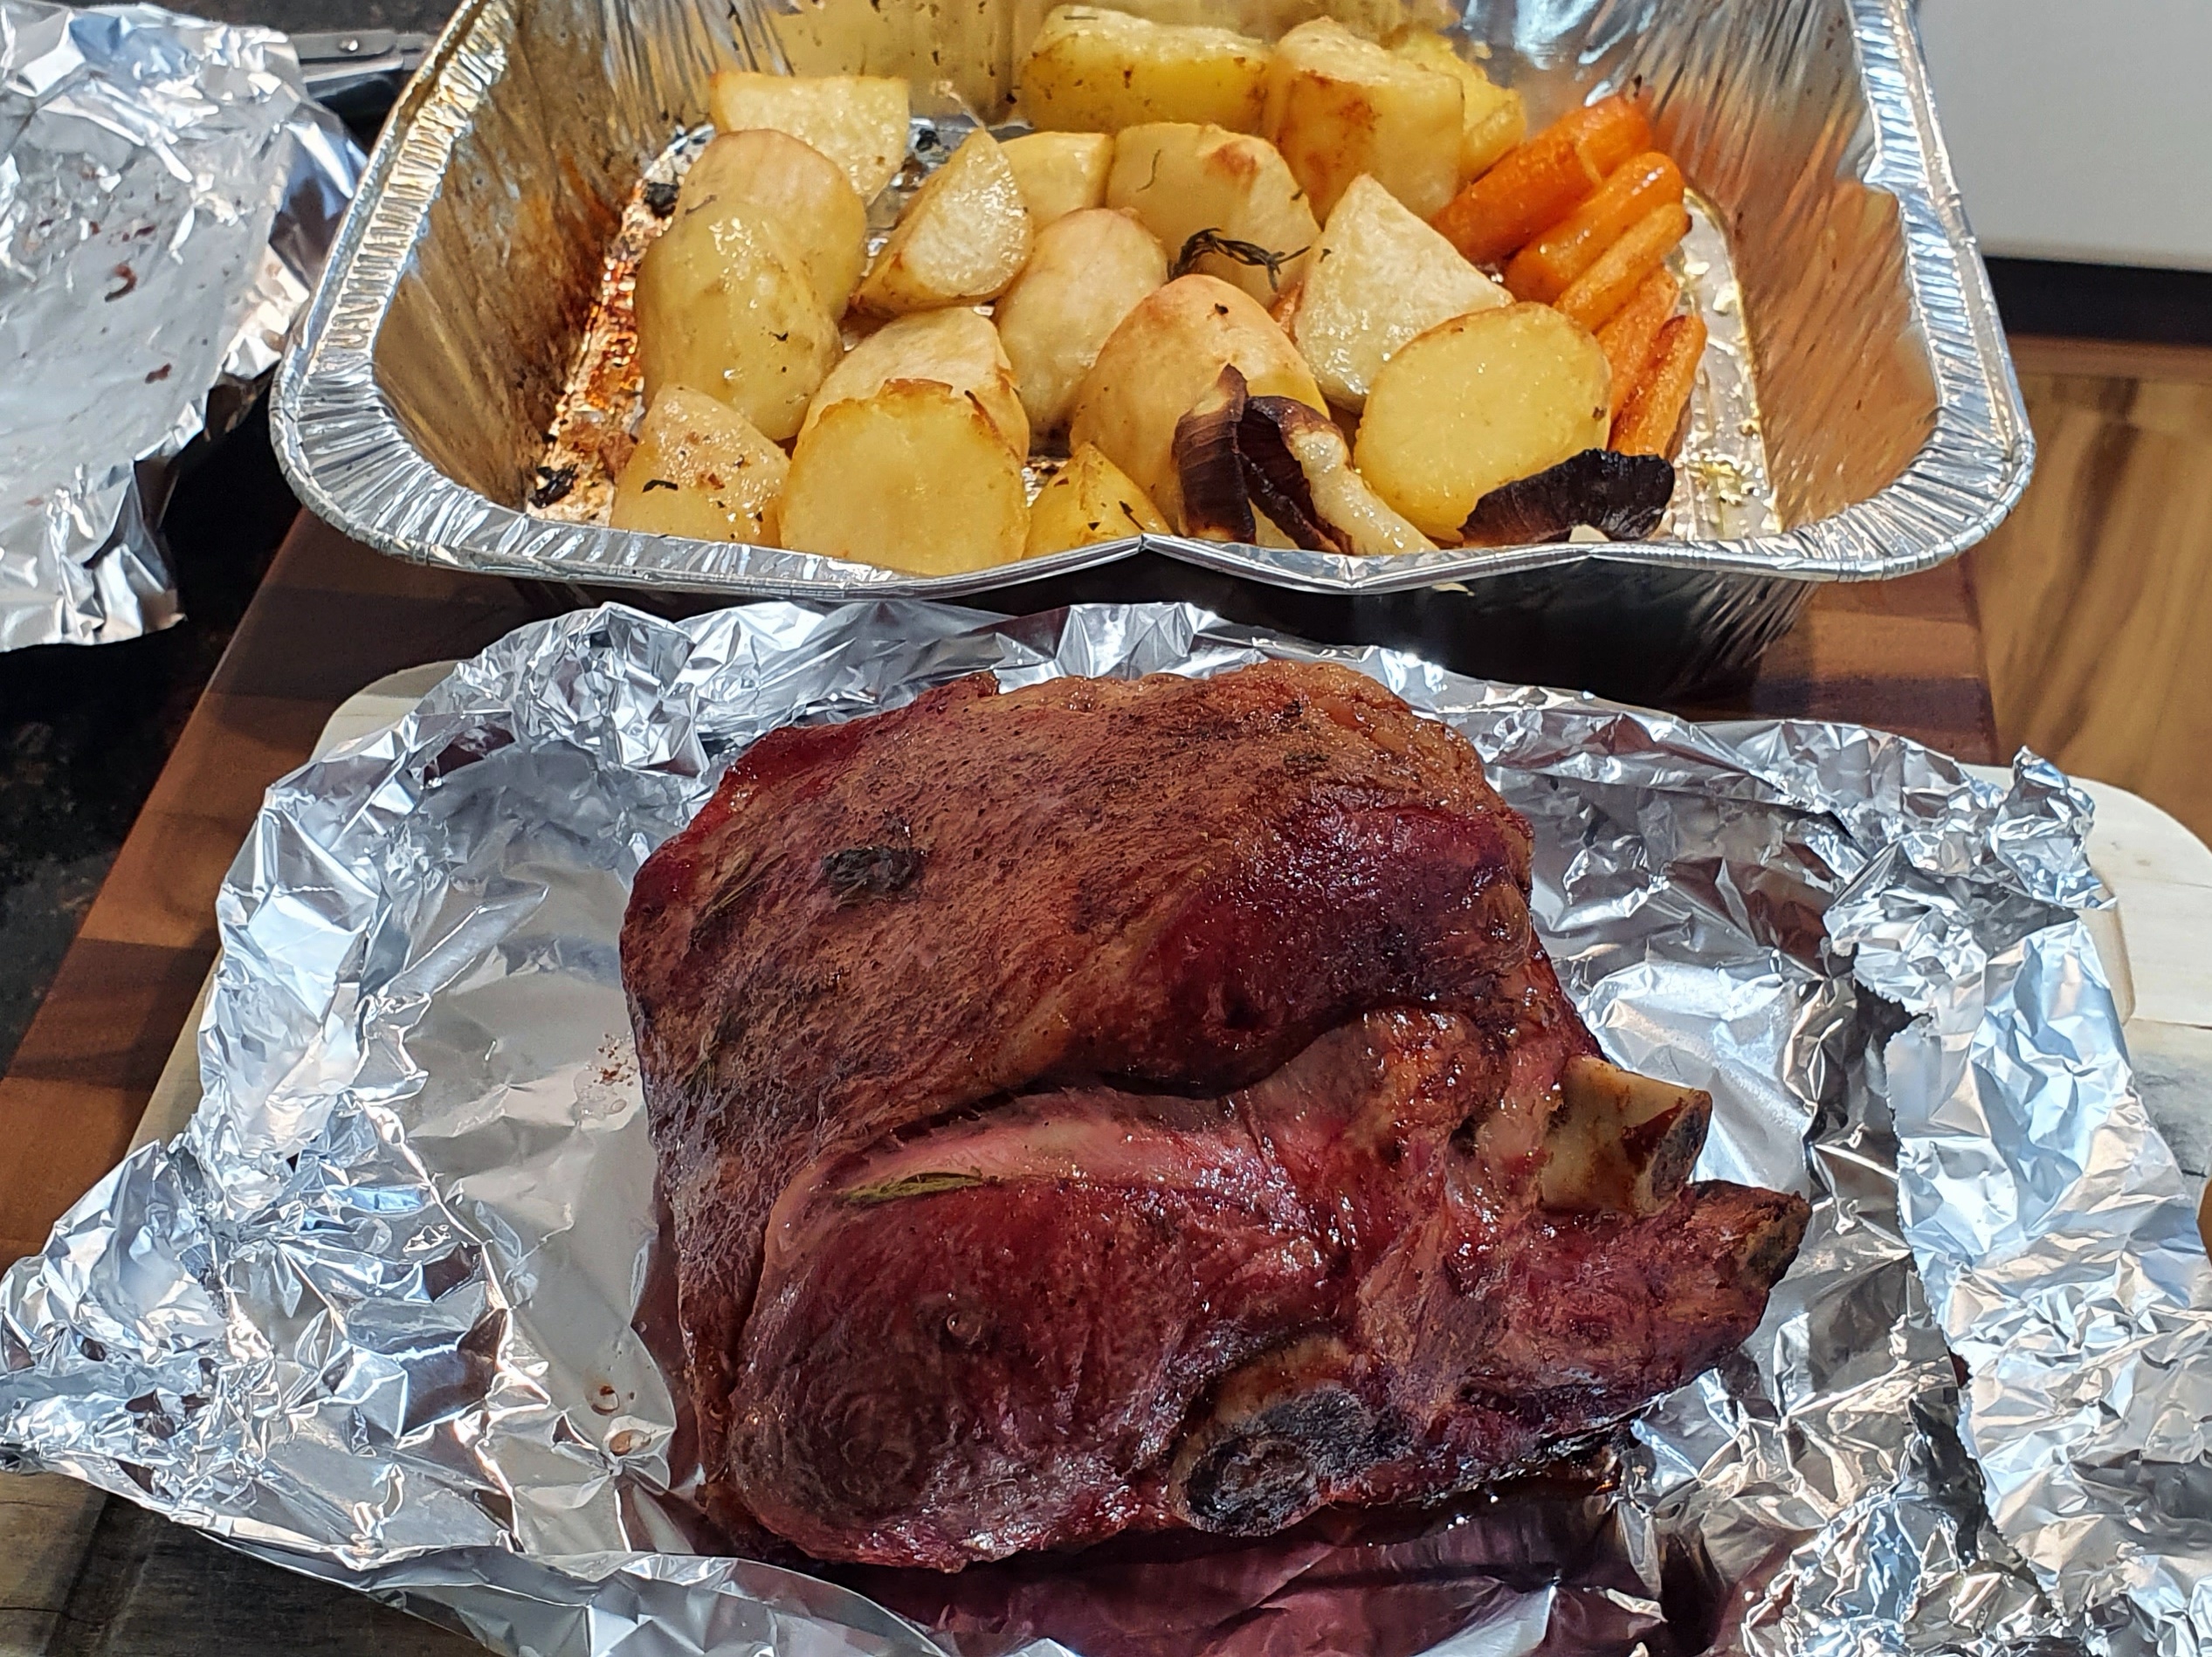
PK’s Slow Charcoal Weber Lamb Leg Roast
There are few meals more mouth-watering than the Aussie Sunday lamb roast.
My favourite is the mini lamb leg roast because it is so cheap yet it always turns out tender across a range of cooking methods. Here I have cooked the roast in my charcoal Weber for ~2.5 hrs using a lowish (130°C) indirect coal method. The spuds needed a finish off in a hot oven to get them crispy but that was the only time I had to do anything.
Bone in it came to 1.1kg and $12.50 for 4 people. Talk about thrifty easy cooking!

Simply
Put the lamb in a zip lock bag with garlic-infused olive oil, a handful of rosemary and oregano, salt and pepper at least 2 hours prior to cooking and refrigerate. Massage the bag every now and again to spread the oil around evenly.

Take the bag out of the fridge so it can approach room temperature just as it goes onto the Weber. Use your preferred coal technique (I described mine above and the coals are off to the side in a holder) so that your meat has an internal temperature of 70 C for medium-well.
Pop the potatoes alongside the lamb at the start, carrots and pumpkin etc in about an hour later. Transfer them to a piping hot oven about 30 minutes prior to serving to get them crispy.
When you get the meat to the temperature you want, transfer it to a chopping board and cover it with aluminium foil to let it rest for at least 10 – 15 minutes.
Serving
Serve hot with Dave’s Mint and Balsamic Sauce and lots of gravy. 🙂

Enjoy,
PK
Here are some more lamb dishes and previous roast posts:
Written by
·
-
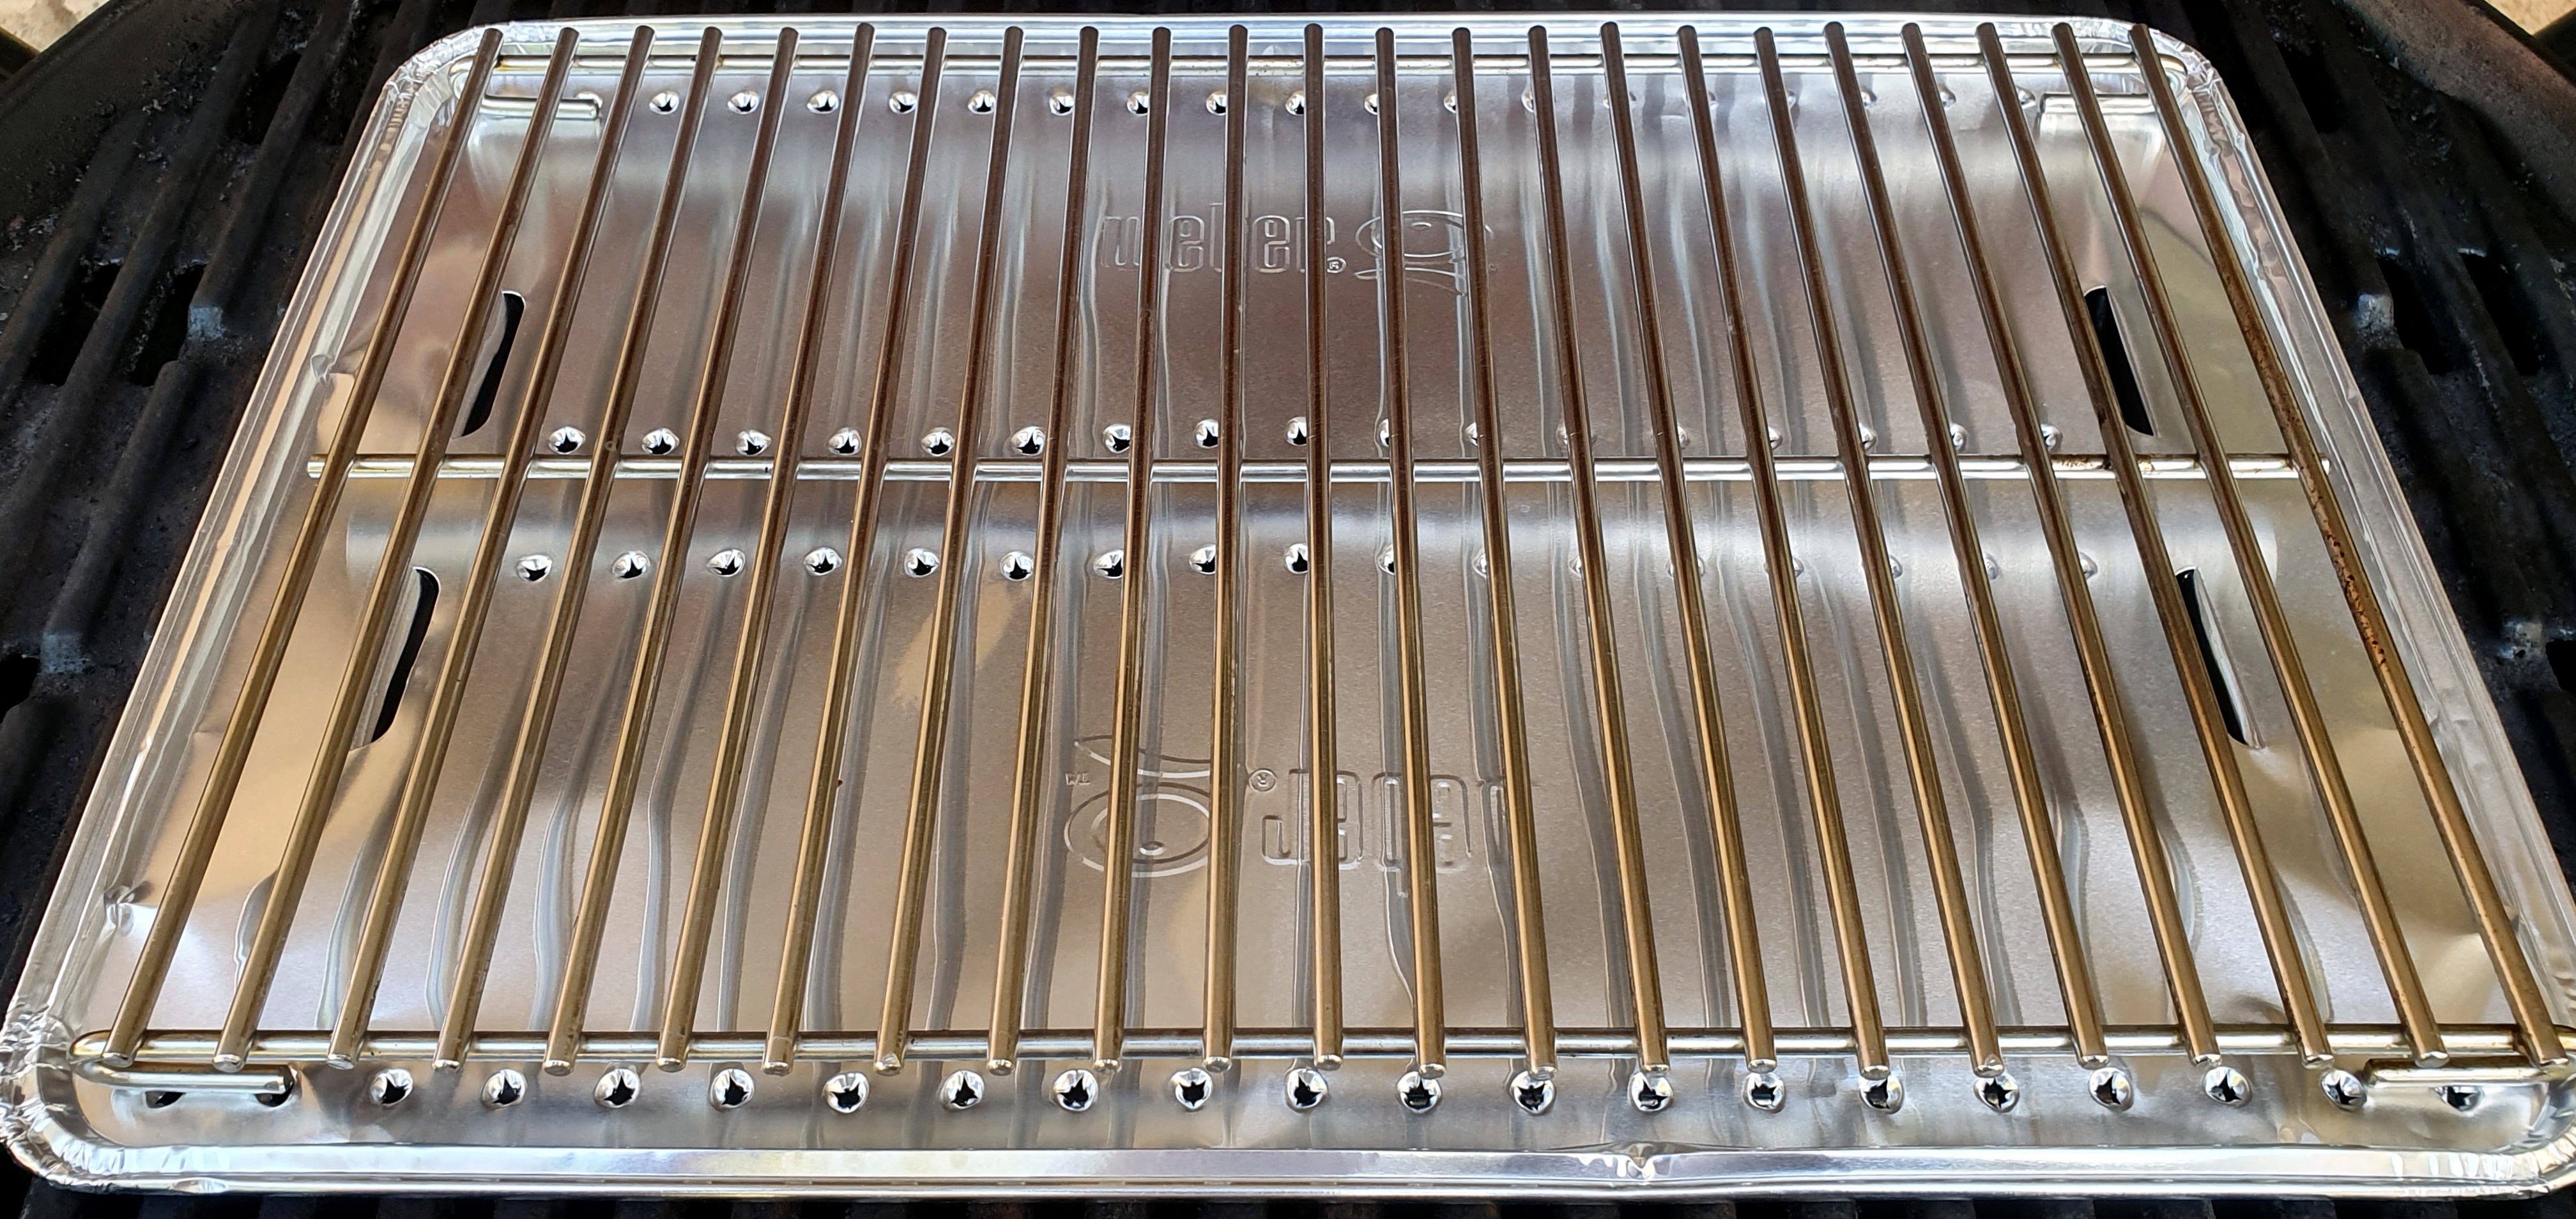
The Weber Trivet Turns Your Weber Q Into An Oven
I have a Weber Q 2000 and it is the best gas BBQ I have ever owned.
Did you know you can transform your Weber 1000, 2000 or 3000 into a roasting oven? I highly recommend the Weber Q Roasting Pack (not a paid recommendation).

The pack contains two foil convections trays and a stainless steel trivet.
The weber website shows you how to make your own trays using aluminium foil but the ones in the pack have little flaps that help you position the tray for the best drainage of fat and air circulation.


You then place the trivet (there are three sizes so make sure you get the one that matches your Weber Q) on the foil tray.

My test roast was a harissa and garlic crusted Australian lamb rack. I think it turned out pretty well. 🙂


Clean up was a dream as the trivet is stainless steel and just needed a wipe down with a soapy sponge.
Enjoy,
PK
Here are some equipment reviews and posts about roasting meat and vegetables for you.
Written by
·
-
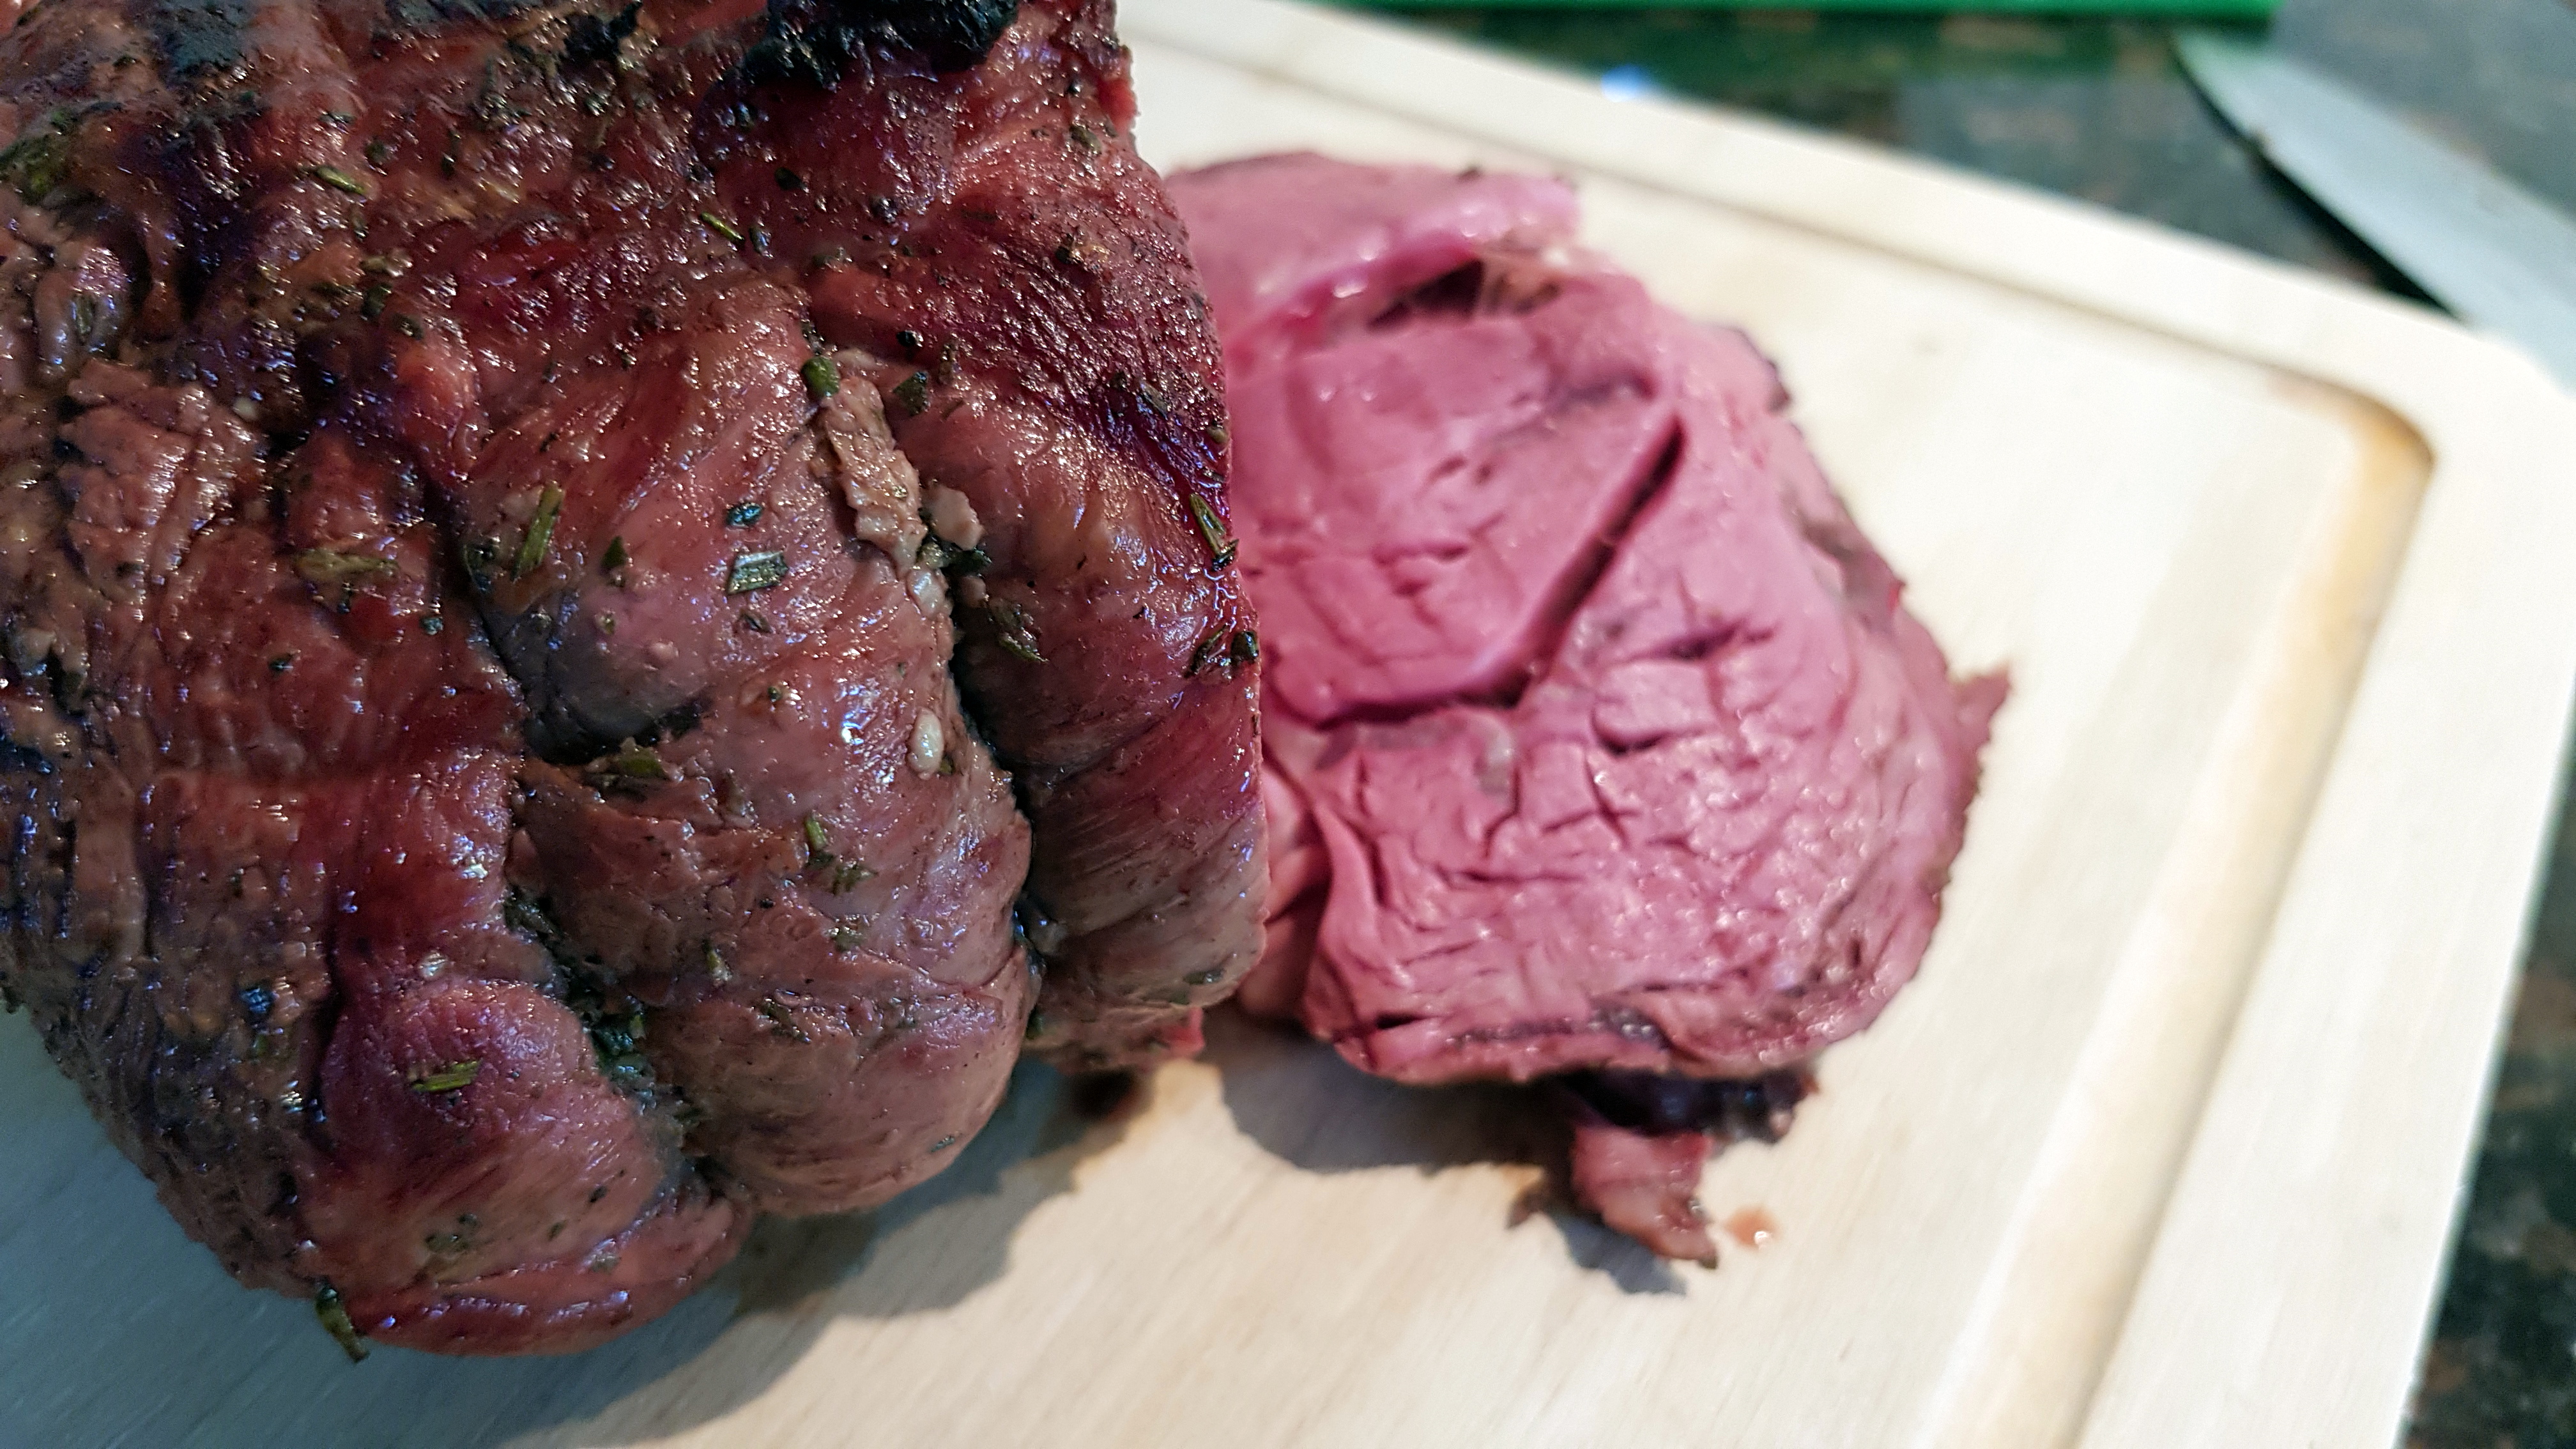
PK’s Rib Eye Roast: With Rosemary And Garlic
Here in Oz we call the boned out beef rib eye cut a ‘scotch fillet’ or a ‘cube roll’. The scotch fillet comes from rib area of the animal and has just the right amount of fat marbling (plus a lovely seam) and tenderness.
Today, I am roasting it in my Weber charcoal kettle BBQ after first coating it in a garlic, chopped rosemary and olive oil mix.
To lock in the flavour I gave it a quick sear before roasting it low and slow until the internal temperature was 60 degrees C. I then let it rest for 20 minutes before carving.
Happy sigh 🙂
Enjoy,
PK
YOU MIGHT ALSO LIKE
MO’AR BEEEEEEF
MORE ROAST POSTS
Please consider subscribing to a weekly email summary of our posts or check us out on Facebook @growitcatchitcookit.
[mc4wp_form id=”15771″]
Written by
·
-

Weber Q Baby: Josh Reviews
Weber has been around since the 1950’s and we have seen the shape change ever so slightly over the years, with each new model keeping the “round” kettle shape.
In 2004 a new model (and shape) was released, known as the “Weber Q” Series. A couple of years later, a “Weber Q Baby” was released, and it’s as it sounds, a smaller version of the Weber Q.
Here are the differences – the Baby Q is on the right:

I acquired the Baby Q Q1000 from Myer when they had a special on a few weeks back for $289, normally they are around the $320-$330 price range. The Baby Q was purchased for camping mainly, and events where a small BBQ would come in handy. My old man has a Q2000 (The big guy) and it’s a great BBQ to use, whether it be for smoking meats, or just simply grilling them.
Once it was home it was an easy assembly, you just need a Philips Screw Driver. The new grill and flat plate, being cast iron, was then lightly oiled with Extra Virgin Olive Oil and then with low heat, was left running for 15 minutes, to burn the new BBQ in. Once this was completed, a quick wipe down and it was boxed back up.
If you purchase one of these, based on this or any other review, the Baby Q only comes with the grill on each side, and I would recommend getting the flat plate for the right hand side (around $60) as its definitely worth having a flat plate!
It uses a normal LPG gas bottle, with the POL fitting. BCF sells a 4kg bottle which is more than enough gas for a week away, with it being used for dinner and breakfast.
For those who wish to be prepared, it would be about 30-45mins a day burn time, 5 days total usage and we have about 2kg left of the 4kg of GAS we left with.
A week ago, my partner and I left for Bremer Bay and Albany. A week later and we absolutely LOVE the Baby Q and it’s the perfect size for portability! We cooked multiple types of food, being: bacon, eggs, toast, tomatoes, burgers, steak, corn and chorizo sausage.


Like with any review, there are a few things worth noting that would make the unit better.
I also have a few tips that will help you get the most out of your Baby Q:
- The hose requires a bit of stretching. It took a couple of days cooking to get the LPG hose to the right movability to connect to the gas bottle.
- A hook to hang your cooking utensils on would be welcomed. This is an easy fix by getting the stand. Depending on size of course!
- Get a couple of spare drip tray’s, or have some spare alfoil (aluminum foil) around. We used the alfoil to make a drip tray and it worked just as good as the Weber branded ones.
- Keep the lid down while cooking, there is a lot of heat loss when it’s up. Remember it’s more like a portable oven than a BBQ.
- When you have finished with it, wash it and keep it clean. A well cleaned BBQ is easier to cook with and will produce a better taste. Also ensure a light oil coating is applied before storing it away long team to protect from rust on the Cast Iron.
Would I recommend this?
YES I WOULD 🙂
Josh
Related Links:
Please consider subscribing to get a weekly email summary of our posts.
[mc4wp_form id=”15771″]
Written by
·
-
Josh’s Weber Q Baby Review
Weber has been around since the 1950’s and we have seen the shape change ever so slightly over the years, with each new model keeping the “round” kettle shape.
In 2004 a new model (and shape) was released, known as the “Weber Q” Series. A couple of years later, a “Weber Q Baby” was released, and it’s as it sounds, a smaller version of the Weber Q.
Here are the differences – the Baby Q is on the right:
I acquired the Baby Q Q1000 from Myer when they had a special on a few weeks back for $289, normally they are around the $320-$330 price range. The Baby Q was purchased for camping mainly, and events where a small BBQ would come in handy. My old man has a Q2000 (The big guy) and it’s a great BBQ to use, whether it be for smoking meats, or just simply grilling them.
Once it was home, it was an easy assembly and you simply need a Philips Screw Driver. The new grill and flat plate, being cast iron, was then lightly oiled with Extra Virgin Olive Oil and then with low heat, was left running for 15 minutes, to burn the new BBQ in. Once this was completed, a quick wipe down and it was boxed back up.
If you purchase one of these, based on this or any other review, the Baby Q only comes with the grill on each side, and I would recommend getting the flat plat for the right hand side (around $60) as its definitely worth having a flat plate!
It uses a normal LPG gas bottle, with the POL fitting. BCF sells a 4kg bottle which is more than enough gas for a week away, with it being used for dinner and breakfast.
For those who wish to be prepared, it would be about 30-45mins a day burn time, 5 days total usage and we have about 2kg left of the 4kg of GAS we left with.
A week ago, my partner and I left for Bremer Bay and Albany. A week later and we absolutely LOVE the Baby Q and it’s the perfect size for portability! We cooked multiple types of food, being: bacon, eggs, toast, tomatoes, burgers, steak, corn and chorizo sausage. None of the times, did the food come out undercooked and was flavoursome.
Like with any review, there are a few things worth noting that would make the unit better.
I also have a few tips that will help you get the most out of your Baby Q:
- The hose requires a bit of stretching. It took a couple of days cooking to get the LPG hose to the right movability to connect to the gas bottle.
- A hook to hang your cooking utensils on would be welcomed. This is an easy fix by getting the stand. Depending on size of course!
- Get a couple of spare drip tray’s, or have some spare alfoil (aluminum foil) around. We used the alfoil to make a drip tray and it worked just as good as the Weber branded ones.
- Keep the lid down while cooking, there is a lot of heat loss when it’s up. Remember it’s more like a portable oven than a BBQ.
- When you have finished with it, wash it and keep it clean. A well cleaned BBQ is easier to cook with and will produce a better taste. Also ensure a light oil coating is applied before storing it away long team to protect from rust on the Cast Iron.
Would I recommend this?
YES I WOULD 🙂
Josh
Written by
·
-

Beer Can Chicken Roasting Rack
I got this beer can chicken roasting rack from Bunnings, for a steal. I used it with a half full can of beer the first time and the result was very pleasing. The rack keeps the chicken vertical, allowing the fat to drip away. The beer keeps the inside of the chicken moist.
Between you and me though, I prefer to skip the beer can and use a lemon instead. The lemon keeps the stuffing inside the chicken, imparts a beautiful citrus aroma and keeps the chicken just as moist.


Check out the result:


Try your favourite dry rub or marinade.
Enjoy,
PK
Here are more chicken dishes and kitchen kit posts:
Written by
·
-
PK Reviews: Beer Can Chicken Roasting Rack
I got this beer can chicken roasting rack from Bunnings for a steal. I used it with a half full can of beer the first time and the result was very pleasing.
Between you and me though, I prefer to skip the beer can and use a lemon instead. The lemon keeps the stuffing inside the chicken, imparts a beautiful citrus aroma and keeps the chicken just as moist.
Check out the result:


Cheers,
PK
Written by
·