Tag: shallots
-

PK’s Coq Au Vin
I have been sitting on this post for about 9 months now because I wasn’t sure it looked appealing. I was worried that you wouldn’t be inspired enough to try it.
Sometimes though we need to be reminded that we are our own worst critic and a good friend of mine just did that. She said its picture looked ‘tasty and who cares what it looks like anyway’ and this made me remember that this blog is all about food connection and the way food makes you feel.
So here it is :).
Coq au vin is a “peasant” French dish of braised chicken (cockerel traditionally) in red wine with a generous heap of bacon, onion, carrots and celery. I should have served with more sauce than shown in the photos below but rest assured the chicken was lovely and tender :).
You will be:
- Preparing your ingredients
- Browning the chicken
- Making the sauce
- Slow cook everything
- Reducing the sauce
- Serving.
You will need:
- Ingredients:
- a whole chicken, skin off, cut into quarters (mine was about 1.3kg)
- 1 celery stick, chopped
- 2 carrots, peeled and chopped
- 140g bacon, chopped (I used ‘short cut’ rashers)
- 1 large brown onion, sliced
- black peppercorns to taste, cracked
- 1 cup plain flour to dust the chicken pieces
- a good slug of olive oil
- 2 cups red wine
- 1/2 cup homemade chicken stock
- A handful of small or chopped mushrooms
- Equipment:
- a long sharp knife
- a chopping board
- an oven proof dish
- tongs
- a wooden spoon
- a dish to keep chicken warm
Preparing your ingredients
- Chop the 1 large brown onion into quarters or slices depending on your preference (you could even use a few whole shallots instead).
- Chop the 2 carrots and the celery stick the way you want too (sometime I prefer larger pieces of vegetables in this dish).
- Quarter the whole chicken (I recommend this knife), remove the skin and dust in flour and black pepper.
- Chop the 140g of bacon.


Browning the chicken
- Chuck a good slug of olive oil in the oven proof dish and put it on the hob (medium heat).
- Brown chicken on all sides.
- Take the chicken pieces out, put them on a plate and chuck them in an oven on very low heat to keep them warm.


Making the sauce
- Put a good slug of red wine to moisten the oven proof dish and then add the:
- 1 celery stick, chopped
- 2 carrots, peeled and chopped
- 140g bacon, chopped
- 1 large brown onion, sliced
- Throw in the handful of chopped mushrooms.
- Add the remainder of the 2 cups red wine and bring to the boil to cook off the alcohol.
- Replace the chicken, cover and put the hob on low heat.


Slow cook everything
Cook for about an hour, turning the chicken every now and again.
Reducing the sauce
Remove the chicken again and put it back into the oven to keep it warm while you reduce the rest of the sauce.


Serving
Mashed or boiled potatoes will go a treat and I also recommend adding some steamed snow peas pods and a nice crusty baguette :).

Enjoy,
PK
Related Links:
- See more chicken recipe posts here
Written by
·
-

PK’s NoRecipe Fried Shallots And Garlic
This oft overlooked garnish is hard to beat for wow factor but boy does it take patience and a watchful eye to make. Even a small distraction can result in burnt onions but the good news is that you can make it ahead of time (even a day ahead).
It has a desirable almost burnt flavour in isolation but it acts to bring that “missing something” when in combination with other ingredients in soups, burgers and salads.
It will take about 15 minutes of regular, gentle moving of them on a very low heat. You won’t be trying to get them crispy in the pan as that will happen when you drain them into paper towel and they cool.
Steps:
- You start by slicing a few shallots and a garlic clove if you are using one.
- Heat a really generous amount of olive oil in a sauce pan.
- Add the shallot and garlic slices and move them often to stop them burning (you want to cook them evenly as a batch and not have some burnt and some underdone.
- Keep cooking until the the shallots have absorbed a lot of the oil and they look a dark golden brown (see pictures below).
- Pop them into some paper towel and let them cool and crisp up.
- Take a sneaky “test” mouthful :).


Serving suggestion:
Enjoy,
PK
Written by
·
-

The Easiest Steak Diane Sauce
My family sure does like its beef :).
We are very lucky in Australia to have a great beef industry and also the climate to barbecue it year round. That mean lots of opportunity to experiment in the kitchen.
Most days I look up recipes that make use of the plants I have in my kitchen garden and work backwards. So I am pleased to say that if like me you have never made Steak Diane before because it sounded complicated, we couldn’t have been more wrong.

Notes:
- adapted from http://www.cooks.com/recipe/qr0lk5fe/steak-diane.html
- no mushrooms in this version but I might try using Enoki next time
- I use porterhouse steaks a lot because that cut is very forgiving on the barbecue.
You will be:
- Preparing the ingredients.
- Serving directly.
You will need:
- Ingredients:
- 2 small shallots, thinly sliced
- 1 tsp chives, finely diced
- 2 tsp parsley, finely diced
- 2 Tbsp salted butter
- 1/8 cup dry sherry
- 1/4 tsp table salt
- 1/4 tsp garlic powder
- 1/2 tsp lemon juice
- 1/2 tsp Worcestershire sauce
- Ground black peppercorns to taste
- A handful of delicate mushrooms like Enoki
- Equipment:
- a long sharp knife
- a chopping board
- a whisk
- a small fry pan
Preparing the ingredients
- Slice the 2 small shallots.
- Finely dice the 2 tsp of parsley and 1 tsp of chives.
- Gently melt the 2 Tbsp of butter in the saucepan.
- Add the shallots, parsley and chives and gently stir until the shallots soften.
- Add and mix the:
- 1/4 tsp table salt
- 1/4 tsp garlic powder
- 1/2 tsp lemon juice
- 1/2 tsp Worcestershire sauce
- ground black peppercorns to taste
- Stir in the 1/8 cup dry sherry.

Serving directly
Cook your steak anyway you like it while you keep the sauce warm (I put some foil on the saucepan after taking it off the heat).
Drizzle, chomp and then sigh :).
Enjoy,
PK
YOU MIGHT ALSO LIKE
MORE FRENCH CUISINE
SAUCES AND CONDIMENTS
COOKING WITH ALCOHOL
THE FULL GICICI INGREDIENTS LIST
Please consider subscribing to a weekly email summary of our posts or check us out on Facebook @growitcatchitcookit.
[mc4wp_form id=”15771″]
Written by
·
-
DrippyStuff: PK’s Cheaters Diane Sauce
My family sure does like its beef :).
We are very lucky in Australia to have a great beef industry and also the climate to barbecue it year round. That mean lots of opportunity to experiment in the kitchen.
Most days I look up recipes that make use of the plants I have in my kitchen garden and work backwards. So I am pleased to say that if like me you have never made Steak Diane before because it sounded complicated, we couldn’t have been more wrong.
Notes:
- adapted from http://www.cooks.com/recipe/qr0lk5fe/steak-diane.html
- no mushrooms in this version but I might try using Enoki next time
- I use porterhouse steaks a lot because it is very forgiving on the barbecue.
You will be:
- Preparing the ingredients.
- Serving directly.
You will need:
- Ingredients:
- 2 small shallots, thinly sliced
- 1 tsp chives, finely diced
- 2 tsp parsley, finely diced
- 2 Tbsp salted butter
- 1/8 cup dry sherry
- 1/4 tsp table salt
- 1/4 tsp garlic powder
- 1/2 tsp lemon juice
- 1/2 tsp Worcestershire sauce
- ground black peppercorns to taste
- Equipment:
- a long sharp knife
- a chopping board
- a whisk
- a small frypan
Preparing the ingredients
- Slice the 2 small shallots.
- Finely dice the 2 tsp of parsley and 1 tsp of chives.
- Gently melt the 2 Tbsp of butter in the saucepan.
- Add the shallots, parsley and chives and gently stir until the shallots soften.
- Add and mix the:
- 1/4 tsp table salt
- 1/4 tsp garlic powder
- 1/2 tsp lemon juice
- 1/2 tsp Worcestershire sauce
- ground black peppercorns to taste
- Stir in the 1/8 cup dry sherry.
Serving directly
Cook your steak anyway you like it while you keep the sauce warm (I put some foil on the saucepan after taking it off the heat).
Drizzle, chomp and then sigh :).
Enjoy,
PK
Written by
·
-
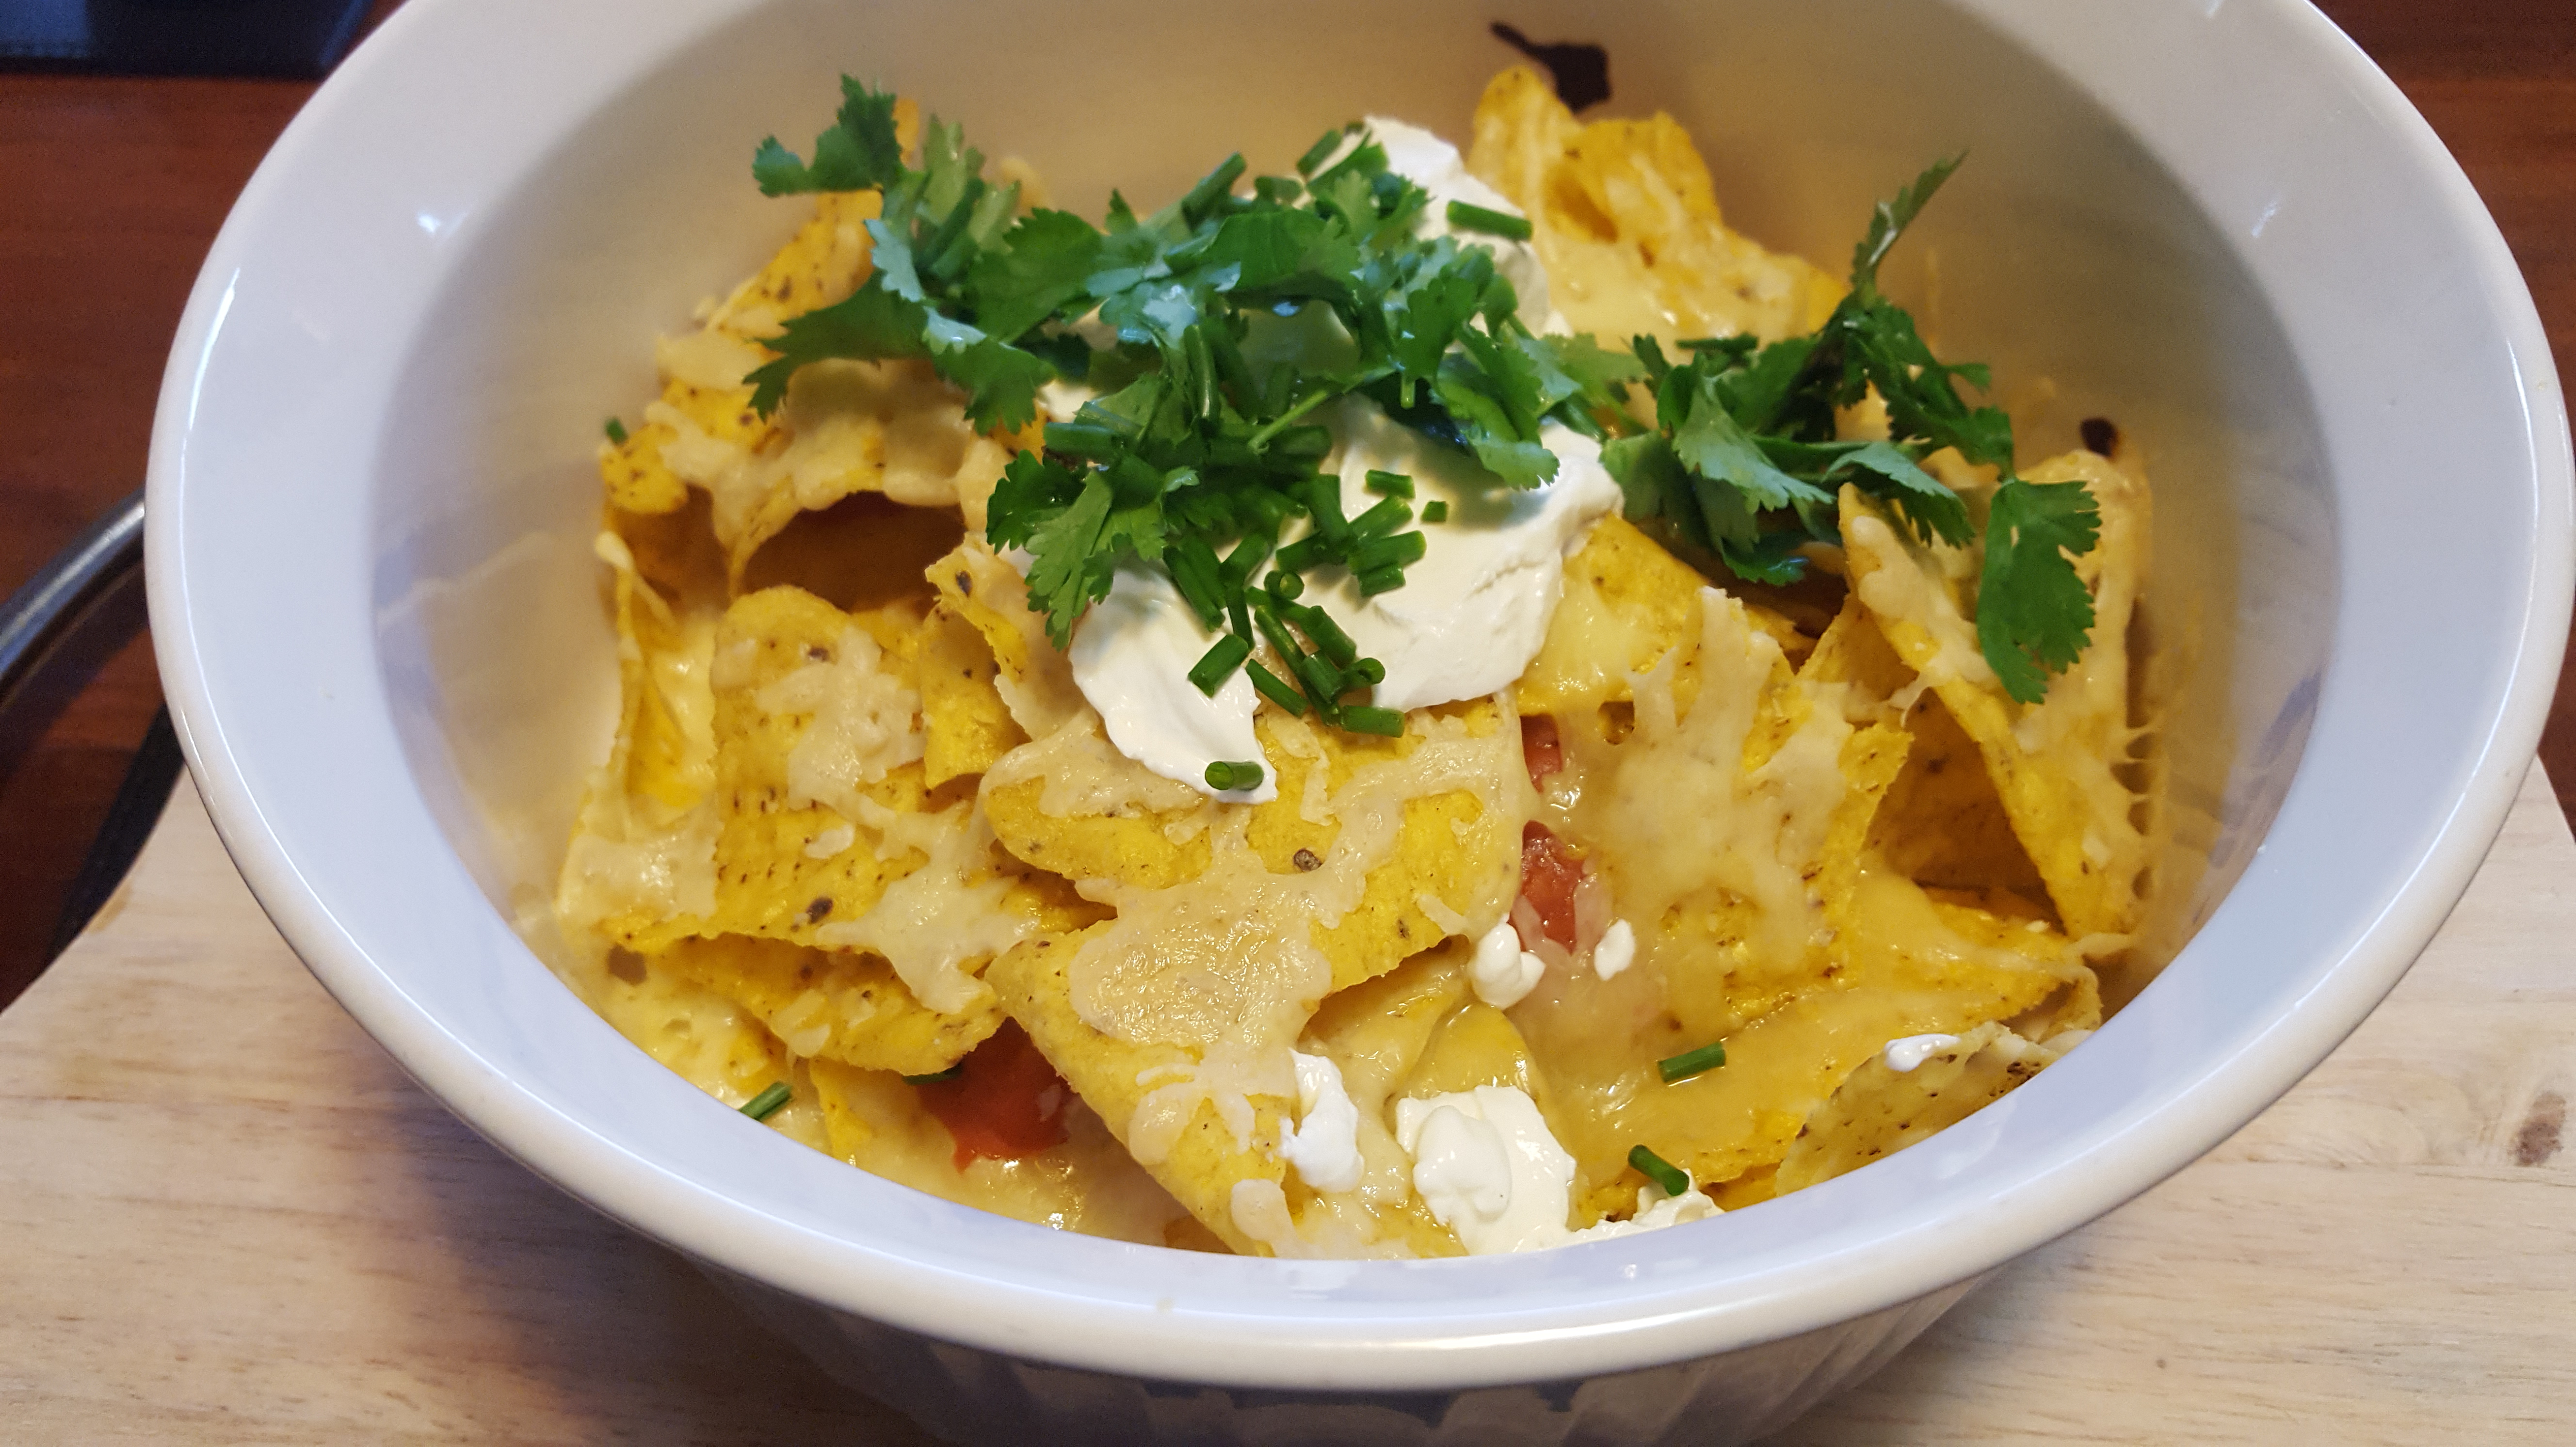
PK’s Simple Nachos
This is one of my favourite family meals. Everyone gets their own dish of the nacho base and once these come out of the oven, we put our favourite toppings on.
The secret to making awesome nachos is to layer the corn chips then some nacho sauce then some cheddar cheese and repeat. Pop them in a say 180 °C until the cheese has melted and that is it.
There is only one other rule to making awesome nachos: Sour Cream!
Magic 🙂


Enjoy,
PK
Pair this with my guacamole (see PK’s You..Can’t.. Handle..The..Gwock).
Written by
·
-
PK’s NoRecipe Nachos
This is one of my favourite family meals. Everyone gets their own dish of the nacho base and once these come out of the oven, we put our favourite toppings on.
The secret to making awesome nachos is to layer the corn chips then some nacho sauce then some cheddar cheese and repeat. Pop them in a say 180 °C until the cheese has melted and that is it.
There is only one other rule to making awesome nachos: Sour Cream!
Magic 🙂
Enjoy,
PK
Pair this with my guacamole (see PK’s You..Can’t.. Handle..The..Gwock).
Written by
·
-

PK’s Cheaters Red Curry Paste
Here is my, unashamedly, unauthentic red curry paste :).

I use it to make Thai Red Chicken Curries and also Tom Kha Gai (one of my favourite south-east Asian soups).
Please read PK’s Curry Paste Kit before you get going and also ramp the chili factor skywards if you are allowed to. You will notice that I use a blender because I am a lazy cook. However I prefer the chunkier look of the paste if you use a mortar and pestle.
One last thing, I would love to use Kaffir lime zest instead of common limes but my tree never seems to fruit. I think it has something to do with what it is grafted to.
You will need:
- Ingredients:
- 1 Tbsp whole coriander seeds
- 0.5 Tbsp whole cumin seeds
- 1 Tbsp rock salt (add more if you want a more authentic taste)
- 0.5 tsp whole black peppercorns
- 1 Tbsp powdered kashmiri chili (add more and use whole chilis if you want a more authentic taste and look)
- 3 coriander roots
- 7cm of pickled galangal root
- 5 garlic cloves
- 3 lemongrass stalks, freshly harvested, leaves removed
- 1 large red shallot
- 1 Tbsp dried belacan (shrimp paste)
- 1 Tbsp lime zest (I used about 2 small limes to get this much)
- a dash of lime juice
- a dash of water (add less or more depending on your desired consistency)
- a dash of olive oil or garlic infused olive oil (I think you can skip this if you are using a mortar and pestle)
- 2 Kaffir lime leaves (sorry everyone, I know this is really not the done thing traditionally)
- Equipment
- a chopping board
- a sharp knife
- a serving bowl
- a wet blender with a very small bowl
- a dry spice mixer
- a medium frypan (for dry roasting the spices)
Make the paste
I love bringing everything together before I start cooking. The ingredients in this dish are so visually appealing and the aromas are simply amazing.

Steps:
- Dry roast the 1 Tbsp whole coriander seeds, 0.5 Tbsp whole cumin seeds and the 0.5 tsp whole black peppercorns.
- When cooled, pop them in you dry spice mixer and pulse to a rough consistency.
- Chuck the rest of the ingredients (at least roughly chopped) in your wet blender:
- 1 Tbsp powdered kashmiri chili
- 1 Tbsp rock salt
- 3 coriander roots
- 7cm of galangal root
- 5 garlic cloves
- 3 lemongrass stalks
- 1 large red shallot
- 1 Tbsp dried belacan
- 1 Tbsp lime zest
- a dash of lime juice
- a dash of water
- a dash of olive oil or garlic infused olive oil
- 2 Kaffir lime leaves

Storing
This paste freezes well in a small container or snap-lock bag. I prefer to make it in just enough of a quantity so I can use it fresh in a dish.
Enjoy and please send me your tips,
PK
Written by
·
- Ingredients:
-

Bish’s Chicken Congee for the Soul
The health benefits of your favourite comfort foods should not be underrated. Traditional recipes especially because they have been handed down from generation to generation for a reason.
Special guest blogger Bish writes:
I’ve been crook most of the week, and as a result I ended up cooking one of my “comfort” foods, congee, or rice porridge.
The thing is, when you are feeling sick, you really don’t feel like doing much, and you sure don’t feel like taking photos of the food you are doing for a potential blog down the road, so PK is going to have to steal some photos from elsewhere to illustrate this post.
Congee is eaten in many parts of the world, and it’s called all sorts of other things in other languages, but in my house (and my mother-in-law’s house) it gets called congee. My mother-in-law and I do bond a bit over cooking and gardening and she’s taught me a few things over the years – like adding dried scallops to my congee while it is cooking.
Anyway, congee has to be one of the simplest dishes to cook and (placebo or whatever) always makes me feel better.
You’ll need:
• Uncooked white rice
• Stock (like Ben’s medicinal chicken broth or PK’s slow cooker chicken stock)
• Other stuff you might want to throw in, like dried scallops
• Condiments – soy sauce, sesame oil, dried shallots and white pepper are my favouritesTo make it:
When I cook up a batch of stock, I freeze it into those takeaway containers that you have lying around, and so there’s always a few of these stored in the freezer – I should label them “in case of illness, make congee with this”. So I’ll start on the assumption that you have some in the freezer…Here we go:
- Take the frozen block of stock out of the freezer, and chuck it in a saucepan on low heat.
- Go take some more cold and flu medications while it defrosts, and turn up the heat a little as you get more liquid.
- When it comes to the boil, chuck in the optional bits you like, and a cup or two of uncooked rice. The amount you put in depends on how much you want to heat, as you’ll probably need to play with the liquid ratios anyway – two cups would do about four big bowls of congee.
- Intermittently come back and take a look at the pot – if it is too dry, add water (or if you have more stock, add more stock), if it is too wet, you can chuck in a bit more rice – but I tend to need to add more water than rice. It’s done when the rice has broken down into a sort of slurry (I know that’s not appetising).
- Turn off the heat and ladle out a bowl full of it. Then you want to finish it off; add in a splash of soy sauce (watch how salty your stock was), a few drops of sesame oil, white pepper and dried shallots. Then go and rug up, and sit and eat it all up. Usually, I then go and have a sleep for an hour or two and then come back, turn the pot back on, warm up the congee, and eat more, then repeat.
- If there’s still some left in the pot that evening, I throw it in the fridge overnight (pot and all) and then have it again for breakfast.
This is not the most amazing recipe in the world or anything, but if you are feeling lousy from a cold or whatever, it’s really easy to make and it does seem to help me get over colds and flus quicker.
I’m going back to bed now.
Bish
Here are more southeast asian inspired cuisine and posts from Bish:
Written by
·
-
Bish’s Chicken Porridge for the Soul
Comfort foods’ health benefits should not be underrated. Traditional recipes especially because they have been handed down from generation to generation for a reason.
Special guest blogger Bish writes:
I’ve been crook most of the week, and as a result I ended up cooking one of my “comfort” foods, congee, or rice porridge.
The thing is, when you are feeling sick, you really don’t feel like doing much, and you sure don’t feel like taking photos of the food you are doing for a potential blog down the road, so PK is going to have to steal some photos from elsewhere to illustrate this post.
Congee is eaten in many parts of the world, and it’s called all sorts of other things in other languages, but in my house (and my mother-in-law’s house) it gets called congee. My mother-in-law and I do bond a bit over cooking and gardening and she’s taught me a few things over the years – like adding dried scallops to my congee while it is cooking.
Anyway, congee has to be one of the simplest dishes to cook and (placebo or whatever) always makes me feel better.You’ll need:
• Uncooked white rice
• Stock (like Ben’s medicinal chicken broth or PK’s slow cooker chicken stock)
• Other stuff you might want to throw in, like dried scallops
• Condiments – soy sauce, sesame oil, dried shallots and white pepper are my favouritesTo make it:
When I cook up a batch of stock, I freeze it into those takeaway containers that you have lying around, and so there’s always a few of these stored in the freezer – I should label them “in case of illnesss, make congee with this”. So I’ll start on the assumption that you have some in the freezer…Here we go:
- Take the frozen block of stock out of the freezer, and chuck it in a saucepan on low heat.
- Go take some more cold and flu medications while it defrosts, and turn up the heat a little as you get more liquid.
- When it comes to the boil, chuck in the optional bits you like, and a cup or two of uncooked rice. The amount you put in depends on how much you want to heat, as you’ll probably need to play with the liquid ratios anyway – two cups would do about four big bowls of congee.
- Intermittently come back and take a look at the pot – if it is too dry, add water (or if you have more stock, add more stock), if it is too wet, you can chuck in a bit more rice – but I tend to need to add more water than rice. It’s done when the rice has broken down into a sort of slurry (I know that’s not appetising).
- Turn off the heat and ladle out a bowl full of it. Then you want to finish it off; add in a splash of soy sauce (watch how salty your stock was), a few drops of sesame oil, white pepper and dried shallots. Then go and rug up, and sit and eat it all up. Usually, I then go and have a sleep for an hour or two and then come back, turn the pot back on, warm up the congee, and eat more, then repeat.
- If there’s still some left in the pot that evening, I throw it in the fridge overnight (pot and all) and then have it again for breakfast.
This is not the most amazing recipe in the world or anything, but if you are feeling lousy from a cold or whatever, it’s really easy to make and it does seem to help me get over colds and flus quicker.
I’m going back to bed now.
Bish
Written by
·
-

How To Make A Nyonya Rempah Paste
This Malaysian curry paste looks hard to make on first glance. After a few goes though you will be able to make it blindfolded and I hope like me you find it an enjoyable process :).
I make it well ahead of time for my favourite south-east Asian curry, a sticky Nyonyan Chicken Curry (see the post here). Please give this paste recipe a try, you won’t be disappointed. The only drawback is that you might not look at store bought pastes in the same light ever again.
Look at the colourful ingredients:

Note:
- All my recipes have their chili quota curbed at my family’s request. I am slowly increasing the amount on the sly so don’t tell them :). Add extra chili for that authentic taste if you can get away with it.
- The paste freezes well.
You will need:
- Ingredients:
- 1 tsp table salt
- 1 tsp brown sugar
- 3.5 Tbsp whole coriander seeds
- 1.5 tsp whole cumin seeds
- 1.5 tsp whole fennel seeds
- 1 tsp powdered kashmiri chili (at the minimum)
- 1 Tbsp dried belacan (shrimp paste)*
- 1 Tbsb powdered turmeric
- 3 cloves garlic
- 270g red shallots (sliced)
- 1/3 cup olive oil
- Note *: I sometimes use a treacle consistency type of belacan but it is so sticky and harder to blend than the dried version.
- Equipment
- a chopping board
- a long sharp knife
- a small bowl
- a small plate
- a wet blender with a very small bowl
- a dry spice mixer or a mortar and pestle
Make the rempah
Steps:
- Bring all of the rempah ingredients together (see What Does Mise en Place Mean?.
- Dry fry the whole spices (3.5 Tbsp whole coriander seeds, 1.5 tsp whole cumin seeds and 1.5 tsp whole fennel seeds).
- Let them cool and add to your spice mill. Mill them in bursts to avoid cooking the spices further in the heat caused by the blades. Keep going until you get a fine powder. Add this powder to your wet mixer and enjoy the aroma.
- Roughly chop the 270g red shallots and 3 garlic cloves and add to the wet mixer.
- I use Sim Seng Lee brand dried belacan (1 Tbsp worth), it stores really well and doesn’t smell out the house! Add it to the wet mixer.
- Add the rest of the ingredients to the wet blender (1/3 cup olive oil, 1 tsp salt, 1 tsp sugar, 1 tsp kashmiri chili and 1 Tbsb powdered turmeric).
- Blend to a smooth paste, spoon it into a bowl and place in the fridge.
Better than a store bought paste by a long shot:

Enjoy,
PK
Written by
·