Tag: rice
-
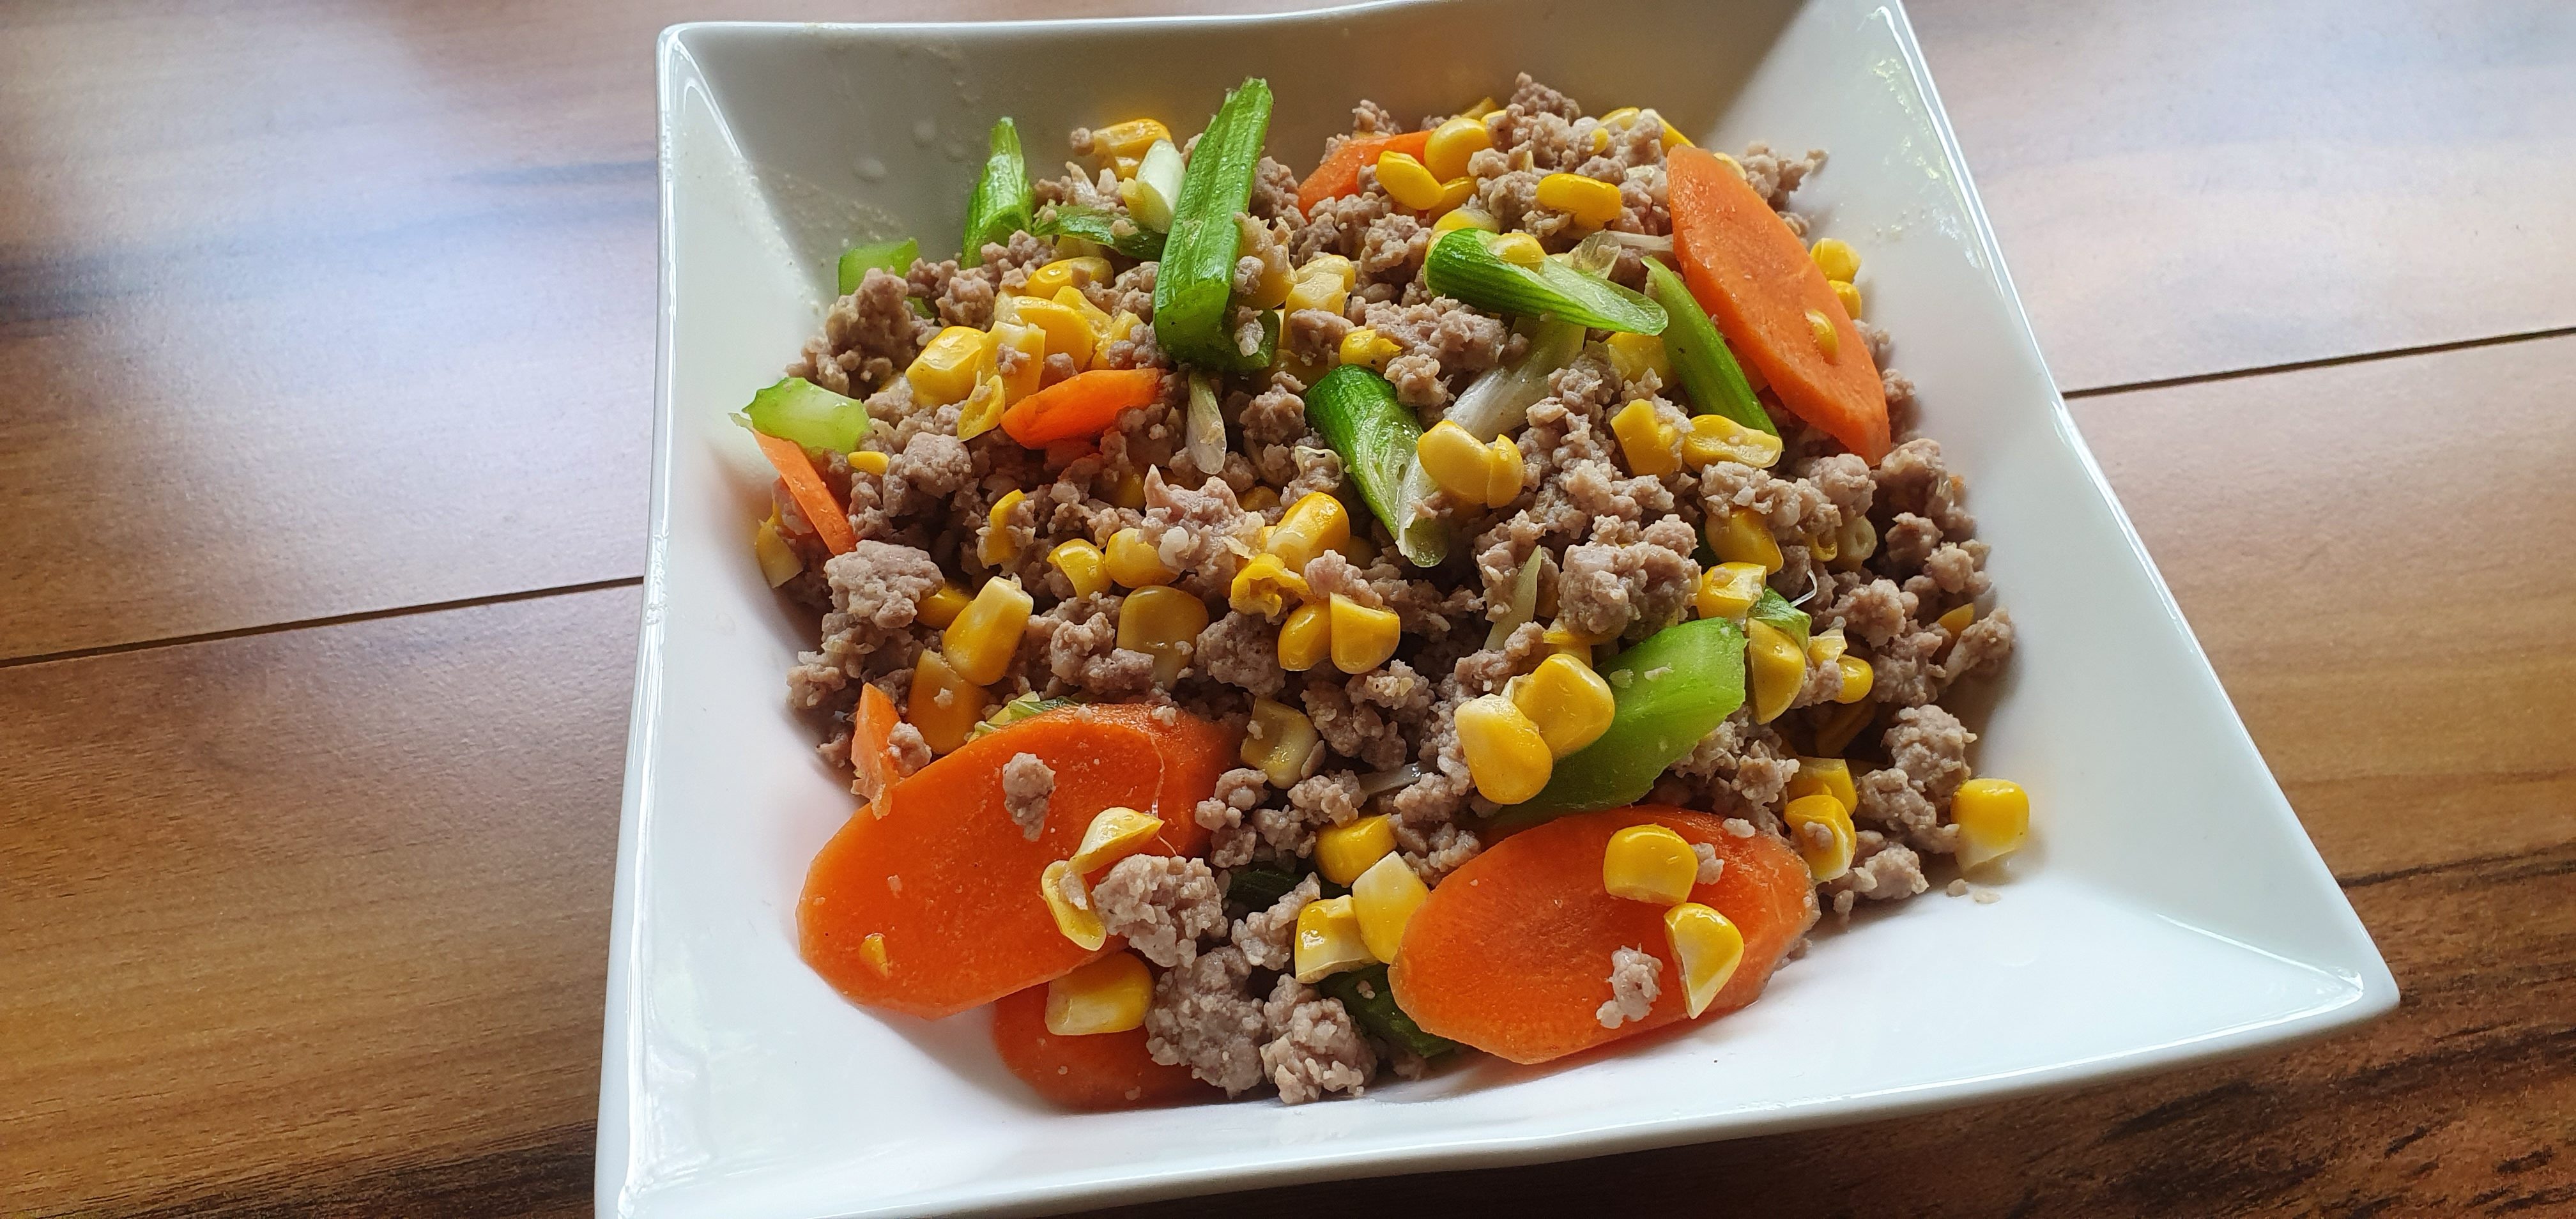
Chinese Minced Pork And Corn
This basic pork mince and corn recipe is light, full of umami favours and ready for your personal touches.
I find that my favourite meals have a few ingredients whose combination belies their individual simplicity.
This dish is the perfect example. Serve with rice, noodles or potatoes and you are good to go!
Ingredients
- 500g pork mince
- 2 garlic cloves
- A good slug of sesame oil (the secret ingredient)
- 1 can corn kernels or ~400g cut from cobs
- 3 spring onions, sliced
- 1 – 2 carrots, sliced
- 2 sticks celery, sliced
- A sprinkle of white pepper
- A sprinkle of salt
- Chillies , to taste, sliced, chopped, whole…..
- Water, just a little if the mince looks to be sticking to the frypan
Simply
Heat some sesame oil in your frypan and prepare the vegetables. Saute the onions and garlic.
Add the pork mince and cook until browned. Add the rest of the chopped vegetables and cook until the vegetables have softened a little but still have a bit of crunch.
A little bit of liquid will come out of the pork and corn kernels as they cook. I also keep a little bit of water on hand if the ingredients are sticking to the pan. I think it is nice for the finished dish to have a little sauce.
Serving
I like to serve it on a bed of rice and have condiments such as fish sauce and Sriracha on the table.
Enjoy,
PK
Here are some more Chinese cuisine inspired dishes and simple meals:
Written by
·
-
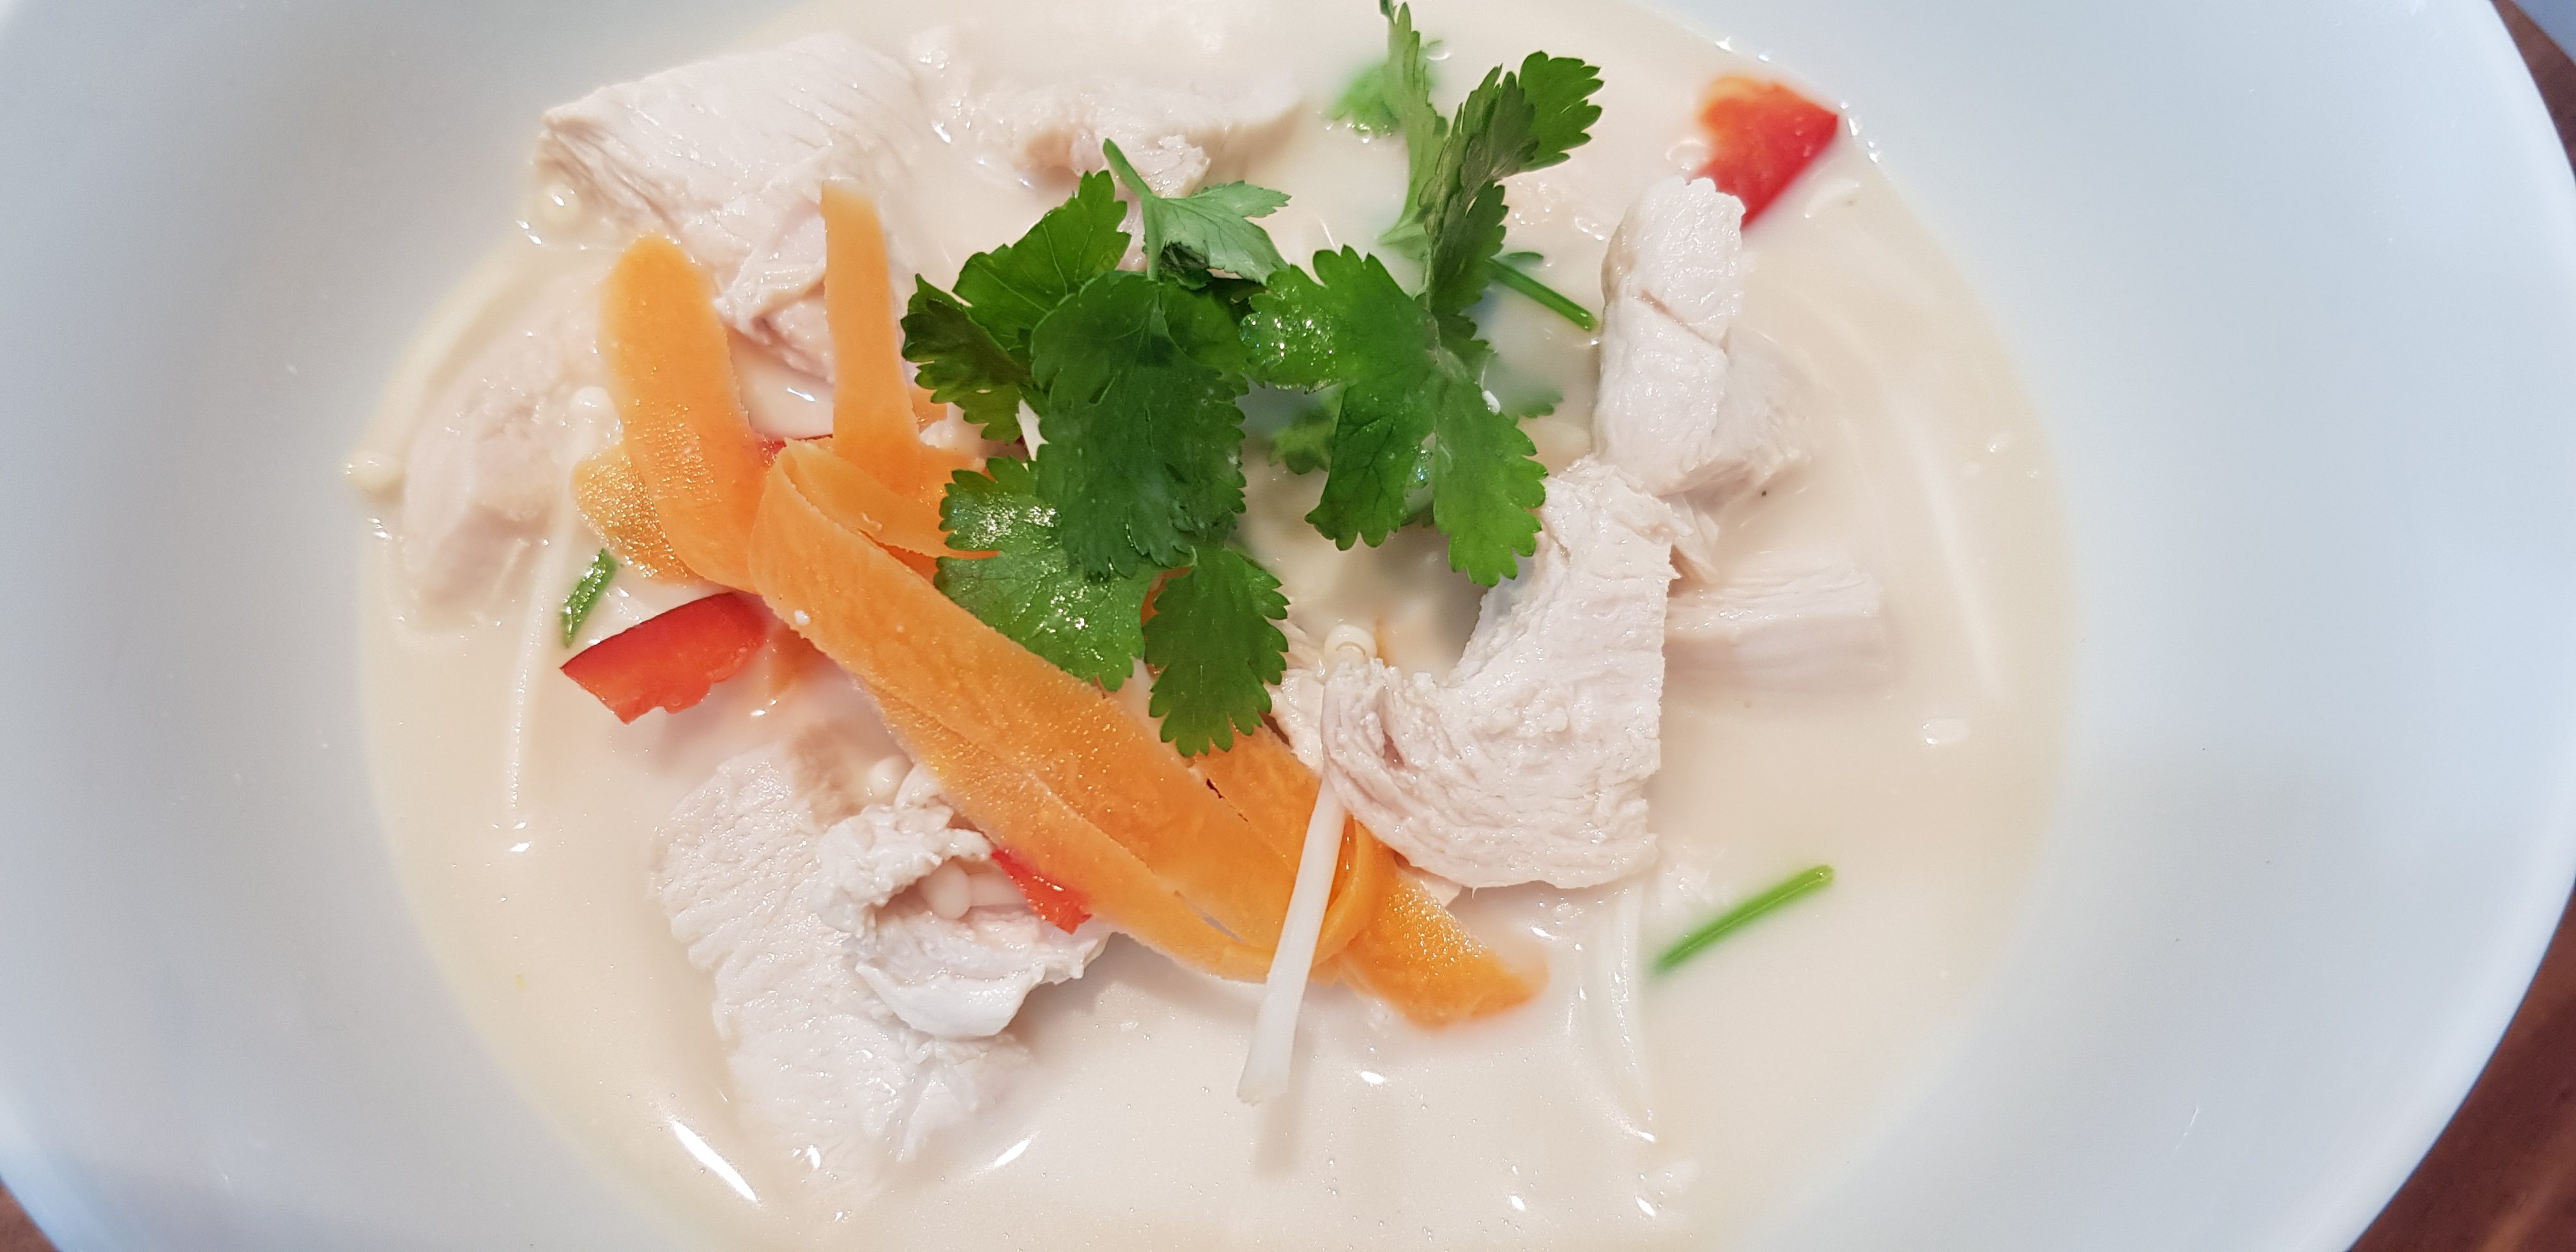
PK’s Simple Tom Kha Gai
My way of making Tom Kha, a Thai coconut, chicken and galangal soup, one bowl at a time is great if you have a family with widely different stands on what they will or won’t eat. For example, I love tomatoes, mushrooms and spring onions so I use lots of them in my bowl. My lads don’t so they get more mushrooms, carrot and corn.
It is also great when you have your friends over for lunch or dinner. Simply put a big pot of soup on the table with the vegetables and rice separate and everyone can build their own bowl. Don’t forget slices of lime, chopped Thai chilies and extra fish sauce. 🙂
Note: I think this makes enough soup for 2 hungry adults.

Steps
- Preparing the ingredients
- Bringing the soup to the boil
- Serving
Ingredients
- 1 poached chicken breast
- 1 small coriander plant (roots and leaves), whole
- 1 chunk of fresh galangal, bruised
- 3 kaffir lime leaves, bruised
- 1 lemongrass stalk, bruised
- 1 Tbsp fish sauce for the pot and 1 Tbsp for each serving bowl
- 1 Tbsp lime juice for the pot and 1 Tbsp for each serving bowl
- 1/2 cup water
- 2 cups chicken stock
- 1 cup coconut milk
- 3 Thai chiles, sliced (optional but encouraged)
- Your personal choice of vegetables
- Coriander leaves to garnish
Equipment
- 1 chef’s knife
- 1 chopping board
- 1 wooden spoon
- 1 saucepan/soup pot
Preparing the ingredients
- Cut your poached chicken breast into cubes or slices.
- Bruise the galangal chunk and the lemongrass stalk and add to the pot.
- Bruise the kaffir lime leaves, or like I have put little tears in the edges to release the flavour better, and add to the pot.
- Add one small coriander plant.
- Add:
- 1 Tbsp fish sauce
- 1 Tbsp lime juice
- 1/2 cup water
- 2 cups chicken stock
- 1 cup coconut milk
- 3 Thai chiles (optional)

Bringing the soup to the boil
- Let everything come to a boil really slowly to infuse all the flavours. I don’t move it very often and then only a gentle swirl.
- Once you have a gentle boil, turn the heat down a bit and add the poached chicken.
- Cook until the chicken is safely warmed through but not for too long or it will go stringy.

Serving
- Build up a bowl of your favourite vegetables and add 1 Tbsp fish sauce and 1 Tbsp lime juice.
- Add some chicken and then add as much soup as you want (liquid only, the rest stays behind).
- Provide your guests with some cooked rice, slices of lime, extra chiles and fish sauce.

Enjoy,
PK
YOU MIGHT ALSO LIKE
MORE THAI DISHES
MORE ASIAN CUISINE
CHICKEN DISHES
MORE SOUP POSTS
Please consider subscribing to a weekly email summary of our posts or check us out on Facebook @growitcatchitcookit.
[mc4wp_form id=”15771″]
Written by
·
-
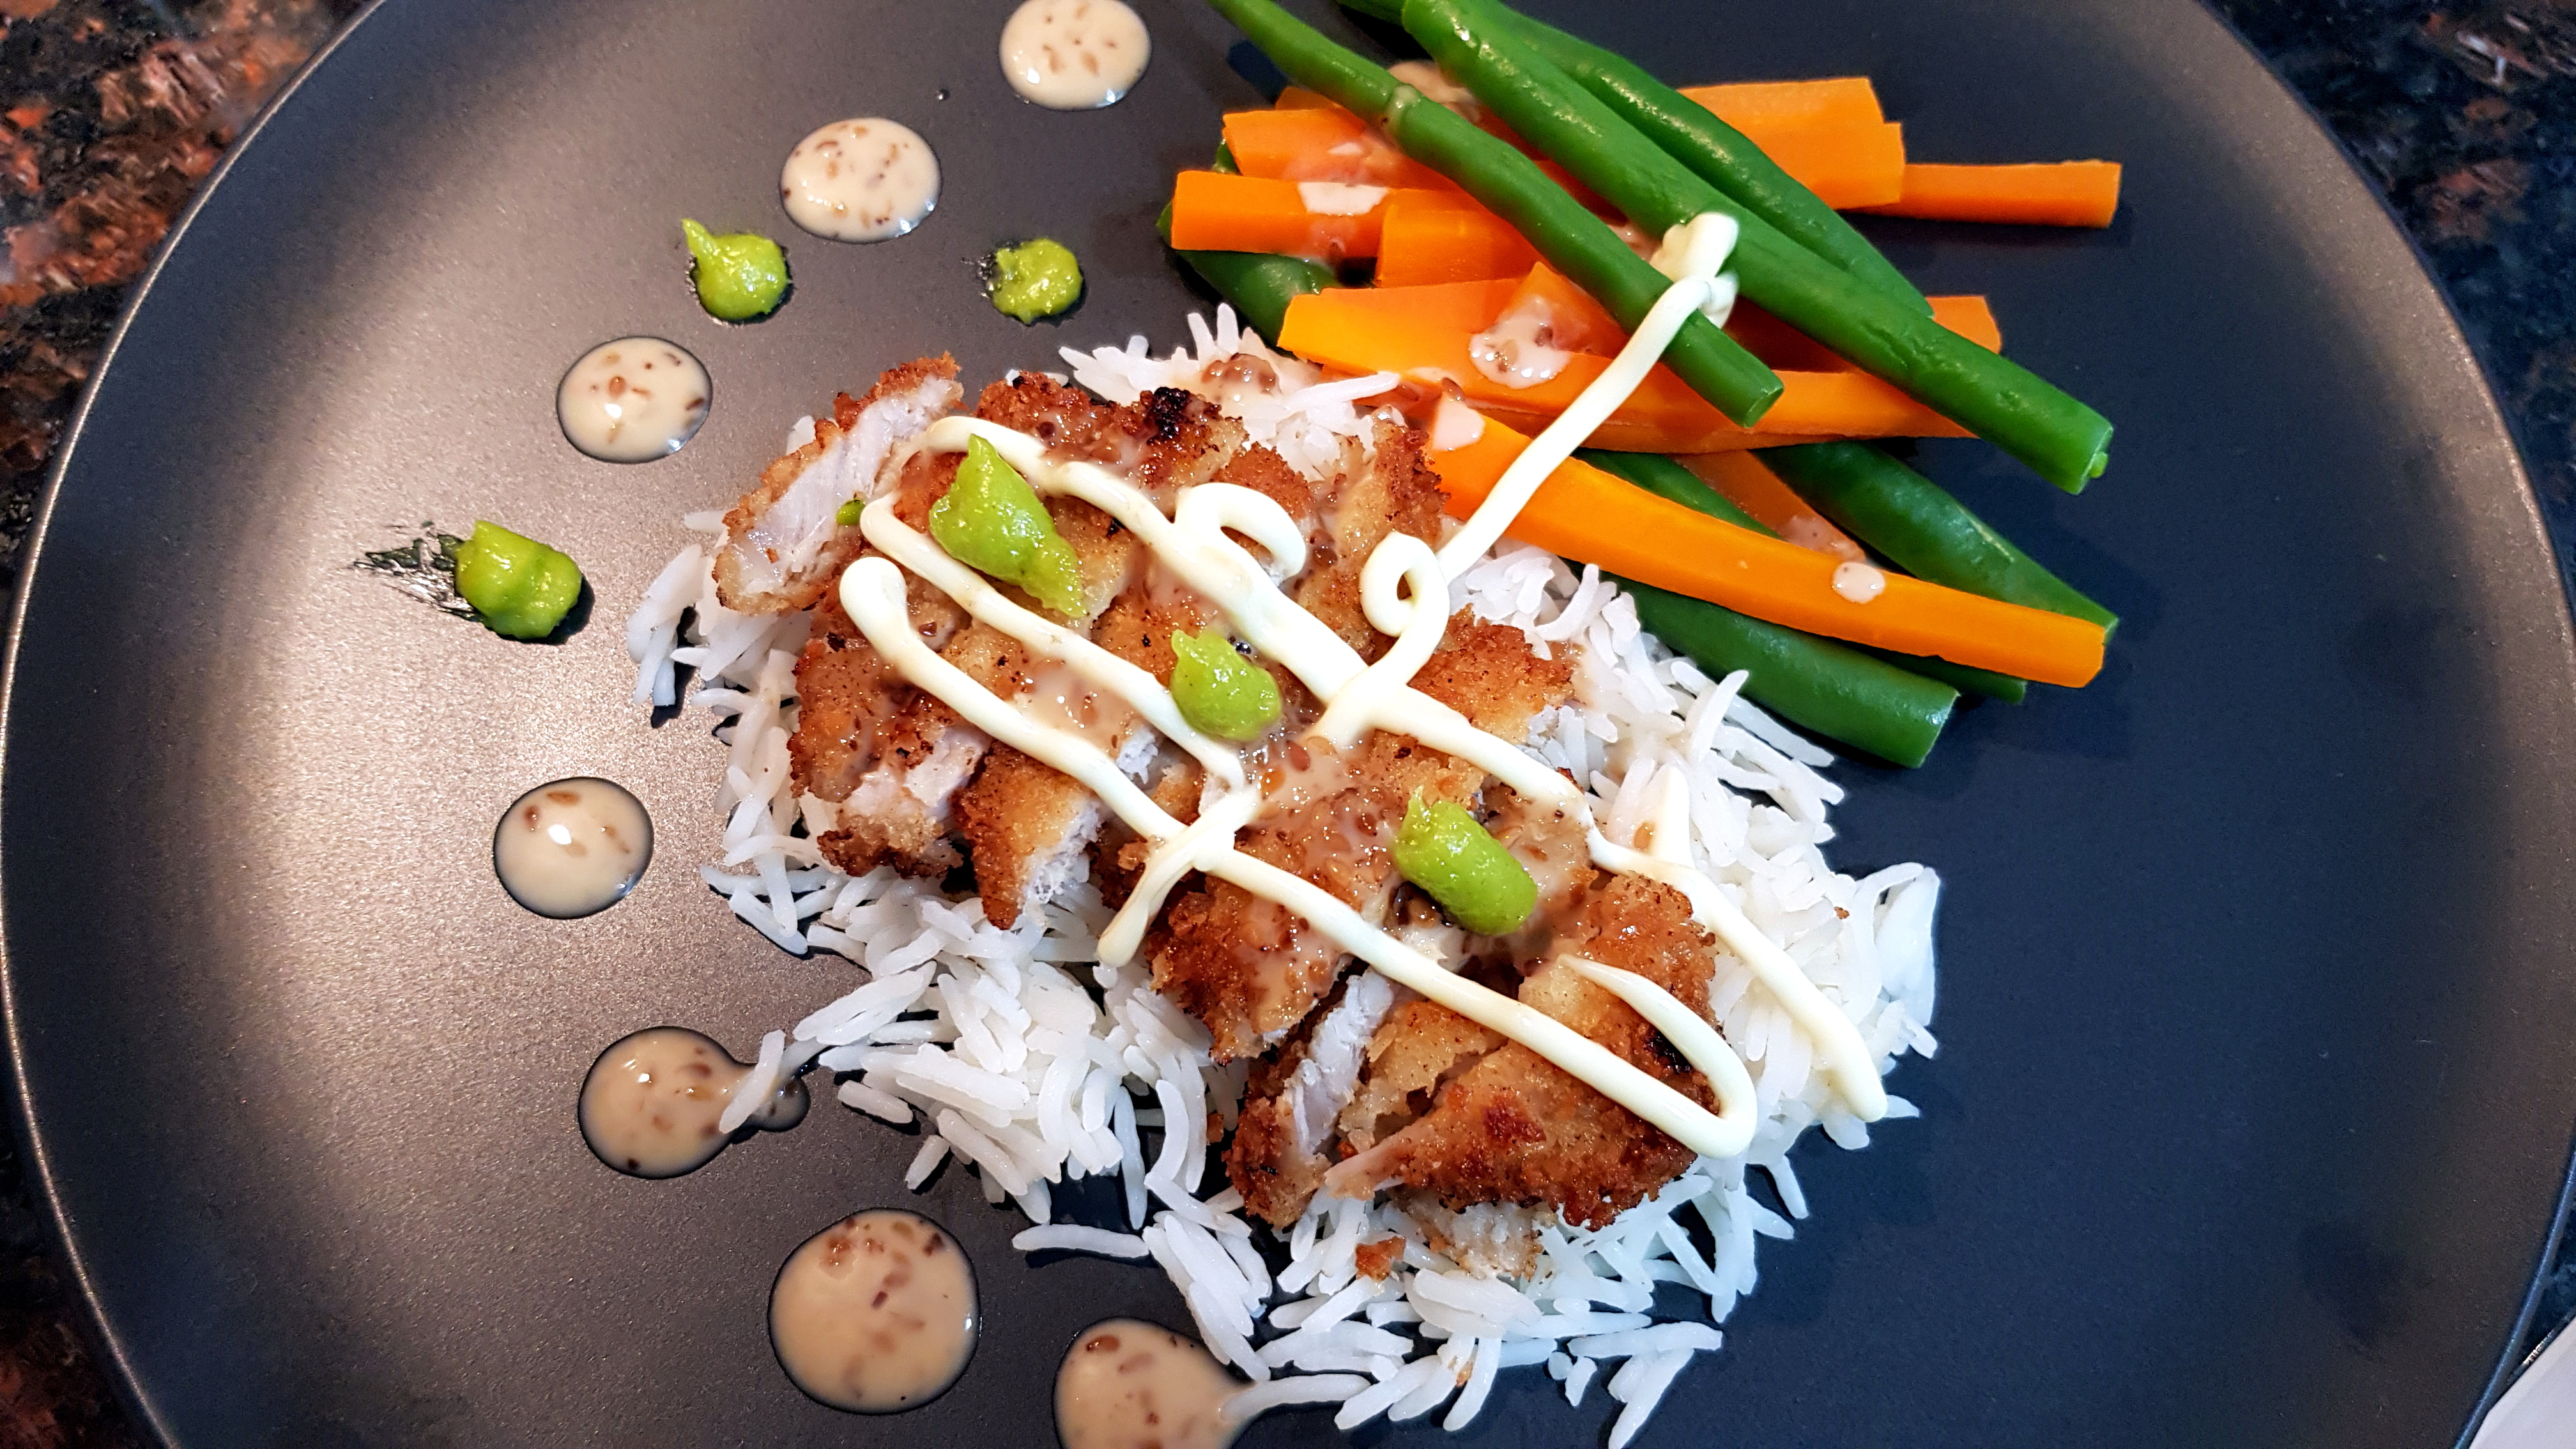
PK’s Asian Style Crumbed Pork Loin Cutlets
Just like my Crumbed Panko Chicken Breasts these crumbed eye of pork loin cutlets are so lite and easy. Simply throw some noodles or rice at it and serve with wasabi paste, Japanese Mayonnaise and Japanese Roasted Sesame Dressing.
Your guests will be blown away!

Takes about 20 minutes of preparation and cooking not including 30 minutes of refrigerating the cutlets after crumbing them.
Steps
- Crumbing the pork eye of loin
- Shallow frying the crumbed pork
- Serving
Ingredients
- 5 pork eye of loin cutlets, each one halved
- 2 eggs, whisked
- 1 garlic clove, finely minced
- Cracked black pepper and table salt to taste
- Panko breadcrumbs, enough to coat the cutlets
- Peanut Oil, enough to cover the bottom of your fry pan
Equipment
- 1 chef’s knife
- 1 chopping board
- 1 plate for the panko crumbs
- 1 bowl for the whisked egg
- 1 whisk or fork
- 1 tray, covered in baking paper
- 1 fry pan to shallow fry the cutlets
Preparing the pork eye of loin
- Take each cutlet and slice them to give you two thin cutlets a piece.
- Season them with a bit of cracked pepper and salt to taste.
- Whisk the 2 eggs in a bowl and then mix in the 1 tsp minced garlic.
- Add the cutlets to the egg mix and spread the panko breadcrumbs on a plate.
- Take each cutlet and roll in the panko getting a nice thick coating.
- Pop them on the the baking paper lined tray and then refrigerate for about half an hour.


Shallow frying the crumbed pork
- Heat the oil over a high heat and then shallow fry the crumbed cutlets, in batches, until they are golden brown.

Serving
Goes great on a bed of rice and vegetables and your favourite Japanese condiments. Or in my kids case, tomato ketchup. 😉

Enjoy,
PK
YOU MIGHT ALSO LIKE
MORE JAPANESE DISHES
MORE ASIAN CUISINE
PORK DISHES
Please consider subscribing to a weekly email summary of our posts or check us out on Facebook @growitcatchitcookit.
[mc4wp_form id=”15771″]
Written by
·
-
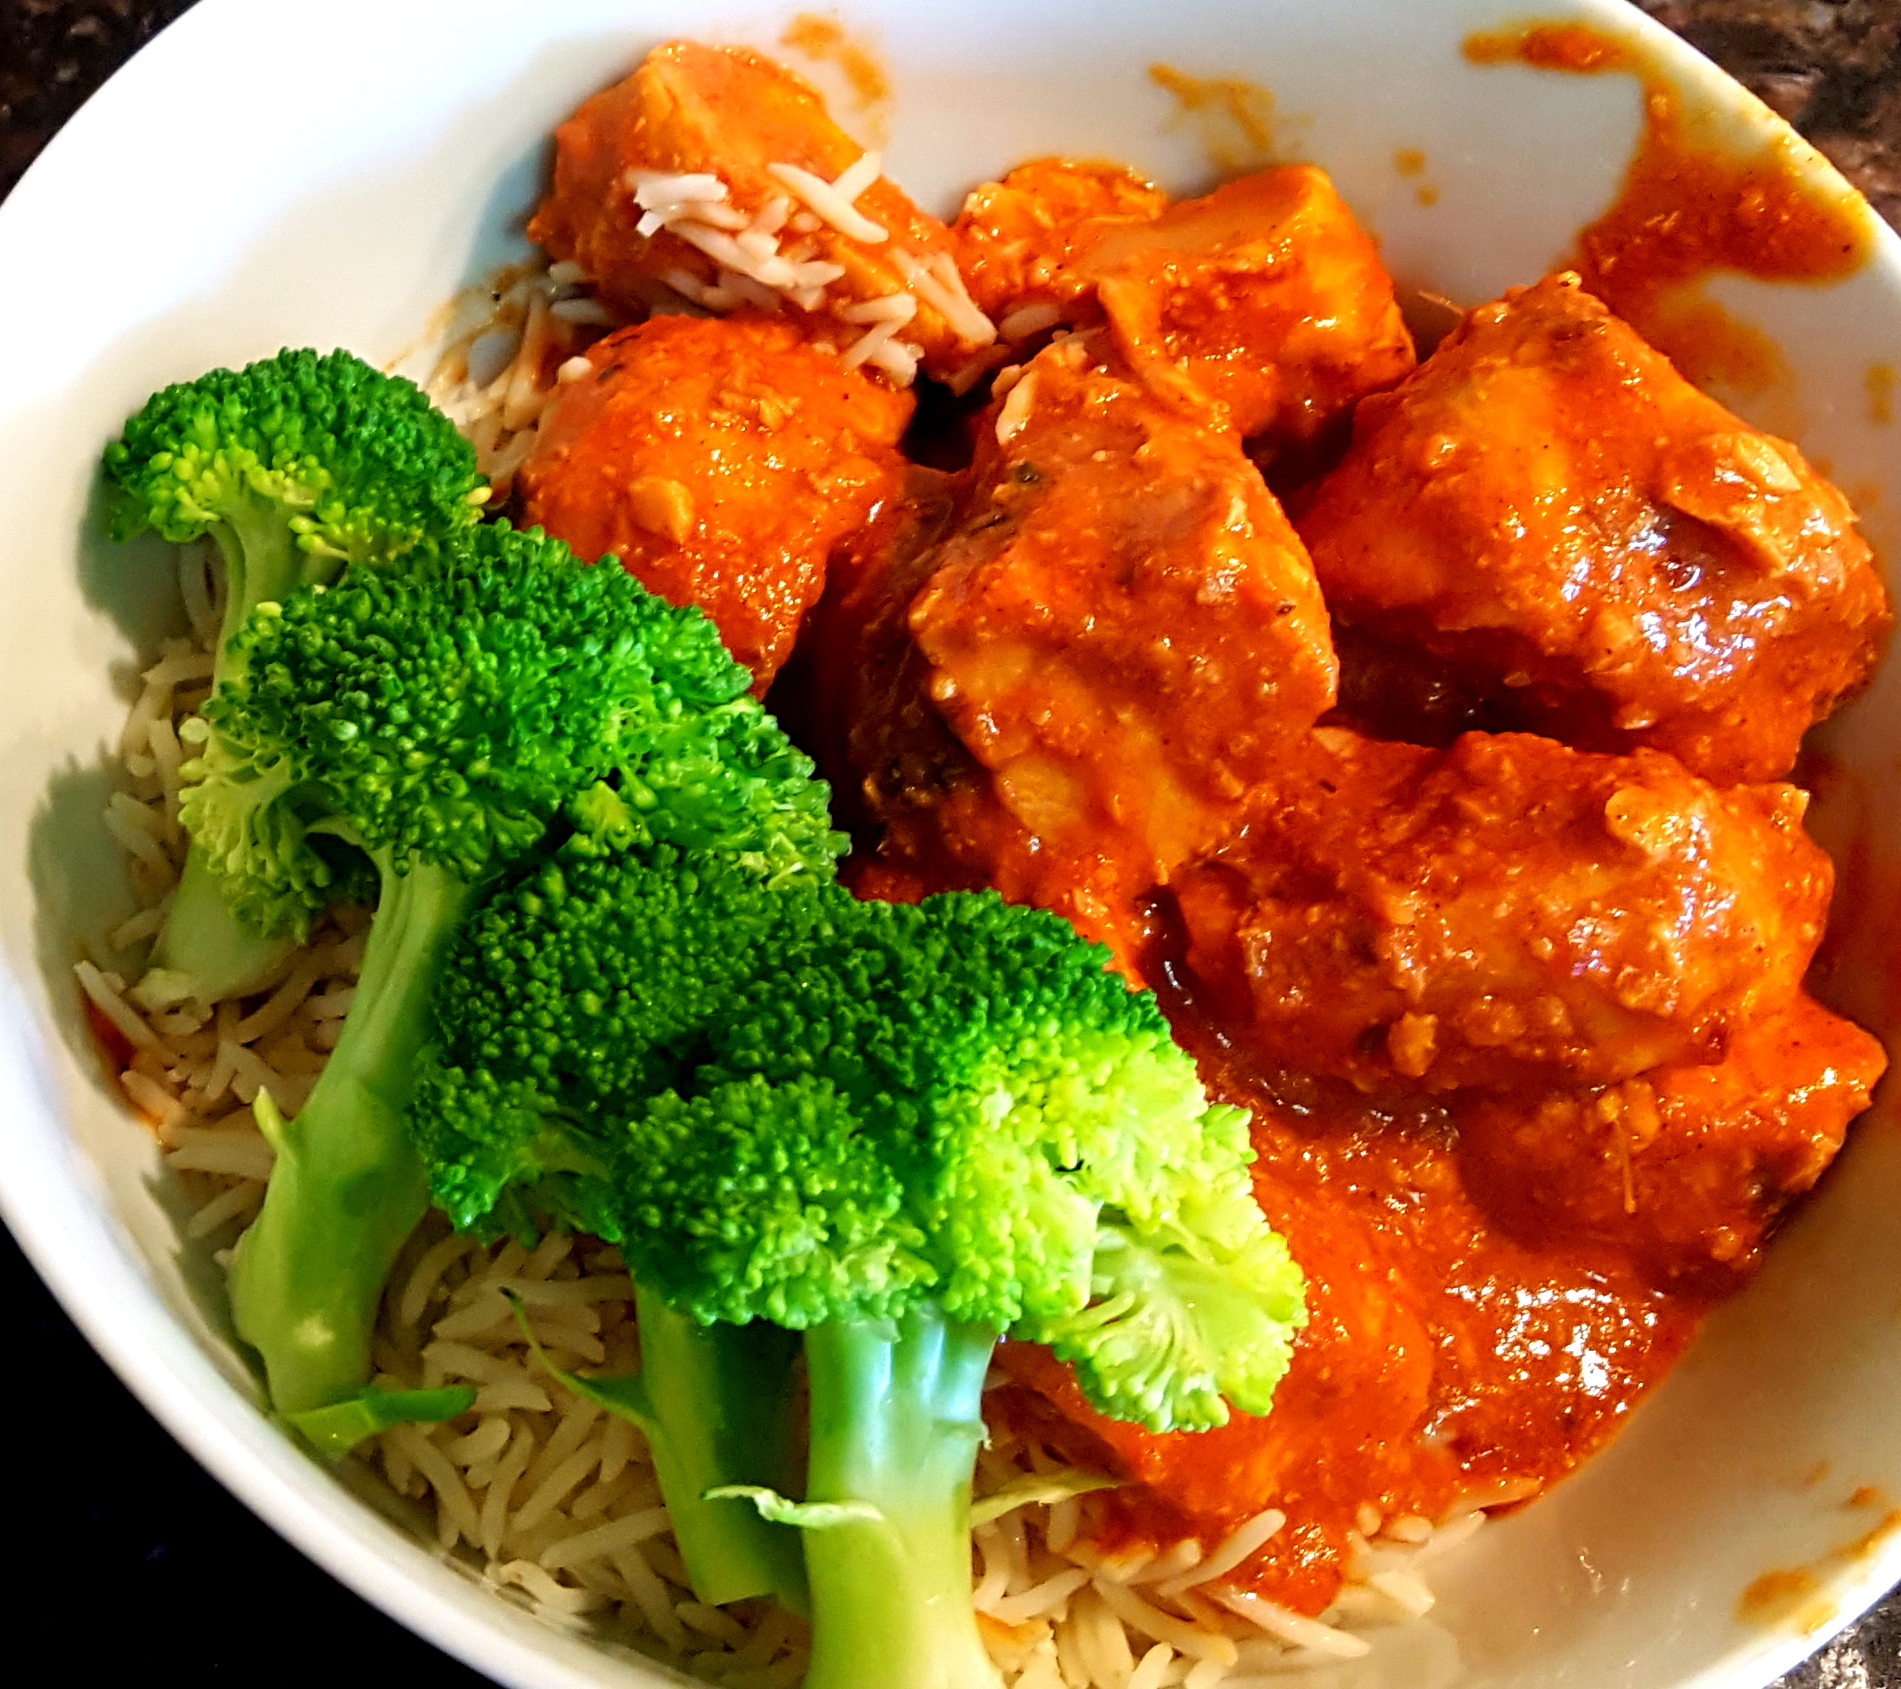
How To Make Rick Stein’s Butter Chicken
You simply can’t get this dish’s depth of flavours using a store bought Butter Chicken paste or simmer sauce. The result is the most succulent chicken in a creamy, nutty, tomato based sauce.
I won’t lie to you though. This is one of the trickier recipes on the blog.
Notes:
- I hope to char grill the chicken better next time but oh my it was amazing anyway. I think I might hit them with a chef’s torch for a bit.
- I also didn’t sprinkle it with Rick’s Chat masala at serving and want to do that next time.
Steps
- Marinating the chicken in marinade 1 for one hour
- Marinating the chicken in marinade 2 for four hours
- Charring the chicken pieces
- Making the sauce
- Serving
Ingredients
- 4 large chicken breasts, skinned and deboned
- Marinade 1
- The juice of 2 limes
- 1 tsp Kashmiri chili powder
- 1 tsp table salt
- Marinade 2
- 50g plain yoghurt
- 50g double cream
- 4 garlic cloves, diced
- 5cm ginger, roughly chopped
- 1 tsp Garam masala
- 1 tsp ground turmeric
- 3/4 tsp ground cumin
- 1/2 tsp beetroot powder (for color)
- The sauce
- 50g ghee
- 5 garlic cloves, diced
- 5cm ginger, diced
- 400g tomato passata
- 1/2 tsp Kashmiri chili powder
- 1/2 tsp ground cumin
- 1/2 tsp ground coriander seeds
- 1/2 tsp ground cinnamon
- 1/2 tsp Garam masala
- 1 tsp dessicated coconut
- 1.5 tsp table salt
- 200ml water
- 25g cashew nuts
- 25g pumpkin seeds
- 2 Tbsp boiling water
- 1 Tbsp fenugreek leaves
- 1/2 tsp caster sugar
- 45ml double cream
Equipment
- 1 chef’s knife
- 1 chopping board
- 1 wooden spoon
- 1 mixing bowl
- 1 bowl or dish for marinading
- 1 wet mixer/blender (used twice so you will need to clean it)
- 1 large heavy based saucepan
- Several skewers
Marinating the chicken in marinade 1 for one hour
- Cut each breast into 3 pieces.
- In a large bowl mix the:
- Two limes worth of juice
- 1 tsp Kashmiri chili powder
- 1 tsp table salt.
- Put the chicken pieces in the marinade and mix to coat.
- Pop the bowl in the fridge for 1 hour.

Marinating the chicken in marinade 2 for four hours
- In your wet mixer/food processor add the:
- 50g plain yoghurt
- 50g double cream
- 4 garlic cloves, diced
- 5cm ginger, roughly chopped
- 1 tsp Garam masala
- 1 tsp ground turmeric
- 3/4 tsp ground cumin
- 1/2 tsp beetroot powder (for color).
- Blend until smooth and add to the chicken making sure every knook and cranny is coated.
- Marinate for 4 hours in the fridge.

Charring the chicken pieces
- Preheat your fan forced oven to 240C.
- Thread the chicken pieces on either oiled metal skewers or pre-soaked (in water to stop them burning) wooden ones.
- Roast for 15-20 minutes aiming for slightly charred but not cooked fully through just yet.
- Start the next step while the chicken is roasting.

Making the sauce
- Grind, dice and chop the sauces ingredients.
- Heat the 50g ghee in the saucepan over a medium heat.
- Add the 5 diced garlic cloves and diced ginger and fry for a minute.
- Stir in the 400g tomato passata and simmer for 5 minutes.
- Stir in the:
- Simmer for another 10 minutes while you do the next step.
- In your wet mixer/food processor blend into a paste the:
- 25g cashew nuts
- 25g pumpkin seeds
- 2 Tbsp boiling water
- Stir the paste into the passata sauce and the rest of the water.
- Add the chicken to the sauce and gently mix everything.
- Simmer for 10 minutes and then stir in the:
- 1 Tbsp fenugreek leaves
- 1/2 tsp caster sugar
- 45ml double cream


Serving
I served this dish over a bed of basmati rice with some steamed vegetables and a plate of pappadums to share.
Spoon the chicken pieces onto the rice using a slotted spoon and then add as much sauce as the person likes.
Rick Stein says to garnish with some torn fresh coriander leaves, shredded ginger and a sprinkle of chat masala.

Enjoy,
PK
YOU MIGHT ALSO LIKE
INDIAN CUISINE
CURRIES GALORE
MORE CHICKEN DISHES
MORE RICK STEIN
Please consider subscribing to a weekly email summary of our posts or check us out on Facebook @growitcatchitcookit.
[mc4wp_form id=”15771″]
Written by
·
-
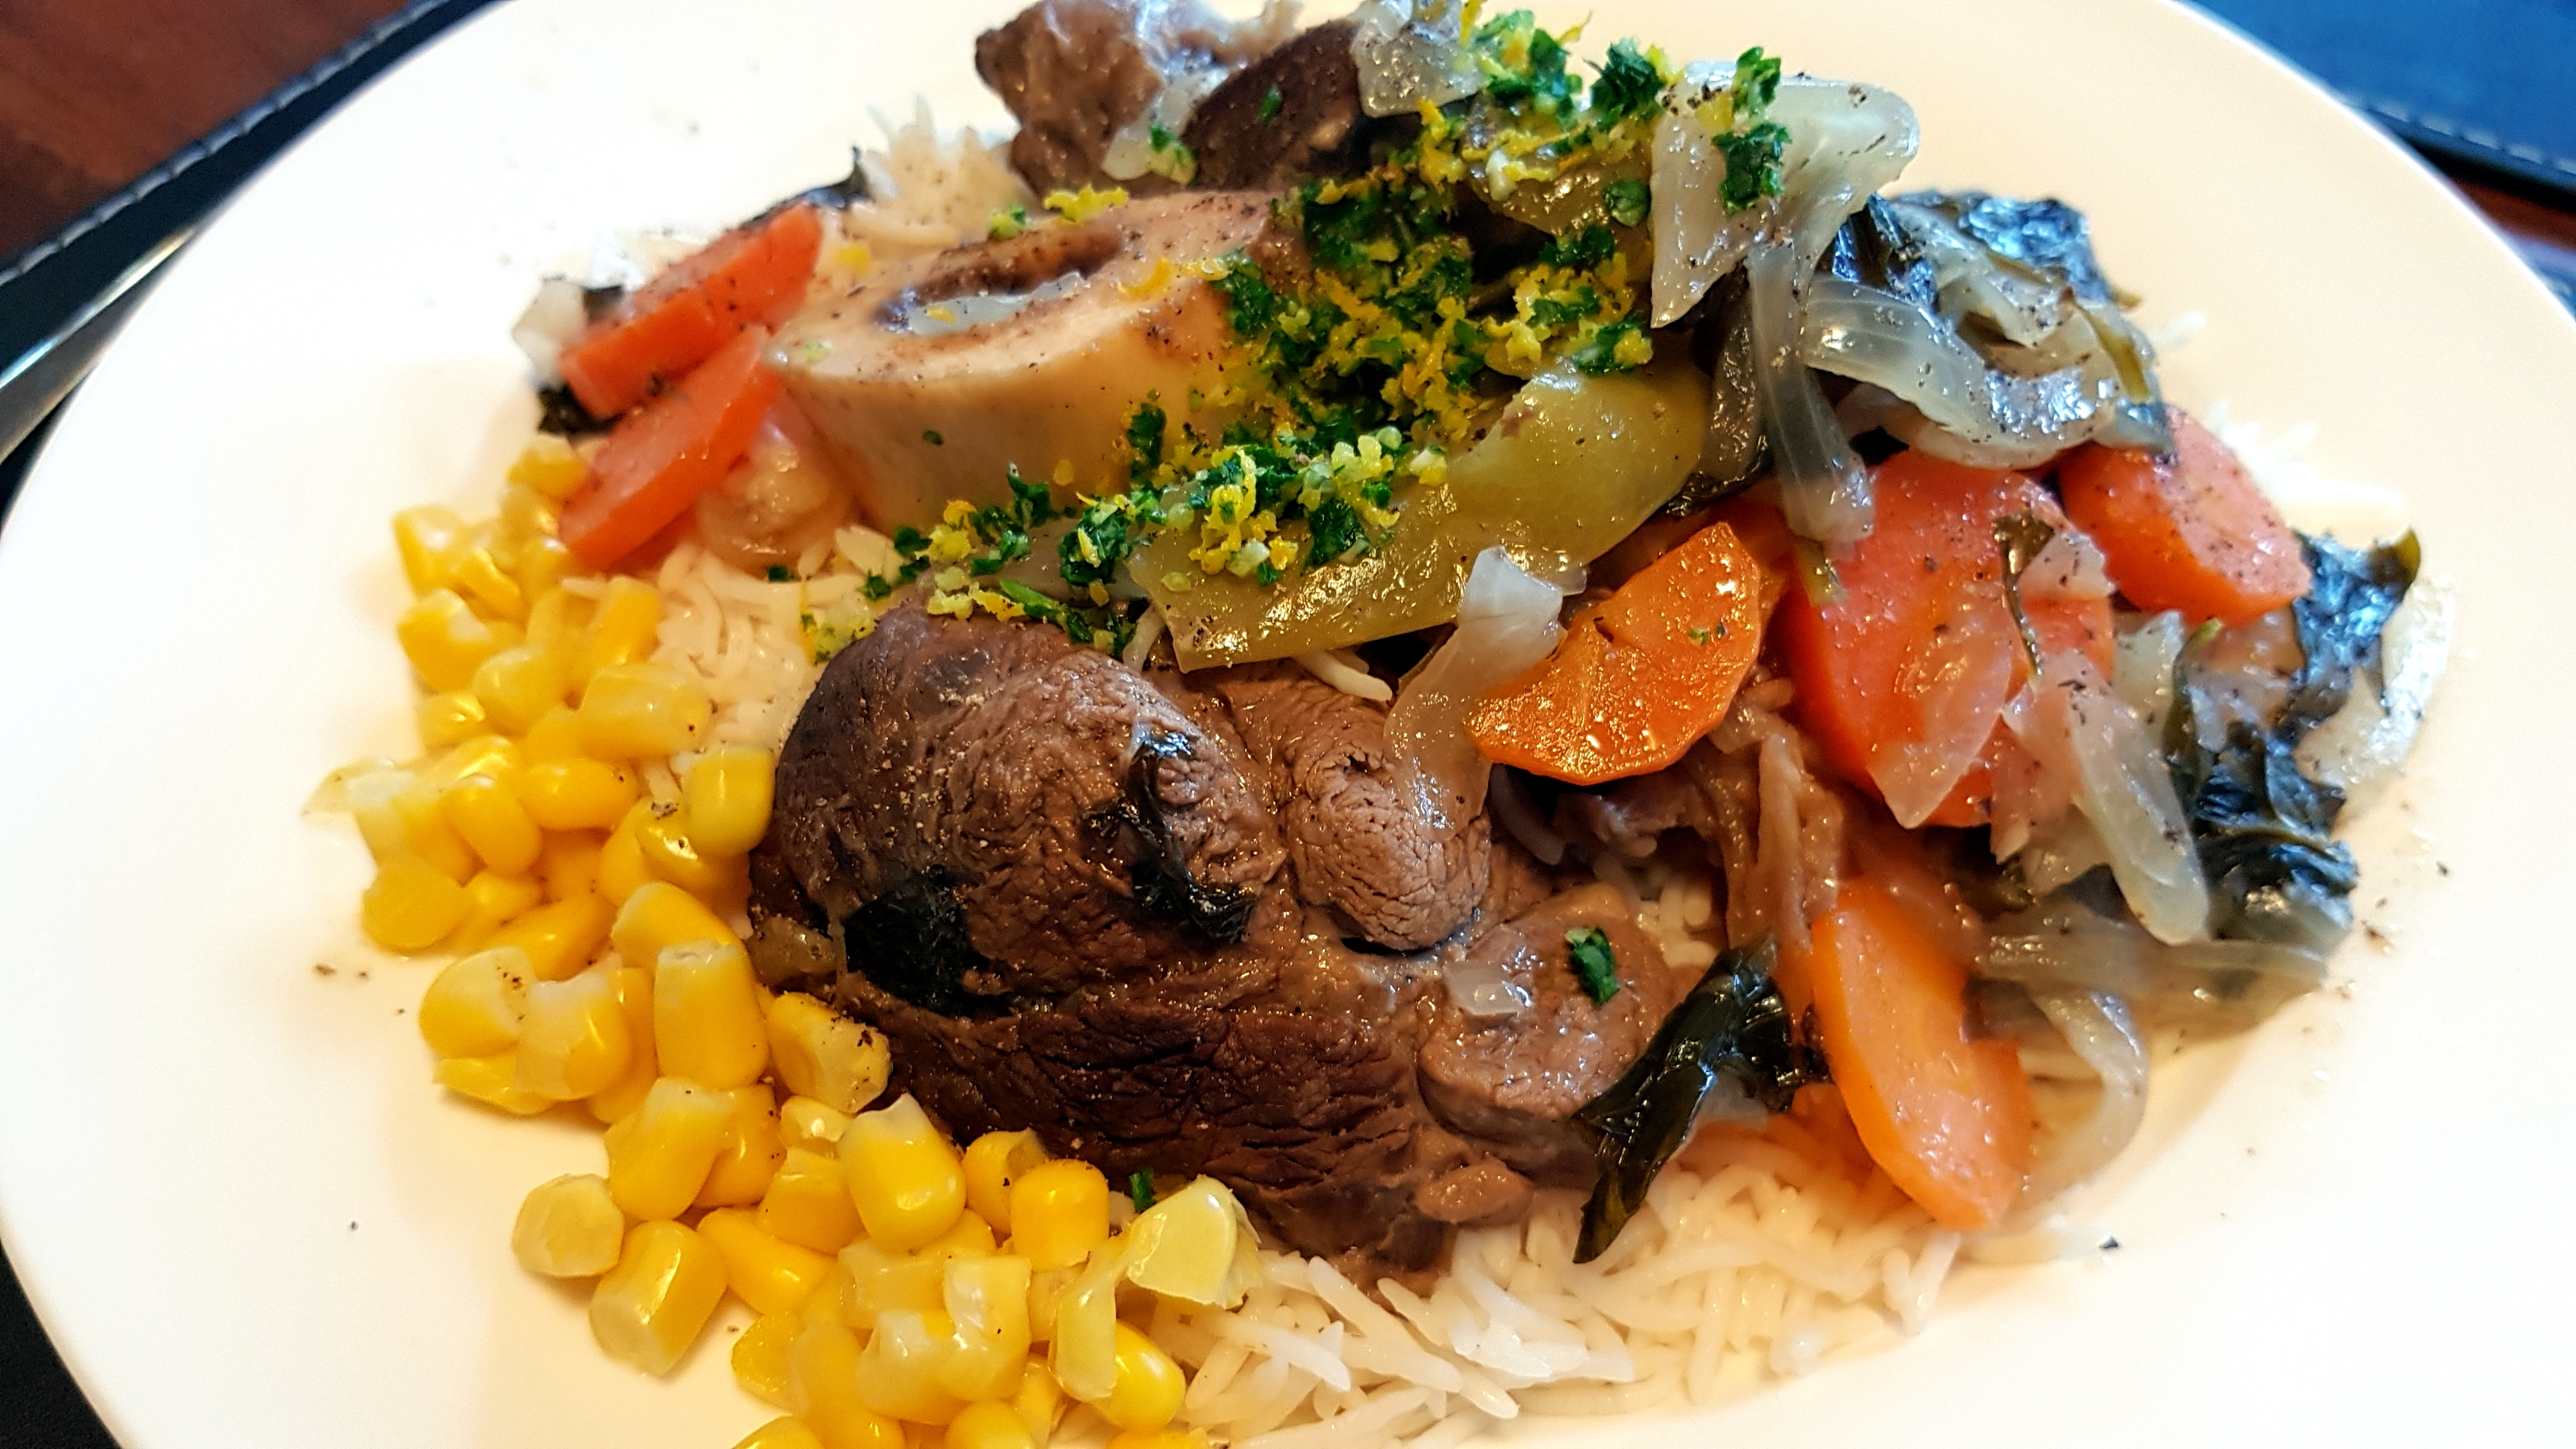
Hugh Fearnley-Whittingstall’s Osso Buco Slow Cooker
Considering how much I love lamb shanks I am surprised it took me this long to cook Osso Buco for the first time. I always use Hugh’s recipe for the shanks (River Cottage’s Citrus Braised Lamb Shanks) so it is a no surprise I am using his Osso Buco Alla Milanese.
You will be using thick slices of beef or veal shins with the shin bone still present. Look at the beautiful rich colour.

The result was tender beef that was falling off the bone and a lovely sauce that was hearty but less fatty than you would get cooking with lamb.
Note: Pop this on early in the day because it might take 6 hours or more on your slow cooker’s medium setting.
You will be:
- Preparing everything
- Sealing the beef shins
- Sweating the vegetables
- Slow cooking everything
- Serving
You will need:
- Ingredients:
- 4 – 6 slices of beef shin with the bone still in the middle (about 1.3kg)
- enough plain white flour to coat the shins
- table salt and cracked black peppercorns to taste
- 50g salted butter
- A couple of slugs olive oil
- 2 garlic cloves, diced
- 2 celery sticks and their leaves, chopped
- 2 brown onions, chopped
- 1 carrot, chopped
- A handful of snow peas, whole
- 2 cups dry white wine
- 2 cups stock (I have used homemade Slow Cooker Chicken Stock and Italian Beef Stock: Brodo Di Manzo but use anything you have to hand)
- A handful of chopped mushrooms (optional)
- Equipment:
- 1 long sharp knife
- 1 chopping board
- 1 frypan
- 1 slow cooker
Preparing everything
- While you let the beef shins come to room temperature prepare the:
- 2 garlic cloves, diced
- 2 celery sticks chopped
- 2 brown onions, chopped
- 1 carrot, chopped
- a handful of snow peas, whole
- Dry the beef shin slices with paper towel, season with salt and pepper and then dust them in the flour.


Sealing the beef shins
- Turn your slow cooker on to high, add a slug of olive oil and cover.
- Melt the 50g of salted butter in a frypan and then add a good slug of olive oil.
- Brown both sides of the shins (if they start to curl on you during cooking, clip the outer ring of connective tissue with kitchen shears).
- Add them to the slow cooker.


Sweating the vegetables
- Add the 2 cups white wine and the 2 cups of stock to the same frypan and bring to a gentle boil.
- Reduce the heat to low and then add the vegetables.
- Cook until they soften and then add everything to the slow cooker.

Slow cooking everything
Turn the slow cooker down to medium or low and cover. Mine took 6 hours before the beef was ready.
Serving
Serve on a bed of basmati rice with extra vegetables and some of Hugh’s gremolata.

Enjoy,
PK
Related Links:
Written by
·
-
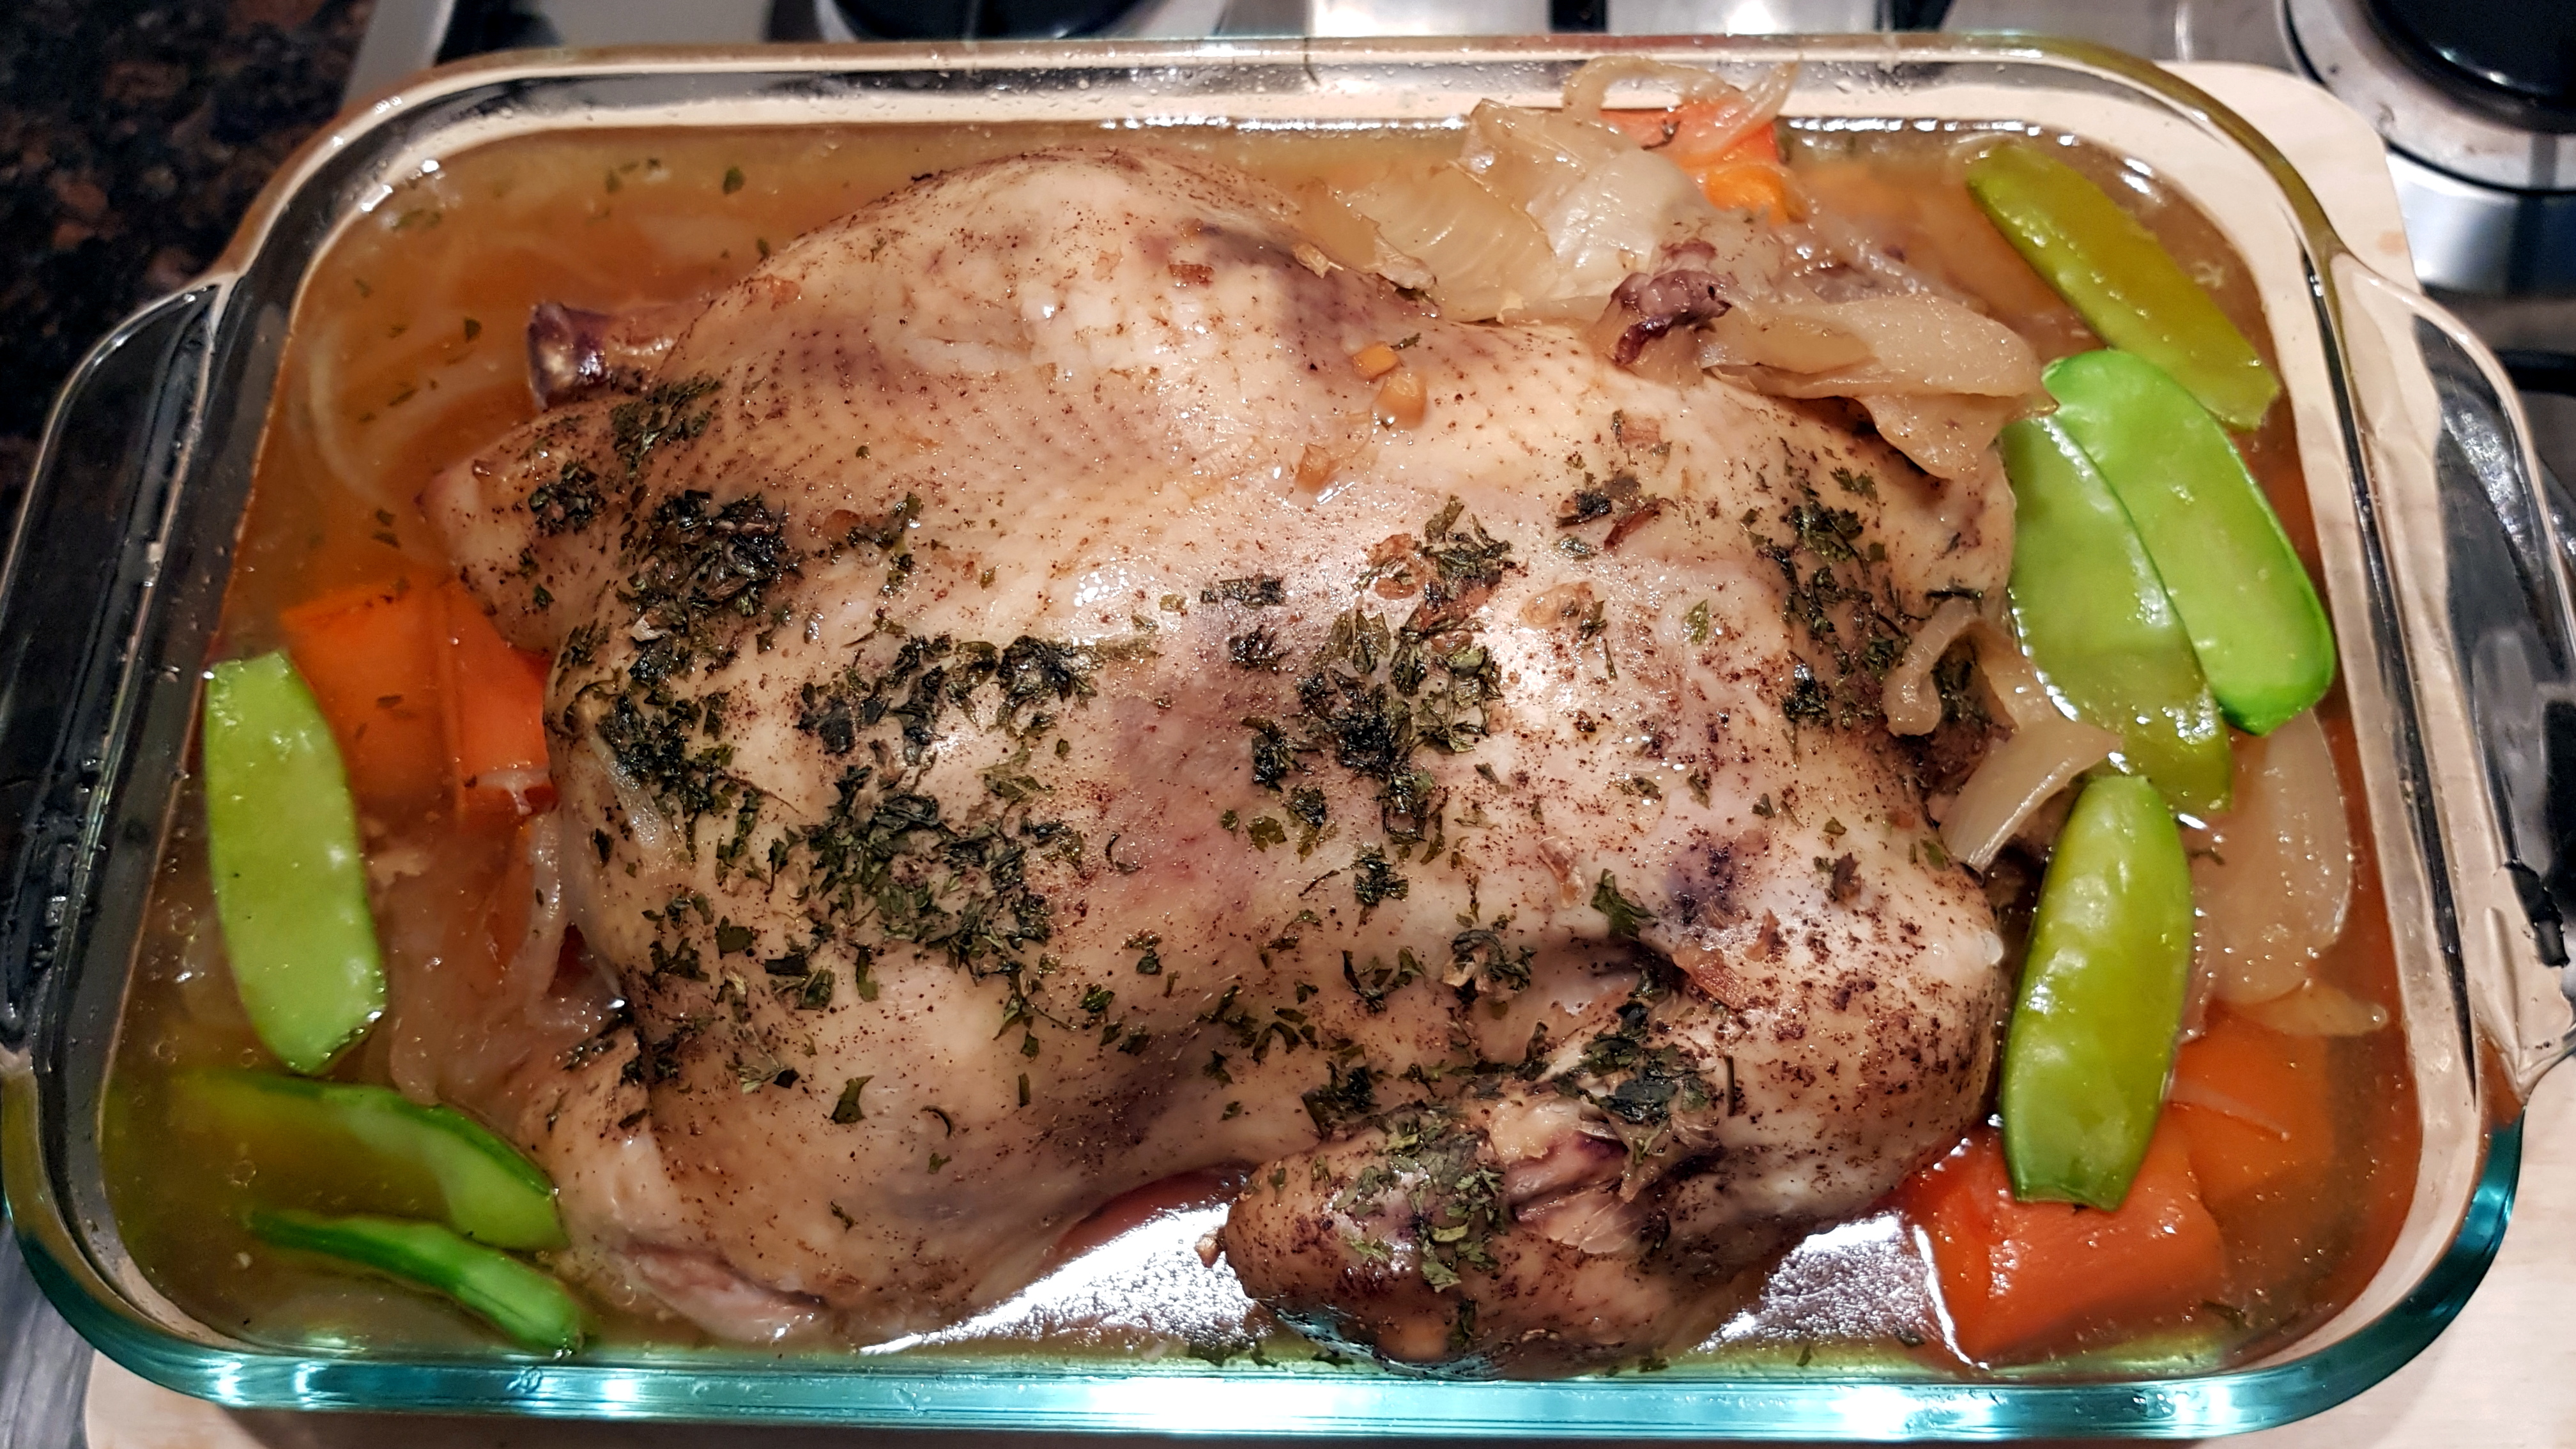
PK’s Slow Cooker Whole Chicken
This mouth-watering dish is designed to be super thrifty and dead easy to boot. I managed to use some old tired veggies and to get a free-range chook on special. I am also happy to say it took longer to eat the dish than it did to prepare it.
I simply took a whole chicken, patted it dry and stuffed it with a whole lemon. I then rubbed a very generous amount of garlic salt, celery salt, ground black pepper and parsley flakes into the skin. The bird then went into a slow cooker that already had a bed of roughly chopped onions, carrots, a whole garlic bulb and a cup of white wine.

8 hours on low and the meat was moist and falling off the bone 🙂 . I was very pleased because chicken is a lean meat and can dry out in a slow cooker if you are not careful.


Serving
I served it with some extra steamed vegetables on a bed of white basmati rice.

Enjoy,
PK
P.S. I have a oven variant of this recipe here.
And here are some more chicken dishes and slow cooker recipes:
Please consider subscribing to a weekly email summary of our posts or check us out on Facebook @growitcatchitcookit.
[mc4wp_form id=”15771″]
Written by
·
-
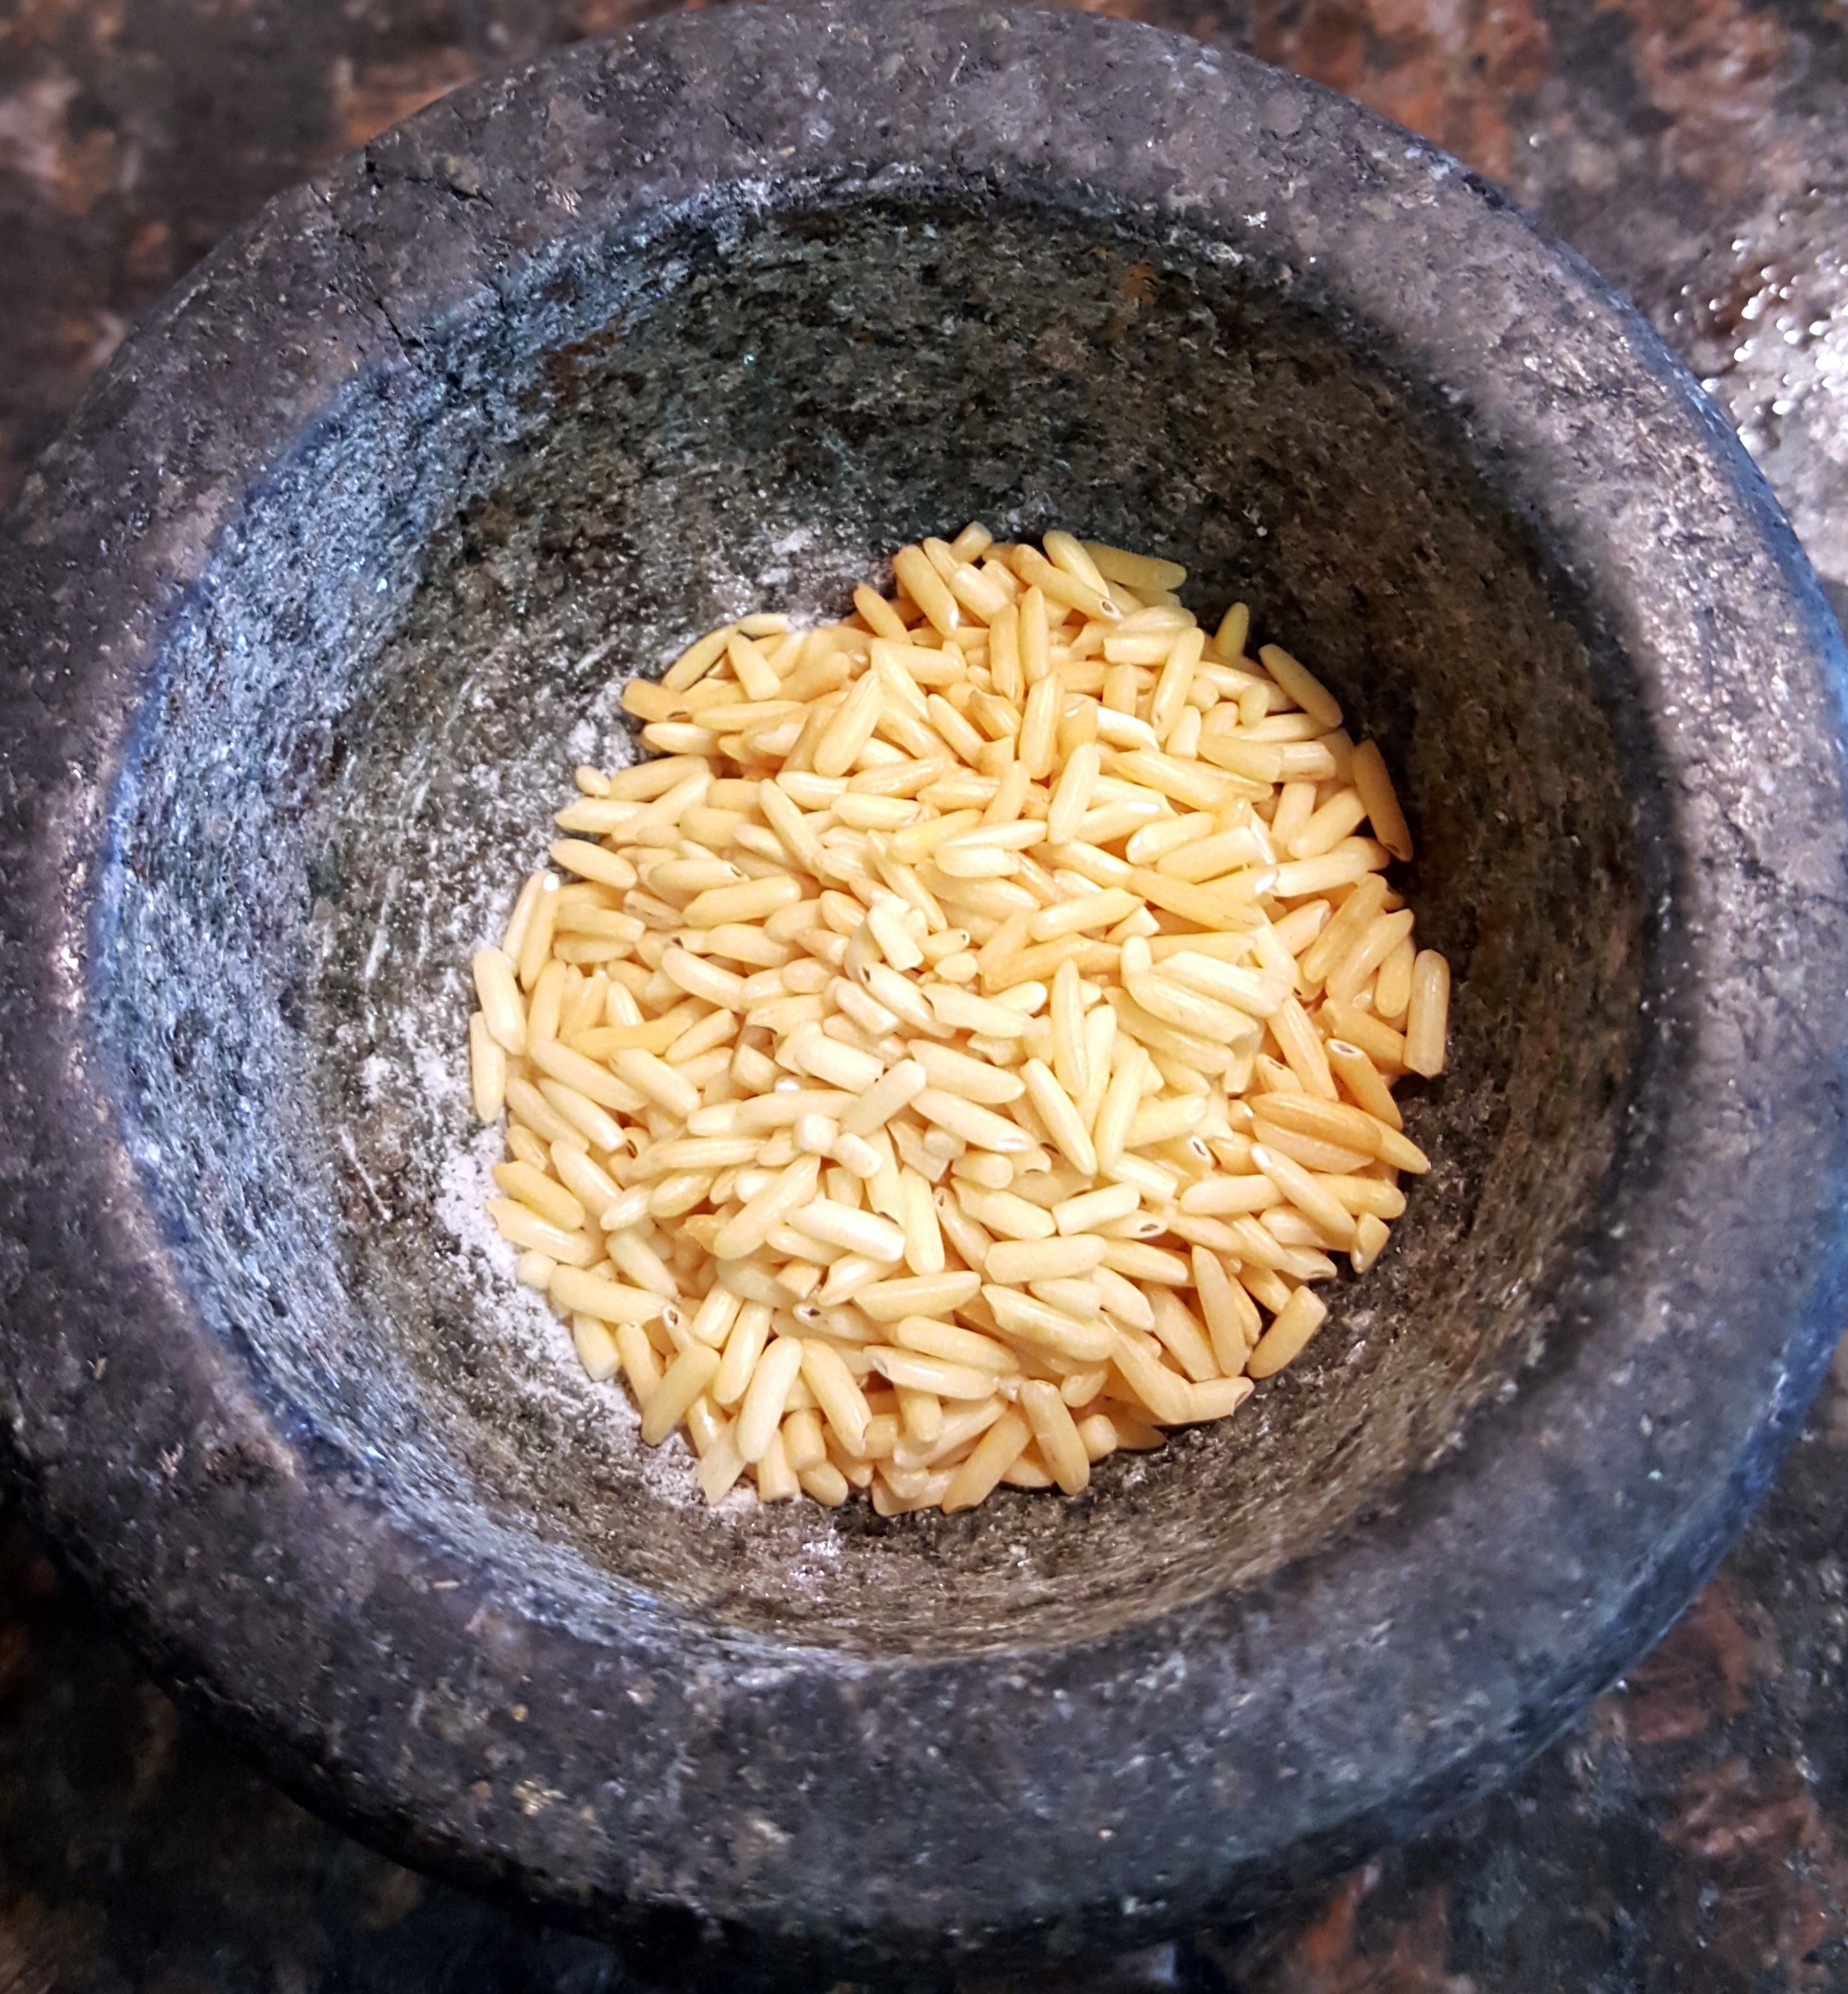
Basmati Rice
This rice variety is originally from India. It is characterised by long slender grains and light fragrance. It is my favourite rice as it pairs well with any dish that you would normally use rice, pasta or potato in.
I have read that this variety of rice, even white, has a lower GI than some brown rice varieties.
The brand I use comes from India but you can buy Australian grown basmati in either dried or parboiled forms.
Related Links:
Written by
·
-

PK’s NoRecipe Nasi Goreng
This simple rice dish is as Indonesian as it gets. It is such a pleasant meal to make and eat. The secrets are the sweet soy sauce used in many Indonesian dishes, ketjap manis, and the addition of a runny fried egg.
Best of all you can make it with any combination of ingredients, even the old veggies in the back of the fridge :).
Steps:
- Chuck a really good slug of peanut oil in a wok or deep pan.
- Add slices of shallots and 2-3 cloves worth of finely diced garlic and stir fry for a few minutes.
- Throw in a handful each of:
- sliced bacon
- sliced snow peas
- corn kernels
- Add 3-4 Tbsp ketjap manis and 2 Tbsp tomato sauce and stir fry until the bacon is cooked.
- Keep stir frying everything as you mix in 2 cups of previously cooked rice.
- Stop when everything is well mixed and hot.
- Serve with a runny fried egg, chili sauce (I used sriracha) and some coriander leaves.


Enjoy,
PK
Related Links:
- See more indonesian cuisine here
Written by
·
-

PK Cooks Sticky Poached Asian Chicken Thighs
I saw this recipe online here http://www.taste.com.au/ and just had to try it. I also proved along the way that you don’t have to follow recipes exactly to get a great result. I did some steps out of order accidentally and had to rapidly reduce the sauce before everything went south.
Everything worked out well though and I hardly had enough left over for lunch the next day :).
The chicken was so tender and the sticky sauce had an amazing balance of citrus, salt and sugar. I will definitely be making this again but I intend to follow the instructions to the letter.

You will be:
- Preparing your ingredients.
- Poaching the chicken
- Grilling the chicken and reducing the sauce
- Serving.
You will need:
- Ingredients:
- 1kg boneless chicken thighs
- 1 cup chicken stock (see PK’s Slow Cooker Chicken Stock)
- a few slugs of olive oil
- 1 Tbsp fish sauce
- 1/4 cup raw sugar
- 3 garlic cloves, finely diced
- 2cm fresh ginger root, grated (or 1 tsp store bought minced ginger)
- 1 stalk lemongrass, grated
- the rind from 1 lime, finely grated
- 2 Tbsp (or more) lime juice
- Equipment:
- a long sharp knife
- a chopping board
- a grater
- a citrus juicer
- a mixing jug
- a whisk or fork
- an oven dish
- a large strainer
- a medium saucepan
Prepare your ingredients
- Lay the 1kg boneless chicken thighs out in an oven proof dish.
- Peel and dice the 3 garlic cloves, add to the mixing jug along with the 1 cup chicken stock.
- Finely grate the 2cm of ginger and add to the jug.
- Finely grate the 1 lemongrass stem (use the tender parts only and not the thick outer leaves) and add to the jug.
- Grate the rind from a single lime and squeeze 2 Tbsp of lime juice (I used my frozen lime cubes from last season). Add both to the jug.
- Add the 1 Tbsp fish sauce to the jug.
- Add the 1/4 cup of raw sugar to the mixing jug and give everything a good mix (make sure the sugar has dissolved fully).


Poaching the chicken
- Pour the liquid mixture over the chicken and cook for an hour in a fan-foced oven pre-heated to 180C.
- Turn the chicken half way.


Grilling the chicken and reducing the sauce
- Strain the sauce into a saucepan and start reducing it.
- Return the chicken to the oven tray and turn on the grill to brown the chicken.
- When the sauce is very reduced, pour it back onto the chicken a grill for a little bit longer.


Serving
Serve with your favourite rice, some fresh spinach (the heat of the meal will blanch them) or some asian vegetables and a few sprigs of coriander.
Enjoy,
PK
Written by
·
-
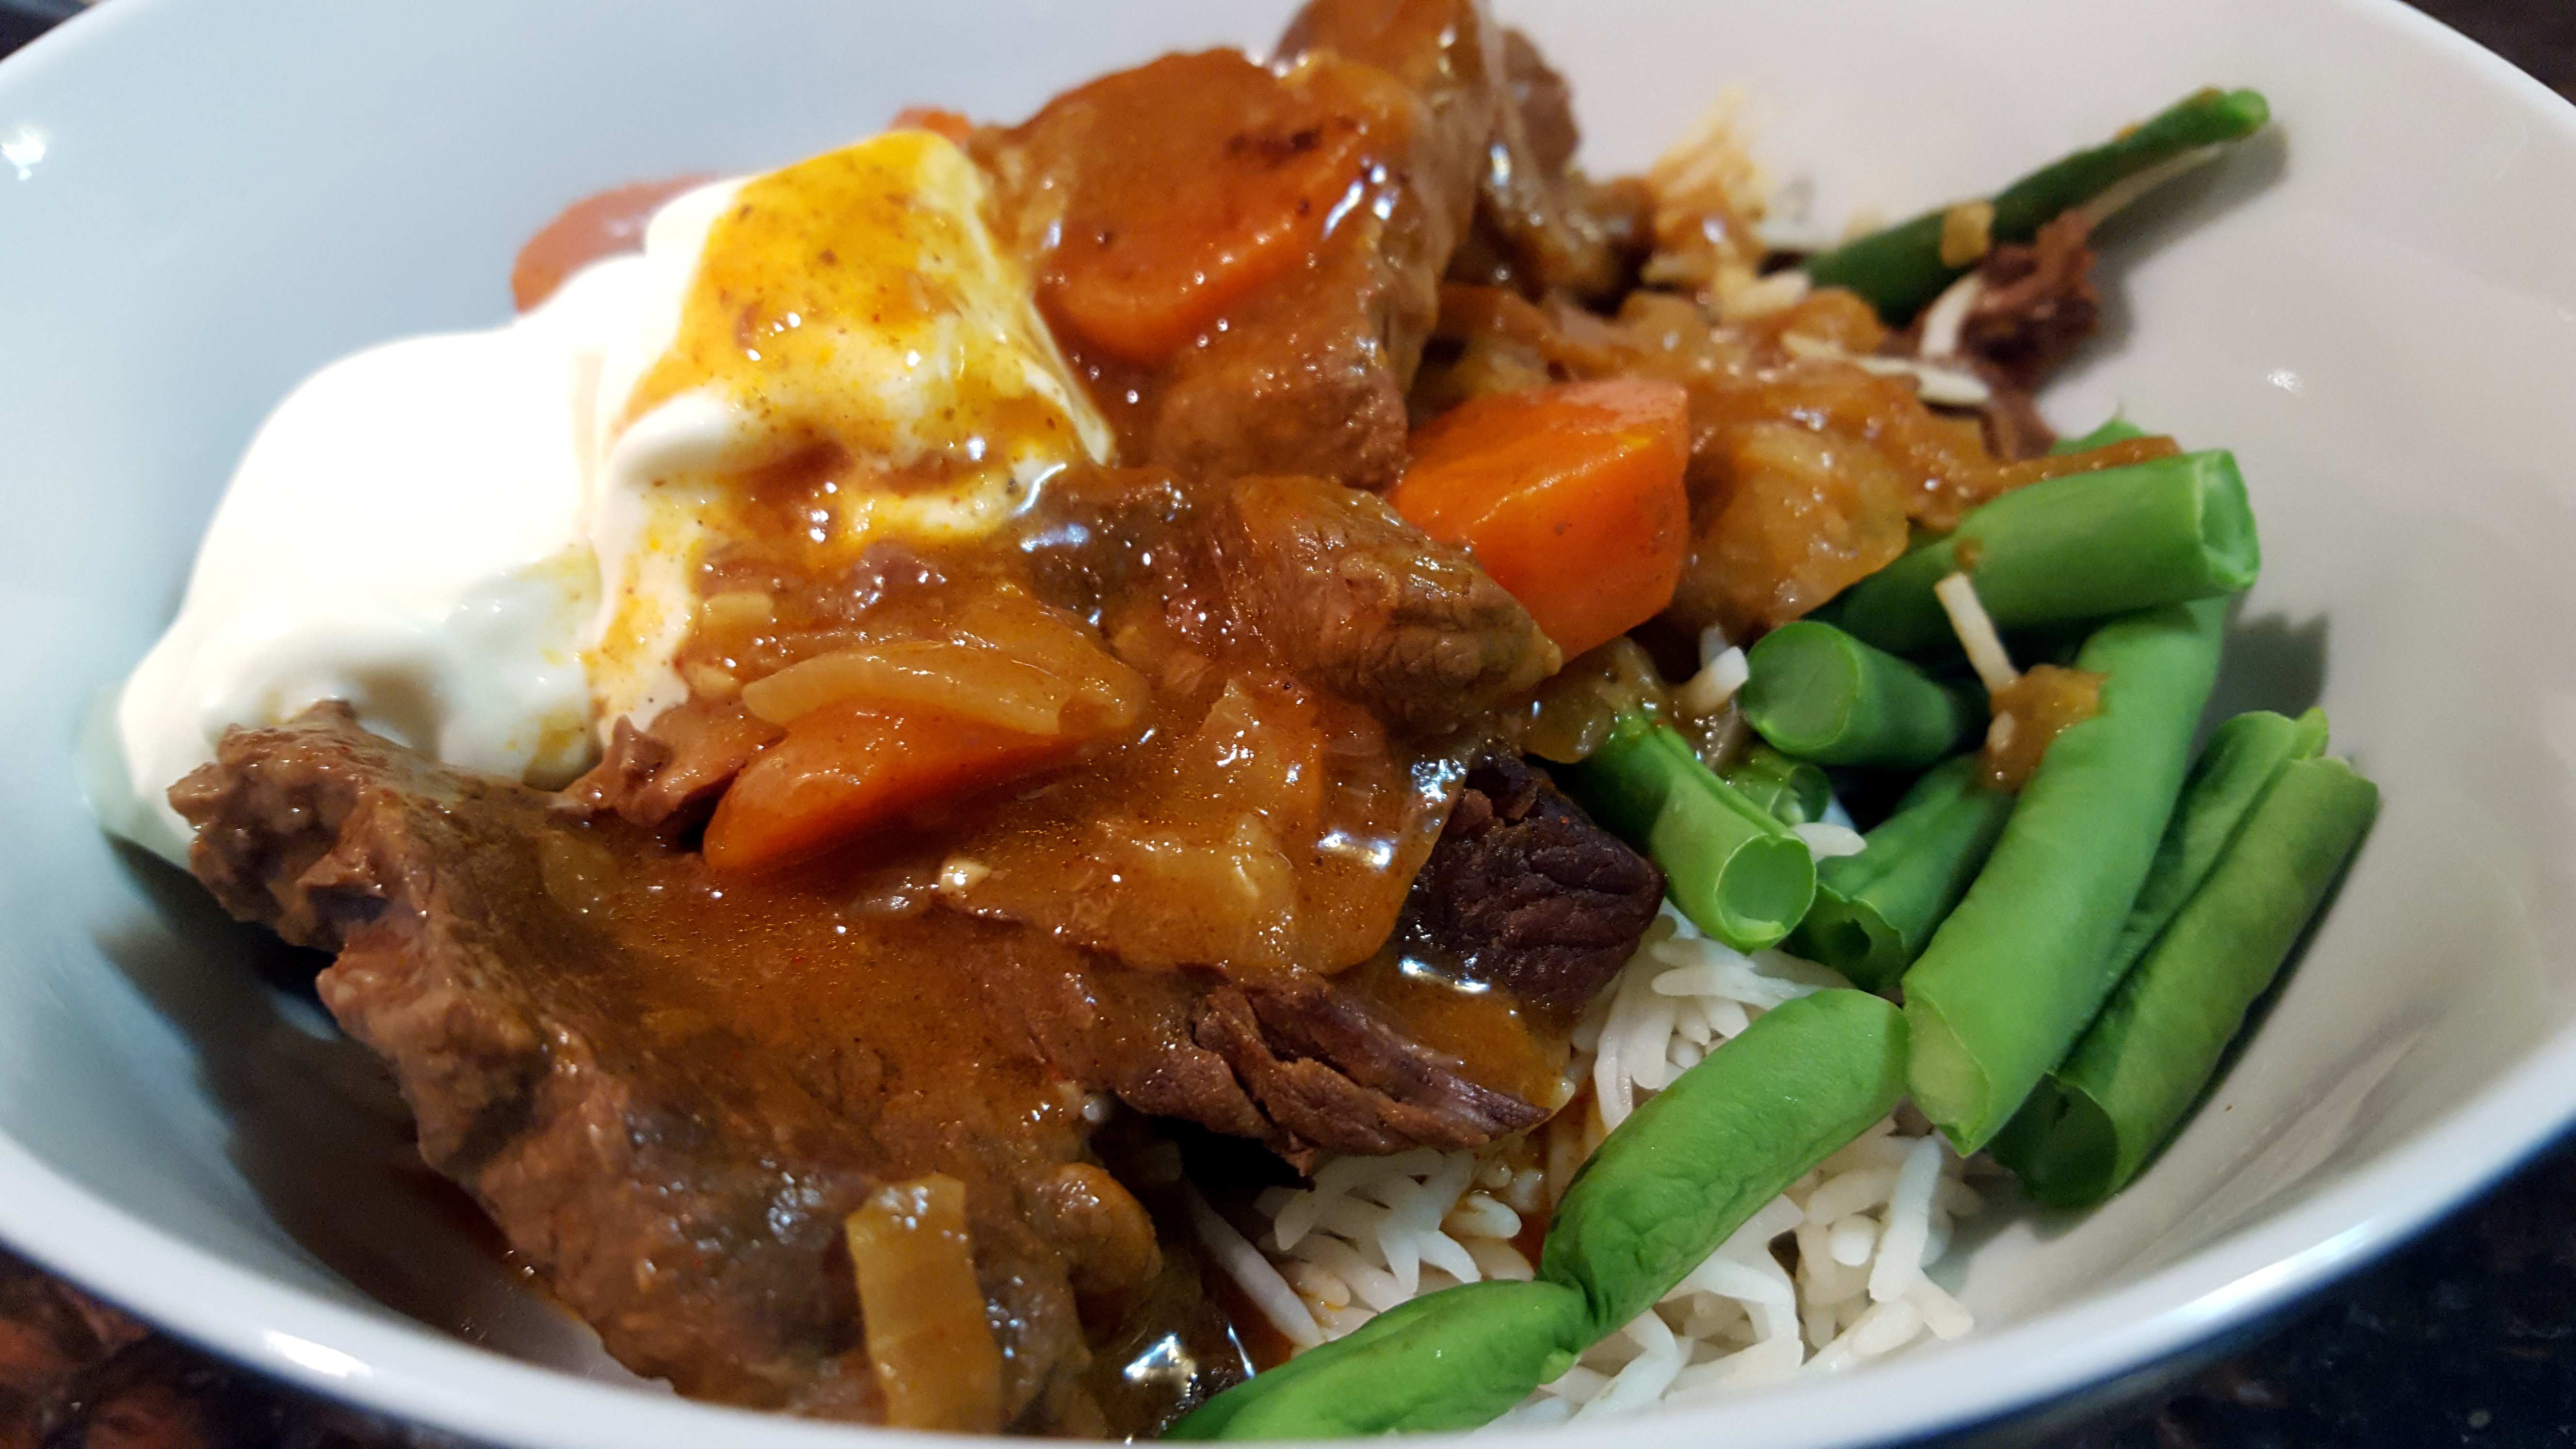
PK’s Lazy Slow Cooker Beef Stroganoff
This slow cooked dish isn’t going to win me points for authenticity but it is tasty, easy to make and kid friendly :).
My youngsters insist on having the sour cream (that you would normally mix through) on the side and they are not mushroom fans. I feel however, that you need mushrooms for a richer flavour. My solution is to use whole ‘cup’ or button mushrooms and that seems to avoid turning dinner into a picking out bits of chopped mushroom exercise :).
You will be:
- Preparing your ingredients.
- Browning the beef and softening the vegetables.
- Cooking low and slow.
- Serving.
You will need:
- Ingredients:
- 1kg of beef (I used rump steak), cubed
- A few slugs of olive oil
- 1 large brown onion, sliced
- 2 -3 garlic cloves, finely diced
- 2 large carrots, peeled and chopped
- 1 Tbsp paprika, ground
- 3 medium mushrooms (I used ‘cup’), whole or chopped
- 2 Tbsp plain flour
- Table salt to taste
- Black peppercorns to taste, ground
- 2 cups home-made stock (I only had chicken to hand)
- A good slug of tomato paste
- A good slug of Worcestershire sauce
- A handful of small or chopped mushrooms (optional)
- Equipment:
- 1 long sharp knife
- 1 chopping board
- 1 fry pan
- 1 slow cooker
- 1 mixing jug
- 1 whisk or fork
Prepare your ingredients
- Turn your slow cooker onto medium and add a slug of oil, lid on.
- Cube the 1kg of beef and sprinkle with salt and pepper to taste.
- Slice the 1 brown onion.
- Peel and finely dice the 2 -3 garlic cloves.
- Peel and chop the 2 carrots.
- Rinse the 3 ‘cup’ mushrooms and rough chop them if you prefer.

Browning the beef and softening the vegetables
- Heat a slug of olive oil in a fry pan over medium heat.
- Brown the beef and then add it to the slow cooker along with the whole or chopped mushrooms.
- Add a bit more oil to the fry pan if you need it (I didn’t).
- Throw into the fry pan the
- onions
- garlic
- carrots
- tomato paste
- stock
- 2 Tbsp plain flour
- 1 Tbsp ground cumin
- a good slug of Worcestershire sauce
- Give everything a gentle but thorough mix, cooking on medium heat until the onions have softened.
- Pour the contents of the fry pan into the slow cooker.


Cooking low and slow
1. Cover and cook on medium for 4 to 5 hours and the sauce is somewhat reduced.

Serving
My kids prefer that I take the mushrooms out before I serve the dish on a bed of rice and steamed greens. I then give everyone a very healthy dollop of sour cream.

Enjoy,
PK
Written by
·