Tag: orange
-
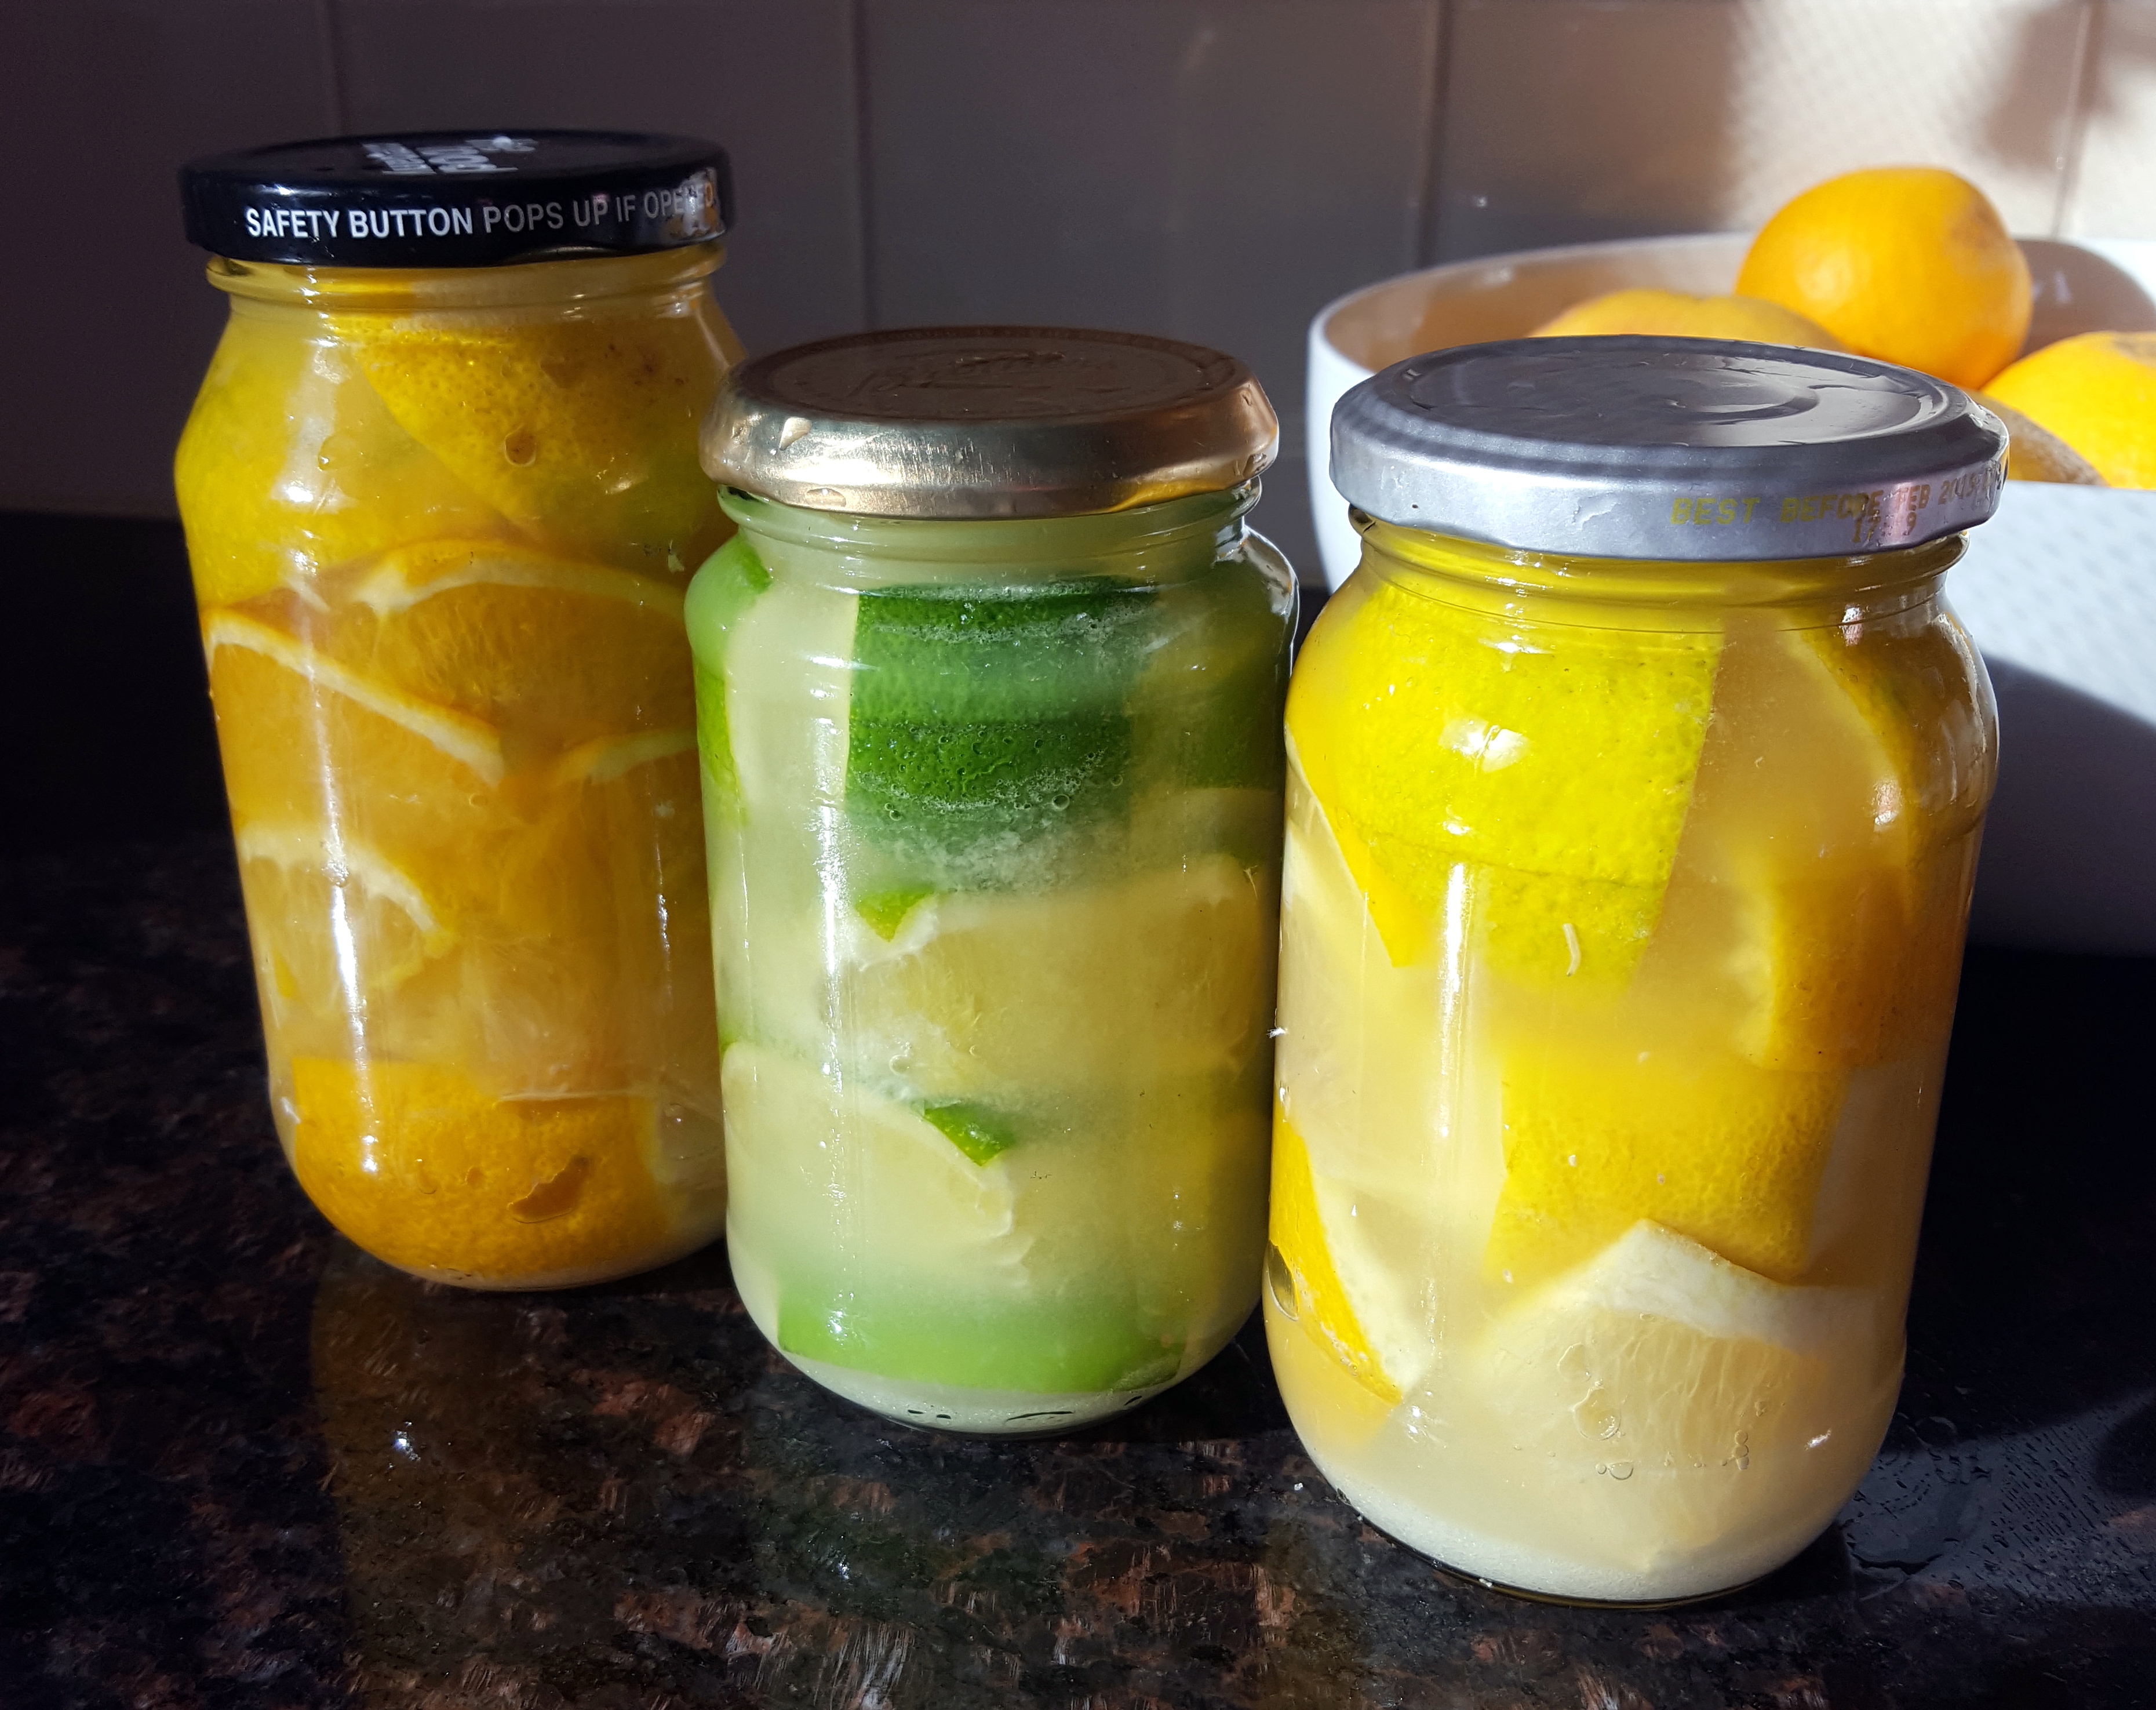
PK’s NoRecipe Preserved Citrus
It’s winter in Perth, Western Australia and this year we are having a really good lemon and orange harvest. I am always on a look for ways to preserve surplus harvest and a good friend of mine suggested I try making preserved lemons. She won me over with ‘they go great in Tagines’ but she didn’t mention how amazing they look in the jars :).
I used lots of salt but I am still going to chuck them in the fridge after a couple of weeks of them sitting sitting in a cool, dry cupboard for a few weeks.

Here are the steps I took:
- I cleaned my chosen citrus with a scourer and rinsed them off (I used the last of the limes, some fresh lemons and a mix of lemons and oranges to make three jars respectively).
- I then took each piece of fruit, cut the ends off and quartered them (large fruit got cut in half again).
- I put 1/2 Tbsp of table salt in the bottom of each of my jars (pre-sterilised with boiling water), put a layer of fruit, pushed that down with a wooden spoon and then added another 1/2 Tbsp salt.
- I repeated the fruit, press and salt cycle until the jar was full to the brim.
- I then added freshly squeezed juice to the jar, added 1 Tbsp salt and popped on a sterilised lid.
- A few taps on the kitchen bench to get all the air bubbles to the top and I moved onto the next type of citrus.
- Then all the jars went into a cupboard for a few weeks.
I will let you know how they go 🙂
(update: they were amazing and I even gave a few jars away)
PK
Related Links:
- See more citrus preserving ideas here
Written by
·
-
How To Make Preserved Citrus
It’s winter in Perth, Western Australia and this year we are having a really good lemon and orange harvest. I am always on a look for ways to preserve any surplus and a good friend of mine suggested I try making preserved lemons. She won me over with ‘they go great in Tagines’ but she didn’t mention how amazing they look in the jars.
I used lots of salt but I am still going to chuck them in the fridge it after they sit in a cool, dry cupboard for a a few months.
Note: Follow your nose, if it smells bad don’t eat them.

Here are the steps I took:
- I cleaned my chosen citrus with a scourer and rinsed them off (I used the last of the limes, some fresh lemons and a mix of lemons and oranges to make three jars respectively).
- I then took each piece of fruit, cut the ends off and quartered them (large fruit got cut in half again).
- I put 1/2 Tbsp of table salt in the bottom of each of my jars (pre-sterilised with boiling water), put a layer of fruit, pushed that down with a wooden spoon and then added another 1/2 Tbsp salt.
- I repeated the fruit, press and salt cycle until the jar was full to the brim.
- I then added freshly squeezed juice to the jar, added 1 Tbsp salt and popped on a sterilised lid.
- A few taps on the kitchen bench to get all the air bubbles to the top and I moved onto the next type of citrus.
- Then all the jars went into a cupboard for a few months. I haven’t had any jars explode on me but putting them in a cupboard or box stops an entire room being coated in glass and rotten food.
I will let you know how they go 🙂
(update: they were amazing and I even gave a few jars away)
(update 2: I couldn’t point you at a better website for how to use your preserved citrus then this https://www.bonappetit.com/recipes/slideshow/preserved-lemon-slideshow
Enjoy,
PK
Here are more preserving food ideas and uses for citrus:
Written by
·
-
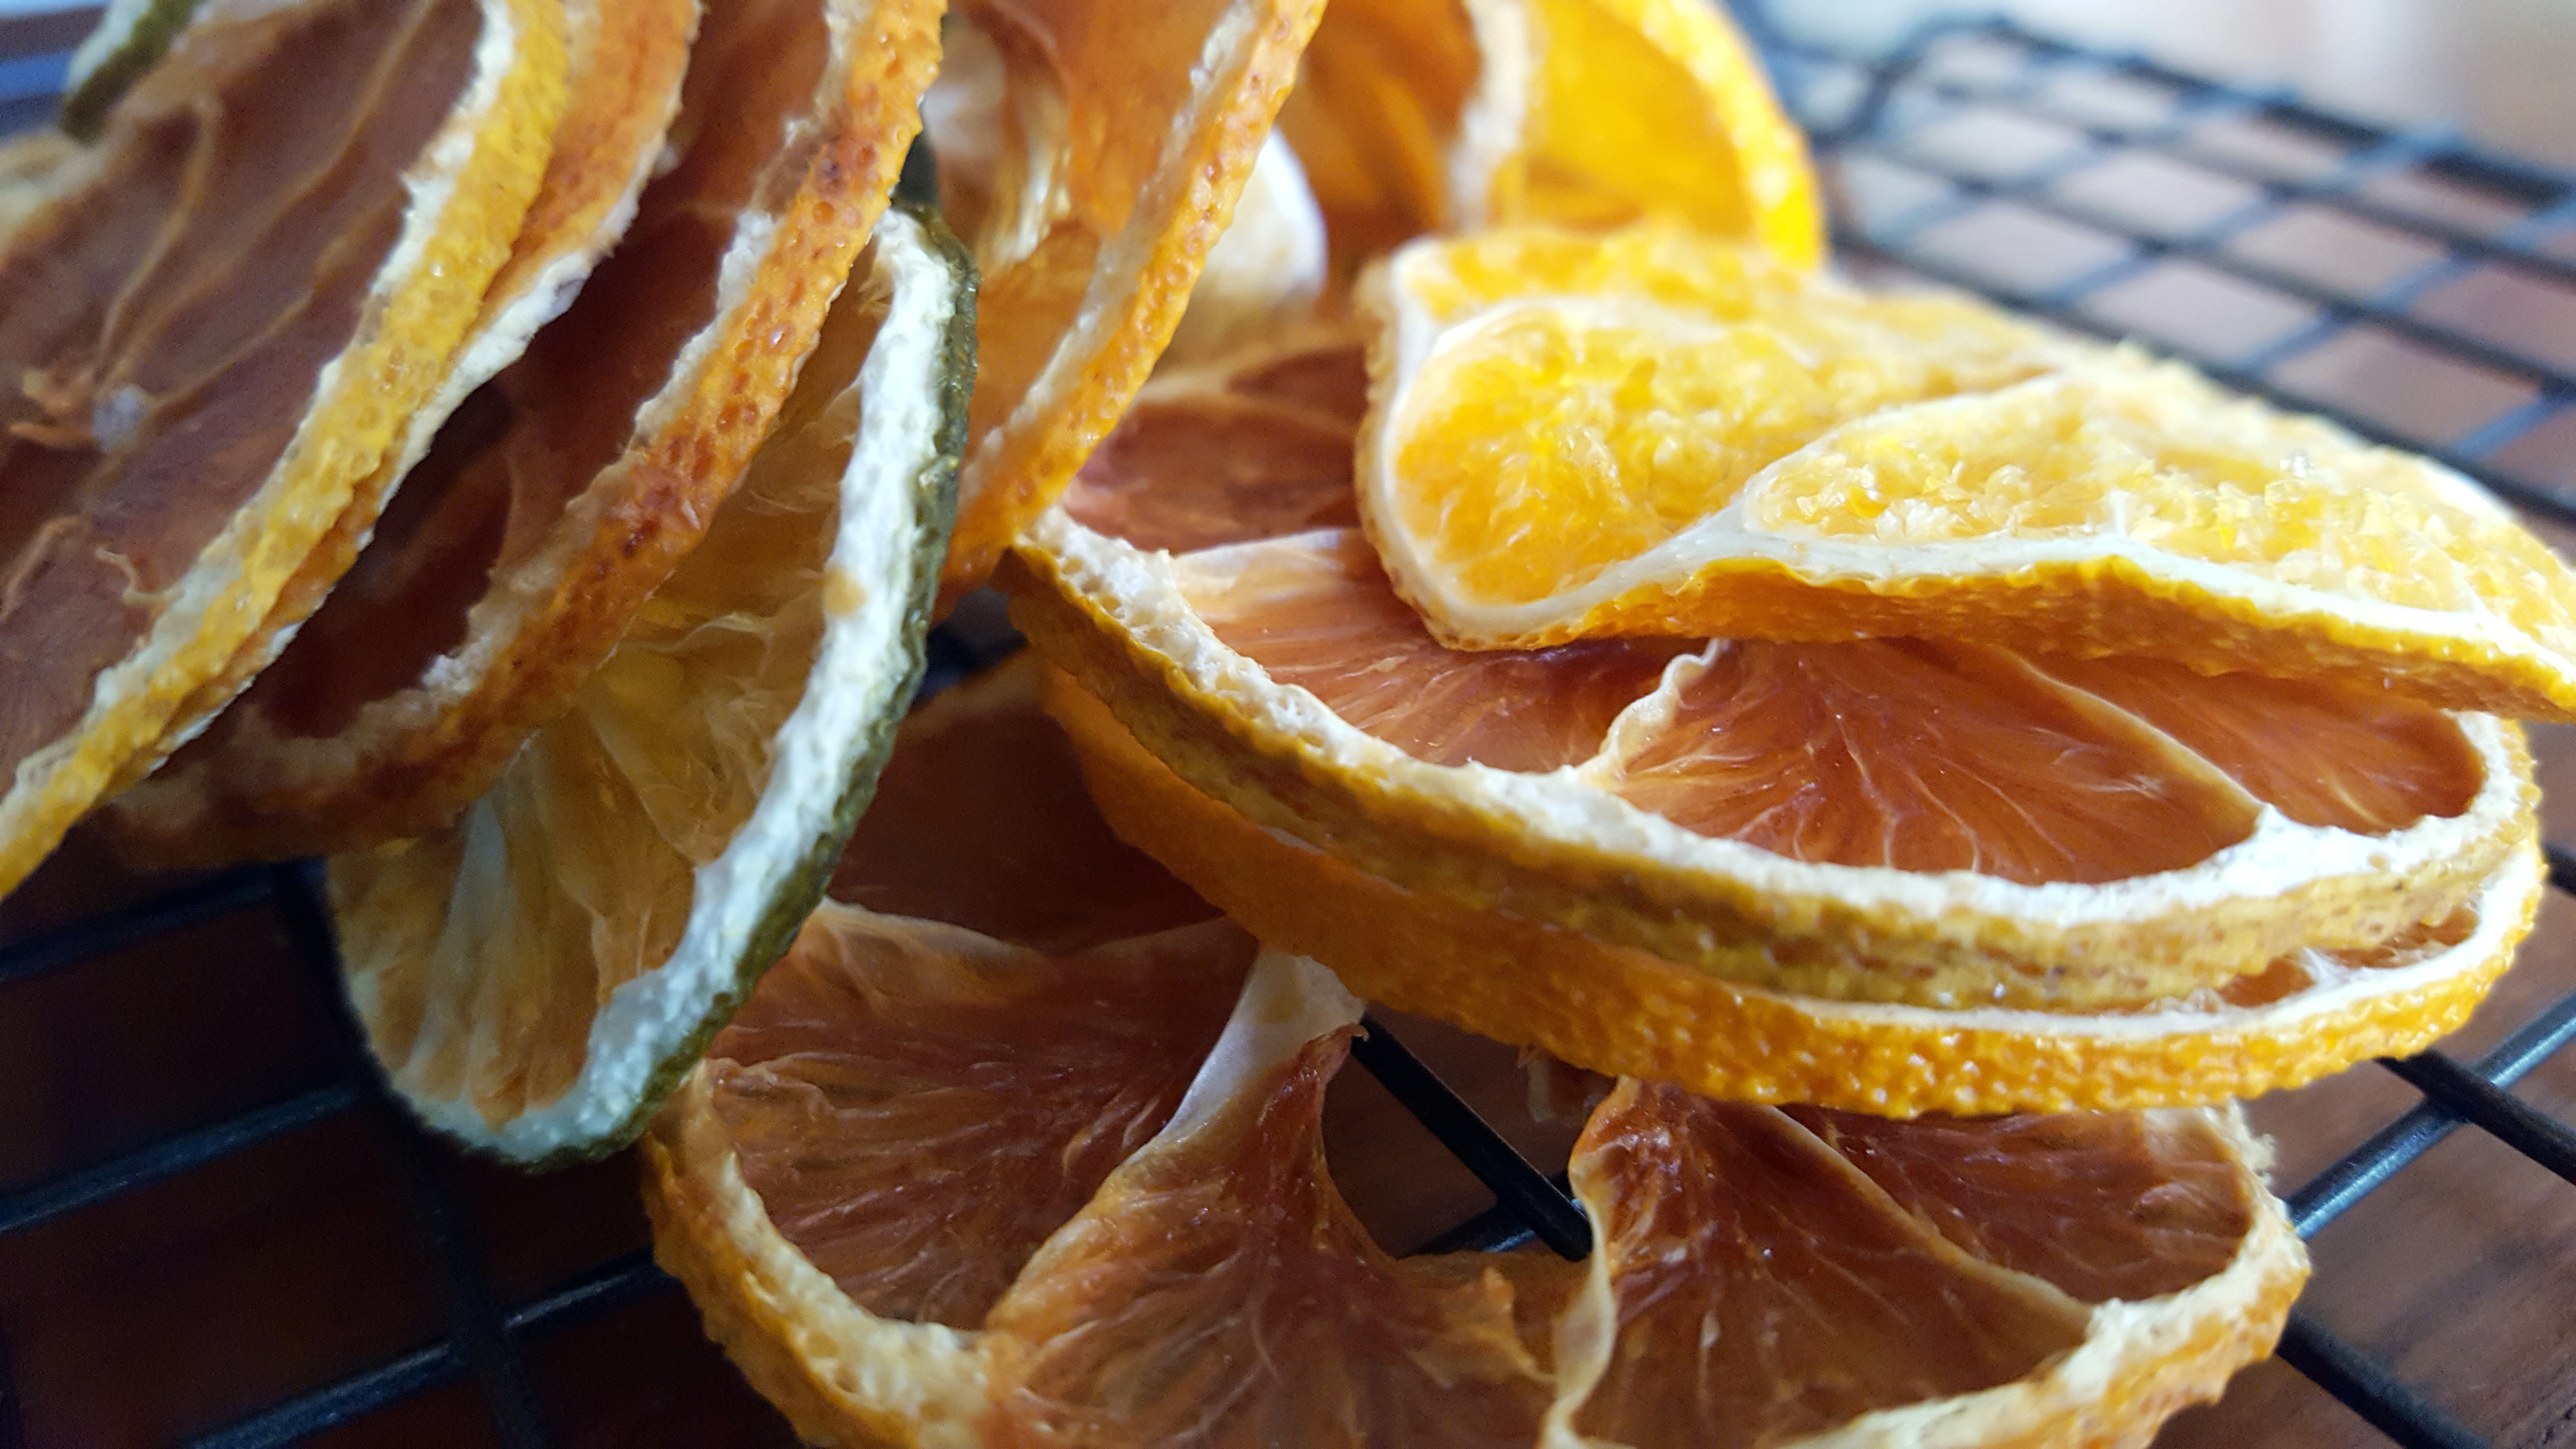
PK’s NoRecipe Dried Citrus Slices
I love preserving food as much as I like growing it (and talking about it). So I did some googling on ways to preserve citrus after my lemon tree decided to try and bury me in fruit :).
My lime tree is a heavy cropper too but in Perth it is not hard to find people willing to take them off your hands :).
Dried citrus can be used for a wide range of things like:
- flavouring jugs/cups of water.
- flavouring your teas.
- adding to smoothies.
- cooking mediterranean and middle-eastern dishes.
- cleaning your kettle of scale (wow).
Simply cut your chosen citrus (I used lemons, limes and oranges) into thin slices.

Pop them on a tray or (my preference) a rack and into an 80C fan-forced oven for 4 to 6 hours. I made sure they were very dry before I took them out and whilst the rind is brittle there is a bit of play in the flesh.
Enjoy,
PK
Written by
·
-
PK’s Dried Citrus Slices
I love preserving food as much as I like growing it (and talking about it). So I did some googling on ways to preserve citrus after my lemon tree decided to try and bury me in fruit :).
My lime tree is a heavy cropper too but in Perth it is not hard to find people willing to take them off your hands :).
Dried citrus can be used for a wide range of things like:
- flavouring jugs/cups of water.
- flavouring your teas.
- adding to smoothies.
- cooking mediterranean and middle-eastern dishes.
- cleaning your kettle of scale (wow).
Simply cut your chosen citrus (I used lemons, limes and oranges) into thin slices.
Pop them on a tray or (my preference) a rack and into an 80C fan-forced oven for 4 to 6 hours. I made sure they were very dry before I took them out and whilst the rind is brittle there is a bit of play in the flesh.
Enjoy,
PK
Written by
·
-

PK Makes River Cottage’s Citrus Braised Lamb Shanks
Everyone has a dish that they feel slightly guilty about. Guilty because somehow it turns out exceptionally good every single time. This is mine and it has magical powers :).
It is originally from the hit Channel 4 series and books, ‘River Cottage’ and I merely adapted it to work in a slow cooker. I like dishes that are a bit different and I prefer this lighter white wine and citrus version over traditional red wine based lamb shank recipes.
River Cottage’s Hugh Fearnly-Whittingstool can’t have known its romantic power when he added this dish to his cookbook though, surely not. It was the first meal I cooked for my wife to be and she fell madly in love with me. That’s the magical bit and might contradict her version of events :).
You will be:
- Sweating the vegetables in the slow cooker.
- Browning the lamb shanks and deglazing the frypan.
- Cooking it slow.
- Serving.
You will need:
- Ingredients:
- 4 lamb shanks
- 2 carrots
- 1 large brown onion
- 2 celery sticks
- 2 bay leaves
- 2 garlic cloves, peeled
- a few sprigs of fresh thyme or lemon thyme
- a small handful of parsley or celery leaves, chopped
- 1 large orange
- 1 large lemon
- half a bottle of white wine (I used a Sauvignon blanc)
- 1 cup of home made stock (I used chicken stock as that was all I had) or 1 cup water
- several slugs of olive oil
- a good slug of tomato paste
- ground rock salt to taste
- cracked black peppercorns to taste
- 0.5 Tbsp whole black peppercorns (optional)
- A handful of small or chopped mushrooms (optional)
- Equipment:
- a chopping board
- a long sharp knife
- kitchen tongs
- a wooden spoon
- a citrus zester
- a citrus juicer
- a large frypan
- a slow cooker
Steps:
Sweating the vegetables in the slow cooker
- Put a slug of olive oil into your slow cooker and turn it on high, lid on.
- Rough chop the:
- 2 carrots.
- 2 celery sticks.
- handful of parsley or celery leaves.
- Finely slice the 1 large brown onion.
- Finely chop the 2 garlic cloves.
- Add the above to your slow cooker to start them softening up, lid on (mix everything around occasionally).
- Once the onions have started to soften, throw in the 2 bay leaves and the sprigs of thyme.
- If you like a bit of peppery kick, chuck 0.5 Tbsp of black peppercorns in too.
- Juice and then zest the lemon and the orange and add to the slow cooker (retain some of the mixed juice and zest for serving time).
- Add the 1 cup of stock or 1 cup of water and mix gently.
- Add a good slug of tomato paste.
- Add a handful of small mushrooms now if you are using them.
I love seeing ingredients together like this:

Nice and soft:

Browning the lamb shanks and deglazing the frypan
- Season the 4 lamb shanks with salt and pepper.
- Chuck another slug of olive oil into the pan and bring to medium heat.
- Slightly brown every surface of the shanks. Yep, even the ends with a bit of creative meat stacking :).
- Then add them to the slow cooker.
- I now deglaze the frypan with half a bottle of white wine. When boiling I then add it to the slow cooker.
- If the slow cooker looks a bit full don’t panic. Everything will shrink down as it cooks :).

Cooking it slow
- Turn your slow cooker to medium and cook for at least 2 hours using kitchen tongs to periodically move the shanks around.
- Now you can keep the slow cooker on medium for speed or turn it down to low for a slower cook (my preference).
- When the meat is literally falling of the bone, when you are giving it a gentle mix with the kitchen tongs, it is ready.
Serving
I generally serve the shanks on a bed of mashed potato with some steamed green vegetables alongside. This time though I cooked my PK’s NoRecipe Oven Baked Potatoes and served the shanks on the bone with some greens.
Remember how we set aside some mixed zest and juice? Sprinkle a bit of the zest and then drizzle some juice over each serve to freshen the citrus flavours and aromas.
On or off the bone this dish is visually appealing:


Make this dish for someone you love,
PK
Written by
·
-

Giuseppe’s Flourless Chocolate Cake
Gus isn’t claiming this is his own recipe but he baked this awesome flourless cake and I asked him if I could share the recipe with you. You should have seen my toddler’s eyes when he tasted it.
Gus said it was really easy to make (I think he is too modest) but he has a hot tip for the candied orange peel. Never leave candied orange on the burner and get distracted. It doesn’t end well for the pan nor the hob :).

Steps
- Baking the cake.
- Making the candied orange topping.
Ingredients
- 180g dark chocolate
- 160g unsalted butter
- 200g almond meal
- 150g caster sugar
- 5 eggs
- 1 large orange
- 1/2 cup water
- 1/2 cup raw sugar
Equipment
- 1 bowl to melt the butter and chocolate (or a saucepan)
- 1 bowl for the egg whites
- 1 bowl for the egg yolks
- 2 whisks
- 1 springform cake tin (about 25 -28 cm)
- 1 chopping board
- a peeler or citrus zester
- a long sharp knife
- a small saucepan for the orange peel
Steps:
Baking the cake
- Heat your oven to 160°C.
- Melt the dark chocolate and butter and mix together, set aside.
- Separate the eggs and in one bowl beat whites until firm peaks form.
- Beat yolks & caster sugar until pale & creamy in another bowl.
- Add slightly cooled chocolate mixture to the egg yolk mixture, fold in gently.
- Add almond meal to this mix, fold in.
- Fold in beaten egg whites, in 2 or 3 lots folding in gently. Tip: always add beaten egg whites in small batches, these add air and support the mix as there is no yeast to leaven the mix. You will find the last lot of egg whites will fold in easily and not have all the air swished out.
- Line the base of a springform cake tin with baking paper, grease base and sides with butter.
- Pour mix in and bake for about 40 min. It should be moist inside with a thin crust that will form cracks.
Making the candied orange topping 🍊
- Wash the orange well.
- Using a vegetable peeler, peel orange, try not to take the white pith. Just get the peel.
- On a board cut the peel strips as thin as possible (this is the time consuming part) but they can be as large as you like.
- In a small saucepan mix equal parts of water and sugar, I usually do half cup of each.
- Heat to dissolve sugar and then add the sliced orange peel.
- Allow to boil and then turn heat down to a simmer.
- Allow to simmer gently for about 30-40 min, liquid will evaporate. I usually add a little more water2 or 3 times while simmering.
- When you are happy it’s “candied” enough take off the heat, allow to cool slightly, it will be very hot and I have learned this the hard way from trying to taste the syrup :).
- Place candied peel on cake. You can also pour the remaining syrup over the cake, it will have a nice orange flavour
Enjoy,
😊
Gus
YOU MIGHT ALSO LIKE
MORE VEGETARIAN , GLUTEN-FREE INGREDIENTS AND MEALS
Please consider subscribing to a weekly email summary of our posts or check us out on Facebook @growitcatchitcookit.
[mc4wp_form id=”15771″]
Written by
·