Tag: spinach
-
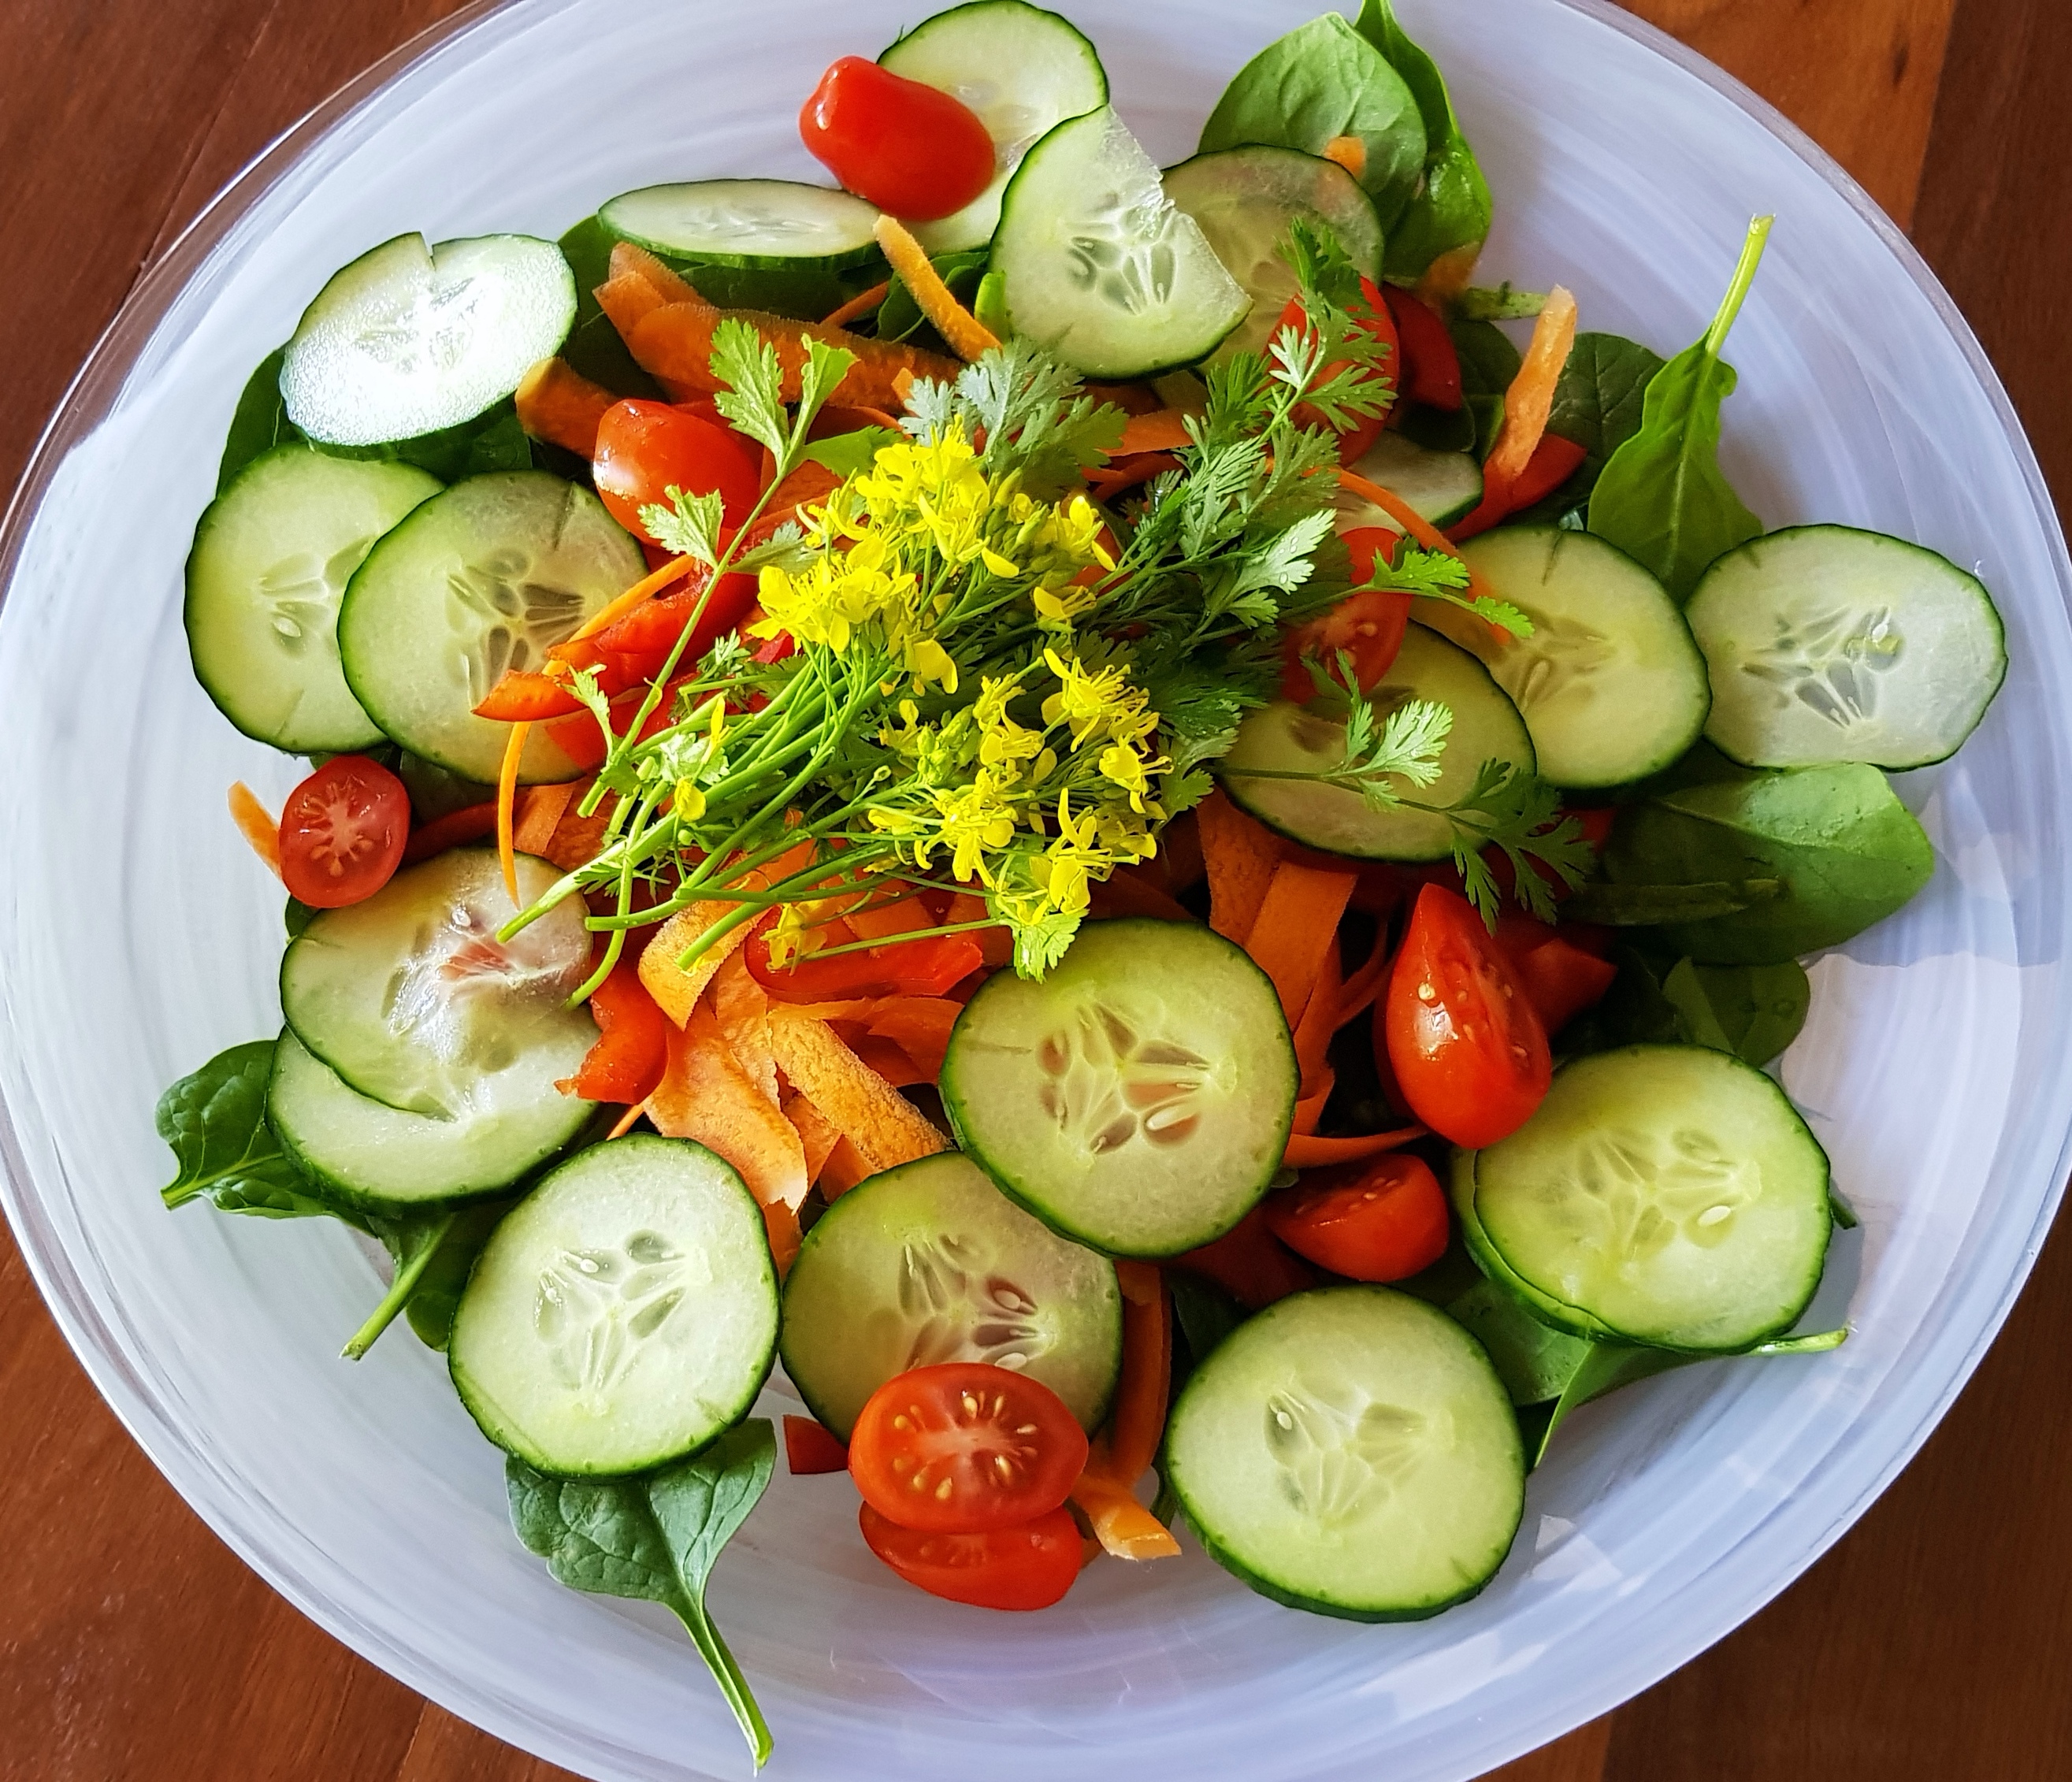
KT’s NoRecipe Green Salad
I used to find making salads overly time-consuming until KT taught me this simple method. It scales really well so you can make it for large gatherings just as easily.
You start with a layer of washed and dried greens. I use a salad spinner to do this as it gets them drier than paper towel.
Then add layers of your favourite salad ingredient.


I garnished with some mizuna flowers for that something different 🙂

Enjoy,
PK
Related Links:
Written by
·
-

Komatsuna
This really easy to grow leafy green will add that bit of special to your salads and stir fries. Use it as a substitute for spinach or along side. It is also called Japanese mustard spinach and is heavily used in Japan and throughout Asia.
I grow grow both green and red varieties (plants are about 10cm tall) and pick the leaves when they are still young.
Taste/Aroma:
Whilst the leaves look and smell like spinach their stronger taste is more like Mizuna and leaf beets,
Plant:

Grow It Perth

Planting/Care:
Very easy to grow in rich friable soil. Occasionally use liquid fertiliser or pellets designed for use on vegetables. Nitrogen is useful when growing plants for their foliage.
You will get the normal suite of BadCritters such as caterpillars, weevils and the like. Visual inspection, keeping weeds down and eating the komatsuna leaves before they do is the key 🙂 .
Related Links:
- see more asian green posts here
- go to all meal ingredients
- go the Grow It Perth calendar
Written by
·
-

PK’s Mini Chicken Parcels
These little chicken parcels encourage variety and experimentation when it comes to their fillings. They especially lend themselves to using up leftover chicken and those limp vegetables at the back of the fridge.
Your kids are going to love them and I found them really easy to make even though I am a pastry novice :). I even eat them cold the next day at work for a snack.
One sheet of puff pastry makes four small rectangular parcels and you can scale the recipe up easy peasy. I show you how I generally make them below but as I said, mix it up.
You will be:
- Bringing together the ingredients.
- Making the parcels.
- Cooking the parcels.
- Serving.
You will need:
- Ingredients:
- PK’s NoRecipe Garlic Butter
- PK’s NoRecipe Pulled Chicken Breast
- 1 sheet of frozen puff pastry (makes 4 so scale as you need, I used Pampas brand)
- spinach leaves
- corn kernels
- coriander leaves
- ground black peppercorns
- 1 egg (beaten for the glazing and sealing)
- 2 Tbsp water (for the egg mix)
- Equipment:
- a chopping board
- a small sharp knife
- an oven tray or dish
- a basting brush
- a small whisk
- a bowl to beat the egg
Steps:
Bringing together the ingredients
- Defrost your frozen puff pastry sheet and cut it into 4 squares.
- Take the garlic butter out of the fridge.
- Take the pulled chicken out of the fridge.
- Wash and dry the spinach leaves and coriander leaves.
- Cook and cool the corn kernels.
- Whisk the single egg along with the 2 Tbsp water.
- Turn your fan forced oven on to 190°C.
Making the parcels
Now for the fun part but remember that with the fillings, less is more :).
- Spoon a little of the garlic butter into the middle lower half of the square.
- Build up the rest of the fillings in layers.
- Brush the egg mix on all four sides of the square to make it stick.
- Then fold the square over to make a pillow shape.
- Press the edges with you finger to seal the pillow and then brush more of the egg mixture over the whole thing.
- Add some air holes with your knife.
- Put the parcels in your oven tray and refrigerate if required by your meal’s timing.
Filling the parcels:
Add some air holes and and few slices with the knife to make them look nice:

Cooking the parcels:
- Put the oven tray into your preheated 190°C fan forced oven and cook until golden brown (approximately 40 minutes).
- Slice one and eat it before anyone else gets one. If you get caught say you are just making sure everything is cooked through :).

Serving
Here I simply served the parcels, about 4 per hungry adult, with some more greens and a glass of white wine.

Enjoy,
PK
Written by
·
-
PK’s Chicken Puff Pastry Parcels
These little chicken parcels encourage variety and experimentation when it comes to their fillings. They especially lend themselves to using up leftover chicken and those limp vegetables at the back of the fridge.
Your kids are going to love them and I found them really easy to make even though I am a pastry novice. I even eat them cold the next day at work for a snack.
One sheet of puff pastry makes four small rectangular parcels and you can scale the recipe up easy peasy. I’ll show you how I generally make them below but as I said, mix it up. 🙂
You will be:
- Bringing together the ingredients.
- Making the parcels.
- Cooking the parcels.
- Serving.
You will need:
- Ingredients (makes 4 small parcels):
- PK’s NoRecipe Garlic Butter
- PK’s Pulled Chicken Breast FoodHack
- 1 sheet of frozen puff pastry (I used Pampas brand)
- Small amounts of:
- spinach leaves
- corn kernels
- coriander leaves
- ground black peppercorns
- 1 chicken egg (beaten for the glazing and sealing)
- 2 Tbsp water (for the egg mix)
- Equipment:
- a chopping board
- a small sharp knife
- an oven tray or dish
- a basting brush
- a small whisk
- a bowl to beat the egg
Bringing together the ingredients
- Defrost your frozen puff pastry sheet and cut it into 4 squares.
- Take the garlic butter out of the fridge.
- Take the pulled chicken out of the fridge.
- Wash and dry the spinach leaves and coriander leaves.
- Cook and cool the corn kernels.
- Whisk the single egg along with the 2 Tbsp water.
- Turn your fan forced oven on to 190°C.
Making the parcels
Now for the fun part but remember that with the fillings, less is more :).
- Spoon a little of the garlic butter into the middle lower half of the square.
- Build up the rest of the fillings in layers.
- Brush the egg mix on all four sides of the square to make it stick.
- Then fold the square over to make a pillow shape.
- Press the edges with you finger to seal the pillow and then brush more of the egg mixture over the whole thing.
- Add some air holes with your knife.
- Put the parcels in your oven tray and refrigerate if required by your meal’s timing.
Filling the parcels:
Add some air holes and and few slices with the knife to make them look nice:

Cooking the parcels:
- Put the oven tray into your preheated 190°C fan forced oven and cook until golden brown (approximately 40 minutes).
- Slice one and eat it before anyone else gets one. If you get caught say you are just making sure everything is cooked through :).

Serving
Here I simply served the parcels, about 4 per hungry adult, with some more greens and a glass of white wine.

Enjoy,
PK
YOU MIGHT ALSO LIKE
MORE KID FRIENDLY MEALS
OUR OTHER RECIPES STARRING CHICKEN
Please consider subscribing to a weekly email summary of our posts or check us out on Facebook @growitcatchitcookit.
[mc4wp_form id=”15771″]
- see more kid friendly meals here
Written by
·
-
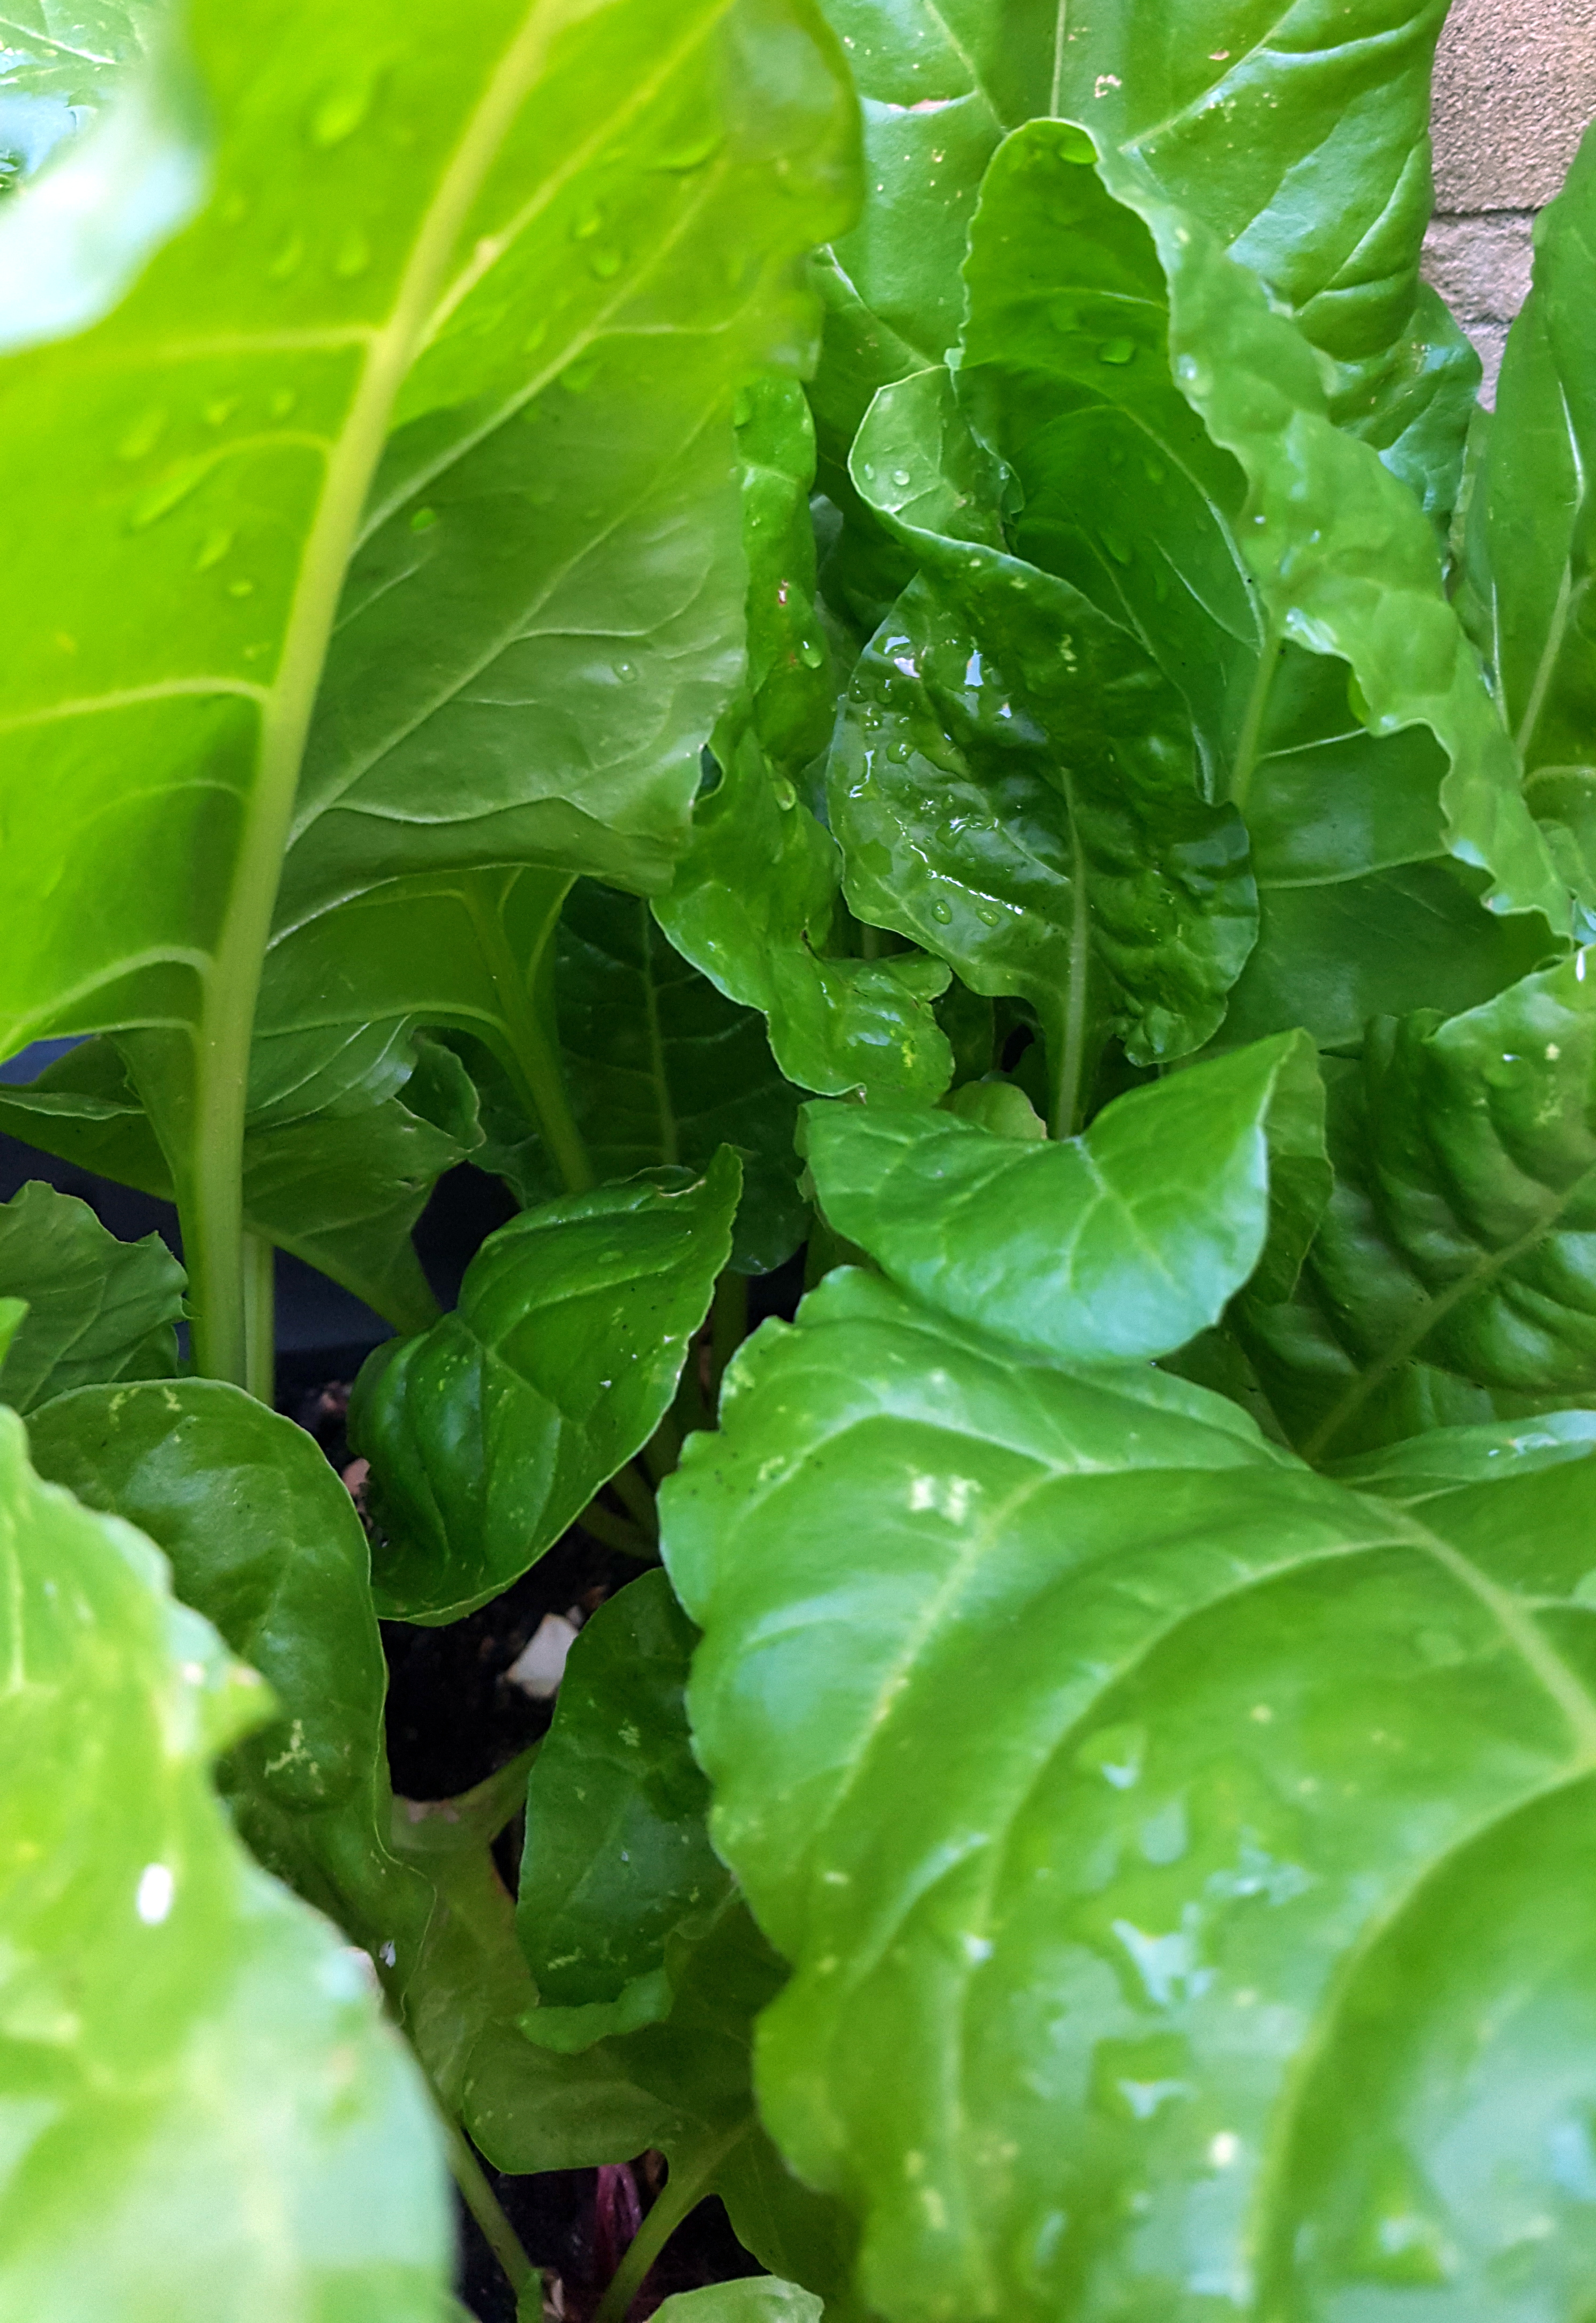
Leaf Beet – Perpetual Spinach
This handy little leaf is not actually spinach proper but a member of the beet family. Who knew? 🙂
It doesn’t matter though because you can use them just as you would spinach leaves in a raft of dishes from salads to toasted sandwiches and stir fries.
The ‘perpetual’ part of the name is true though and you will get crop after crop.
Growing
Perpetual spinach is easy to grow from seed. I soak them overnight in a jam jar with water in it. Then I liberally sprinkle them over an area of prepared soil that gets full sun. I then cover the area with another thin layer of soil and gently water it in.
I keep the area moist but not waterlogged until the seedlings emerge. After that I water normally.

Pest control:
I use Pyrethrum spray if they are getting attacked by caterpillars, spray this on the top and the bottom of the leaves. My son and I regularly hunt for slugs and snails, both get a squishing and the shells get mixed into the garden beds. Once the plants are going strong though, the best pest control is to harvest the leaves before they get attacked :).
Seven weeks after the seeds went in:
Related Links:
- see more posts using this leaf and spinach proper here
- go to all meal ingredients
Written by
·
-

PK Makes Beef in Oyster Sauce
This was simply the best stir fry I have ever cooked. I literally sighed when I first tasted it and you couldn’t wipe the smile of my face.
I knew it was good because everyone came back for seconds, even my toddler :).
This dish caught my eye because it calls for tenderising, with a mallet or rolling pin, beef eye fillet (tenderlion) steaks. I can see you shaking your head but trust me it is a transformational part of the recipe. The meat literally melts in your mouth!
My hat off to the BBC chef Ching He Huang and her simple but flavoursome recipe. I modified it slightly by leaving out the chili (at my family’s request), adding a lot more vegetable variety and served it with basmati rice rather than sautéed mushrooms.
Ching’s “… approach is to demystify the notion that Chinese cooking is complicated and time consuming by demonstrating traditional recipes that can be easily adapted for the home cook…”.
Mission accomplished mate!
As per my normal practice, I marinaded the beef first thing in the day. In this case I did it to make it easier, having everything ready to go, when I cooked the meal in the evening. That said, this dish will blow you away even if you just flash marinade the meat for a few minutes.
You will be:
- Bashing and flash seasoning the beef.
- Prepping, quickly stir frying the vegetables and putting them aside.
- Quickly stir frying the beef and combing everything as you serve.
You will need:
- Ingredients (as the only main it served 2 adults and a hungry toddler very well):
- 350g beef eye fillet steaks
- 1 tsp light soy sauce
- 1.5 Tbsp oyster sauce
- a pinch of raw sugar
- ground rock salt and ground black peppercorns to taste
- 2 slugs of peanut oil
- 3 cloves garlic, finely diced
- 300g baby spinach leaves
- 1 carrot, chopped into matchsticks
- a handful of snow peas, sliced or whole
- 1 Tbsp dry Sherry
- 1 cup of your favourite rice (mine is basmati)
- Equipment
- a chopping board
- a long sharp knife
- several sheets of baking paper
- a bowl for marinading the meat
- a tenderising mallet or a rolling pin
- a wok or deep fry pan
- a serving dish
Steps:
Prepare the beef
- Place the eye fillet steaks in between two sheets of baking paper and bash the stuffing out of it with a rolling pin or tenderising mallet. I know right :).
- Very thinly slice the bashed beef and place into a bowl.
- Season with the:
- 1 tsp light soy sauce
- 1.5 Tbsp oyster sauce
- a pinch of raw sugar
- ground rock salt and black peppercorns to taste.


Prep and stir fry your vegetables
- Add a slug of peanut oil to the frypan and get it nice and hot.
- Chop and slice all of the vegetables.
- Add the 3 cloves garlic (finely diced) and chopped chili to taste if you like it hot.
- Add the 1 carrot (sliced into sticks).
- Add the handful of snow peas.
- Keep everything moving all the time and then when you think it is time chuck in the 300g baby spinach leaves.
- As soon as the spinach leaves wilt and become warm put the whole lot into a serving dish. I sometimes cover them to keep everything piping hot.


Stir fry the beef:
- Add another slug of peanut oil to the frypan and get it nice and hot again.
- Add the now seasoned beef slices and stir fry for a few minutes at most, remember that they will continue to cook after you take them out of the pan. We don’t want them to be chewy.
- Pour the 1 Tbsp dry Sherry over the meat and quickly toss everything.
- Add the now cooked beef to the cooked vegetables waiting in the serving dish.

Serving:
Serve immediately :).


Thanks again to Ching,
PK
Written by
·
-
PK Makes Ching He Huang’s Beef in Oyster Sauce
My hat off to the BBC chef Ching He Huang and her simple but flavoursome Beef in Oyster Sauce recipe.
This dish caught my eye because it calls for tenderising, with a mallet or rolling pin, beef eye fillet (tenderlion) steaks. I can see you shaking your head but trust me it is a transformational part of the recipe. The meat literally melts in your mouth!

Ching’s “… approach is to demystify the notion that Chinese cooking is complicated and time consuming by demonstrating traditional recipes that can be easily adapted for the home cook…”.
Mission accomplished!
You will be
- Bashing and flash seasoning the beef.
- Stir frying the vegetables
- Stir frying the beef
- Serving
You will need
- Ingredients (as the only main it served 2 adults and a hungry toddler very well):
- 350g beef eye fillet steaks
- 1 tsp light soy sauce
- 1.5 Tbsp oyster sauce
- a pinch of raw sugar
- ground rock salt and ground black peppercorns
- 2 slugs of peanut oil
- 3 cloves garlic, finely diced
- 300g baby spinach leaves
- 1 carrot, chopped into matchsticks
- a handful of snow peas, sliced or whole
- 1 Tbsp dry Sherry
- 1 cup of your favourite rice (mine is basmati)
- Equipment
- a chopping board
- a long sharp knife
- several sheets of baking paper
- a bowl for marinading the meat
- a tenderising mallet or a rolling pin
- a wok or deep fry pan
- a serving dish
Steps:
Bashing and flash seasoning the beef
- Place the eye fillet steaks in between two sheets of baking paper and bash the stuffing out of it with a rolling pin or tenderising mallet. I know right :).
- Thinly slice the bashed beef and place into a bowl.
- Season with the:
- 1 tsp light soy sauce
- 1.5 Tbsp oyster sauce
- a pinch of raw sugar
- ground rock salt and black peppercorns to taste.


Stir frying your vegetables
- Chop and slice all of the vegetables.
- Add a slug of peanut oil to the frypan and get it nice and hot.
- Add the 3 cloves garlic (finely diced) and chopped chili to taste if you like it hot.
- Add the 1 carrot (sliced into sticks).
- Add the handful of snow peas.
- Keep everything moving all the time and then when you think it is time chuck in the 300g baby spinach leaves.
- As soon as the spinach leaves wilt and become warm put the whole lot into a serving dish. I sometimes cover them to keep everything piping hot.


Stir frying the beef
- Add another slug of peanut oil to the frypan and get it nice and hot again.
- Add the now seasoned beef slices and stir fry for a few minutes at most, remember that they will continue to cook after you take them out of the pan. We don’t want them to be chewy.
- Pour the 1 Tbsp dry Sherry over the meat and quickly toss everything.
- Add the now cooked beef to the cooked vegetables waiting in the serving dish.

Serving
Serve from a central dish and let everyone take what they need. Make sure there is plenty of rice and good conversation. 🙂

Thanks again to Ching,
PK
Here are some more Chinese and asian fusion posts:
Written by
·
-

Dr C’s NoRecipe Tandoori and Coriander Rissoles
Dr C has the right idea on the minimal recipe idea so his is the first ‘RecipeFree’ cab off the rank. Experiment with your own quantities and remember to enjoy yourself :).
He writes:
Try my tandoori and coriander rissoles with chili and mint yoghurt. Eat them with salad or whack’em between two bits of toast with fresh spinach. Yum!
Take say 500 g beef mince and combine with a good whack of tandoori paste, an egg, lots of breadcrumbs (say 2 cups), coriander sprigs and chopped spring onions.
Add salt & pepper, chili and make patties however large or small you want but be consistent.
The only limit to the serving options is your imagination.
Enjoy,
Dr C.
See other ‘RecipeFree’ posts here.
Written by
·
-
Dr C’s Tandoori and Coriander Rissoles
Try my tandoori and coriander rissoles with chili and mint yoghurt. Eat them with salad or whack’em between two bits of toast with fresh spinach. Yum!
Take say 500 g beef mince and combine with a good whack of tandoori paste, an egg, lots of breadcrumbs (say 2 cups), coriander sprigs and chopped spring onions.
Add salt & pepper, chili and make patties however large or small you want but be consistent. Then fry the rissoles until they are cooked all the way through.

The only limit to the serving options is your imagination.

Enjoy,
Dr C.
YOU MIGHT ALSO LIKE
MORE FROM DR C
OTHER OFF THE CUFF MEALS
Please consider subscribing to a weekly email summary of our posts or check us out on Facebook @growitcatchitcookit.
[mc4wp_form id=”15771″]
Written by
·