Tag: south east asian
-
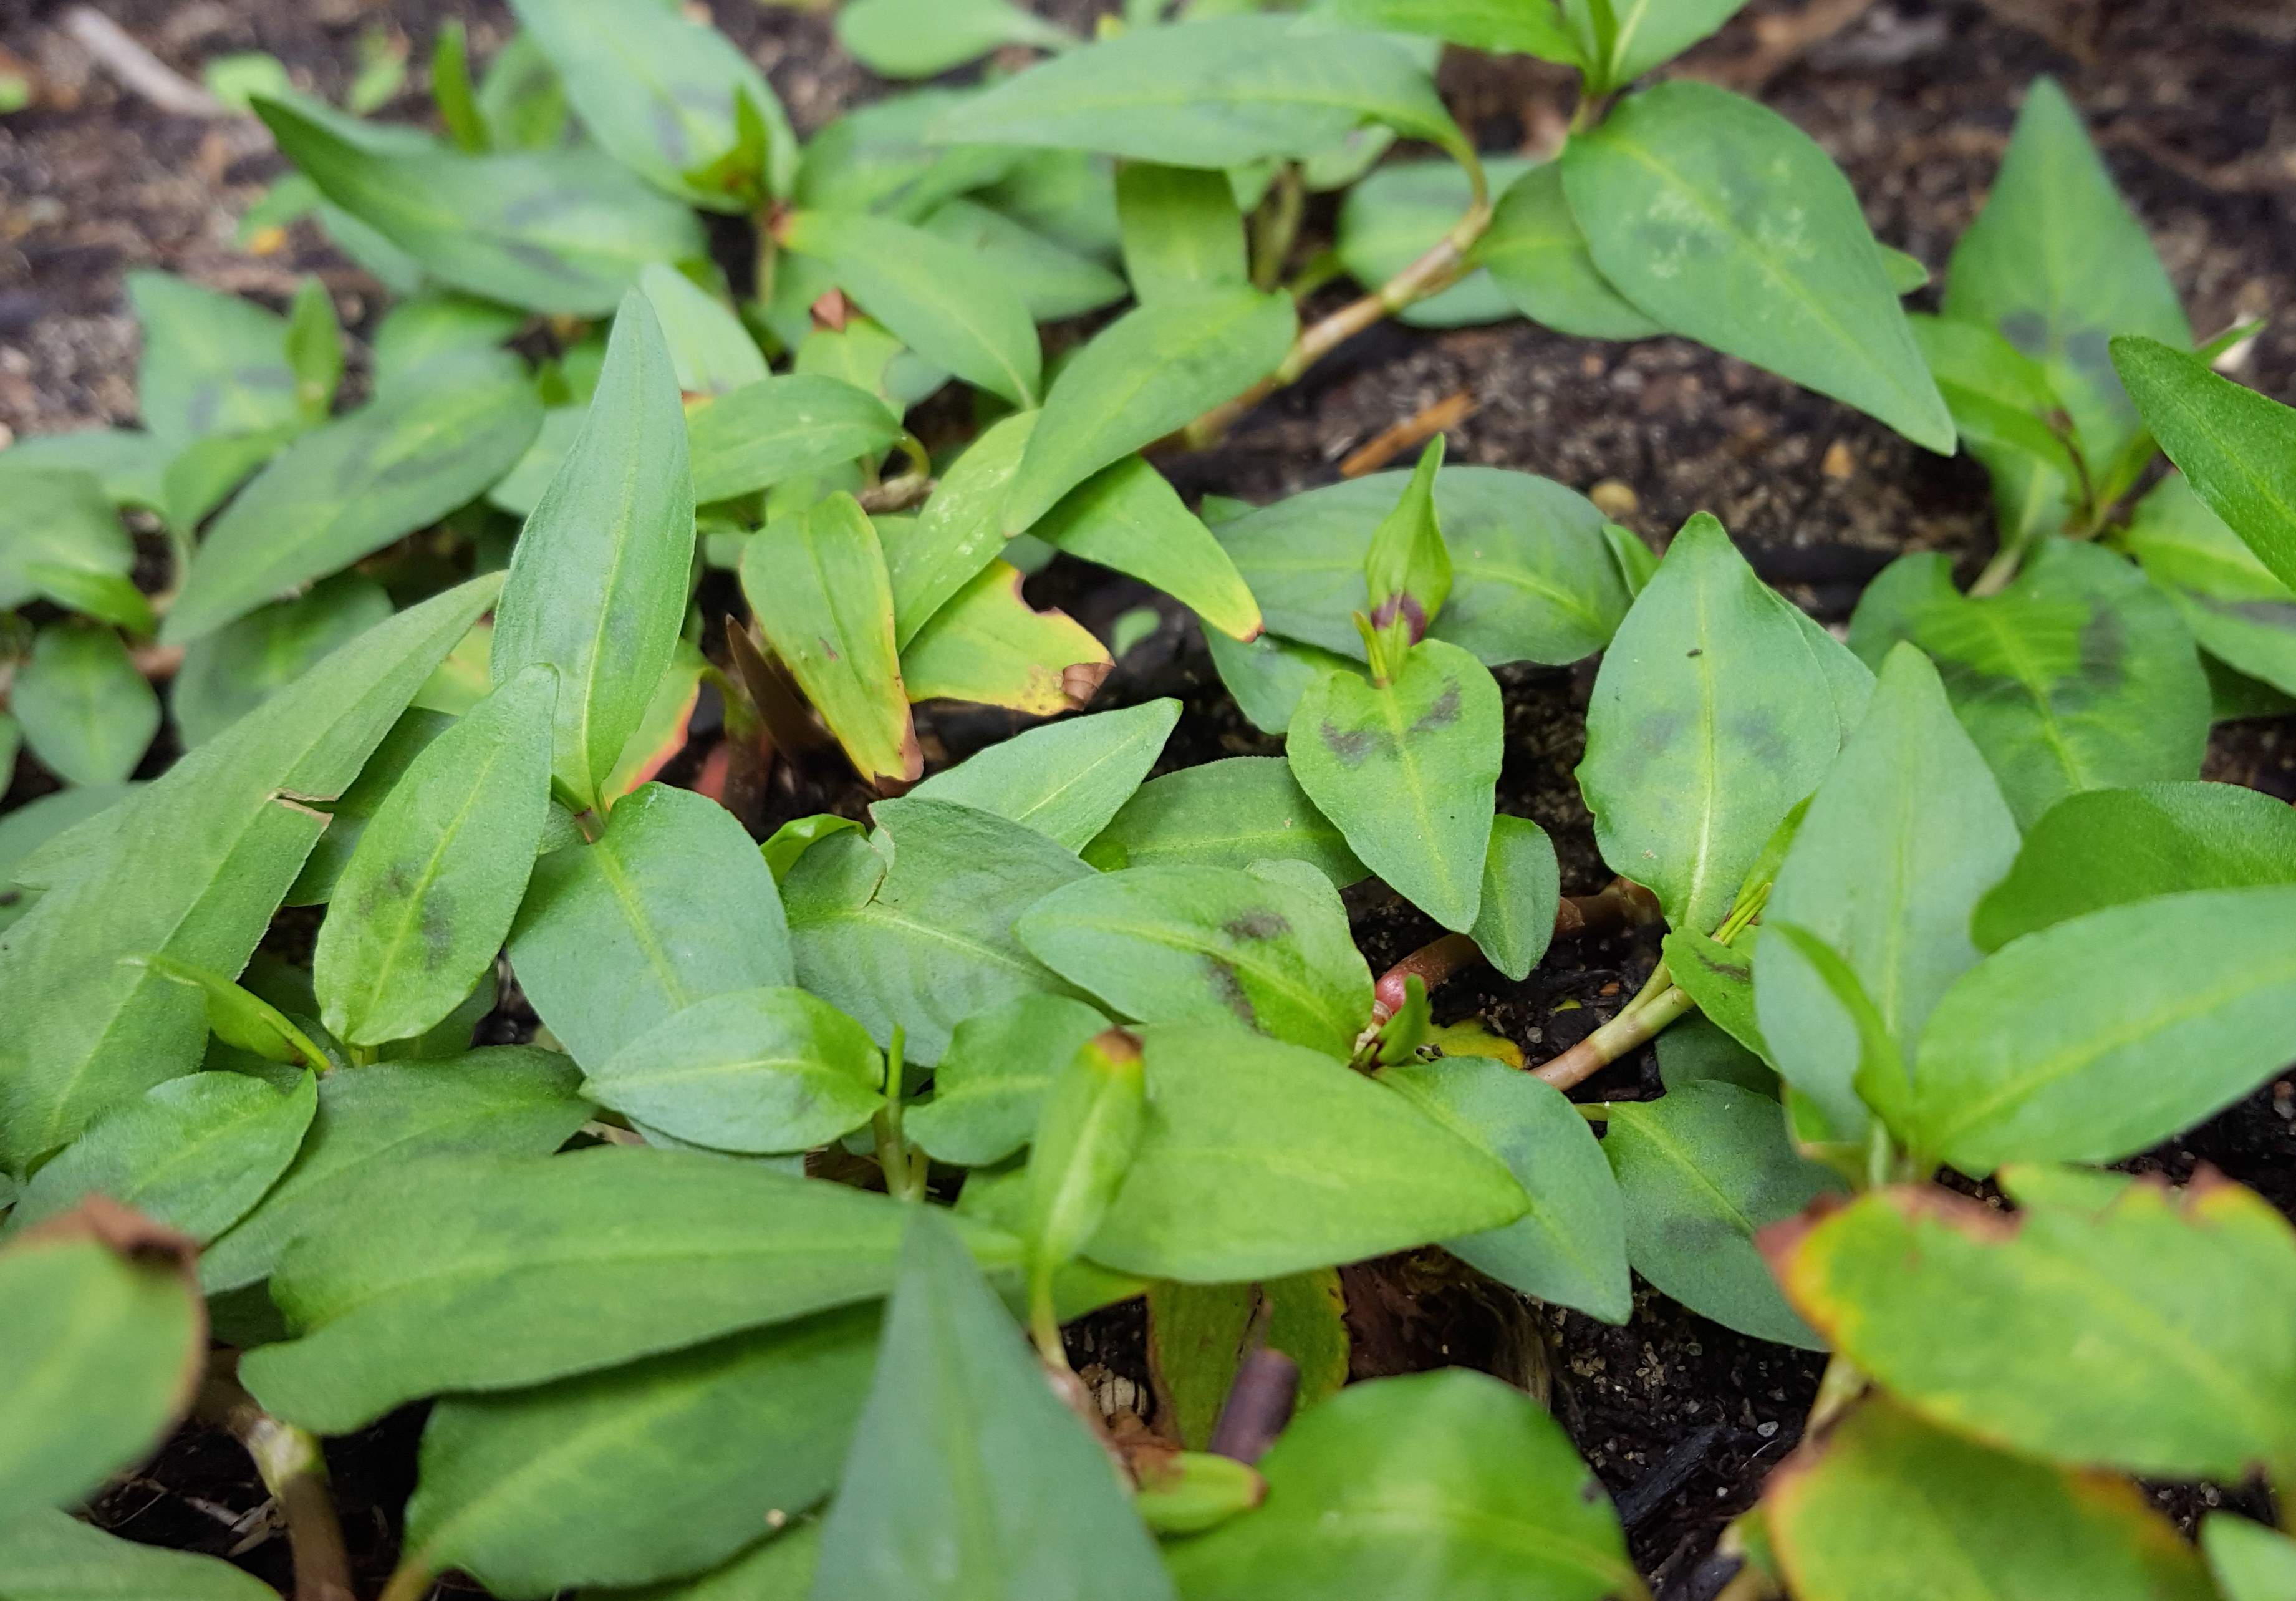
Vietnamese Coriander
Let’s face it, Coriander (also known as Cilantro) can be hard to grow in Perth conditions. It will bolt at the first sign of warm weather and dislikes full sun. So I also grow Vietnamese Coriander (also called Vietnamese Mint or Laksa Leaf) as a substitute herb and also a prized ingredient in its own right.
Taste/Aroma:
Heavily reminiscent of true Coriander but with a peppery bite. Just like true coriander, people either love or loath the taste. It goes well sprinkled on asian salads such as PK’s Thai Beef Salad or in soups and curries.
Flower:

Plant:

Harvesting Months:
- March
- April
- May
- June
Planting/Care:
Watering twice a week (less in winter) is all that is required. It is a very hardy herb and tolerates full sun to part shade and even boggy soils. It looks a bit like mint in the way it creeps out but it doesn’t send out troublesome runners and a quick prune is all that is needed to contain it.
Cuttings can be taken and will easily propagate in a dish of water (thanks Eira Clapton for the tip).
Related Links:
- go to all ingredients
Written by
·
-
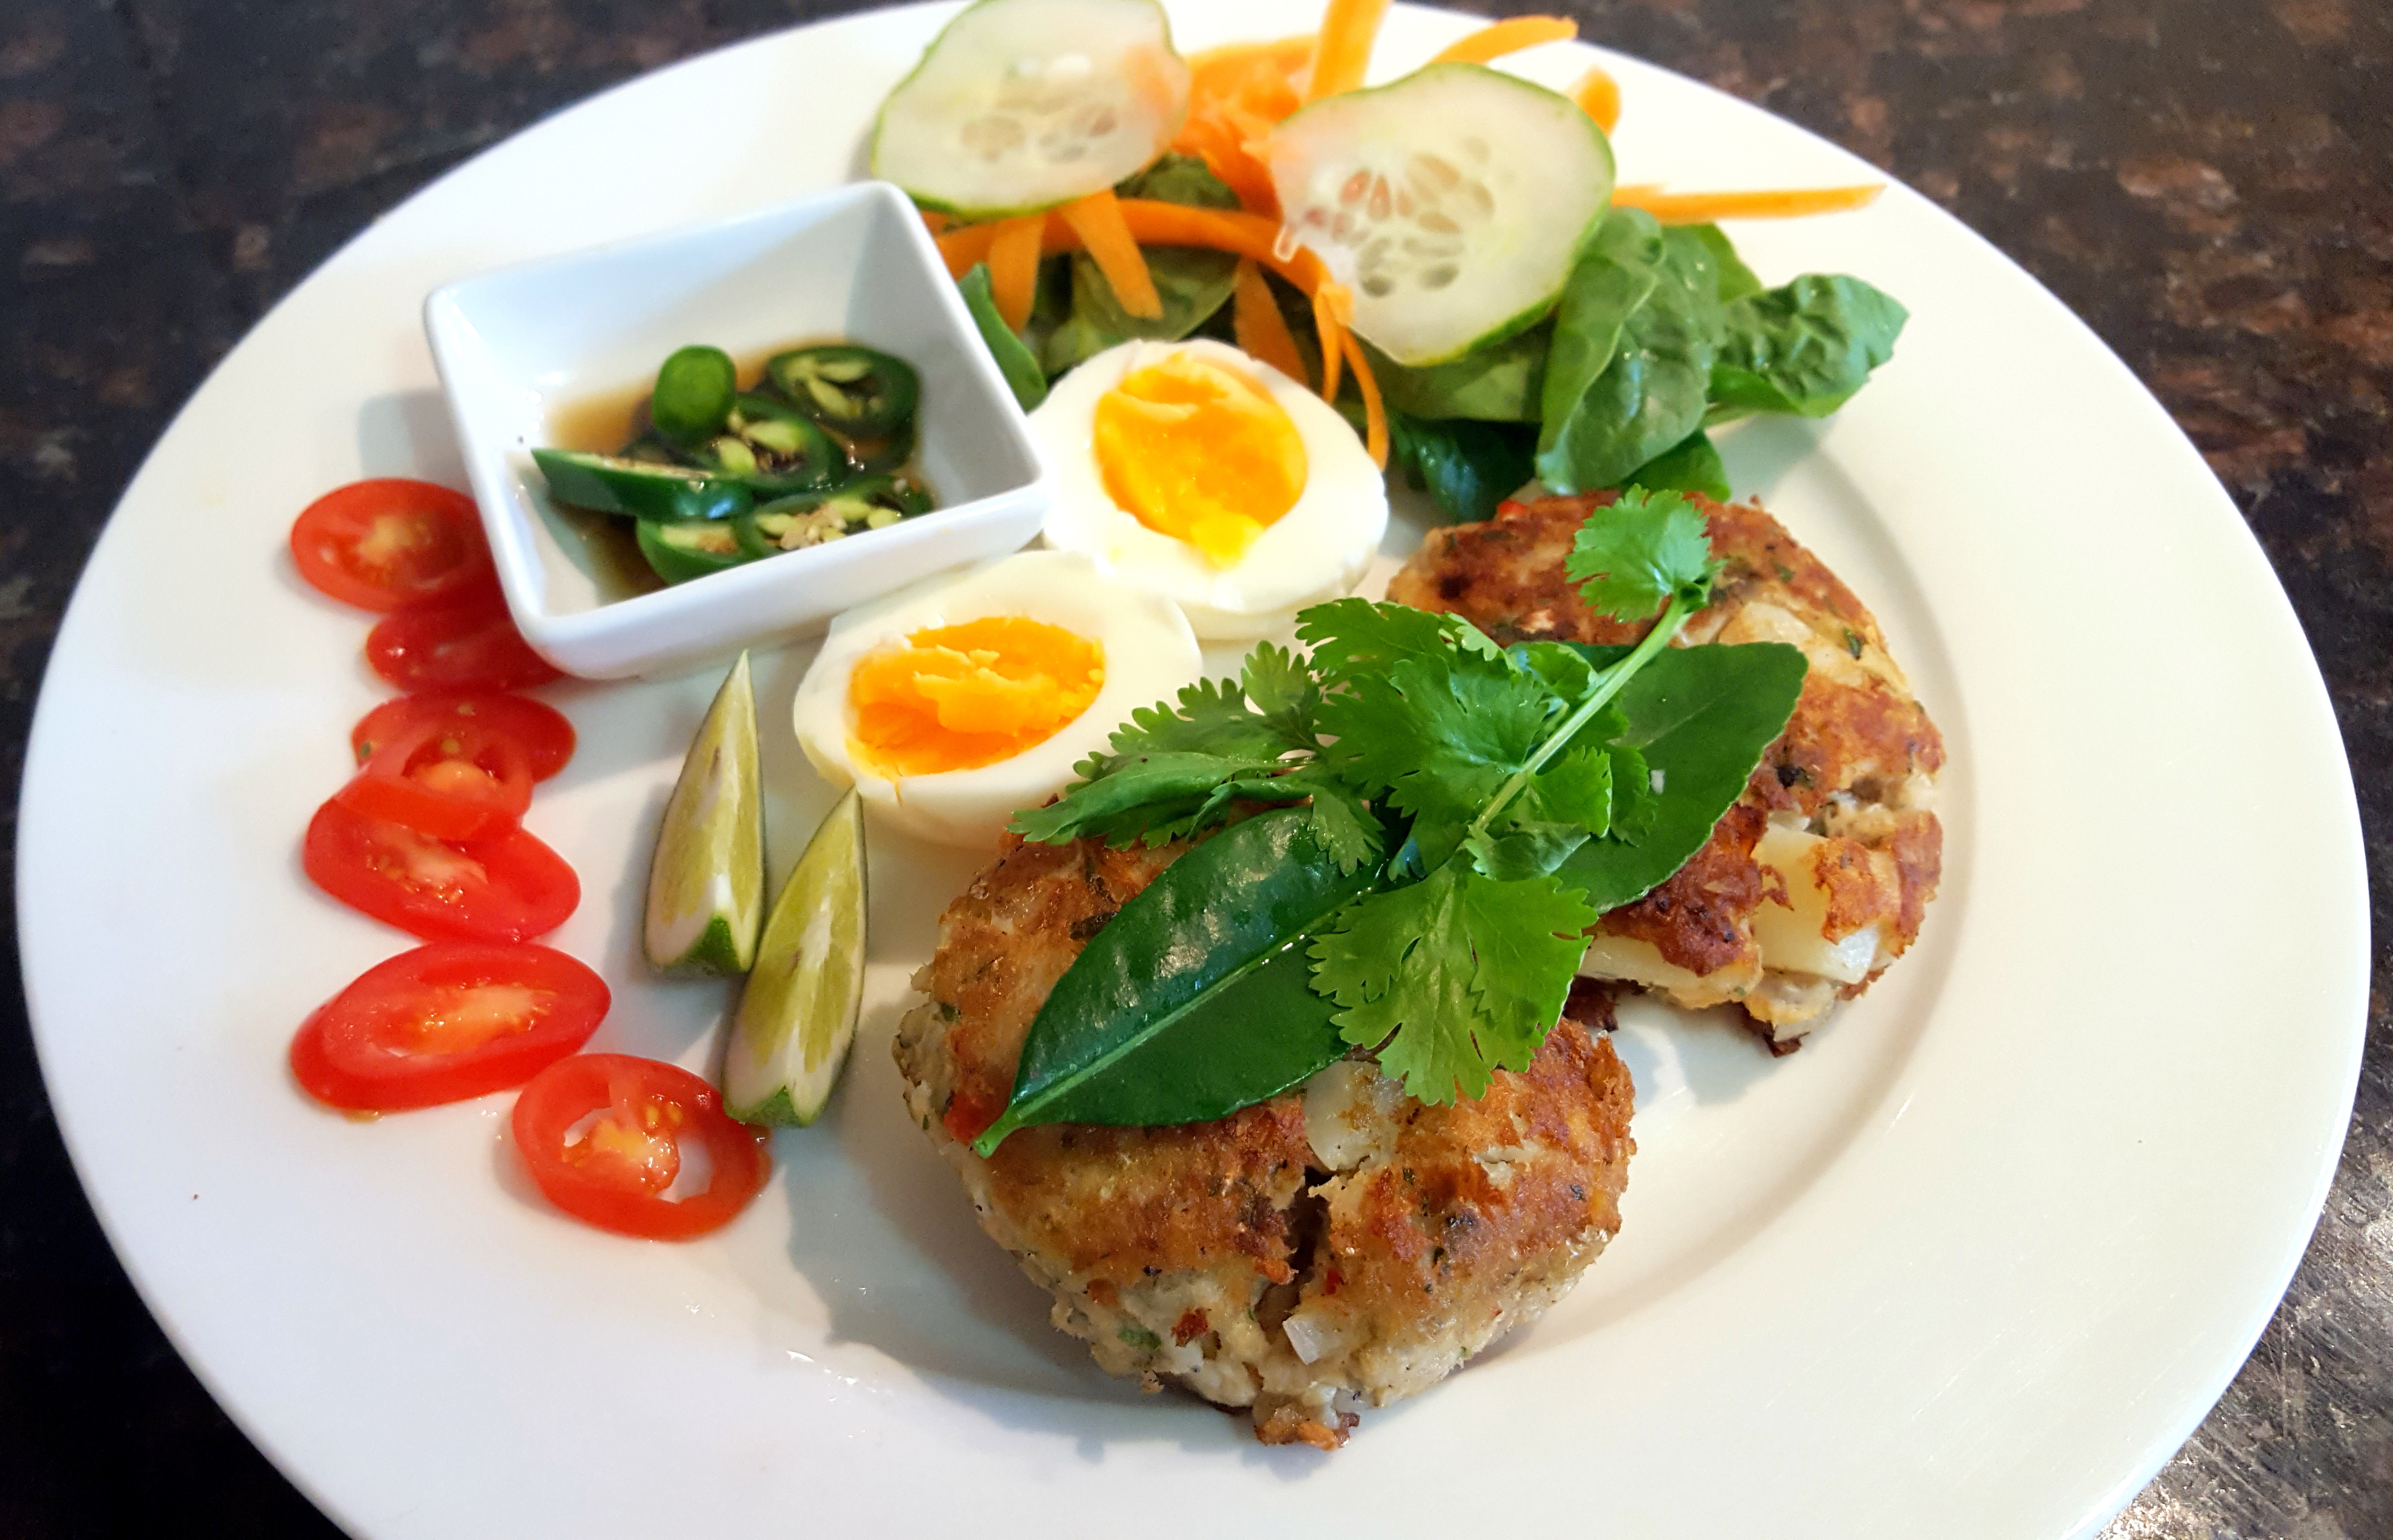
PK’s Easy Thai Fish Cakes
Fish cakes taste great and are an amazing way of making a little bit of fish go further. They were a staple growing up and one of the dishes, my mum cooked us, that will always stay with me :).

I never use a recipe and no two batches come out the same but that is half the fun.
Below I am doing a take on Thai fish cakes but I am just as likely to make them coated in breadcrumbs. Sometimes I keep the potatoes chunky, sometimes I mash everything well to give a smoother texture.
I just follow two basic rules in that I use a 1:1 ratio of fish to parboiled potatoes and I like to add colour by using finely minced fresh vegetables in the mix itself. If you find the cakes fall apart during cooking, try a bit more egg in the mix next time.
Parboil the potatoes:

Mash your fish (I am using canned John West Pink Salmon):

Prepare the vegetables (I am going for a Thai taste so I am using lime zest, shallots, coriander, garlic and some red capsicum for colour):

Whisk an egg or two and mix everything up (I did this gently as I wanted a chunky look):
Make small or large cakes, using your hands, as you please and then pop them in the fridge for a bit (just look at the colours, beautiful):

A quick shallow fry is all that is needed:

Serve with some greens and you favourite sides:

Enjoy,
PK
YOU MIGHT ALSO LIKE
THAI CUISINE
SOUTH EAST ASIAN FOOD
MORE POTATO DISHES
MORE NORECIPE GOODNESS
Please consider subscribing to a weekly email summary of our posts or check us out on Facebook @growitcatchitcookit.
[mc4wp_form id=”15771″]
Written by
·
-

Mung Bean Sprouts
Wikipedia writes ‘also known as the moong bean, green gram, or mung, is a plant species in the legume family. The mung bean is mainly cultivated in India, China, and Southeast Asia. It is used as an ingredient in both savoury and sweet dishes’.
Here are the seeds and as you can see I am buying them in larger quantities to save money:


My kids and I love growing them as sprouts:

Yum,
PK
Links:
- see more sprout posts here
- go to all meal ingredients
- go the Grow It Perth calendar
Written by
·
-

Lemongrass
I first learnt about this flavoursome member of the grass family when I started cooking the Thai classic soup, Tom Yum Goong. I have been growing it ever since for use in sauces, soups, salads and fish cakes.
The plant itself looks and smells amazing and is a natural mosquito repellent to boot :).
Taste/Aroma:
Lemongrass has a mild citrus taste and freshly cut stalks smell (to me anyway) like citrus, roses and herbs.
The stalks are particularly fibrous and are in this respect unpleasant to eat unless you remove the outer few layers and then the top two thirds of the stalk.
You then finely dice, grate or crush the bottom whiter part.

You can of course bend or bruise the whole stalk and use it to flavour soups and sauces, removing the stalk before serving.
Stalks:

Plant:

Harvesting Months:
- All months
Planting/Care:
It is really easy to grow and although you can buy plants from the nursery it is just a easy to get a few stalks with roots attached and plant them. Do this around November if possible. Mine is in the ground but it will do you proud in a pot too.
One way to harvest lemon grass is to pull sharply from the base. You are likely to get some roots and this will help it last longer. I have it on good authority that the Malay way is to cut the base of a stalk with a knife. New stalks will then grow from the cut.
Either way you will get new stalks growing for a continual harvest.
Regrowth if you use a knife instead:

Related Links:
- see more lemongrass posts here
- go to all meal ingredients
- go the Grow It Perth calendar
Written by
·
-

PK’s Cheaters Red Curry Paste
Here is my, unashamedly, unauthentic red curry paste :).

I use it to make Thai Red Chicken Curries and also Tom Kha Gai (one of my favourite south-east Asian soups).
Please read PK’s Curry Paste Kit before you get going and also ramp the chili factor skywards if you are allowed to. You will notice that I use a blender because I am a lazy cook. However I prefer the chunkier look of the paste if you use a mortar and pestle.
One last thing, I would love to use Kaffir lime zest instead of common limes but my tree never seems to fruit. I think it has something to do with what it is grafted to.
You will need:
- Ingredients:
- 1 Tbsp whole coriander seeds
- 0.5 Tbsp whole cumin seeds
- 1 Tbsp rock salt (add more if you want a more authentic taste)
- 0.5 tsp whole black peppercorns
- 1 Tbsp powdered kashmiri chili (add more and use whole chilis if you want a more authentic taste and look)
- 3 coriander roots
- 7cm of pickled galangal root
- 5 garlic cloves
- 3 lemongrass stalks, freshly harvested, leaves removed
- 1 large red shallot
- 1 Tbsp dried belacan (shrimp paste)
- 1 Tbsp lime zest (I used about 2 small limes to get this much)
- a dash of lime juice
- a dash of water (add less or more depending on your desired consistency)
- a dash of olive oil or garlic infused olive oil (I think you can skip this if you are using a mortar and pestle)
- 2 Kaffir lime leaves (sorry everyone, I know this is really not the done thing traditionally)
- Equipment
- a chopping board
- a sharp knife
- a serving bowl
- a wet blender with a very small bowl
- a dry spice mixer
- a medium frypan (for dry roasting the spices)
Make the paste
I love bringing everything together before I start cooking. The ingredients in this dish are so visually appealing and the aromas are simply amazing.

Steps:
- Dry roast the 1 Tbsp whole coriander seeds, 0.5 Tbsp whole cumin seeds and the 0.5 tsp whole black peppercorns.
- When cooled, pop them in you dry spice mixer and pulse to a rough consistency.
- Chuck the rest of the ingredients (at least roughly chopped) in your wet blender:
- 1 Tbsp powdered kashmiri chili
- 1 Tbsp rock salt
- 3 coriander roots
- 7cm of galangal root
- 5 garlic cloves
- 3 lemongrass stalks
- 1 large red shallot
- 1 Tbsp dried belacan
- 1 Tbsp lime zest
- a dash of lime juice
- a dash of water
- a dash of olive oil or garlic infused olive oil
- 2 Kaffir lime leaves

Storing
This paste freezes well in a small container or snap-lock bag. I prefer to make it in just enough of a quantity so I can use it fresh in a dish.
Enjoy and please send me your tips,
PK
Written by
·
- Ingredients:
-

Galangal (Alpinia galanga)
I was first introduced this root (from the ginger family) when I fell in love with and started cooking Tom yum goong. Tom yum is a Thai soup with a, hard to perfect, balance of hot and sour flavours and is exceptionally high in aromatic and visual appeal. I grow a lot of the ingredients for these soups in my kitchen garden, I like it that much :).

However, I generally buy the whole root (pickled) from my local Asian grocer. In Australia it is often called Galanga. It is also commonly available sliced and vacuum packed in the frozen section.I used to buy Galangal 🙂 now I grow it myself in pots rich in organics and in full sun. When you want to harvest it, pull a chunk out, cut what you want and slap the rest back under the soil. Be as rough as you want, this plant can take it!
I then use it in one of two ways:
- For soups I add it whole (see the picture above) but I bruise it with a rolling pin or score it with a knife to release the flavour. When the soup is done, I chuck the root into the compost bin.
- In pastes I slice it finely first (it is a very hard root and may make the wet blender wobble) and then blend it into the paste.
- Young leaves can be eaten too.
It is true what they say about regular ginger root being a poor substitute as it is much stronger flavoured in my opinion.
From Wikipedia:
Alpinia galanga, (also Languas galanga), a plant in the ginger family, is an herb used in cooking, especially in Indonesian and Thai cuisines. It is one of four plants known as galangal, and is differentiated from the others with the common name greater galangal (or simply Thai galangal).
An example of a live plant in my garden:

The flower is a beauty too:

So easy to split and regrow:

Enjoy,
PK
Related Links:
Please consider subscribing to get a weekly email summary of our posts.
[mc4wp_form id=”15771″]
Written by
·
-

Bish’s Chicken Congee for the Soul
The health benefits of your favourite comfort foods should not be underrated. Traditional recipes especially because they have been handed down from generation to generation for a reason.
Special guest blogger Bish writes:
I’ve been crook most of the week, and as a result I ended up cooking one of my “comfort” foods, congee, or rice porridge.
The thing is, when you are feeling sick, you really don’t feel like doing much, and you sure don’t feel like taking photos of the food you are doing for a potential blog down the road, so PK is going to have to steal some photos from elsewhere to illustrate this post.
Congee is eaten in many parts of the world, and it’s called all sorts of other things in other languages, but in my house (and my mother-in-law’s house) it gets called congee. My mother-in-law and I do bond a bit over cooking and gardening and she’s taught me a few things over the years – like adding dried scallops to my congee while it is cooking.
Anyway, congee has to be one of the simplest dishes to cook and (placebo or whatever) always makes me feel better.
You’ll need:
• Uncooked white rice
• Stock (like Ben’s medicinal chicken broth or PK’s slow cooker chicken stock)
• Other stuff you might want to throw in, like dried scallops
• Condiments – soy sauce, sesame oil, dried shallots and white pepper are my favouritesTo make it:
When I cook up a batch of stock, I freeze it into those takeaway containers that you have lying around, and so there’s always a few of these stored in the freezer – I should label them “in case of illness, make congee with this”. So I’ll start on the assumption that you have some in the freezer…Here we go:
- Take the frozen block of stock out of the freezer, and chuck it in a saucepan on low heat.
- Go take some more cold and flu medications while it defrosts, and turn up the heat a little as you get more liquid.
- When it comes to the boil, chuck in the optional bits you like, and a cup or two of uncooked rice. The amount you put in depends on how much you want to heat, as you’ll probably need to play with the liquid ratios anyway – two cups would do about four big bowls of congee.
- Intermittently come back and take a look at the pot – if it is too dry, add water (or if you have more stock, add more stock), if it is too wet, you can chuck in a bit more rice – but I tend to need to add more water than rice. It’s done when the rice has broken down into a sort of slurry (I know that’s not appetising).
- Turn off the heat and ladle out a bowl full of it. Then you want to finish it off; add in a splash of soy sauce (watch how salty your stock was), a few drops of sesame oil, white pepper and dried shallots. Then go and rug up, and sit and eat it all up. Usually, I then go and have a sleep for an hour or two and then come back, turn the pot back on, warm up the congee, and eat more, then repeat.
- If there’s still some left in the pot that evening, I throw it in the fridge overnight (pot and all) and then have it again for breakfast.
This is not the most amazing recipe in the world or anything, but if you are feeling lousy from a cold or whatever, it’s really easy to make and it does seem to help me get over colds and flus quicker.
I’m going back to bed now.
Bish
Here are more southeast asian inspired cuisine and posts from Bish:
Written by
·
-
Bish’s Chicken Porridge for the Soul
Comfort foods’ health benefits should not be underrated. Traditional recipes especially because they have been handed down from generation to generation for a reason.
Special guest blogger Bish writes:
I’ve been crook most of the week, and as a result I ended up cooking one of my “comfort” foods, congee, or rice porridge.
The thing is, when you are feeling sick, you really don’t feel like doing much, and you sure don’t feel like taking photos of the food you are doing for a potential blog down the road, so PK is going to have to steal some photos from elsewhere to illustrate this post.
Congee is eaten in many parts of the world, and it’s called all sorts of other things in other languages, but in my house (and my mother-in-law’s house) it gets called congee. My mother-in-law and I do bond a bit over cooking and gardening and she’s taught me a few things over the years – like adding dried scallops to my congee while it is cooking.
Anyway, congee has to be one of the simplest dishes to cook and (placebo or whatever) always makes me feel better.You’ll need:
• Uncooked white rice
• Stock (like Ben’s medicinal chicken broth or PK’s slow cooker chicken stock)
• Other stuff you might want to throw in, like dried scallops
• Condiments – soy sauce, sesame oil, dried shallots and white pepper are my favouritesTo make it:
When I cook up a batch of stock, I freeze it into those takeaway containers that you have lying around, and so there’s always a few of these stored in the freezer – I should label them “in case of illnesss, make congee with this”. So I’ll start on the assumption that you have some in the freezer…Here we go:
- Take the frozen block of stock out of the freezer, and chuck it in a saucepan on low heat.
- Go take some more cold and flu medications while it defrosts, and turn up the heat a little as you get more liquid.
- When it comes to the boil, chuck in the optional bits you like, and a cup or two of uncooked rice. The amount you put in depends on how much you want to heat, as you’ll probably need to play with the liquid ratios anyway – two cups would do about four big bowls of congee.
- Intermittently come back and take a look at the pot – if it is too dry, add water (or if you have more stock, add more stock), if it is too wet, you can chuck in a bit more rice – but I tend to need to add more water than rice. It’s done when the rice has broken down into a sort of slurry (I know that’s not appetising).
- Turn off the heat and ladle out a bowl full of it. Then you want to finish it off; add in a splash of soy sauce (watch how salty your stock was), a few drops of sesame oil, white pepper and dried shallots. Then go and rug up, and sit and eat it all up. Usually, I then go and have a sleep for an hour or two and then come back, turn the pot back on, warm up the congee, and eat more, then repeat.
- If there’s still some left in the pot that evening, I throw it in the fridge overnight (pot and all) and then have it again for breakfast.
This is not the most amazing recipe in the world or anything, but if you are feeling lousy from a cold or whatever, it’s really easy to make and it does seem to help me get over colds and flus quicker.
I’m going back to bed now.
Bish
Written by
·
-

PK’s Thai Beef Salad
I love south east asian salads. They are a feast for your eyes and your taste buds. The range of flavours is diverse and so hard to get right sometimes. The pay off is worth it though and this particular dish is no exception. It is now a family favourite and lends itself well to any communal meal.
I have shown my timing preferences below for serving the salad with warm beef slices. Of course, if you prefer cold meat in this dish, you can make them in any order and well ahead of time. Oh and don’t forget to bring your steaks out of the fridge a little earlier so they are approaching room temperature as they go in the frypan.
STEPS:
- Make the Nam jim dressing
- Roast the rice
- Gather the salad ingredients
- Cook the beef steaks
- Serving Suggestions
You will need:
- Nam jim Ingredients (repeated here for your shopping list):
- 1 tsp powdered kashmiri chilli
- 5 coriander roots (cilantro)
- 3 garlic cloves
- 2.5cm piece fresh ginger root
- 3 Tbsp fish sauce
- 3 Tbsp lime juice
- 1 Tbsp palm sugar
- Roasted Rice Ingredients
- 100g of basmati or jasmine rice
- 1 Tbsp of rock sea salt
- Salad Ingredients
- several large cabbage leaves (1 per person)
- 2 cups baby spinach leaves
- 1 handful of coriander leaves and stems
- 1/2 large red capsicum
- 1/3 of a burpless cucumber
- 1 red shallot
- 1 spring onion
- 6 cherry tomatoes
- 1 cup bean sprouts
- 1 handful of mint leaves
- 1 medium carrot
- 1 handful of snow peas
- your favourite fresh chilis (optional)
- unsalted peanuts to taste (optional)
- Steak Ingredients
- small eye fillet steaks (1 per person)
- ground black pepper to taste
- table salt to taste
- kecap manis or soy sauce (optional)
- Equipment
- an oven tray
- a mortar and pestle
- a chopping board
- a small serving bowl for the roasted rice
- a large salad bowl
- a large frypan
Make the Nam jim dressing

Steps:
- Make the Nam Jim dressing as per PK’s Favourite Nam Jim Dressing.
Roast the rice
Steps:
- Pre-heat your oven to 200° C.
- Spread the rice grains across an oven tray and cook for about 15 minutes or until golden brown.
- Remove them from the oven and allow them to cool.
- Grind 1 Tbsp of rock sea salt in a mortar and pestle.
- Add the cooled roasted rice grains to the mortar and pestle and grind to your desired consistency. I personally like the result to be variably granulated and not fully powdered.
- Add to a small serving bowl.
Gather the salad ingredients
Steps:
- Wash and dry all of the vegetables.
- Put the cabbage leaves aside as you won’t need them until serving time.
- Keep the 1 cup of bean sprouts aside for the same reason
- Slice and then
- To a large salad bowl add:
- 2 cups baby spinach leaves
- 1 handful of hand torn coriander leaves and stems
- 1/2 red capsicum fine sliced (deseeded and pith removed)
- 1/3 of a burpless cucumber sliced and quartered
- 1 shallot fine sliced
- 1 spring onion fine sliced
- 6 halved cherry tomatoes
- 1 handful of hand torn mint leaves
- 1 medium carrot fine sliced (I use a potato peeler to make thin strips)
- 1 handful of hand torn snow peas (chop the ends off each first.
Cook the beef steaks

Steps:
- Preheat your frypan and add a splash of olive oil. You could barbecue them outside of course but I prefer a frypan when cooking eye fillet steaks.
- Cook the eye fillet steaks to medium rare and allow them to rest, optionally adding a bit of kecap manis or soy sauce at this point.
- Thinly slice the cooked steaks.
Serving Suggestions
Steps:
- Place a whole cabbage leaf on each plate.
- Fill to the brim with the salad ingredients.
- Add the beef slices.
- Throw some bean sprouts over the top.
- Serve to the table and let each person add as much or as little of the roasted rice and Nam jim dressing as they like.
- Have sliced fresh chillis and unsalted peanuts on the table for just the same reason.
Enjoy,
PK
Written by
·
-
Easy Thai Beef Salad
I love southeast asian salads. They are a feast for your eyes and your taste buds. The range of flavours is so diverse, you will never get bored of them.
The key to a good beef salad is a great dressing and a good cut of beef that is thinly sliced and not over cooked. I hope you enjoy making the nam jim dressing and building the salad at the table like my family does. 🙂
Notes: I have shown my timing preferences below for serving the salad with warm beef slices. Of course, if you prefer cold meat in this dish, you can make them in any order and well ahead of time. Oh and don’t forget to bring your steaks out of the fridge a little earlier so they are approaching room temperature as they go in the fry-pan.
STEPS:
- Make the Nam jim dressing
- Roast the rice
- Gather the salad ingredients
- Cook the beef steaks
- Serving Suggestions
You will need:
- Nam jim Ingredients (repeated here for your shopping list):
- 1 tsp powdered kashmiri chilli
- 5 coriander roots (cilantro)
- 3 garlic cloves
- 2.5cm piece fresh ginger root
- 3 Tbsp fish sauce
- 3 Tbsp lime juice
- 1 Tbsp palm sugar
- Roasted Rice Ingredients
- 100g of basmati or jasmine rice
- 1 Tbsp of rock sea salt
- Salad Ingredients
- several large cabbage leaves (1 per person)
- 2 cups baby spinach leaves
- 1 handful of coriander leaves and stems
- 1/2 large red capsicum
- 1/3 of a burpless cucumber
- 1 red shallot
- 1 spring onion
- 6 cherry tomatoes
- 1 cup bean sprouts
- 1 handful of mint leaves
- 1 medium carrot
- 1 handful of snow peas
- your favourite fresh chilis (optional)
- unsalted peanuts to taste (optional)
- Steak Ingredients
- small eye fillet steaks (1 per person)
- ground black pepper to taste
- table salt to taste
- kecap manis or soy sauce (optional)
- Equipment
- an oven tray
- a mortar and pestle
- a chopping board
- a small serving bowl for the roasted rice
- a large salad bowl
- a large frypan
Make the Nam jim dressing
Steps:
- Make the Nam Jim dressing as per PK’s Favourite Nam Jim Dressing.
Roast the rice
Steps:
- Pre-heat your oven to 200° C.
- Spread the rice grains across an oven tray and cook for about 15 minutes or until golden brown.
- Remove them from the oven and allow them to cool.
- Grind 1 Tbsp of rock sea salt in a mortar and pestle.
- Add the cooled roasted rice grains to the mortar and pestle and grind to your desired consistency.
- Add the finished product into a small serving bowl.
Gather the salad ingredients
Steps:
- Wash and dry all of the vegetables.
- Put the cabbage leaves aside, you won’t need them until serving time.
- Keep the 1 cup of bean sprouts aside for the same reason
- To a large salad bowl add:
- 2 cups baby spinach leaves
- 1 handful of hand torn coriander leaves and stems
- 1/2 red capsicum fine sliced (deseeded and pith removed)
- 1/3 of a burpless cucumber sliced and quartered
- 1 shallot fine sliced
- 1 spring onion fine sliced
- 6 halved cherry tomatoes
- 1 handful of hand torn mint leaves
- 1 medium carrot fine sliced (I use a potato peeler to make thin strips)
- 1 handful of hand torn snow peas (chop the ends off each first.
Cook the beef steaks
Steps:
- Preheat your fry-pan and add a splash of olive oil. You could barbecue them outside of course but I prefer a fry-pan when cooking eye fillet steaks.
- Cook the eye fillet steaks to medium rare and allow them to rest, optionally adding a bit of kecap manis or soy sauce at this point.
- Thinly slice the cooked steaks.
Serving Suggestions
Steps:
- Place a whole cabbage leaf on each plate.
- Fill to the brim with the salad ingredients.
- Add the beef slices.
- Throw some bean sprouts over the top.
- Serve along with the roasted rice and Nam jim dressing, sliced fresh chillis and unsalted peanuts.
Enjoy,
PK
Here are more southeast asian inspired cuisine and salad posts:
Written by
·