Tag: Bish
-
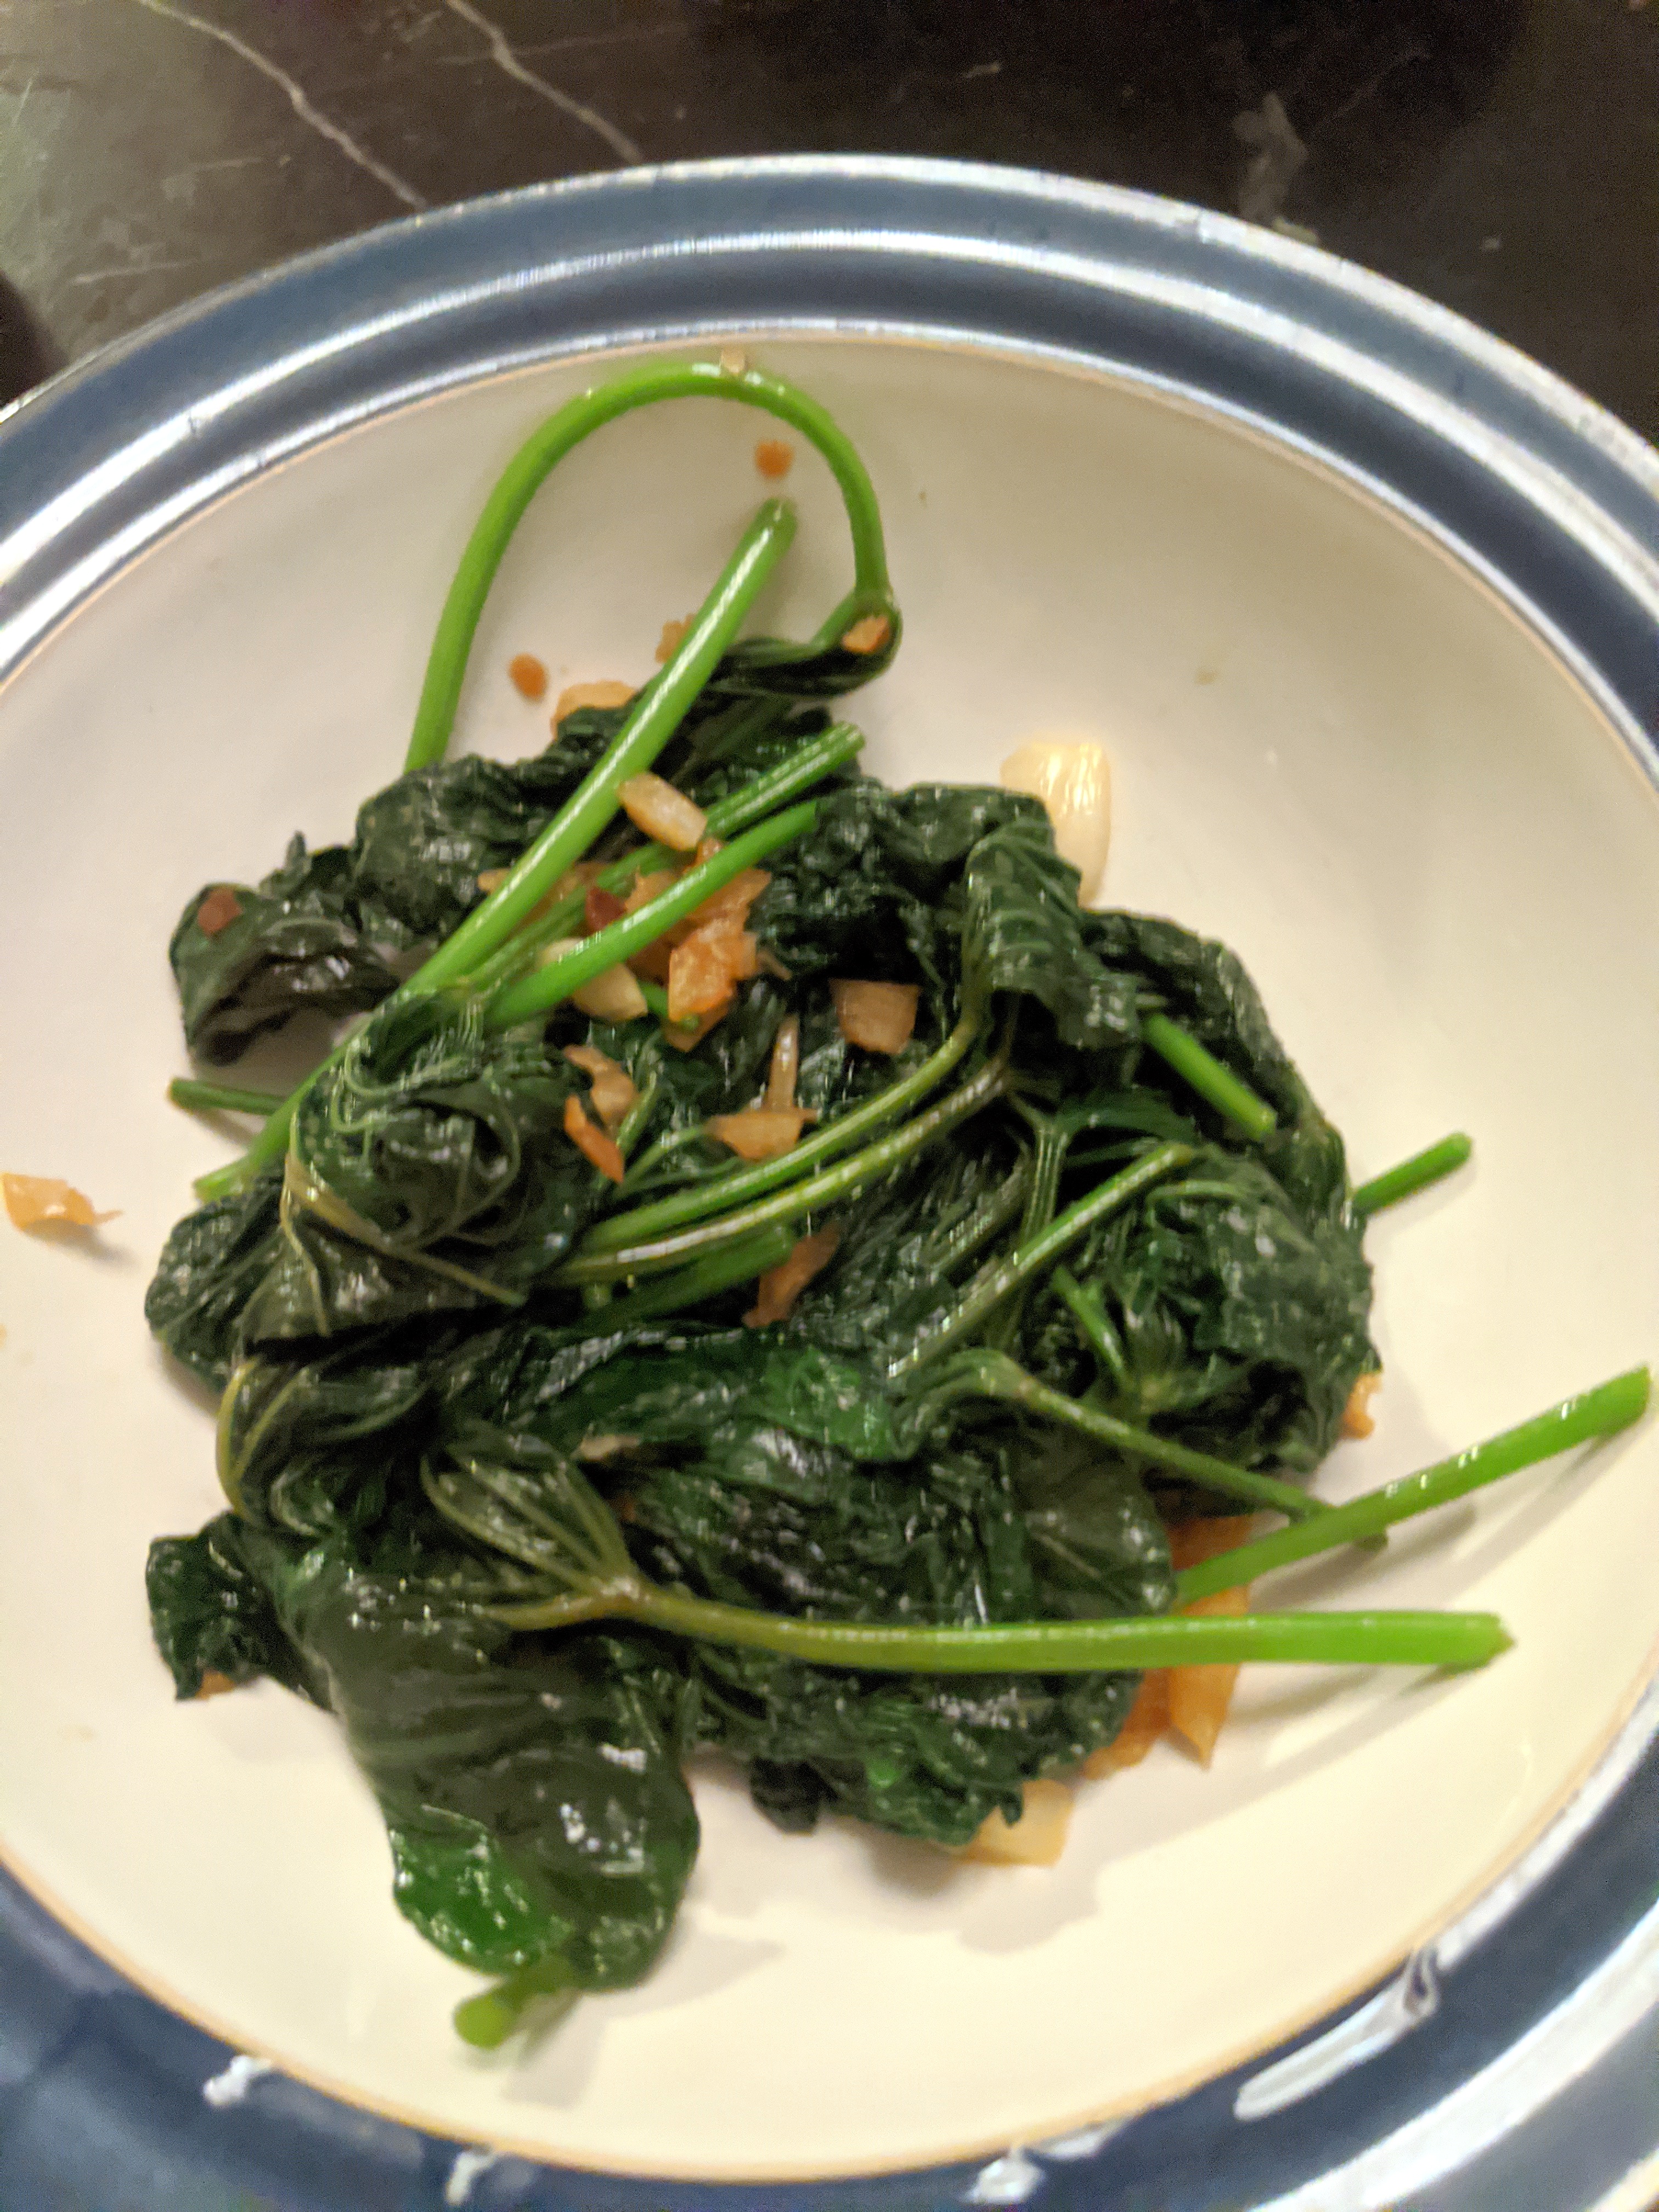
Bish’s Sweet Potato Surprise
I have grown plenty of sweet potatoes in my gardens over the years, and they’re really easy to grow generally, although I’ve had hit and miss crops from them in terms of the potatoes themselves.
But this year, when faced with a sprouting sweet potato in the cupboard, I decided to try something different, and to instead grow it for the leaves, which I didn’t realise were edible. And I’m really glad I did it.

The other night, I harvested a bunch of the smaller leaves off a bunch of runners in the pot, and trimmed them off the main stalks – so I had a bunch of leaves with stems attached, as you can see in the pictures of them in the bowl for washing. I washed them well, a few times, to make sure they were clean, and then I stir fried them.

I used what I had in the cupboard – so in this case it was a couple of cloves of garlic , which I let fry up a bit until they were nice and crunchy, and then tossed in the leaves, along with a splash of soy sauce and sesame oil. Once the leaves had wilted down, I grabbed them out and immediately served them as a side to a separate red curry I had made. The taste is a bit like spinach, and the texture reminds me of kang kong, another of my favourite asian greens.


It was a nice little addition to dinner – and afterwards when my wife told my mother-in-law (who is Chinese Malaysian, and is who I get a lot of my cooking inspiration from), she said they used to do it a lot, and she had forgotten it! So I got a few brownie points with her as well.
It’s a fast growing, prolific vegetable that I reckon is worth a try for both the leaves and the tubers themselves.
Bish
Here is some more from Josh and other baked goodies:
Written by
·
-
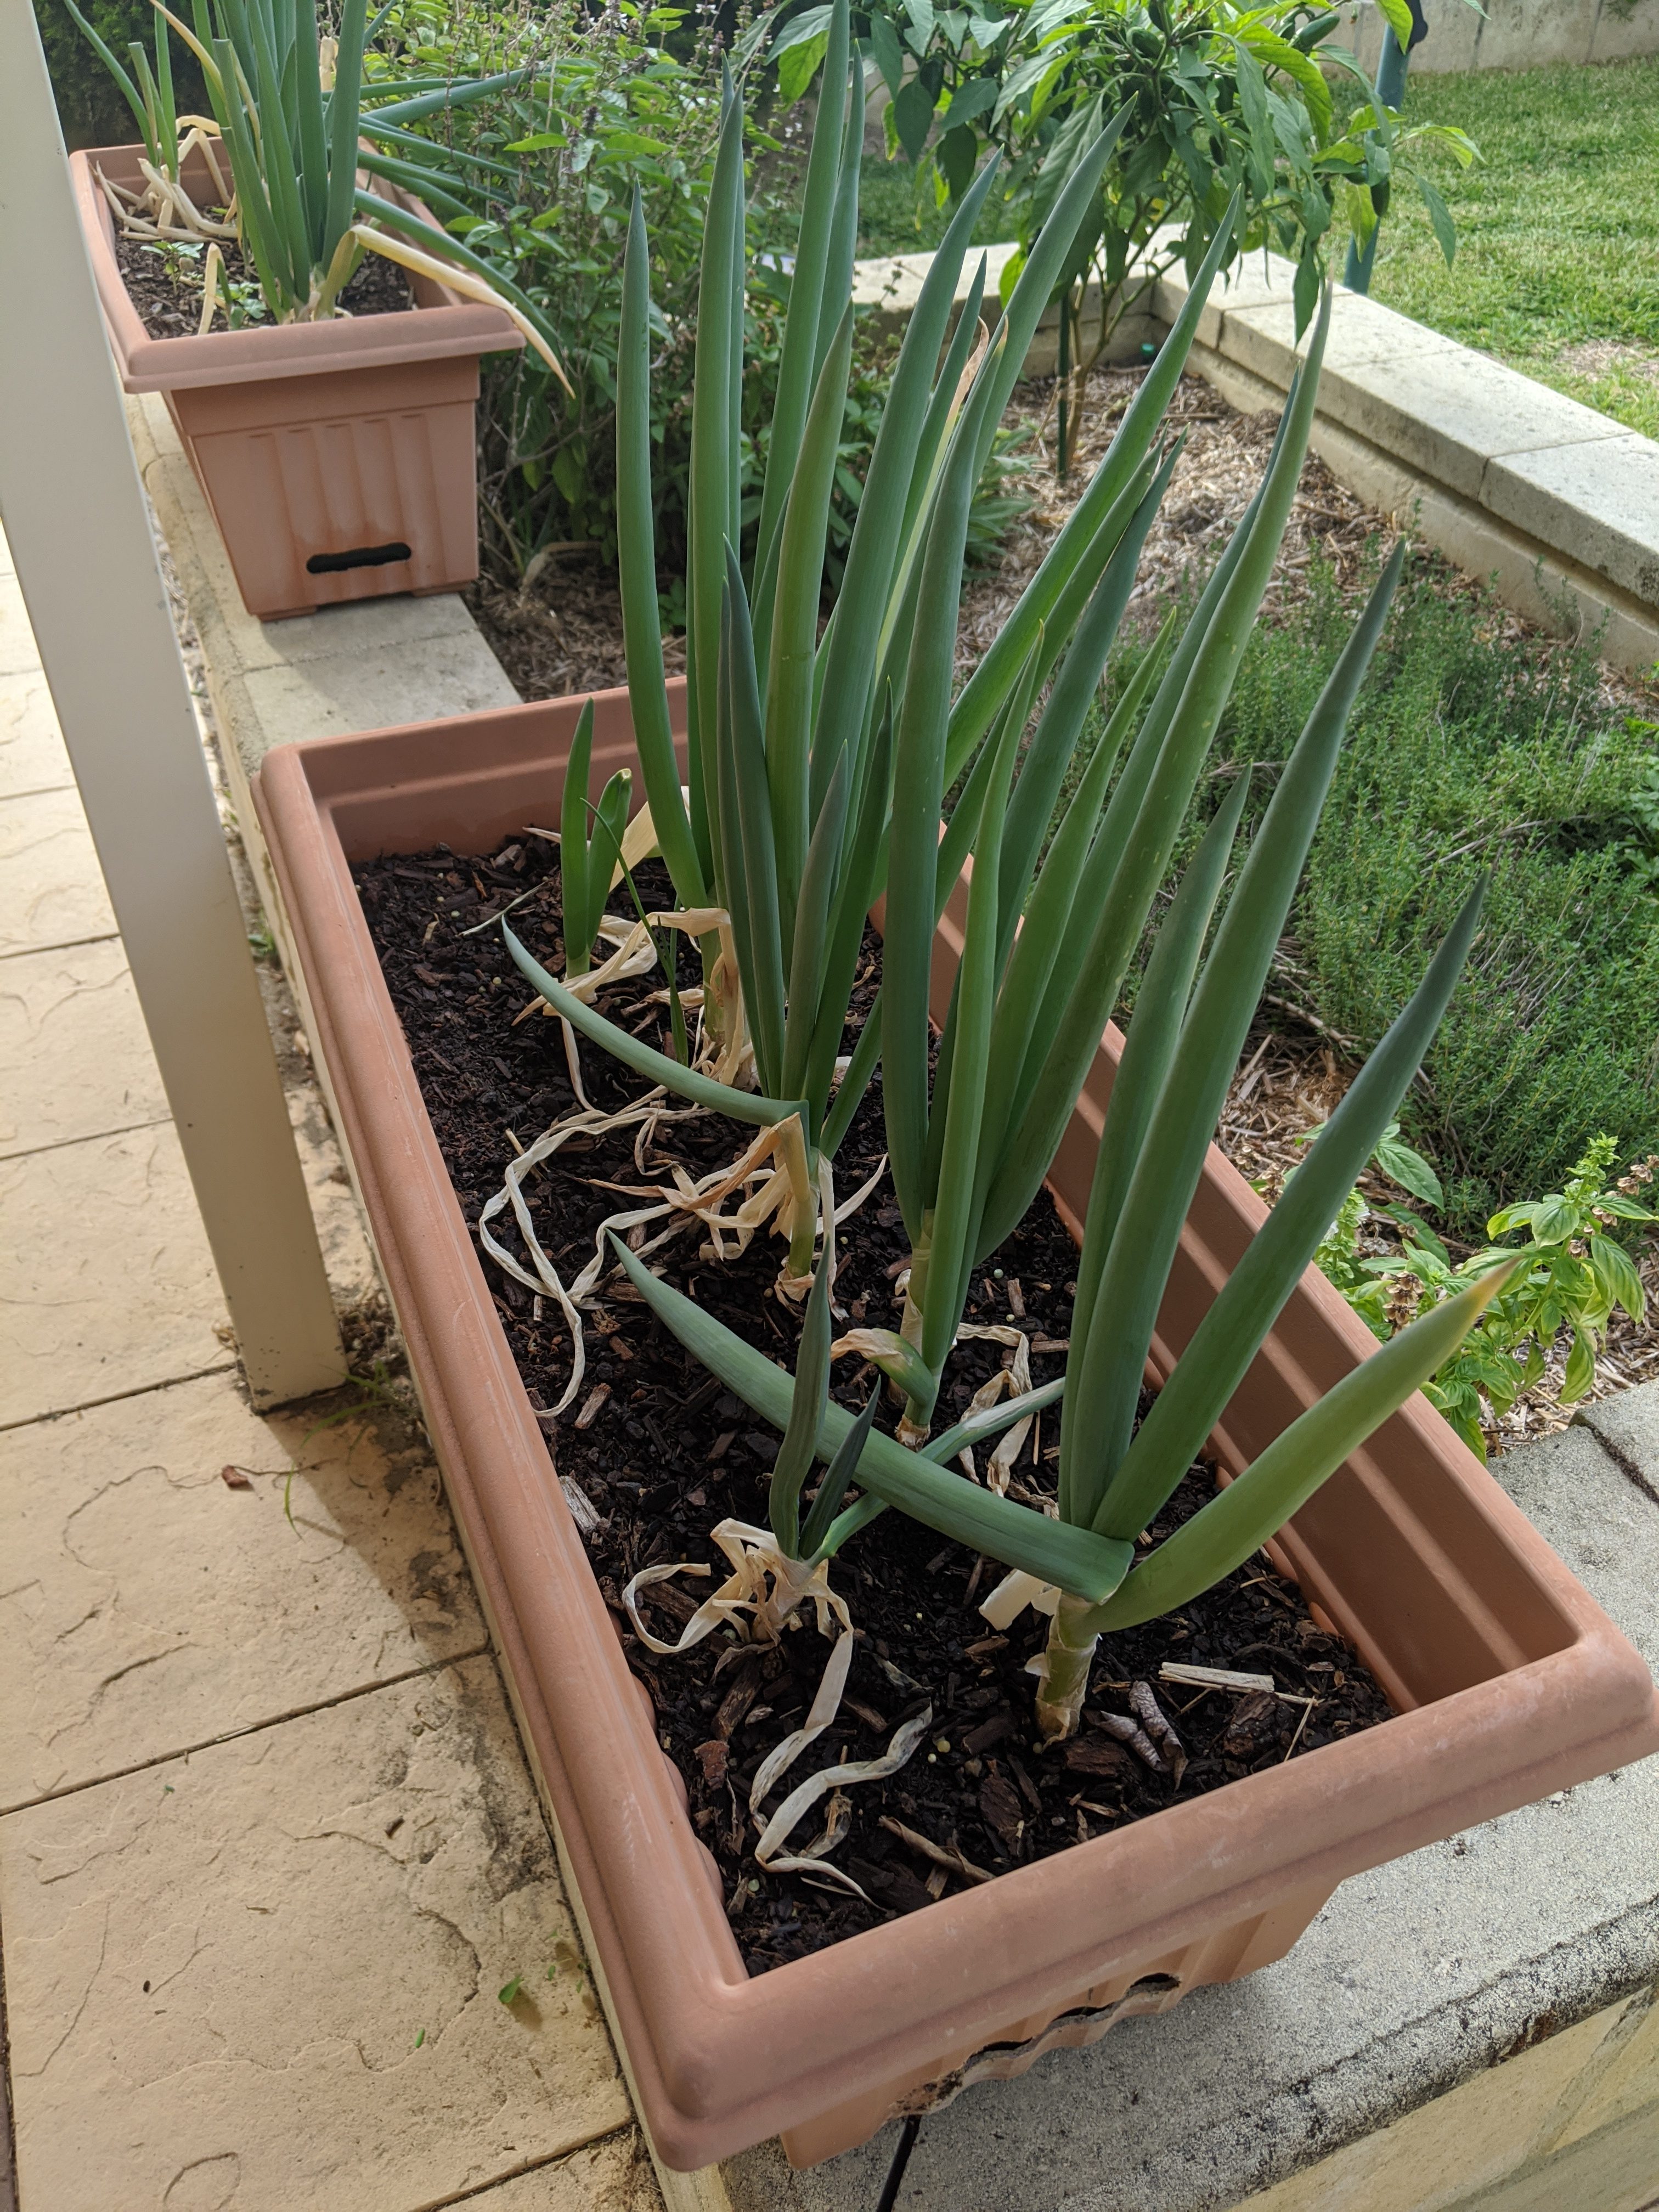
Bish Grows Spring Onions The Thrifty Way
I’ll readily admit I heard about this from PK directly, and have been super happy with how it’s gone – I’ve not bought spring onions for over a year as a result.
The trick is to buy (your last!) bunch of spring onions from the supermarket, and make sure a few of the ends have roots on them. Then, cut off that part with a centimetre or two of stalk above the roots and stick them in a pot of well draining potting mix.
These were my first two, just chucked in a pot as a tester a long time ago (April, 2018). They quickly grew and grew, and I let them go to seed, so that I could collect the seeds and re-sow them.

I then sowed a few seeds here and there, but in the meantime, bought some more spring onions from the shops, and then started dropping the bases into larger pots… along with a few coming up from seed.

These grow really quite rapidly, in a matter of days you have spring onions growing rapidly (these ones in the picture below were planted around a day or two apart to get the gist of how quickly they grow).

Nowadays I have three of these longer pots with onions in them, so I can pretty much grab one or two whenever I want to – I just get a pair of scissors and cut them off just above the ground level, and then they reshoot.
Here they are today:

Last year, I let the whole lot go to seed at one point, and then completely ripped them all out of the pots and replaced all the potting mix. The soil was a tangled web of little white roots, and I simply shoved them into a back corner of the garden out of the way to see what would happen – they pretty much all kicked the bucket without the attention (i.e. water) they normally get in the pots (they’re on our herb bed edges, where we tend to water frequently).
I know this isn’t great for the farmers that grow the spring onions, but I hope that this can free them up to grow more difficult (and profitable?) vegetables for me – like leeks or other veggies that I can’t grow in the garden!
Anyway, this is such a simple thing to do, and it’s meant that we’ve saved a bit of money buying veggies, and can always get a fresh spring onion from the garden whenever we need one!
Enjoy the gardening in solitude,
Bish
Here are some more of Bish’s tips and kitchen ingredients:
Written by
·
-

Bish’s Burning Mango Salsas
A long time ago I was in Darwin for work and had a few extra days to explore a place I now think of as one of my favourite Australian cities. One of my fondest memories was going to the markets and sampling food that was really unique – fusions of different cultures and tastes I’ve struggled to find anywhere else.
One of the strongest memories of taste was of some dried mango that was dusted with chilli and salt. I’ve not seen this for a while, and with my mother in law giving me a bag of mangoes the other day I decided to embrace my inner Top Ender and see what I can create.

Salsa 1: Mango Salsa with Chilli, Lime and Salt
Take your bounty of mangoes and remove all the flesh from the fruit – as much as you can! I cut the cheeks off and then score the flesh, invert the skin and slide the chunks off (make sure to let the juice dribble in as well, don’t lose that!). Then separately, take a mortar and pestle, and crush up some dried chillies (I still have some really hot birds eye ones from a crop a year or so ago, so I use two for about a small bowl of fruit), and chuck them into the mango chunks. The final two touches – salt (a pinch for a small bowl, but start light and add more if you need to), and some zest of a lime and the juice (about ½ a lime’s worth for a small bowl).


Salsa 2: Mango Salsa with Balachaung
The second one is a bit of a cheat. I am quite fond of a condiment called balachaung, which is a sort of dried relish of dried shallots, garlic, shrimp, salt and chilli. It is a super tasty, hot, salty topping that works a treat on leftovers like fried rice. I get mine from the local Asian supermarkets (pretty much my basket always has some “sweet meat”, a can of soy bean milk and a can of “grass jelly drink”. I’ll have to take PK shopping there sometime…

Repeat the steps above to get the fruit cut up and into a bowl, and then sprinkle the balauchaung on top of the mango. That’s pretty much it – but be careful that you don’t overdo this one.
Serving
Both of these salsas are pretty good by themselves (or on crackers or something), but they also are a pretty good accompaniment to seafood like prawns… which is how we’re going to eat these ones tonight!

Bish
PS pair this dish with Craigo’s NoRecipe BBQ Prawn Skewers
Here are more posts by Bish and uses of chillies:
Written by
·
-

Bish’s Basil Pesto Experiment 1
I have two large planter boxes at the edge of our patio that are where I grow my herbs, along with a long thin veggie patch against a fence. Luckily this space is enough for me to play around with some different herbs and veggies.
Giving the long thin veggie patch a bit of a spruce:
Lately we’ve had a surfeit of basil in one of the planter boxes (the other is full of mint) and after some prompting we decided we’d have a go at making pesto.

After picking and washing a heap (and returning a few little spiders back to the patch) we decided we’d try to make a couple of varieties.
The first one we started with basil in a stick blender attachment, and poured in olive oil. It mulched the basil more than anything else, but as we added pine nuts it started to blend down a bit more. Adding some spring onions as a test didn’t help with the mulch-like consistency, though. That wasn’t a great experiment, especially when I didn’t close the blender attachment properly and got it all over myself, the kitchen bench and floor…
The second batch started with four cloves of garlic, and some olive oil. This went into a nice creamy paste quickly, and we added some more pine nuts and then started to add in some basil. This created a much creamier pesto, which went a vibrant light green pretty quickly. Unfortunately, 4 cloves of garlic is a bit much… it’s more like a garlic sauce.
On an earlier trip out that day I’d bought a couple of flip-top seal jars, and after they’d been washed and dried out I loaded up the basil into one each.

I was pretty chuffed with this, but anywhere where there is air (you can see the bubbles) went brown within minutes . I had poured some oil on top to help seal it away from the air but didn’t think about these little air pockets.
A week later we’ve been using the pesto in various dishes (pasta, mainly) but each time we have to scoop out the unsightly brown bits. It’s a bit of a pain, but it doesn’t take away from the taste. The next trick we will try is to blanche the basil and dry it before we turn it into pesto – this should help as the heat will destroy the enzymes that react with oxygen to cause the brown discolouration.
It’s not like we don’t have heaps more basil to test it on, anyway…
Bish
Related Links:
- see more of Bish’s posts here
Please consider subscribing to get a weekly email summary of our posts.
[mc4wp_form id=”15771″]
Written by
·
-

Bish Is Rocketing Along
Bish writes:
I am a persistent casual gardener, in that I keep trying but due to work and life I don’t spend as much time as I should on maintenance and the like. My garden’s nothing like Ben’s! Anyway, now that the team are testing out some of the Mr Fothergill’s planters, I thought I’d chip in with my own story about using their products.
I had a burst of energy the other day and decided that I would clean up the little herb beds that we have out the back. These are really productive little raised beds, and I think because we have good drainage and they get the morning sun, they are especially so in winter. Anyway, I removed a bunch of mint, an old sage plant that was starting to struggle (after three years of providing us with plenty of leaves for burnt sage butter, yum), an old thyme plant and some old oregano stragglers. I ended up still having a bunch of space left in one of them.
I had started to organise my seed collection (I usually let one of my crop go to seed so that I have some seeds to play with next time) I found a five year old packet of Mr Fothergill’s seeds, this one containing Rocket. I figured after that long these were probably not too viable, so I just scattered the seeds across the empty space in my herb bed and raked it through just to cover the seeds, and thought no more about it.

As you can see in the picture, here we are a few weeks later and pretty much all of them have germinated and I am going to be faced with a massive oversupply of Rocket in the near future, so looks like we’ll be making pesto or something with it all! It certainly says something about the viability of seeds and how they are able to persist in many situations – and the way they’re treated by Mr. Fothergill’s!I’ll keep an eye out for some good pesto recipes but if anyone else knows some please send them in!
Bish
Related Links:
- see more of Bish’s posts here
Please consider subscribing to get a weekly email summary of our posts.
[mc4wp_form id=”15771″]
Written by
·
-

Bish’s Chicken Congee for the Soul
The health benefits of your favourite comfort foods should not be underrated. Traditional recipes especially because they have been handed down from generation to generation for a reason.
Special guest blogger Bish writes:
I’ve been crook most of the week, and as a result I ended up cooking one of my “comfort” foods, congee, or rice porridge.
The thing is, when you are feeling sick, you really don’t feel like doing much, and you sure don’t feel like taking photos of the food you are doing for a potential blog down the road, so PK is going to have to steal some photos from elsewhere to illustrate this post.
Congee is eaten in many parts of the world, and it’s called all sorts of other things in other languages, but in my house (and my mother-in-law’s house) it gets called congee. My mother-in-law and I do bond a bit over cooking and gardening and she’s taught me a few things over the years – like adding dried scallops to my congee while it is cooking.
Anyway, congee has to be one of the simplest dishes to cook and (placebo or whatever) always makes me feel better.
You’ll need:
• Uncooked white rice
• Stock (like Ben’s medicinal chicken broth or PK’s slow cooker chicken stock)
• Other stuff you might want to throw in, like dried scallops
• Condiments – soy sauce, sesame oil, dried shallots and white pepper are my favouritesTo make it:
When I cook up a batch of stock, I freeze it into those takeaway containers that you have lying around, and so there’s always a few of these stored in the freezer – I should label them “in case of illness, make congee with this”. So I’ll start on the assumption that you have some in the freezer…Here we go:
- Take the frozen block of stock out of the freezer, and chuck it in a saucepan on low heat.
- Go take some more cold and flu medications while it defrosts, and turn up the heat a little as you get more liquid.
- When it comes to the boil, chuck in the optional bits you like, and a cup or two of uncooked rice. The amount you put in depends on how much you want to heat, as you’ll probably need to play with the liquid ratios anyway – two cups would do about four big bowls of congee.
- Intermittently come back and take a look at the pot – if it is too dry, add water (or if you have more stock, add more stock), if it is too wet, you can chuck in a bit more rice – but I tend to need to add more water than rice. It’s done when the rice has broken down into a sort of slurry (I know that’s not appetising).
- Turn off the heat and ladle out a bowl full of it. Then you want to finish it off; add in a splash of soy sauce (watch how salty your stock was), a few drops of sesame oil, white pepper and dried shallots. Then go and rug up, and sit and eat it all up. Usually, I then go and have a sleep for an hour or two and then come back, turn the pot back on, warm up the congee, and eat more, then repeat.
- If there’s still some left in the pot that evening, I throw it in the fridge overnight (pot and all) and then have it again for breakfast.
This is not the most amazing recipe in the world or anything, but if you are feeling lousy from a cold or whatever, it’s really easy to make and it does seem to help me get over colds and flus quicker.
I’m going back to bed now.
Bish
Here are more southeast asian inspired cuisine and posts from Bish:
Written by
·
-
Bish’s Chicken Porridge for the Soul
Comfort foods’ health benefits should not be underrated. Traditional recipes especially because they have been handed down from generation to generation for a reason.
Special guest blogger Bish writes:
I’ve been crook most of the week, and as a result I ended up cooking one of my “comfort” foods, congee, or rice porridge.
The thing is, when you are feeling sick, you really don’t feel like doing much, and you sure don’t feel like taking photos of the food you are doing for a potential blog down the road, so PK is going to have to steal some photos from elsewhere to illustrate this post.
Congee is eaten in many parts of the world, and it’s called all sorts of other things in other languages, but in my house (and my mother-in-law’s house) it gets called congee. My mother-in-law and I do bond a bit over cooking and gardening and she’s taught me a few things over the years – like adding dried scallops to my congee while it is cooking.
Anyway, congee has to be one of the simplest dishes to cook and (placebo or whatever) always makes me feel better.You’ll need:
• Uncooked white rice
• Stock (like Ben’s medicinal chicken broth or PK’s slow cooker chicken stock)
• Other stuff you might want to throw in, like dried scallops
• Condiments – soy sauce, sesame oil, dried shallots and white pepper are my favouritesTo make it:
When I cook up a batch of stock, I freeze it into those takeaway containers that you have lying around, and so there’s always a few of these stored in the freezer – I should label them “in case of illnesss, make congee with this”. So I’ll start on the assumption that you have some in the freezer…Here we go:
- Take the frozen block of stock out of the freezer, and chuck it in a saucepan on low heat.
- Go take some more cold and flu medications while it defrosts, and turn up the heat a little as you get more liquid.
- When it comes to the boil, chuck in the optional bits you like, and a cup or two of uncooked rice. The amount you put in depends on how much you want to heat, as you’ll probably need to play with the liquid ratios anyway – two cups would do about four big bowls of congee.
- Intermittently come back and take a look at the pot – if it is too dry, add water (or if you have more stock, add more stock), if it is too wet, you can chuck in a bit more rice – but I tend to need to add more water than rice. It’s done when the rice has broken down into a sort of slurry (I know that’s not appetising).
- Turn off the heat and ladle out a bowl full of it. Then you want to finish it off; add in a splash of soy sauce (watch how salty your stock was), a few drops of sesame oil, white pepper and dried shallots. Then go and rug up, and sit and eat it all up. Usually, I then go and have a sleep for an hour or two and then come back, turn the pot back on, warm up the congee, and eat more, then repeat.
- If there’s still some left in the pot that evening, I throw it in the fridge overnight (pot and all) and then have it again for breakfast.
This is not the most amazing recipe in the world or anything, but if you are feeling lousy from a cold or whatever, it’s really easy to make and it does seem to help me get over colds and flus quicker.
I’m going back to bed now.
Bish
Written by
·
-

Bish’s Curry Nuts
We have a new special guest blogger and this guy know a lot about the web of life and the impact that feeding our population has on it. It is partly because of him that I realise we have a moral duty to ask where our food comes from and how it gets to us. It is important not to waste one iota of the food we grow, so I love any recipe that helps.
So here is his first post.
Bish writes:

.
We have an overactive curry leaf plant (Murraya koenigii) in our garden and we have been struggling to find uses for it apart from our own curries. It’s going so well that it has flowered a few times and has a crop of berries on it at the moment, which I’m trying to work out how to use to propagate some more.A Sri Lankan friend told us how he uses them to make a nice snack and so we’ve been giving it a try.
You’ll need:
- Two stems of curry leaves, removed from stems
- Two handfuls of unsalted, raw cashews
- Salt (to taste)
- Olive oil (a splash)
Basically, cut off a couple of stems full of leaves and then take them off the stem so you have the individual leaves separated. Put a splash of olive oil in a small frypan, get it hot and toss in the leaves, you’ll hear them crackle and spit as they crispen up. Chuck in a good whack of salt (how much depends on your own preference) and then add the raw, unsalted cashews. Turn down the heat so that the nuts don’t burn and then just keep them moving about in the pan until they roast up nicely.
Once you’re happy with the colour of the nuts (watch that they, nor the leaves, burn) then take them off the heat and either start munching on them as soon as they’re cool enough or let them totally cool … who am I kidding, as soon as these are done you’ll be tucking into them. The leaves are great as part of the snack too – salty, curry, crunchy goodness.

Bish
Related Links:
- see more of Bish’s posts here
Please consider subscribing to get a weekly email summary of our posts.
[mc4wp_form id=”15771″]
Written by
·