Author: PK
-

Chinese Minced Pork And Corn
This basic pork mince and corn recipe is light, full of umami favours and ready for your personal touches.
I find that my favourite meals have a few ingredients whose combination belies their individual simplicity.
This dish is the perfect example. Serve with rice, noodles or potatoes and you are good to go!
Ingredients
- 500g pork mince
- 2 garlic cloves
- A good slug of sesame oil (the secret ingredient)
- 1 can corn kernels or ~400g cut from cobs
- 3 spring onions, sliced
- 1 – 2 carrots, sliced
- 2 sticks celery, sliced
- A sprinkle of white pepper
- A sprinkle of salt
- Chillies , to taste, sliced, chopped, whole…..
- Water, just a little if the mince looks to be sticking to the frypan
Simply
Heat some sesame oil in your frypan and prepare the vegetables. Saute the onions and garlic.
Add the pork mince and cook until browned. Add the rest of the chopped vegetables and cook until the vegetables have softened a little but still have a bit of crunch.
A little bit of liquid will come out of the pork and corn kernels as they cook. I also keep a little bit of water on hand if the ingredients are sticking to the pan. I think it is nice for the finished dish to have a little sauce.
Serving
I like to serve it on a bed of rice and have condiments such as fish sauce and Sriracha on the table.
Enjoy,
PK
Here are some more Chinese cuisine inspired dishes and simple meals:
Written by
·
-

KT’s Potato Wedges
KT has a full proof method for making potato wedges and she is going to share it with us.
Simply:
Cut the potatoes into wedge shapes. Peel them or not 🙂
Preheat your oven to 240C.
Drizzle some olive oil (be as sparing as you like) and sprinkle with salt and pepper.

Cook for 45 minutes to an hour.

Serving
Wedges go with almost everything. Add them to meat and vegetables or simply serve them with dipping sauces.

KT
Here are some more potato dishes and posts by KT:
Written by
·
-

Cheese: Havarti
I think everyone has heard of this famous Danish cheese. Havarti has world-wide fame as a light and easy table cheese and because it is easy to cook with. It is a relatively new cheese but has become a staple in Denmark

Milk
Cow
Origin
Denmark
Aged
Traditional methods see it aged for 3 months. Modern manufacturing methods see the cheese undergo quicker processes and are not aged.
Aroma
Noticeable sweet and buttery aroma.
Taste
Buttery with a sharp taste (no real bite though).
Texture
The processed version is semi-soft and squeaky on the teeth.
Look
Pale yellow.
Serving
I love it as a table cheese, sliced in sandwiches and grilled on bread. It pairs well with meat, fruit and herbs (especially dill).

Manufacturing and Salting Method
Normal cheese-making methods are used. The curds are pressed into moulds, dry salted and finally brine salted prior to a short ageing process.
Wine
Enjoy with your favourite white.
Here are some more posts about cheese:
Written by
·
-

Garden Auger Veggie Bed Makeover
Gardening in Perth means you are going to get acquainted with a quartz sand that repels water and is low in the good stuff most plants love.
You can add wetting agents and fertiliser as a short term fix for the water issue but without adding organic matter and some clay your vegetable beds won’t retain nutrients and water for long.
I have to admit that my normal soil improvement routine is sub par. I normally add a bit of compost, worm castings and manure to the very top of my beds and just under the roots of transplanted seedlings.
This is a step in the right direction but for new beds or tired old ones we want to get organic matter to more than just the top lens. I wanted to do better but didn’t want to have to dig the whole bed out and start again.
So I bought a garden auger drill bit (from Bunnings and made by Sutton Tools) for my cordless drill to get down to the bottom of the bed and break up compacted soil and old roots.
See the before and after:

The process is uncomplicated and surprisingly fun:
- Attach the bit
- Drill into the sand as far as the auger will go
- Pull the auger up and out
- Fill the resulting hole with organics (compost, manure etc), minerals ,(rock dust, egg shell, blood and bone etc) and a little bentonite clay
- Cover over with soil/sand
- Mix in compost and manure into the top layer
- Water the whole bed thoroughly to level it out
- Let the bed rest for a week or so.
Look at the sand (light grey color) that came up from the bottom of an established bed:

Neat little holes you can use to get nutrients down deep:

The holes are about 800 nn deeo and 50mm wide:

Mix in some more goodness to the top layer the deeper the better, with your pitchfork:

Now the soil is light and fluffy to a deep level and ready for planting:

Enjoy,
PK
Here are some more of my reviews:
Written by
·
-
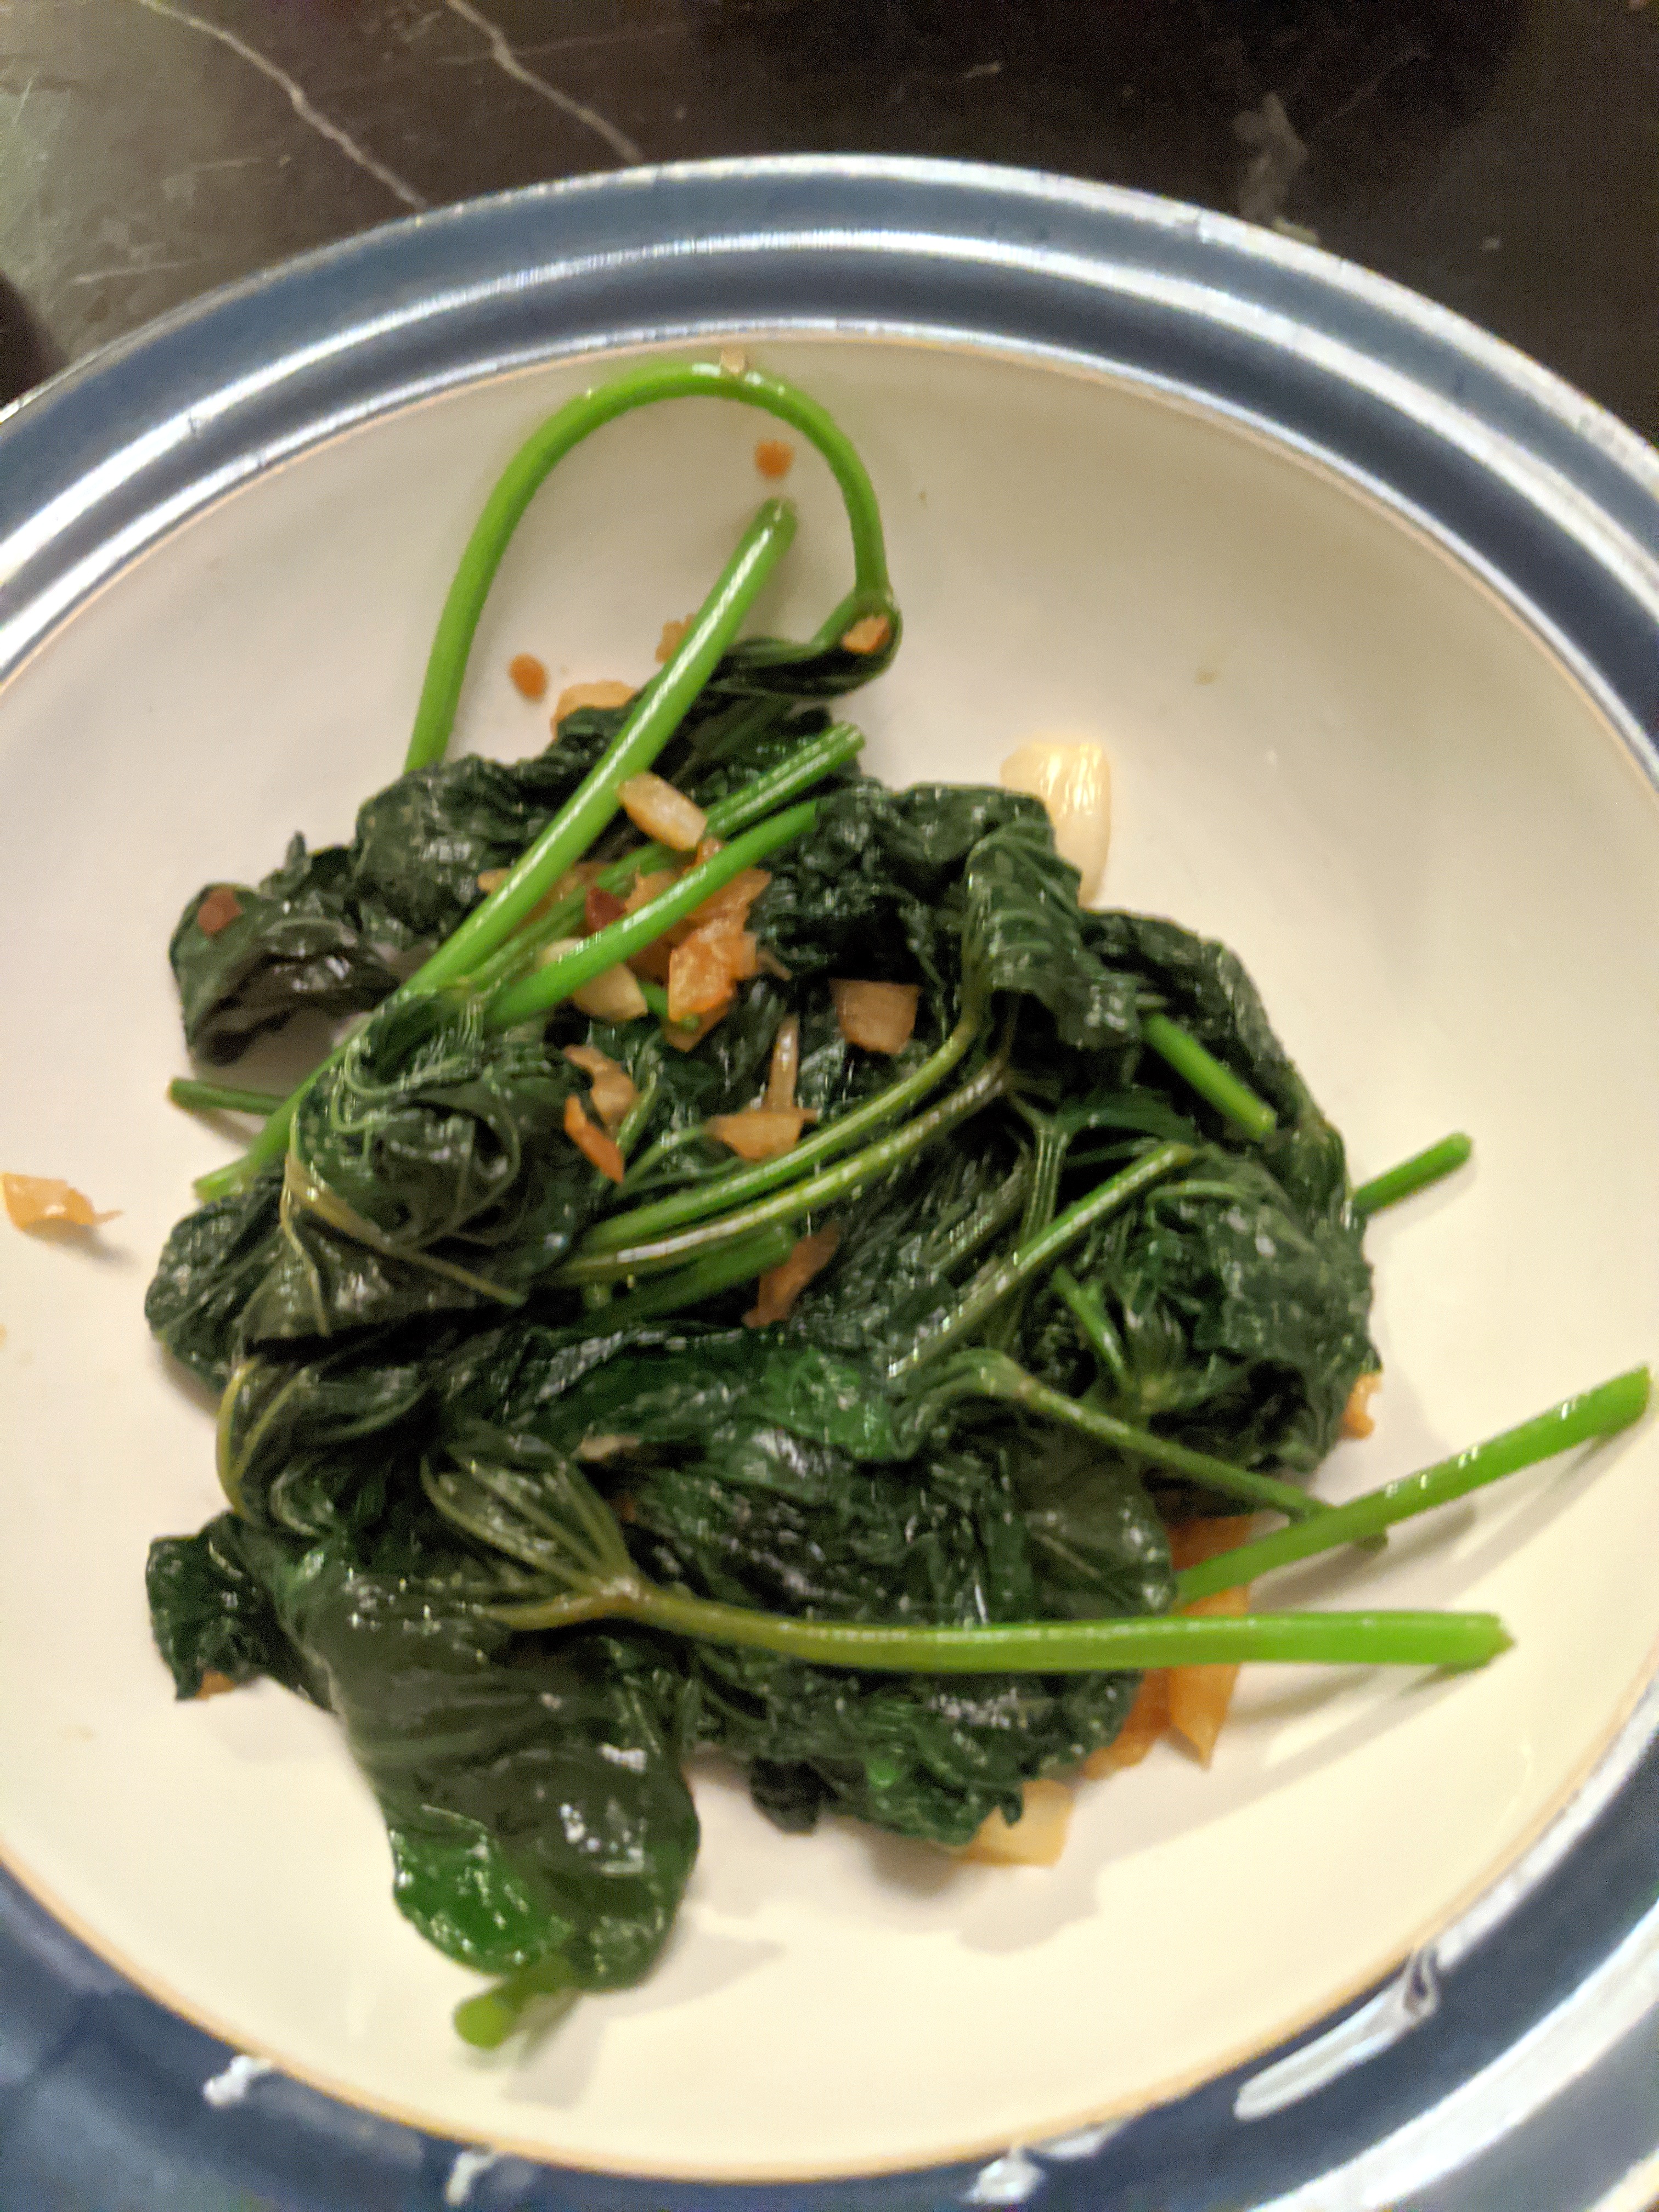
Bish’s Sweet Potato Surprise
I have grown plenty of sweet potatoes in my gardens over the years, and they’re really easy to grow generally, although I’ve had hit and miss crops from them in terms of the potatoes themselves.
But this year, when faced with a sprouting sweet potato in the cupboard, I decided to try something different, and to instead grow it for the leaves, which I didn’t realise were edible. And I’m really glad I did it.

The other night, I harvested a bunch of the smaller leaves off a bunch of runners in the pot, and trimmed them off the main stalks – so I had a bunch of leaves with stems attached, as you can see in the pictures of them in the bowl for washing. I washed them well, a few times, to make sure they were clean, and then I stir fried them.

I used what I had in the cupboard – so in this case it was a couple of cloves of garlic , which I let fry up a bit until they were nice and crunchy, and then tossed in the leaves, along with a splash of soy sauce and sesame oil. Once the leaves had wilted down, I grabbed them out and immediately served them as a side to a separate red curry I had made. The taste is a bit like spinach, and the texture reminds me of kang kong, another of my favourite asian greens.


It was a nice little addition to dinner – and afterwards when my wife told my mother-in-law (who is Chinese Malaysian, and is who I get a lot of my cooking inspiration from), she said they used to do it a lot, and she had forgotten it! So I got a few brownie points with her as well.
It’s a fast growing, prolific vegetable that I reckon is worth a try for both the leaves and the tubers themselves.
Bish
Here is some more from Josh and other baked goodies:
Written by
·
-
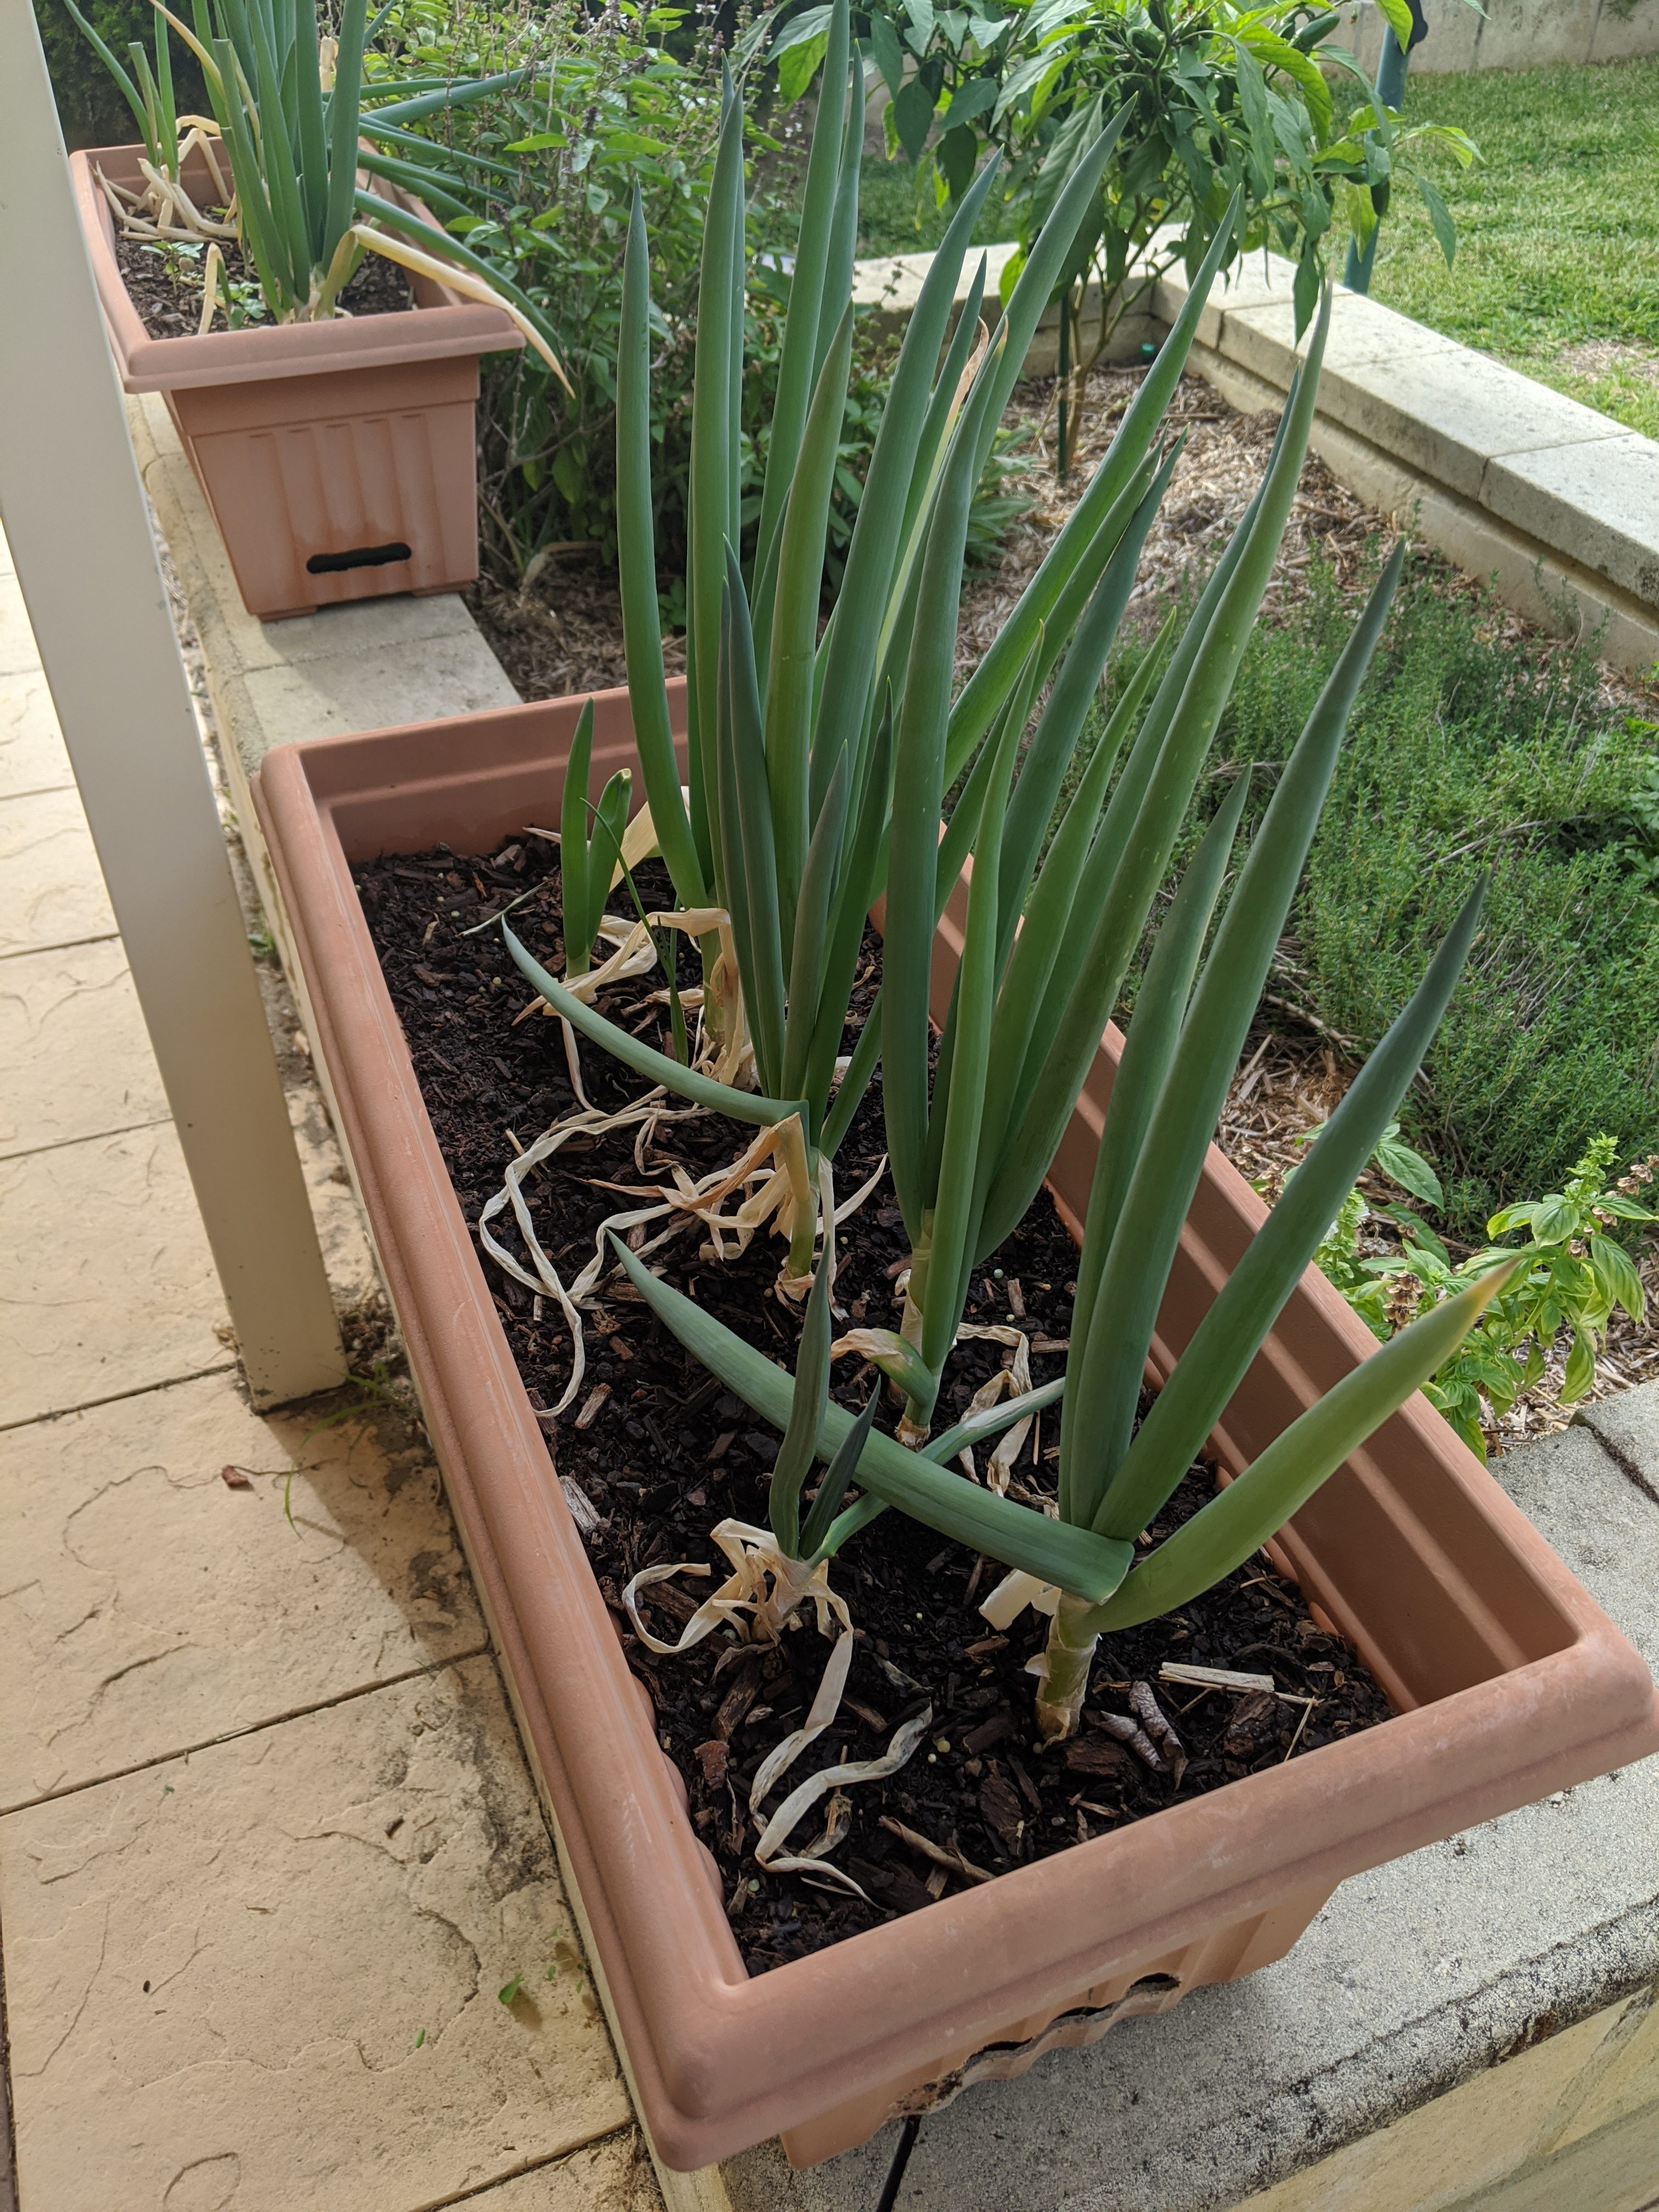
Bish Grows Spring Onions The Thrifty Way
I’ll readily admit I heard about this from PK directly, and have been super happy with how it’s gone – I’ve not bought spring onions for over a year as a result.
The trick is to buy (your last!) bunch of spring onions from the supermarket, and make sure a few of the ends have roots on them. Then, cut off that part with a centimetre or two of stalk above the roots and stick them in a pot of well draining potting mix.
These were my first two, just chucked in a pot as a tester a long time ago (April, 2018). They quickly grew and grew, and I let them go to seed, so that I could collect the seeds and re-sow them.

I then sowed a few seeds here and there, but in the meantime, bought some more spring onions from the shops, and then started dropping the bases into larger pots… along with a few coming up from seed.

These grow really quite rapidly, in a matter of days you have spring onions growing rapidly (these ones in the picture below were planted around a day or two apart to get the gist of how quickly they grow).

Nowadays I have three of these longer pots with onions in them, so I can pretty much grab one or two whenever I want to – I just get a pair of scissors and cut them off just above the ground level, and then they reshoot.
Here they are today:

Last year, I let the whole lot go to seed at one point, and then completely ripped them all out of the pots and replaced all the potting mix. The soil was a tangled web of little white roots, and I simply shoved them into a back corner of the garden out of the way to see what would happen – they pretty much all kicked the bucket without the attention (i.e. water) they normally get in the pots (they’re on our herb bed edges, where we tend to water frequently).
I know this isn’t great for the farmers that grow the spring onions, but I hope that this can free them up to grow more difficult (and profitable?) vegetables for me – like leeks or other veggies that I can’t grow in the garden!
Anyway, this is such a simple thing to do, and it’s meant that we’ve saved a bit of money buying veggies, and can always get a fresh spring onion from the garden whenever we need one!
Enjoy the gardening in solitude,
Bish
Here are some more of Bish’s tips and kitchen ingredients:
Written by
·
-
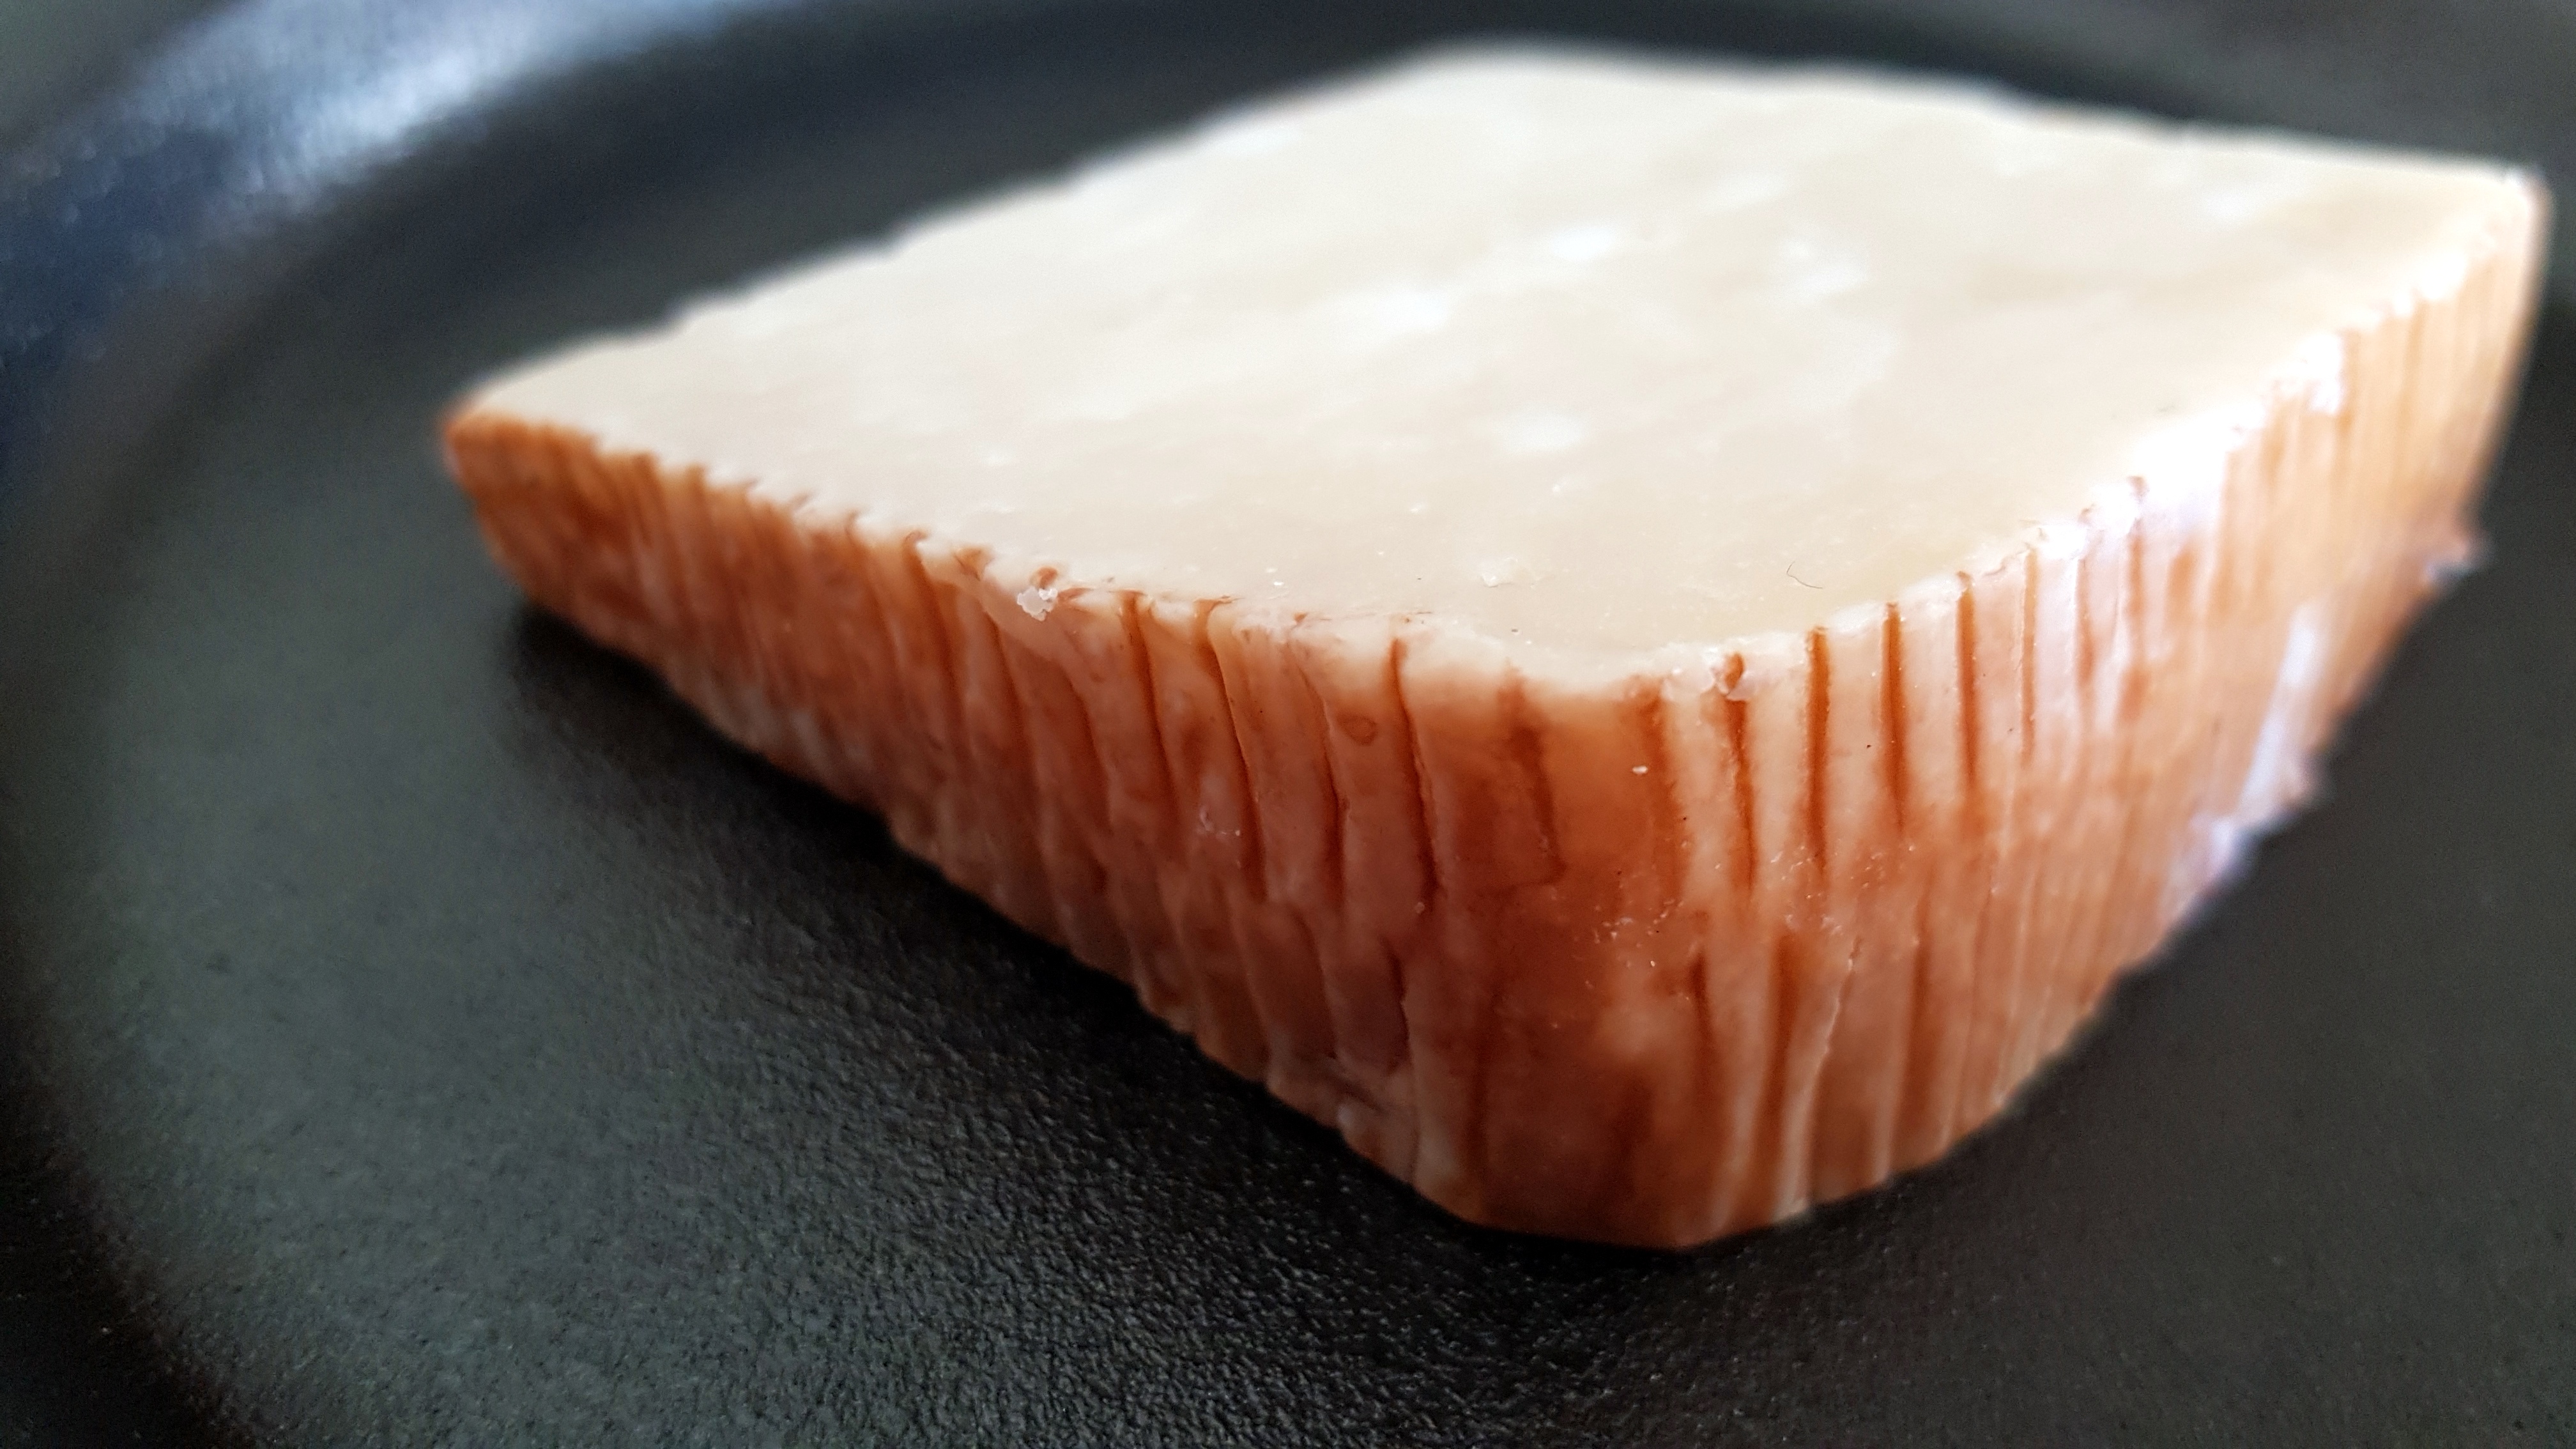
Cheese: Moliterno
Moliterno is a hard sheep and goats milk cheese that hails from southern Italy.
It is full of flavour with a distinct but pleasant bight. It is medium on the salt scale and has a hard gritty texture.
As such it is the perfect table cheese and can also be used in salads, sandwiches and grated on stews and pastas.


Milk
Sheep and goat
Origin
Italy
Aged
Yes, at least 60 days and mine was 6 months.
Aroma
Not strong but very present. Smells grassy, definitely a sheep milk cheese.
Taste
Nutty with medium saltiness.
Texture
Hard gritty texture but not as much as Parmigiano-Reggiano.
Look
Yellow straw interior with visible openness. Orange rind.
Serving
I love it as a table cheese and in toasted sandwiches, pastas etc.


Manufacturing and Salting Method
Handmade/traditional cheese making methods are used. The curds are partially cooked, then pressed into moulds, dry salted and finally brine salted prior to a short ageing process.
Wine
Cheese.com says ‘ Wines such as Greco di Tufo, Falanghina, Lacryma Christi del Vesuvio and Aglianico make a perfect match.’
Here are some more posts about cheese:
Written by
·
-

Cotechino
Cotechino is a traditional Italian sausage found through the northern areas and the central mountain regions.
It is made from pork meat, rind and fat with spice blends that feature fennel but differ from one region to the next.
Cotechino is slowly simmered in broth infused with herbs and spices over several hours. It makes the kitchen fragrant and heavenly as it slowly cooks.

It is traditional served with lentils but I present here with carrot puree, capers and potato mash.

 Enjoy,
PK
Here are some more posts about Italian cuisine and ways to preserve meat:
Written by
·
-

One Pot Chicken Chasseur
This hearty chicken stew is a signature dish in French cuisine. I have read that the pairing of mushrooms and chicken (the stars of the show) is not just a coincidence. During the hunt for chicken and other game, hunters would forage for mushrooms as they went.
I can see how this dish would be perfect after a long cold day hunting. The fresh ingredients come together perfectly and leave you satisfied without being heavy.
This is my take and it all happens in one casserole pot.

Steps
- Preparing the chicken and the vegetables
- Browning the chicken
- Cooking the vegetables
- Simmering for about an hour then reducing the sauce
- Serving
Equipment
- 1 chef’s knife
- 1 wooden spoon
- 1 casserole dish or hob suitable dish
Ingredients
- 4 – 6 chicken thighs, skinless, deboned
- 1 brown onion, diced
- 2 garlic cloves, diced
- 2 carrots, sliced
- 2 celery sticks, sliced
- Mushrooms (I used a handful of buttons and another of shitake)
- A good slug of tomato paste
- white wine or chinese cooking wine, to deglaze
- Thyme sprigs to taste
- 1L chicken stock (I used this home-made stock)
- olive oil
- Flour, enough to coat the chicken thighs
- Salt to taste
- Black peppercorns (cracked or ground) to taste
Preparing the chicken and the vegetables
- Coat the chicken in a mix of flour and pepper and set aside.
- Prepare the:
- 1 brown onion, diced
- 2 garlic cloves, diced
- 2 carrots, sliced
- 2 celery sticks, sliced
- Mushrooms, cleaned and sliced or left whole but stems separated
- Thyme, rinsed

Browning the chicken
- Add a slug of olive oil to your pot and bring to medium heat.
- Cook the chicken thighs in batches for about 5 minutes a side.
- Remove them to a plate and cover to keep them warm


Cooking the vegetables
- Deglaze the pan with some white wine or fortified cooking wine.
- Add the onions and and cook until soft.
- Add the garlic cloves and cook for a minute or so.
- Add the carrots, celery, mushrooms and thyme.
- Cook for another minute or so and add a good slug of tomato paste.
- Add the 1L chicken stock and bring to the boil.


Simmering for an hour then reducing the sauce
- Turn the heat to a low simmer.
- Put the chicken thighs back into the pot and giver everything a gentle mix.
- Simmer for about an hour.
- Remove the chicken thighs again and keep them warm.
- Turn the heat back up and reduce the remaining liquid until it is thickened considerably (10 to 15 minutes should do it).
- Return the thighs again and give a gentle mix.
At the start of simmering:

After simmering for an hour:

After the sauce has been reduced:

Serving
I simply placed the dish in the middle of the table and let everyone serve themselves. Crusty bread and mashed potatoes were the accompanying act but it also goes great with rice.
Enjoy,
PK
Here are some more French cooking secrets and chicken recipes :
Written by
·
-

Pasta Cooked In Broth
The ultimate in comfort food, this pasta in broth recipe is example of how a few ingredients can make an amazing meal.

I recently made a big batch of Italian chicken stockand used 2 cups of it below.
I brought them to the boil and then added 1 cup of pasta.


I reduced the heat to a low boil and cooked until the pasta was ready.
That is it!

I mixed in some grated cheese (a percorino with peppercorns) and served with a raw egg yolk and some basil.

Enjoy,
PK
Here are some more pasta recipes and Italian cuisine:
Written by
·