Tag: simple to prepare
-

Easy Thai Beef Salad
I love southeast asian salads. They are a feast for your eyes and your taste buds. The range of flavours is so diverse, you will never get bored of them.
The key to a good beef salad is a great dressing and a good cut of beef that is thinly sliced and not over cooked. I hope you enjoy making the nam jim dressing and building the salad at the table like my family does. 🙂
Notes: I have shown my timing preferences below for serving the salad with warm beef slices. Of course, if you prefer cold meat in this dish, you can make them in any order and well ahead of time. Oh and don’t forget to bring your steaks out of the fridge a little earlier so they are approaching room temperature as they go in the fry-pan.
STEPS:
- Make the Nam jim dressing
- Roast the rice
- Gather the salad ingredients
- Cook the beef steaks
- Serving Suggestions
You will need:
- Nam jim Ingredients (repeated here for your shopping list):
- 1 tsp powdered kashmiri chilli
- 5 coriander roots (cilantro)
- 3 garlic cloves
- 2.5cm piece fresh ginger root
- 3 Tbsp fish sauce
- 3 Tbsp lime juice
- 1 Tbsp palm sugar
- Roasted Rice Ingredients
- 100g of basmati or jasmine rice
- 1 Tbsp of rock sea salt
- Salad Ingredients
- several large cabbage leaves (1 per person)
- 2 cups baby spinach leaves
- 1 handful of coriander leaves and stems
- 1/2 large red capsicum
- 1/3 of a burpless cucumber
- 1 red shallot
- 1 spring onion
- 6 cherry tomatoes
- 1 cup bean sprouts
- 1 handful of mint leaves
- 1 medium carrot
- 1 handful of snow peas
- your favourite fresh chilis (optional)
- unsalted peanuts to taste (optional)
- Steak Ingredients
- small eye fillet steaks (1 per person)
- ground black pepper to taste
- table salt to taste
- kecap manis or soy sauce (optional)
- Equipment
- an oven tray
- a mortar and pestle
- a chopping board
- a small serving bowl for the roasted rice
- a large salad bowl
- a large frypan
Make the Nam jim dressing

Steps:
- Make the Nam Jim dressing as per PK’s Favourite Nam Jim Dressing.
Roast the rice
Steps:
- Pre-heat your oven to 200° C.
- Spread the rice grains across an oven tray and cook for about 15 minutes or until golden brown.
- Remove them from the oven and allow them to cool.
- Grind 1 Tbsp of rock sea salt in a mortar and pestle.
- Add the cooled roasted rice grains to the mortar and pestle and grind to your desired consistency.
- Add the finished product into a small serving bowl.
Gather the salad ingredients
Steps:
- Wash and dry all of the vegetables.
- Put the cabbage leaves aside, you won’t need them until serving time.
- Keep the 1 cup of bean sprouts aside for the same reason
- To a large salad bowl add:
- 2 cups baby spinach leaves
- 1 handful of hand torn coriander leaves and stems
- 1/2 red capsicum fine sliced (deseeded and pith removed)
- 1/3 of a burpless cucumber sliced and quartered
- 1 shallot fine sliced
- 1 spring onion fine sliced
- 6 halved cherry tomatoes
- 1 handful of hand torn mint leaves
- 1 medium carrot fine sliced (I use a potato peeler to make thin strips)
- 1 handful of hand torn snow peas (chop the ends off each first.
Cook the beef steaks

Steps:
- Preheat your fry-pan and add a splash of olive oil. You could barbecue them outside of course but I prefer a fry-pan when cooking eye fillet steaks.
- Cook the eye fillet steaks to medium rare and allow them to rest, optionally adding a bit of kecap manis or soy sauce at this point.
- Thinly slice the cooked steaks.
Serving Suggestions
Steps:
- Place a whole cabbage leaf on each plate.
- Fill to the brim with the salad ingredients.
- Add the beef slices.
- Throw some bean sprouts over the top.
- Serve along with the roasted rice and Nam jim dressing, sliced fresh chillis and unsalted peanuts.
Enjoy,
PK
Here are more southeast asian inspired cuisine and salad posts:
Written by
·
-

PK’s BBQ Western Rock Lobster With Garlic Butter
Seafood has an unfair advantage over other foods in the looks department. Even if you don’t like seafood you have to admit the colours and textures are eye catching. Nothing epitomises this more for me than lobsters and crayfish.
I am new to this seafood cooking business so this is the only way I know how to cook lobster. I am glad to say though that it did the massive Western Rock Lobster, caught by a friend of mine in the waters off Perth, proud.
This method is so easy, even if a fresh whole lobster looks a bit intimidating. Indeed, the first time I halved a whole one I wondered how to even get started :).
This is a great point scorer with my wife and I am also very happy that I get to make my garlic butter using ingredients from my kitchen garden.
STEPS:
- Halve the lobster
- BBQ time
- Serving
You will need:
- Ingredients:
- table salt to taste
- cracked pepper to taste
- enough garlic butter to coat the flesh side of lobster halves
- Equipment
- a long sharp knife
- kitchen scissors
- a chopping board
- a barbecue or frypan
Halve the lobster
Steps:
- Place the lobster right side up and, starting in the middle of the carapace, use a long sharp knife to cut the hard outer skeleton stopping at the start of the tail.
- Flip the lobster over, repeat the cut so that the body is sliced in half.
- Using kitchen scissors cut the tail’s hard outer skeleton length ways, first the top and then the bottom. This way you probably won’t break the intestinal tract and you can pull it out easily.
- Finish cutting all the way through the tail meat with the knife now.
- To be safe I scooped out all the tomalley (the gunky brown stuff in the head and body) and gave the halves a good rinse.
- I now cover the flesh side of the lobster halves with garlic butter, pushing it into all the nooks and crannies. Then I add lots of black pepper and a bit of salt.
I do the same thing if I am using just the tails:

BBQ time
Steps:
- Place the lobster halves flesh side up on a preheated medium flame grill.
- The garlic butter will start to sizzle and some of the flesh will start to go white. That is when I turn them over.
- When the flesh side is opaque white and looking chargrilled, whip them off the grill and serve immediately. You will need to experiment a bit to make sure they are not under cooked nor turned to rubber 🙂
Serving
As this was a massive beastie I simply served one half to each adult with a fresh green salad. It was perfect and I got to bank lots of brownie points.

I would love to hear how you cook lobster or crays or any improvements on the above.
Enjoy,
PK
Written by
·
-
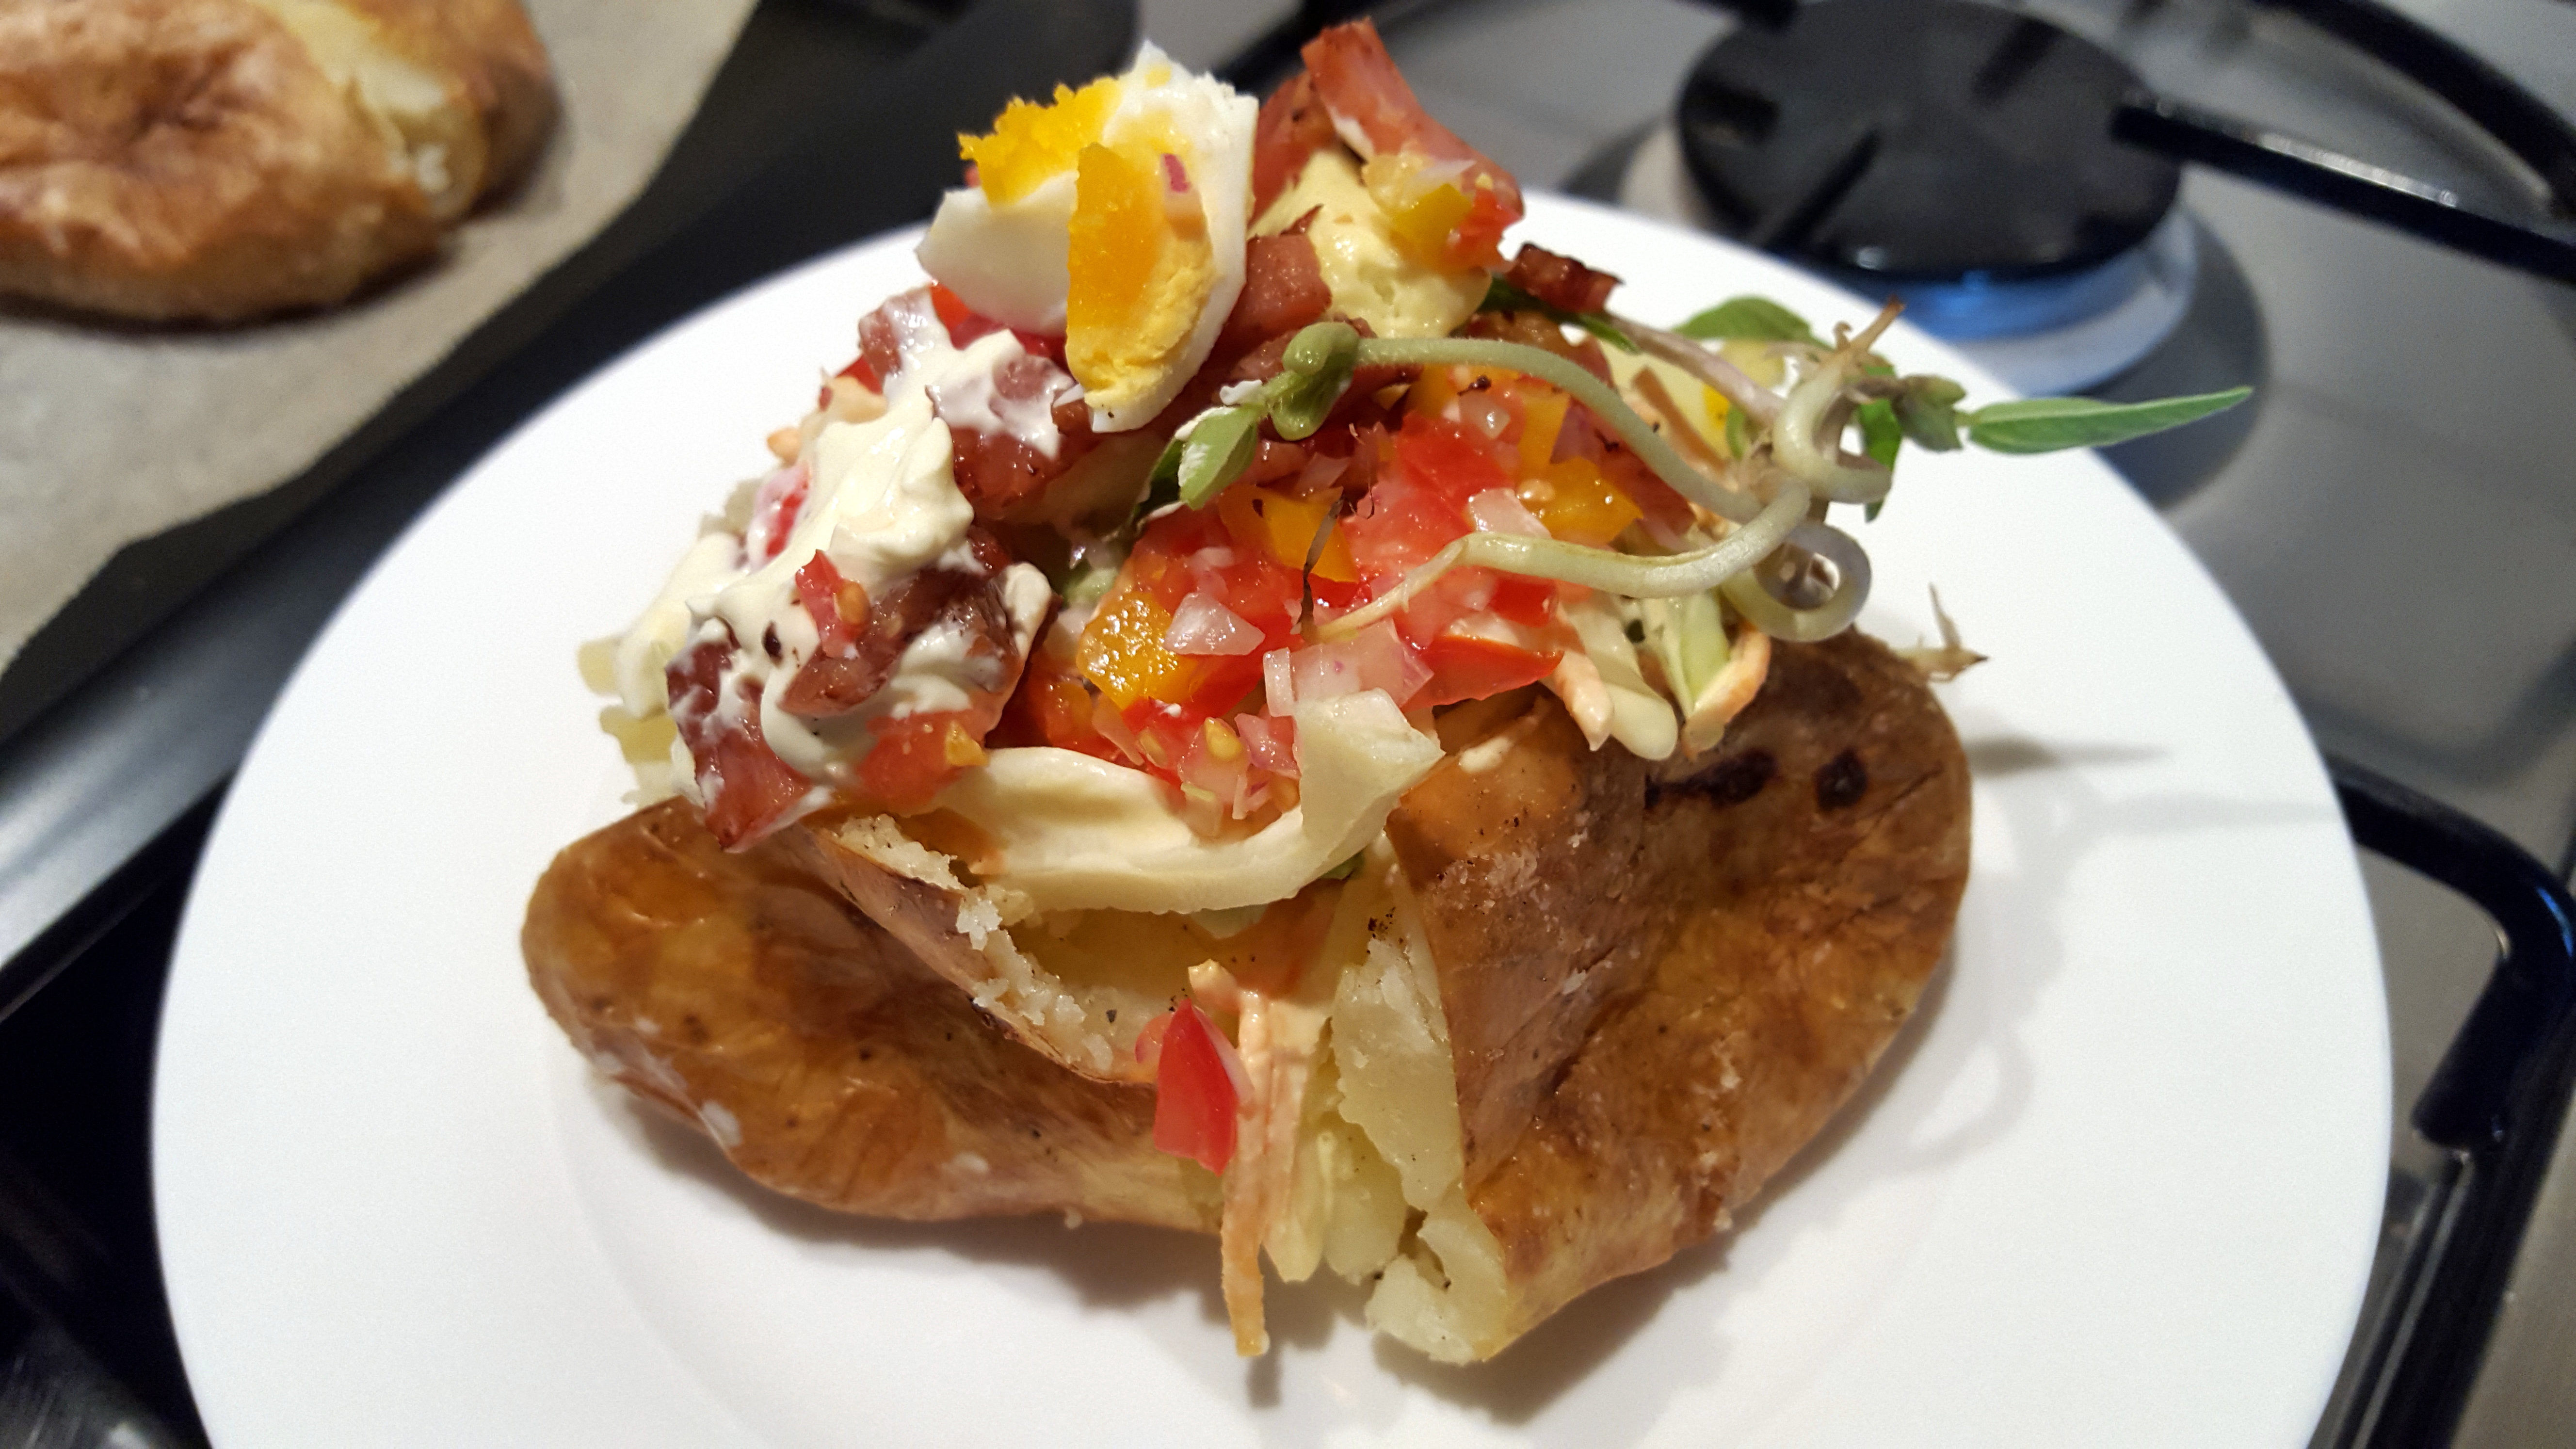
PK’S Easy Oven Baked Potatoes
Perfectly crisp on the outside, fluffy in the middle, baked potatoes are perfect for a Perth winter night. This is a great meal for enjoying with friends and family. You can build your own topping as you go so it is very family/guest friendly. There is nothing better than eating with your hands as you chat away.
I suggest 1.5 medium potatoes per adult and a few more for tomorrow’s lunch.
Everyone has their favourite potato variety that you must use for baked potatoes. However, I have found that you can make perfect oven baked potatoes from most varieties.
STEPS:
- Prepare and cook the potatoes
- Prepare your toppings
- Serving
You will need:
- Ingredients:
- your favourite potatoes
- table salt
- ground black pepper
- your favourite toppings, sauces and condiments.
- Equipment
- paper towel
- a chopping board
- a long sharp knife
- an oven dish or oven rack
- several plates to serve the toppings
Prepare and cook the potatoes
Steps:
- Pre-heat your oven to 200 degrees Celsius.
- Scrub each potato to remove dirt, eyes and deeper imperfections.
- Dry them thoroughly using the paper towel, this is important for the crispy finish.
- Spray each potato with olive oil spray and dust them liberally with salt and pepper.
- Pop them on the oven rack (or oven dish) making sure there is space between them.
- Cook for about 1 hour (longer depending on your oven or if you are using really big potatoes). I test the largest potato at this stage. If it is ready the others are too.
Before:

After:

Prepare your toppings
Steps:
- Harvest, chop, slice and gather your favourite toppings
- Put them on plates in the middle of the table so your guests can build their own potato.
Here is what I used. Sour cream, cheese and coleslaw are must-haves in my family:

Serving
I can’t remember where I read this but it is the most important part of the process.
Just before serving the potatoes, you need to first cut them, then squeeze them with your thumbs and forefingers (to break up the insides) and then flatten them out a bit. This will let the steam out and stop the potato skin from going soggy. You will also have a great base to load the toppings onto.
Here is a video of me doing just that whilst trying not to burn my fingers:
Here are a few of my favourite combinations:
They don’t freeze well but they do make a great lunch the following day:

Enjoy,
PK
Here are more potato dishes and winter warmers:
Written by
·
-

Welchy’s Easy Mushroom Soup
There’s nothing better on a cold winter’s night than to sit down and tuck into something hot!
Whether it be a curry, casserole or soup…I love nothing more than eating a dish that warms you right down to your bones!
Mum has made soups all my life. As a kid, she may as well have put hearts and livers on a plate and put it in front of me. There was nothing worse than the idea of soup, let alone Mushroom soup. But as with most dishes, nostalgia tends to set in and I have a newfound appreciation of all things my mum cooked as a kid and how much I wish to be there again.
This dish is about 10 minutes of prep (if you are slightly mad and enjoy cracking the stem of the mushroom off and then peeling each..and every…single…mushroom). And then 20-30 minutes simmering.
Ingredients
- 1 kg mushrooms, stems removed if you wish and peeled
- 1 brown onion, chopped
- 2 garlic cloves, chopped
- 1 teaspoon butter
- 6 cups vegetable stock
- 1 cup thickened cream
Method
- Melt butter in a Crock pot or large saucepan. Cook the onion until partly softened. Add garlic and cook until onion is browned and softened.
- Now add in the mushrooms and cook until they are lightly browned, stirring often so they don’t stick to the pan.
- Add the vegetable stock and season with salt and pepper.
- Bring to the boil and then allow to simmer for 20 minutes.
- Once the mushrooms are tender and cooked through, remove from the heat and allow to cool slightly.
- Use an electric mixer to puree the soup (I personally like it to be slightly chunky, but puree a bit longer if you like a smooth soup).
- When ready to serve, stir in the cream and top with freshly chopped basil. And as always…enjoy!

Enjoy,
Welchy
Here are more soup posts and Welchy recipies:
Written by
·
-
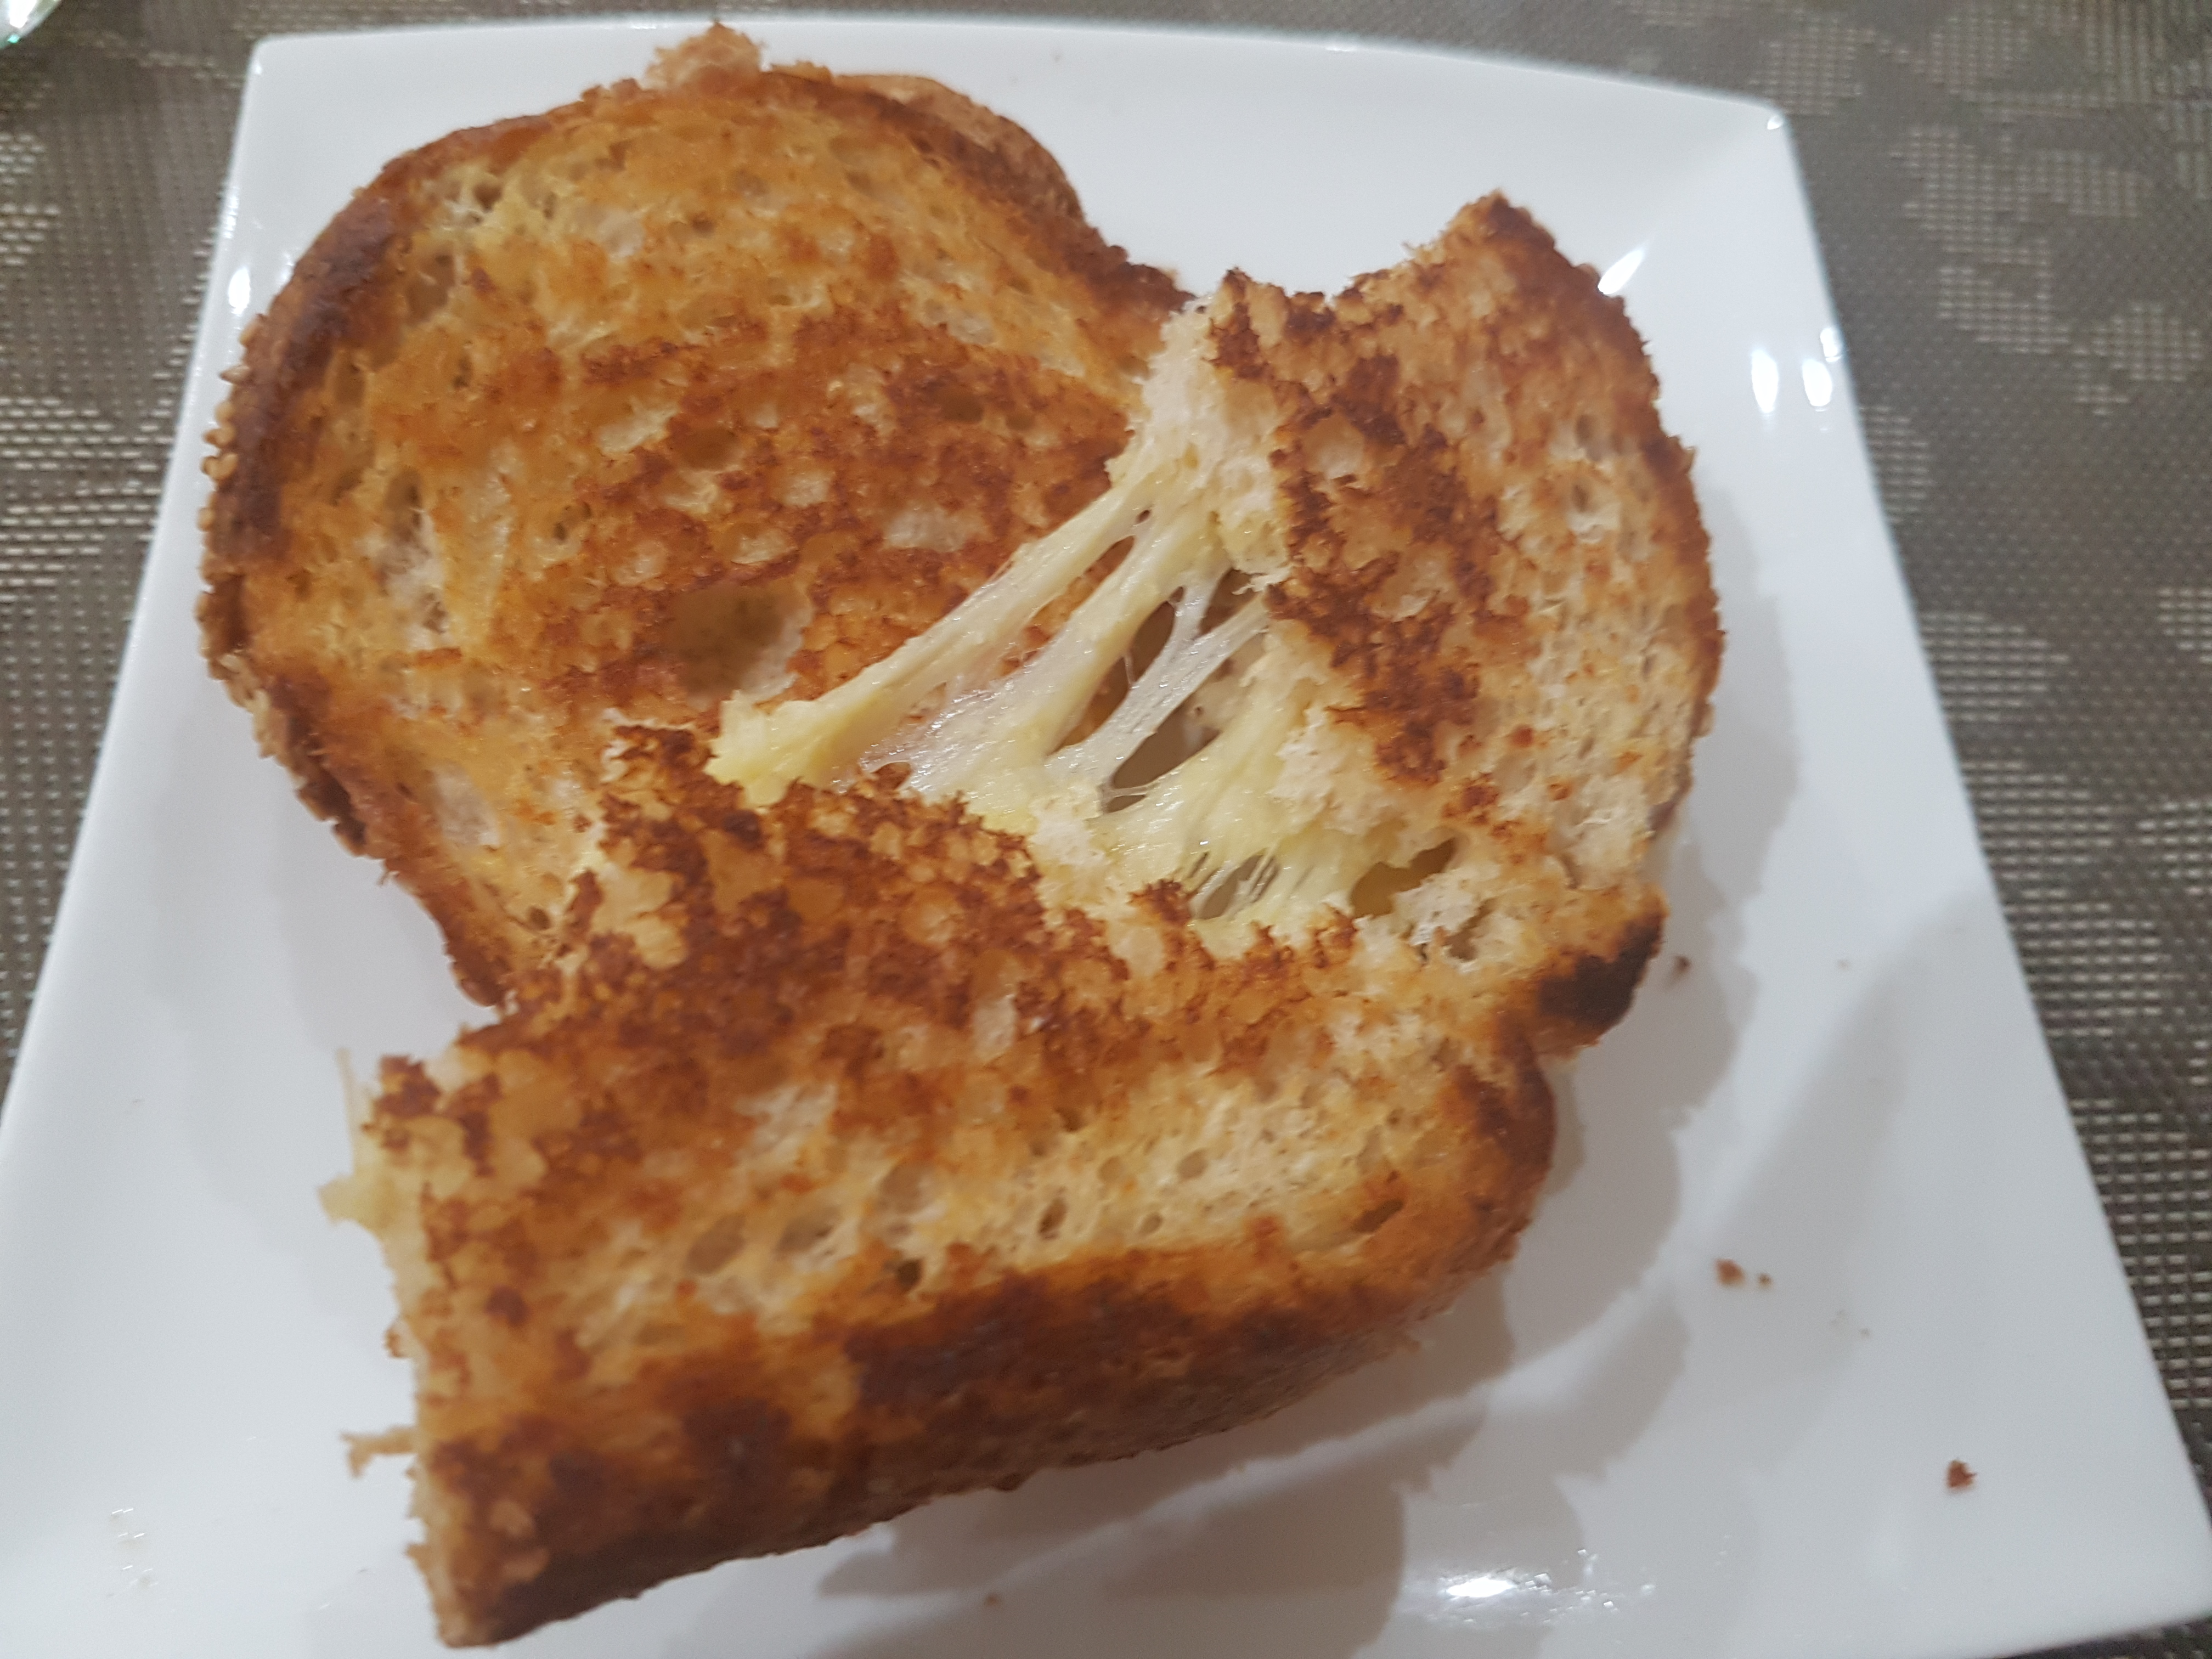
Welchy’s Ultimate Fry Pan Cheese Toastie
As a kid, the ultimate treat was one of Mum’s cheese toasted sandwiches. This wasn’t just your run of the mill, use-a-toaster type of toasted sandwich though. Mum perfected the Ultimate Cheese Toastie in the fry-pan! Buttery, toasted, crunchy goodness on the outside with superbly melted stringy cheese in the middle…served with you know…a heaping side of motherly love.
Look how simple the ingredient list is:

First off, I’d start with a blend of cheeses. I chose Cheddar, Kraft’s 4 cheese blend and Parmesan. Pick any cheeses you like though, Gruyere, Mozzerella, Havarti, anything that melts well. I cut up some fresh bread and butter and we’re ready to go!
Ingredients/Utensils
- Fresh bread
- Butter
- Cheeses (a few slices/enough for a sandwich) – Cheddar, American, Gruyere, Mozzarella, Parmesan, Four Cheese mix, whichever you prefer/have handy.
- Frying pan
Method
1. Butter both sides of the bread. Put a dollop of butter in the pan too for extra buttery crunch!

2. Place one side of the bread into the pan. Layer with your selected cheeses. Allow the bread to fry in the pan, usually about 30 seconds. Use a spatula to lift the corner and check if it’s browning. Once it starts to brown, add the lid of the sandwich and flip!

3. Fry the second side for 30 seconds to 1 minute, or until nicely browned.

And you are done!
This recipe isn’t much, it’s not difficult, and it can be made fairly quickly once you get the hang of it. Great to eat wrapped in some parchment paper as you race out the door, or as I prefer, at the table with a glass of ice cold milk.
Love Welchy,
Here are some more snacks and more Welchy posts”
Written by
·
-

Easy Chicken Katsu Udon
Chicken Katsu Udon is an amazingly versatile dish, perfect for snacks, sides or a main meaIs. At is simplest it consists of a bowl of noodles, vegetables and broth topped with crumbed fried chicken.
It is very easy to make and friends of mine have even made it on a camping trip.

This recipe will feed two adults for lunch. Add more noodles, chicken, vegetables and broth to bulk it up for dinner.
You will be:
- Preparing the chicken.
- Frying the onion toppings.
- Preparing the other vegetables.
- Cooking the noodle broth and crumbed chicken
- Serving.
You will need:
- Ingredients
- 1 large chicken breast, butterflied
- Ground rock salt, to taste
- Ground black pepper corns, to taste
- White flour, enough to coat the chicken breast
- Panko bread crumbs, enough to coat the chicken breast
- 1 egg, beaten egg
- 1 brown onion, sliced
- 1 cup Asian greens e.g. bok choy leaves and stems
- 1 small handful torn coriander (cilantro) leaves
- 1 packet of soft Udon noodles
- 4 cups home-made chicken stock
- Olive oil and/or chili oil, enough to cover the base of the pan to half the depth of the chicken breast and a splash for frying the onions
- A handful of sliced shitake or enoki mushrooms
- Equipment
- several chopping boards
- a long sharp knife
- a rolling pin or meat tenderiser
- two large plates
- one medium sized bowl for coating the chicken breasts
- a medium sized saucepan for the broth and noodles
- a deep frypan for shallow frying the crumbed chicken
- paper towel to absorb excess oil
- deep bowls for serving
- tongs for cooking the chicken in the oil
- tongs for adding the hot noodles to the serving bowls
Preparing the chicken

- Take your chicken breast and butterfly it. I completely separate the halves at this stage, place them on a chopping board and bash the stuffing out of them using a rolling pin. This makes them really tender and easier to cook through without burning the outside crumb coating. This dish also works really well with chicken tenderloins (these are the pectoralis minor of a chicken and they don’t need tenderising).
- Salt and pepper them to taste and then successively coat them in flour, dip them in the egg and roll them in the panko crumbs.
- Refrigerate them for 30 minutes or as long as it takes you to prepare the rest of the dish.


Fry the onions
- Thinly slice the 1 brown onion.
- Heat the oil in your deep fry pan.
- Add the onions and crisp them up, moving them continuously.
- Pop them into the fridge after soaking up excess oil with paper towel.
- Clean the fry pan with some paper towel so you get rid of any burnt onion bits.

Prepare the vegetables

- Roughly chop your Asian greens and other vegetables of choice. No need to cook the greens as they will quickly steam as you add them to the hot broth at serving time.
- Tear the coriander leaves to make a nice garnish.
- Hot Tip – Bring the crumbed chicken breasts out of the fridge at this point and allow them to return to room temperature. This will allow you to cook them golden brown on the outside and avoid a raw center.
Cook the noodle broth and crumbed chicken

You are going to have to keep an eye on two processes here. Sorry 🙂
- Add the stock and noodles to the saucepan.
- Heat the oil in the deep frypan so it is lightly bubbling.
- While you are lightly frying the chicken, slowly bring the noodle broth to the boil.
- When golden brown on both sides, remove the chicken from the oil and pat dry with paper towel.
- Slice the chicken.
The panko crumbs are so light that I prefer a longer slower fry:
Cooking the noodles in the broth as it comes to the boil:

The sliced chicken:

Serving
- Add the desired amount of noodles to each bowl using tongs.
- Add the desired amount of greens and vegetables to each bowl.
- I add the slices of mushroom now.
- Pour in the desired amount of broth to each bowl.
- Top with some of the torn coriander and the fried onions.

Happy slurping,
PK
Here are more soup recipes and Japanese cuisine posts:
Written by
·