Tag: ginger
-
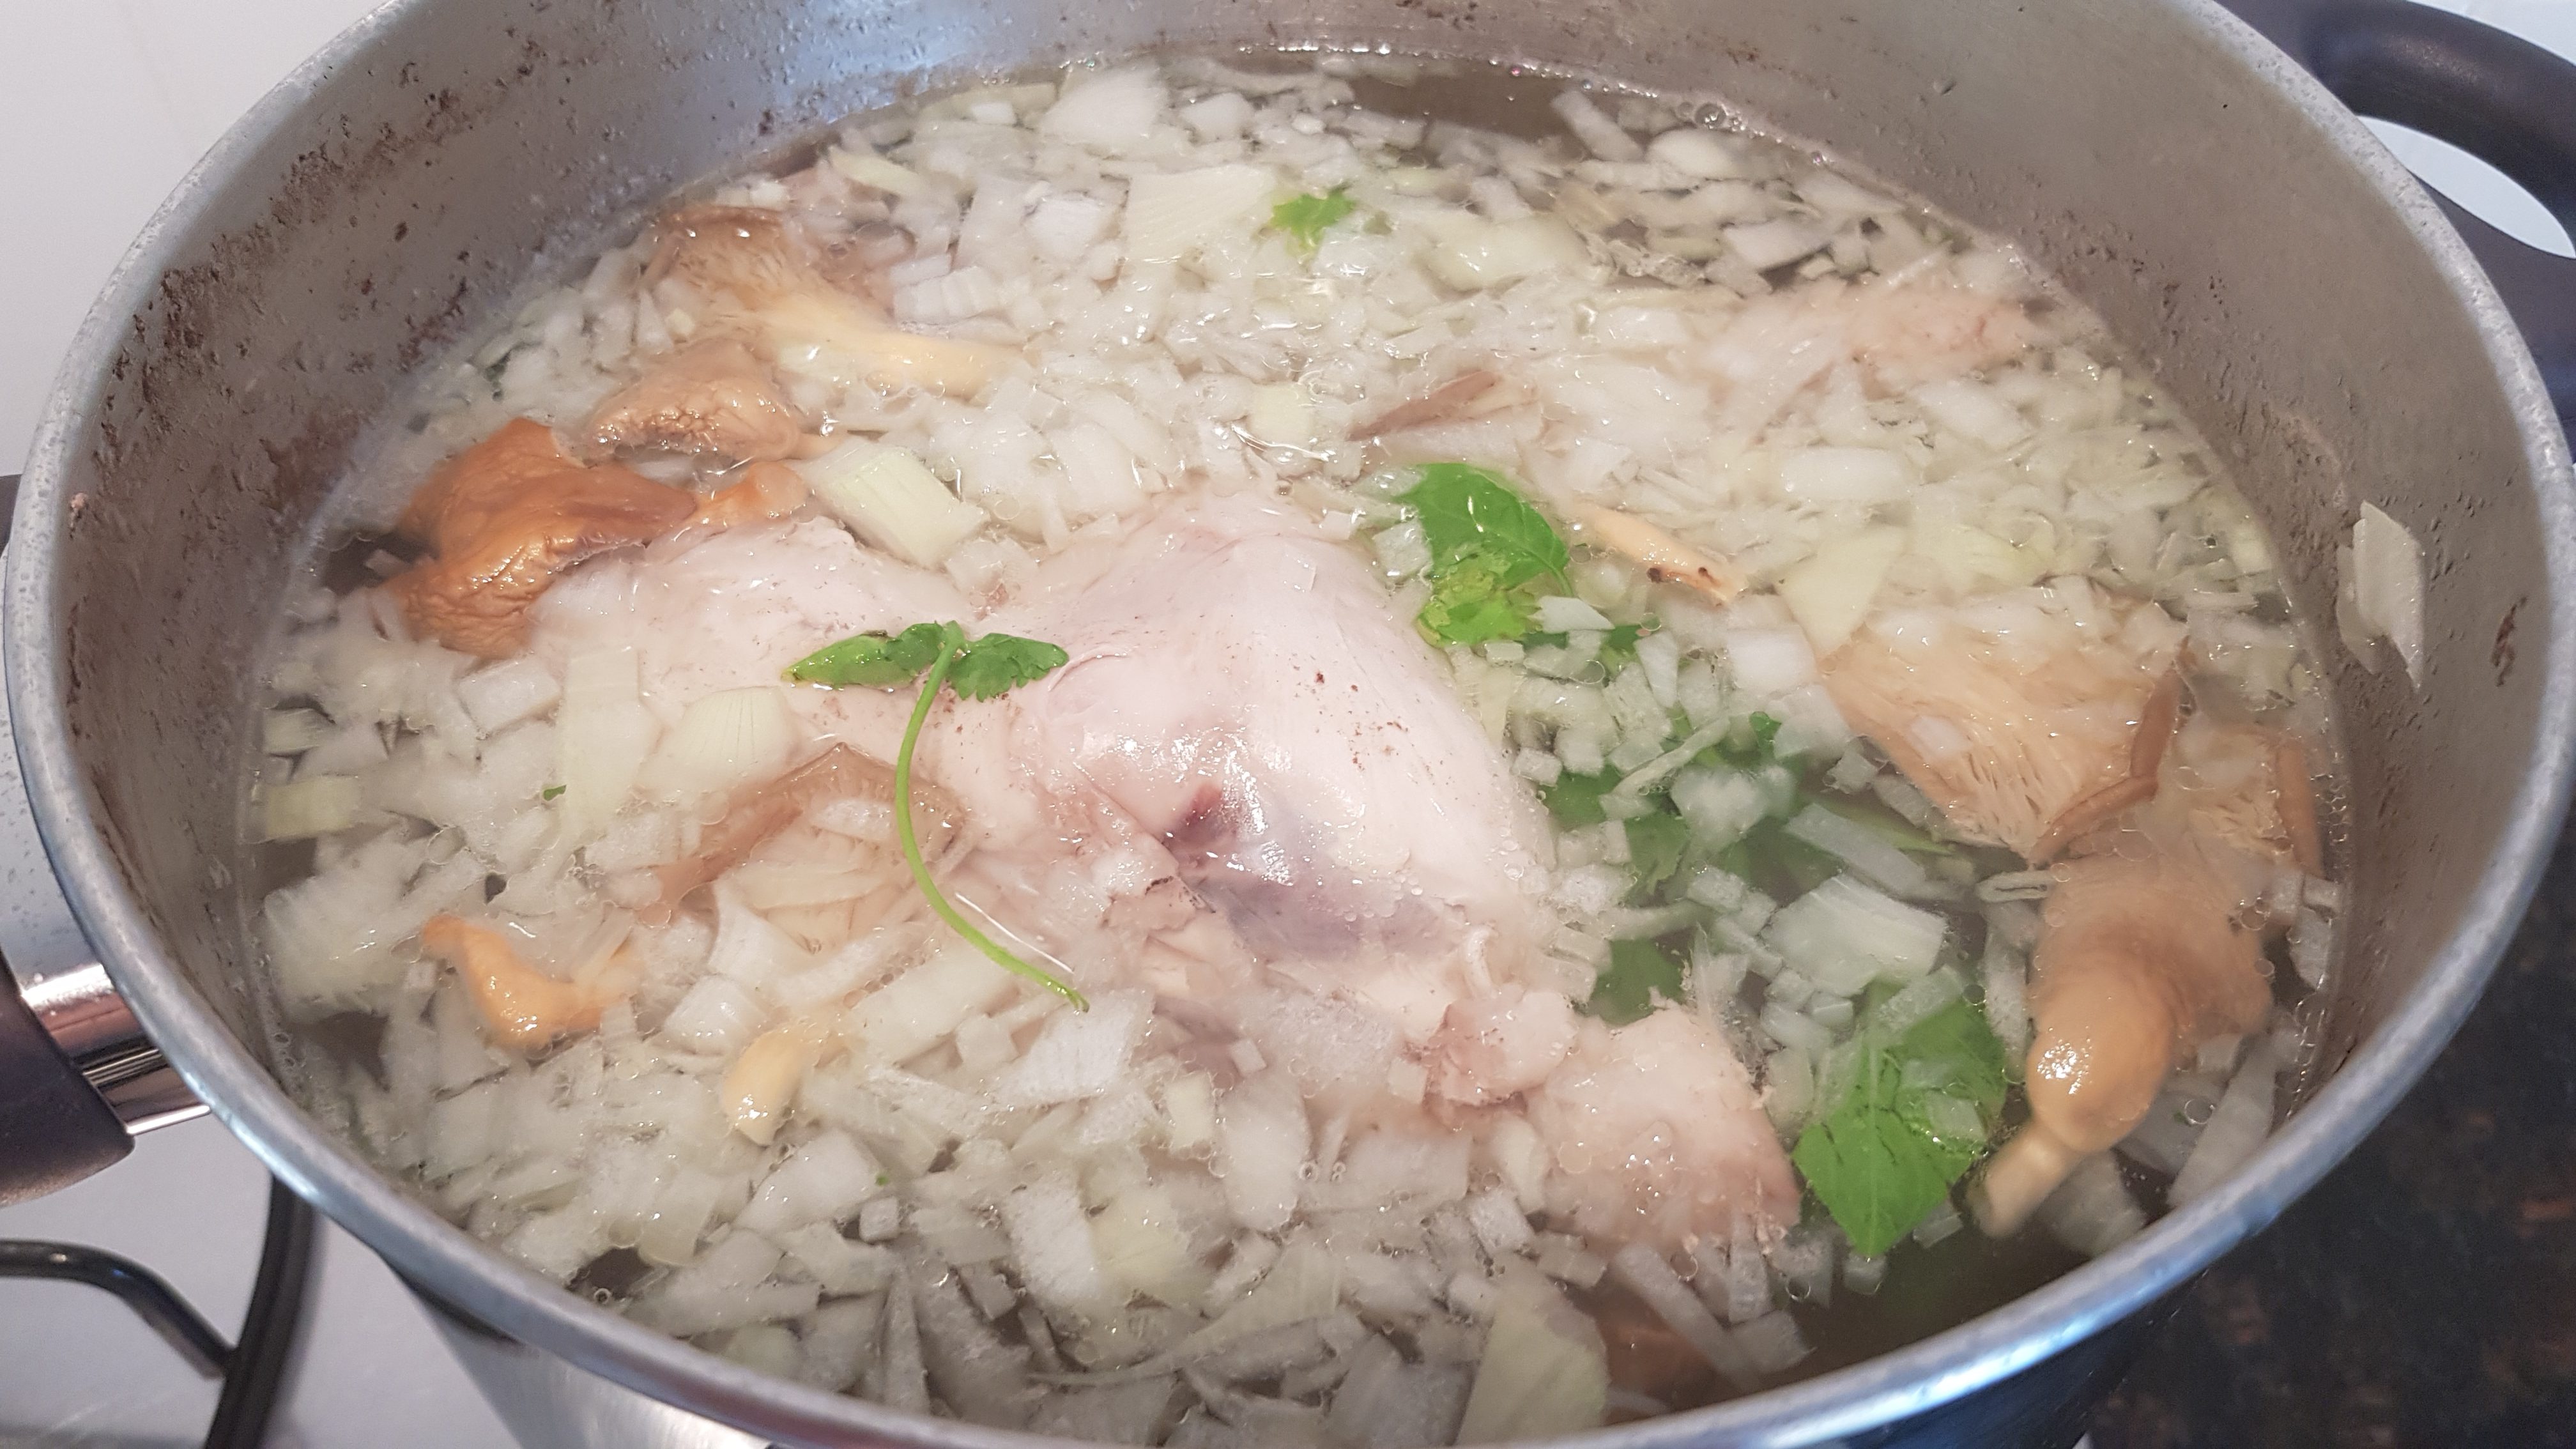
Asian Style Chicken Stock Base
This simple chicken stock is a great base from which to make a huge range of Asian dishes. I use it to make Udon soup and when I am poaching chicken thighs for example.
There are three stages in making this stock.
Firstly throw ginger, garlic and sliced onion into a large pot of water. Add a chicken frame and bring the whole lot to a rolling boil.
You could also add a few abalone feet for extra flavour. It all depends on what you intend to use the stock for.

Then turn down the heat and simmer the stock. There will be a layer of fat scum that you can scoop of with a slotted spoon or sieve.


Simmer for at least 2 hours and then strain the liquid.
Enjoy,
PK

If you liked this post you might like these too. 🙂
Asian cusine:
Using stock:
Written by
·
-

Ginger: Grow And Eat
Ginger root (originally from Southeast Asia) is one of the most common spices used in cooked dishes, baking, drinks and confectionery. It pops up in European, Indian and Asian cuisines having been traded and planted around the world.
It is easy to grow in warm climates. I simply buried a few roots about 10cm down in rich organic soil and waited for new stems to appear. Unlike galangal the leaves suffer a bit in the Perth summer sun and that might guide your choice of planting location.


Ginger flower – By Venkatx5 – Own work, CC BY-SA 3.0, https://commons.wikimedia.org/w/index.php?curid=20134351
You can wait for the stems to die and harvest the whole root but I just go out when I need fresh ginger and dig a bit up. You can then cut off what you need and replant the rest.

When cut it has a pungent smell that is both sweet and peppery.

If you would like to see recipes using ginger please click here.
Enjoy,
PK
Written by
·
-

Welchy’s Wonton Noodle Soup
And so I’m back
From out of space
I just walked in to find you here with that sad look upon your face …the sad face I am referring to is that of my older brother’s. I have been a bit busy and whilst I have been taking lots of photos – I then never got around to writing the actual blog. So here goes…
My boyfriend loves Wonton Noodle Soup and will only eat it from one place (International Food Court in Morley if you ever get a chance). It’s divine – with slivers of pork, crunchy bok choy for texture, a gorgeous broth and then these silky full of flavour wontons… it’s basically Heaven in a bowl. And to top it all off they scatter crumbled pork crackling over the top.
I finally convinced him to let me have a go at cooking my own and suffice to say the results were amazing. Like most men (my younger and ‘opinionated about food even though he never cooks’ brother is one) if he goes for a second helping then you know you are onto a winner. It’s a little fiddly so unless you make it on a weekend, try and make the wontons ahead of time as they can sit in the fridge until you are ready 🙂
Ingredients:
For the Soup- 2½ cup chicken stock
- 2½ cup water
- 1 tsp. soy sauce
- 3 garlic cloves, smashed
- 3 to 4⅛-inch thin fresh ginger root slices (approximately 1 oz.)
- 2 green onions, cut in halves
- salt and pepper to taste
For the Wonton Filling- 4 oz. ground pork
- 1 tsp. soy sauce
- 1 tsp. Shaoxing wine (Chinese cooking wine, you can substitute with dry sherry)
- 1 tsp. cornstarch
- ¼ tsp. sugar
- ¼ tsp. sesame oil
- ¼ tsp. ground fresh ginger root
- 1 small garlic clove
- 1 green onion, finely chopped
- small pinch of black or white pepper
- 20 square wonton wrappers
For the Garnish- chopped green onion
- Cilantro leaves
Method
1. In a medium/large pot, add all ingredients for the soup. Cover, bring it to boil, reduce heat to low and simmer for 10 to 15 minutes. Turn off heat and let all the flavor come together. Meanwhile, let’s make wontons!
2. In a mixing bowl, combine all ingredients for the wonton filling and mix well with a spoon until cornstarch incorporated with other wet ingredients.
3. Take a wonton wrapper on your left hand(if you are right handed) and paint edges of square lightly with cold water using your finger tip. Put ½ teaspoon of filling in centre of wrapper. Fold in half, triangle shape and seal it tightly by pinching edges together with your fingers. Paint one of lower side corners of triangle with water and bring right and left corner together (water painted side down) and press well to make traditional curved wonton shape. Place wontons 1 to ½-inch apart on a parchment paper lined baking sheet. Repeat until you finish with wonton filling and wrappers.
4. When your wontons are ready, discard solid ingredients from soup base and bring it to boil.
5. Carefully add wontons and cook for 10 to 15 minutes. wontons will be fully cooked in 3 minutes, but cook it longer so all flavour from wontons will melt in to soup. Taste and add salt and pepper to your taste at this point.

6. Transfer to a serving bowl, garnish with green onion, cilantro and pepper to your taste.

And then…being super sneaky…I fried a couple of the wontons while the wontons were cooking in the soup. So totally worth it! Would be amazing on a cold night, but no matter the weather I’d eat this haha.

Katie
Related Links:
- see more Welchy posts here
Written by
·
-

PK’s Small Batch Hard Ginger Beer
Not much tops a nice cold glass of home made ginger beer on a hot Perth summers day. In this recipe I use a small 2L fermenting jar with a built in one way airlock. It makes just the right amount to share with a few friends over lunch.
As with my hard apple cider I don’t do a secondary fermentation and that means a flat beverage. I don’t mind and on the plus side I can simply take a jar that has been fermenting for about 4 weeks and chill it a few hours before I need it. No mess, no double handling and no decanting necessary.
The amount of ginger you add is entirely up to you so add more if you crave that ginger kick. I keep getting accused of under doing it by my family :).
Note: Please only follow this recipe if you are of a legal age to drink in your country. Don’t attempt this in an air tight glass jar, it will explode!
You will need:
- Ingredients:
- 2 Tbsp of finely grated or chopped fresh root ginger (add more for an increased kick!)
- 1 small lemon or lime
- 1 Tbsp honey
- ~6 raisins (to add some wild yeasts to the mix)
- 1 teabag (to add some extra tannins to the mix)
- ~ half a sachet of yeast (I use whatever is available, in this case bakers yeast)
- 1 cup raw sugar
- chili powder or chopped fresh chili to taste (optional)
- boiling water (to sanitise everything)
- cooled boiled water
- Equipment
- a small bowl
- a fork
- a chopping board
- a long sharp knife
- a teacup
- a juicer for the lime
- a 2L fermenting jar with a built in one way airlock or similar
Steps:
- Sterilise everything with boiling water. I fill the fermenting jar with boiling water an let it sit while I prepare everything else. When it is cooled somewhat I empty it out. I also run boiling water over the fork, knife, measuring spoons etc.
- I also take some of the boiled water that has cooled to the point of being warm and get my yeast mix started. Bubbles let you know it is working.

- Finely chop the ginger root and add to your now sterilised fermenting jar. I used about 2 Tbsp but you add lots more.

- Make a weak cup of tea and allow it to cool before adding to the jar.

- Juice your lemon or lime and add the juice to the jar.
- Add the 6 raisins, 1 Tbsp honey, 1 cup raw sugar and chili (optional) to the jar.

- Fill with the fermenting jar with the now cooled boiled water, leave a bit of room at the top. Give it all a good stir with a fork.
- Leave the fermenting jar somewhere out of the way, after the first night mine was outside in the shed for a month.

If you ask me, cloudy is good 🙂

Enjoy,
PK
YOU MIGHT ALSO LIKE
OUR OTHER HOME BREWING POSTS
GREAT WAYS TO PRESERVE YOUR HARVESTS
Please consider subscribing to a weekly email summary of our posts or check us out on Facebook @growitcatchitcookit.
[mc4wp_form id=”15771″]
Written by
·
- Ingredients:
-

Ben’s Butterflied Chook
This dish by Ben is one of his favorites and he says you can easily double the recipe so you have leftovers for tomorrow’s lunch :).
He got his friend Louise to road test the recipe recently using these steps:
- So get a butterflied chook from the butcher and brine (see Ben’s Brining Tips for how) the chook overnight.
- Dry the skin with paper towel and leave it in the fridge uncovered for the day.
- Make a rub with:
- 2 x red Chili
- 2 x cloves Garlic
- 1cm sq lump Ginger
- Small bunch Coriander or 1 tsp powder
- 2-3 tbsp Honey
- 1 tbsp mustard
- 1 x Lime juice and the zest of ½ a Lime
- a slug of vegetable oil
- ~1 tsp salt
- Rub the chook about 2 hours before cooking.
- Cook on bbq (charcoal preferred):
- Start with the skin down until it is crispy.
- Then turn bone side down, shut the lid and cook at ~150/180 till cooked.
The preparation stage is what makes this dish so tasty:
After cooking it will look as awesome as Louise’s:

Enjoy everyone and thanks again Lou,
Ben
See more of Ben’s posts here.
Hot Tip: You can recover the chicken bones to make bone meal for your garden.
Written by
·
-

The Easiest Nam Jim Dressing
Wikipedia writes ‘Nam jim (น้ำจิ้ม) is Thai for “dipping sauce”. It can refer to a wide variety of dipping sauces in Thai cuisine, with many of them being a combination of salty, sweet, spicy and sour’.
I use this dressing in my PK’s Thai Beef Salad.
I use a blender (don’t tell anyone please) instead of a mortar and pestle because I am lazy. You will get a more visually appealing result if you use the former, though I hope the taste is similar. I primarily use this dressing on my Thai Beef Salads and they have a lot going on visually anyway.
Edit: Last time I made this dressing I used a mortar and pestle and the results were worth it 🙂
If you haven’t already, please go and have a read of my post PK’s Curry Paste Kit. It will show you just how off the charts bonkers I am about using whole spices and the freshest ingredients when making your own pastes etc. Actually maybe give that post a miss ;).
STEPS:
- Gather the ingredients
- Mix in the wet blender
- Serving
You will need:
- Ingredients:
- 1 tsp powdered kashmiri chili
- 5 coriander roots (cilantro)
- 3 garlic cloves
- 2.5cm piece fresh ginger root
- 3 Tbsp fish sauce
- 3 Tbsp lime juice
- 1 Tbsp palm sugar
- Equipment
- a chopping board
- a long sharp knife
- a tablespoon
- a teaspoon
- a medium sized bowl
- a wet blender with a small bowl
- a dry mill (optional)
- a small serving bowl for the middle of the table
Gather the ingredients
Steps:
- Dry mill your whole kashmiri chilis to get 1 tsb. Mostly I use store bought powder though.
- Wash the 5 coriander roots thoroughly if you have just harvested them. I have a stash in the freezer though of roots retained after using the rest of the plant. See my post Herbs – Coriander (Coriandrum sativum).
- Peel and rough chop the 3 garlic cloves.
- Peel and rough chop the 2.5cm ginger root.
- Bring the 3 Tbsp fish sauce, 3 Tbsp lime juice and 1 Tbsp palm sugar together.

Mix in the wet blender
Steps:
- Pop everything into your wet blender and pulse till you get the look you are after.
- Have a taste and add a bit more of anything you think is under represented. For example I normally add a bit more fish sauce for the saltiness factor.

Serving
Pop the lot in a serving bowl. I do this so that every one can build their own Thai salad at dinner. I haven’t tried storing this in the fridge for very long but the salt content of the fish sauce should let it keep for a while. You might just want to freshen up the citrus flavour by adding a bit of lime or lemon juice.
I would love to hear about your favourite Thai salad dressing or dipping sauce.
Enjoy,
PK
Written by
·
-
PK’s Favourite Nam Jim Dressing
Wikipedia writes ‘Nam jim (น้ำจิ้ม) is Thai for “dipping sauce”. It can refer to a wide variety of dipping sauces in Thai cuisine, with many of them being a combination of salty, sweet, spicy and sour’.
I use this dressing in my PK’s Thai Beef Salad.
I use a blender (don’t tell anyone please) instead of a mortar and pestle because I am lazy. You will get a more visually appealing result if you use the former, though I hope the taste is similar. I primarily use this dressing on my Thai Beef Salads and they have a lot going on visually anyway.
Edit: Last time I made this dressing I used a mortar and pestle and the results were worth it 🙂
If you haven’t already, please go and have a read of my post PK’s Curry Paste Kit. It will show you just how off the charts bonkers I am about using whole spices and the freshest ingredients when making your own pastes etc. Actually maybe give that post a miss ;).
STEPS:
- Gather the ingredients
- Mix in the wet blender
- Serving
You will need:
- Ingredients:
- 1 tsp powdered kashmiri chili
- 5 coriander roots (cilantro)
- 3 garlic cloves
- 2.5cm piece fresh ginger root
- 3 Tbsp fish sauce
- 3 Tbsp lime juice
- 1 Tbsp palm sugar
- Equipment
- a chopping board
- a long sharp knife
- a tablespoon
- a teaspoon
- a medium sized bowl
- a wet blender with a small bowl
- a dry mill (optional)
- a small serving bowl for the middle of the table
Gather the ingredients
Steps:
- Dry mill your whole kashmiri chilis to get 1 tsb. Mostly I use store bought powder though.
- Wash the 5 coriander roots thoroughly if you have just harvested them. I have a stash in the freezer though of roots retained after using the rest of the plant. See my post Herbs – Coriander (Coriandrum sativum).
- Peel and rough chop the 3 garlic cloves.
- Peel and rough chop the 2.5cm ginger root.
- Bring the 3 Tbsp fish sauce, 3 Tbsp lime juice and 1 Tbsp palm sugar together.
Mix in the wet blender
Steps:
- Pop everything into your wet blender and pulse till you get the look you are after.
- Have a taste and add a bit more of anything you think is under represented. For example I normally add a bit more fish sauce for the saltiness factor.
Serving
Pop the lot in a serving bowl. I do this so that every one can build their own Thai salad at dinner. I haven’t tried storing this in the fridge for very long but the salt content of the fish sauce should let it keep for a while. You might just want to freshen up the citrus flavour by adding a bit of lime or lemon juice.
I would love to hear about your favourite Thai salad dressing or dipping sauce.
Enjoy,
PK
Written by
·
-

Welchy’s Wanton Prawn Stack And Salsa
In the spirit of Good Friday and sticking to my parents tradition (and somewhat of my own), I took the opportunity to make something new and exciting. Growing up my brother and I used to dowse fish in tomato sauce or insist the fillets were bread-crumbed just so we could eat it. Dial ahead 12 years and I am finally in a position where I a) enjoy fish and b) can repay my parents by cooking for them … albeit with a little more culinary bravery this time.
The prawns are cooked in a lime sugar syrup, then layered between crunchy golden Wonton sheets and topped with a cucumber, tomato and avocado salsa. The prawns and salsa are fresh, light and sweet and just what you need to offset the richness of the wonton wrappers on each layer. For those that are a little more adventurous, have a go at popping a few chili slices on top as well for that extra punch of flavour.
Serves 6

Ingredients:
Stack
- 18 Wonton sheets
- 4 garlic cloves, peeled and diced
- 3cm piece ginger, peeled and diced
- 1/3 cup coriander leaves, chopped
- 1/4 cup brown sugar, loosely packed
- 1/4 cup lime juice
- 600g prawns, peeled and de-veined
Salsa
- 2 tomatoes, seeded and finely chopped
- 1 small cucumber, seeded and finely chopped
- 1 small avocado, finely chopped
- 2tsp lime juice
Steps:
- Add enough oil to the pan to shallow fry, about 2cm deep should do. Heat over medium heat, and cook the wonton sheets 2 at a time for 30 seconds or until golden and puffed. Transfer to a plate lined with paper towel and continue on with the rest of the sheets until all cooked. Set aside.
- Add garlic and ginger to the oil. Cook until golden (should be about a minute). Transfer to a plate lined with paper towel and set aside. Add the coriander to the oil, cooking for 30 seconds or until crisp. Transfer to the plate with the garlic and ginger.
- Heat a large pan over high heat. Add the lime juice and brown sugar and stir until the sugar dissolves. Cook the prawns in batches and stir for 3 minutes or until the prawns change colour. Transfer to a bowl and continue with the batches until all the prawns are cooked.
- In a bowl, combine the chopped tomato, cucumber, avocado and the 2 teaspoons of lime juice. Season with salt and pepper to taste and stir to combine.
- To serve, place a wonton sheet on the plate. Place two to three prawns on the sheet, drizzle a spoonful of the tomato mixture and a sprinkle of the garlic and ginger mixture. Continue with another wonton sheet, prawns and tomato and garlic mixture. Finish with a wanton sheet and the tomato mixture, and top with a few slices of chili if you choose. Squeeze a lime over the entire stack for an additional pop of flavour!
I served this with squid rings marinated in a bush spice rub and a garden salad, but with the salsa in the stack this dish would be just as good on its own! Fresh, zingy, zesty and creamy…what more could you want from a dish?! Now to sit back with a glass of wine and the comfort of my family…Enjoy!

Love Welchy.
Here are some seafood posts and more from Welchy:
Written by
·
-
Welchy’s Prawn Stack
In the spirit of Good Friday and sticking to my parents tradition (and somewhat of my own), I took the opportunity to make something new and exciting. Growing up my brother and I used to dowse fish in tomato sauce or insist the fillets were bread-crumbed just so we could eat it. Dial ahead 12 years and I am finally in a position where I a) enjoy fish and b) can repay my parents by cooking for them … albeit with a little more culinary bravery this time.
The prawns are cooked in a lime sugar syrup, then layered between crunchy golden Wanton sheets and topped with a cucumber, tomato and avocado salsa. The prawns and salsa are fresh, light and sweet and just what you need to offset the richness of the wanton wrappers on each layer. For those that are a little more adventurous, have a go at popping a few chili slices on top as well for that extra punch of flavour.
Serves 6

Cooking skill: Beginner/Intermediate cooks
Ingredients:
- 18 Wanton sheets
- 4 garlic cloves, peeled and diced
- 3cm piece ginger, peeled and diced
- 1/3 coriander (fresh is best but dried is also fine)
- 1/4 cup brown sugar, loosely packed
- 1/4 cup lime juice
- 600g prawns, peeled and de-veined
Salsa
- 2 tomatoes, seeded and finely chopped
- 1 small cucumber, seeded and finely chopped
- 1 small avocado, finely chopped
- 2tsp lime juice
Steps:
- Add enough oil to the pan to shallow fry, about 2cm deep should do. Heat over medium heat, and cook the wanton sheets 2 at a time for 30 seconds or until golden and puffed. Transfer to a plate lined with paper towel and continue on with the rest of the sheets until all cooked. Set aside.
- Add garlic and ginger to the oil. Cook until golden (should be about a minute). Transfer to a plate lined with paper towel and set aside. Add the coriander to the oil, cooking for 30 seconds or until crisp. Transfer to the plate with the garlic and ginger.
- Heat a large pan over high heat. Add the lime juice and brown sugar and stir until the sugar dissolves. Cook the prawns in batches and stir for 3 minutes or until the prawns change colour. Transfer to a bowl and continue with the batches until all the prawns are cooked.
- In a bowl, combine the chopped tomato, cucumber, avocado and the 2 teaspoons of lime juice. Season with salt and pepper to taste and stir to combine.
- To serve, place a wanton sheet on the plate. Place two to three prawns on the sheet, drizzle a spoonful of the tomato mixture and a sprinkle of the garlic and ginger mixture. Continue with another wanton sheet, prawns and tomato and garlic mixture. Finish with a wanton sheet and the tomato mixture, and top with a few slices of chili if you choose. Squeeze a lime over the entire stack for an additional pop of flavour!
I served this with squid rings marinated in a bush spice rub and a garden salad, but with the salsa in the stack this dish would be just as good on its own! Fresh, zingy, zesty and creamy…what more could you want from a dish?! Now to sit back with a glass of wine and the comfort of my family…Enjoy!

Written by
·