Tag: coriander
-
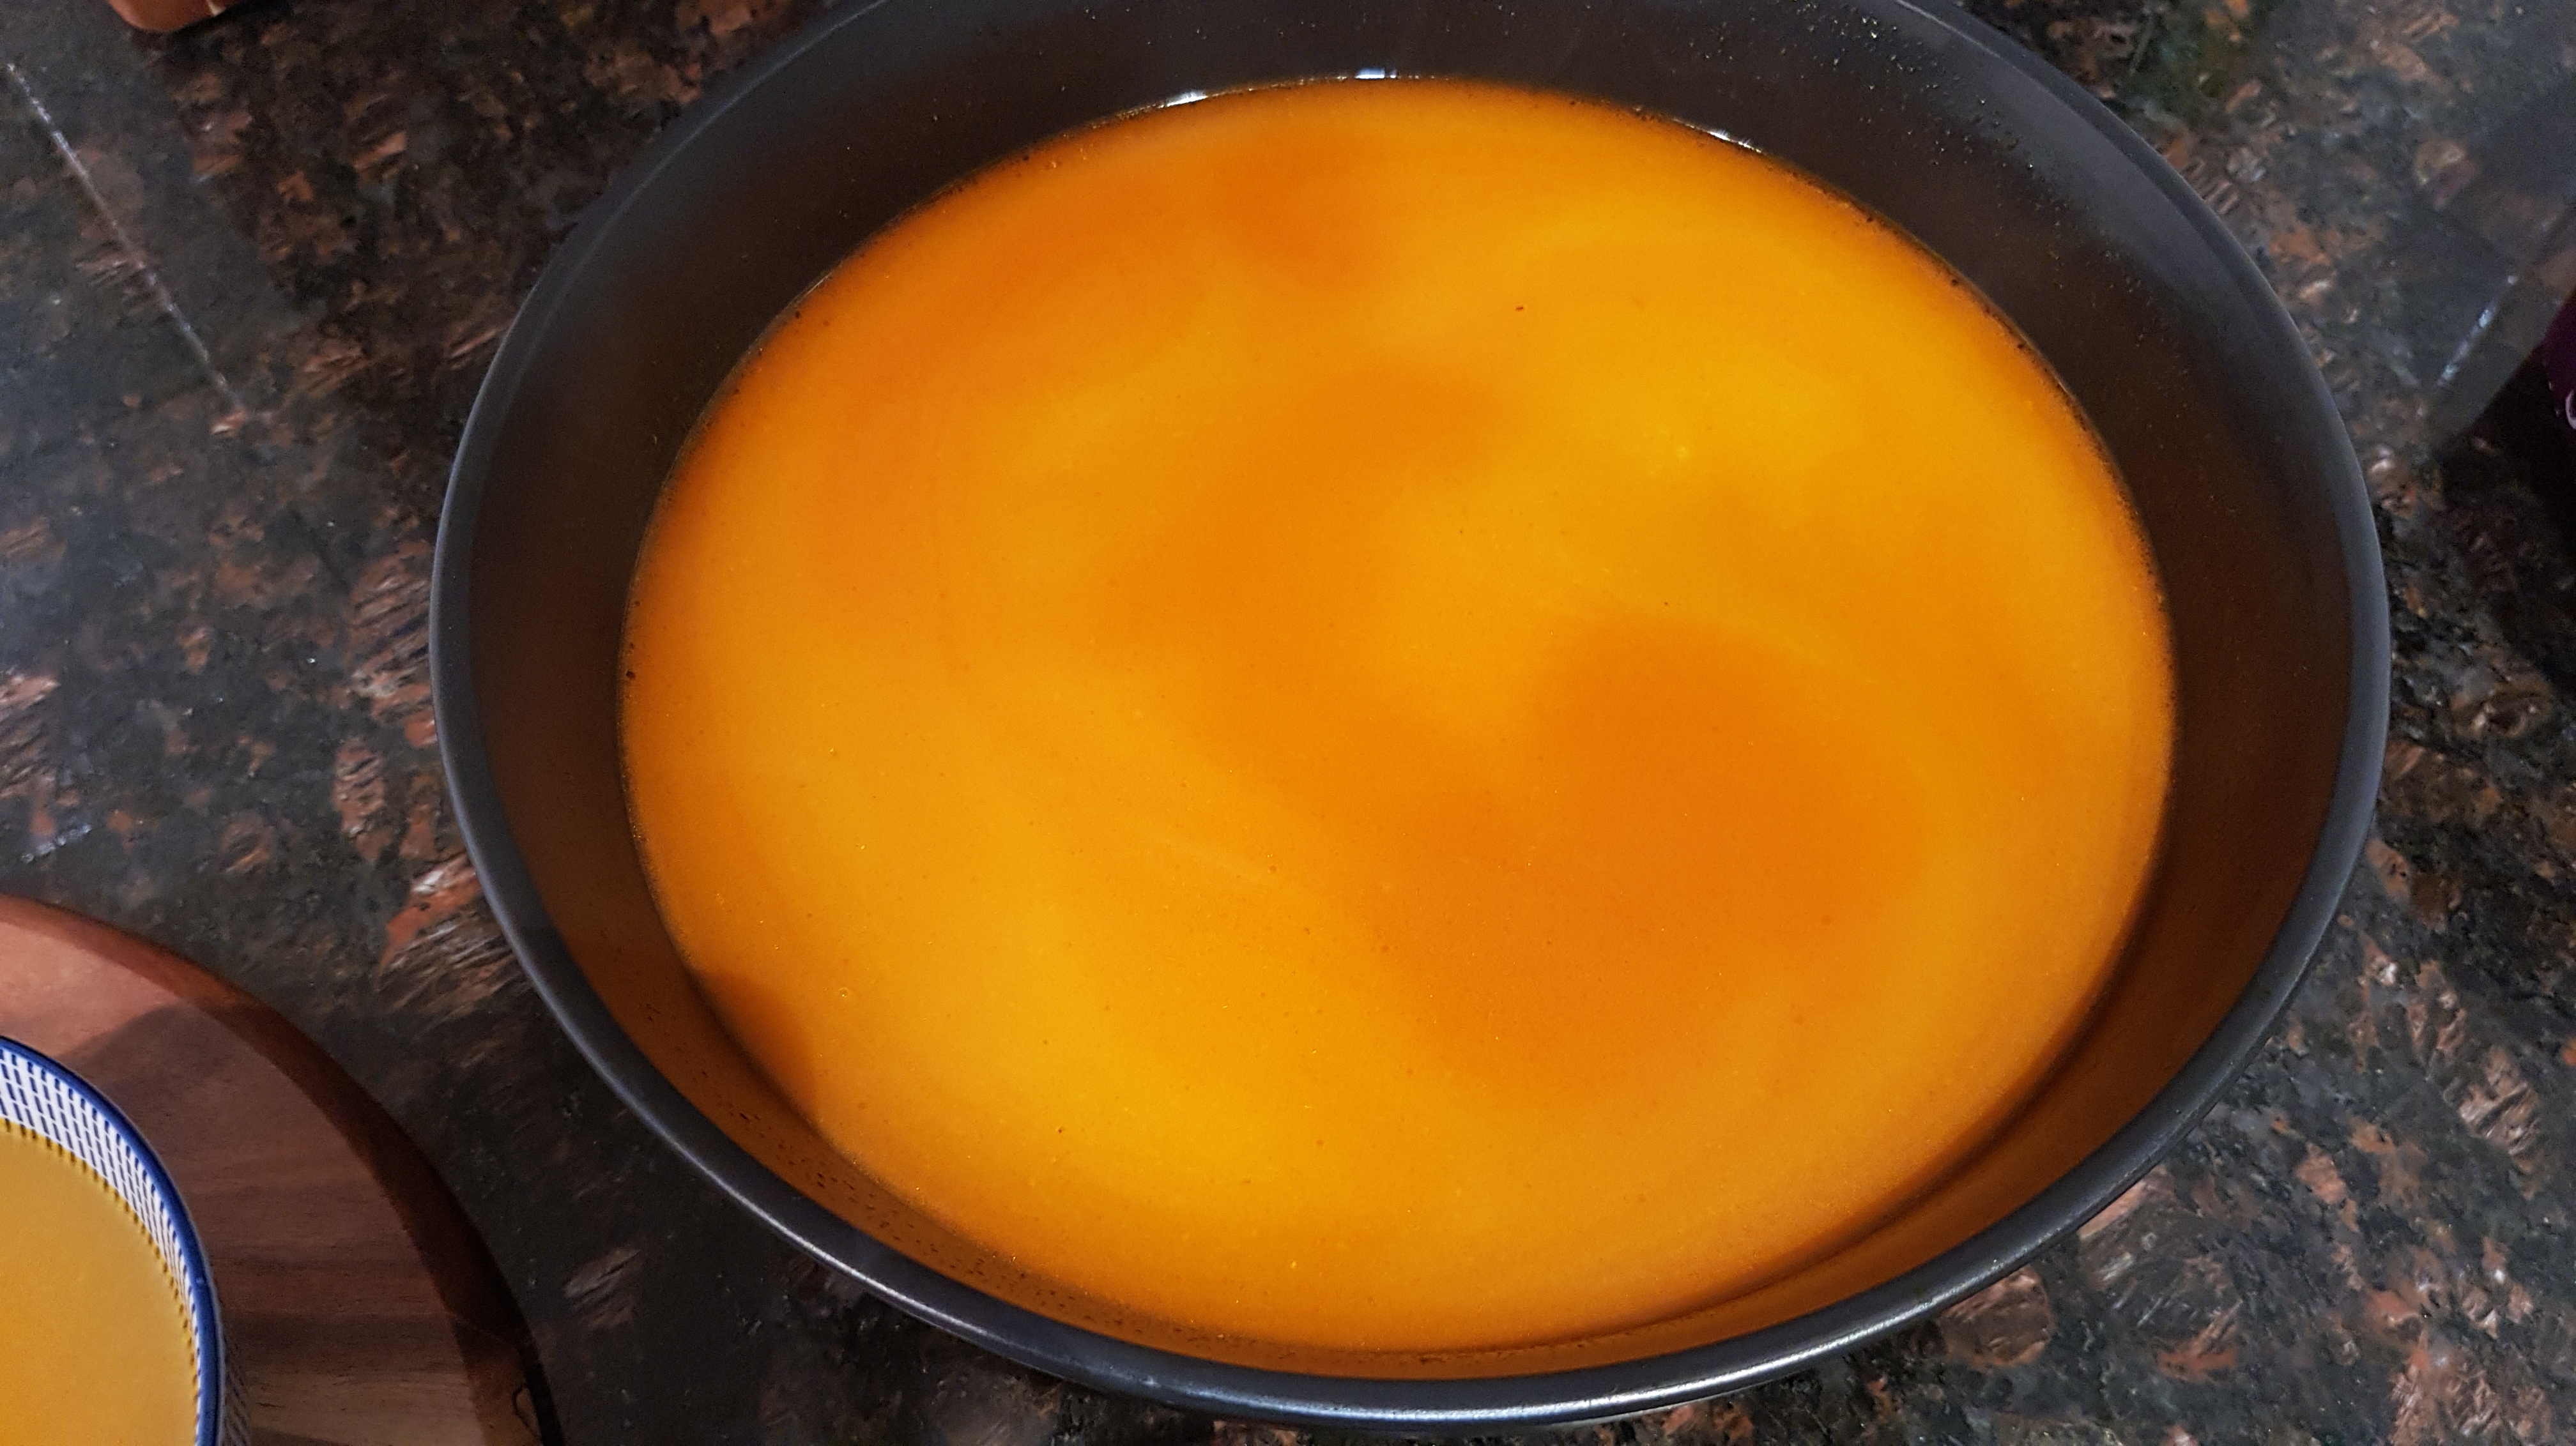
Bombay Brasserie’s Chicken Shorba Soup
Making this spicy Indian chicken soup was a labour of love. It was however very worth the effort.
The recipe comes from an collection called The Bombay Brasserie Cookbook. It tastes and smells amazing with a hearty but flavoursome kick to it.
I love the colours of the ingredients and also that it uses chicken frames to get the base flavour. Talk about thrifty!
From this.

To this heavenly result.

Steps
- Boiling the chicken frames
- Frying the ingredients for half an hour
- Simmering for 1 hour
- Thickening and straining the soup
- Serving
Ingredients
Halved from original recipe.
- 2 chicken frames
- a good slug of olive oil
- 1 brown onion, sliced
- 2 large tomatoes, diced
- 1/2 cup Greek yogurt
- 1 tsp minced ginger
- 6 garlic cloves, diced
- 3 small green chilies
- 2 sprigs coriander
- 1 sprig fresh mint
- 1/2 tsp coriander seeds
- 1/2 Tbsp Garam masala
- 1/2 Tbsp ground turmeric
- 1/2 tsp ground cumin
- 1 tsp Kashmiri chili powder
- table salt, to taste
- 2.5L water
- 1/2 Tbsp gram flour
- 1/2 tsp cumin seeds
Equipment
- 1 chef’s knife
- 1 chopping board
- 1 wooden spoon
- 1 saucepan
- 1 stockpot
- 1 sieve or fine strainer
Boiling the chicken frames
- Bring a sauce pan of water to the boil.
- Add your chopped up chicken frames.
- After a few minutes drain the water.

Frying the ingredients for half an hour
- Put a good slug of olive oil into your stockpot on medium heat.
- Add the 1 brown onion and fry until golden and soft.
- Add the:
- 1 brown onion
- 2 large tomatoes
- 1/2 cup Greek yogurt
- 1 tsp minced ginger
- 5 of the garlic cloves
- 3 small green chilies
- 2 sprigs coriander
- 1 sprig fresh mint
- 1/2 tsp coriander seeds
- 1/2 Tbsp Garam masala
- 1/2 Tbsp ground turmeric
- 1/2 tsp ground cumin
- 1 tsp Kashmiri chili powder
- Fry for another 15 minutes.
- Add the chicken bones and fry for another 15 minutes breaking the bones up as you go.


This is the consistency you want.

Simmering for 1 hour
- Add the 2.5L of water and bring everything to the boil.
- Simmer for about 1 hour.

Thickening and straining the soup
- We don’t want add room temperature flour to a hot stock so heat some more olive oil (about 1 Tbsp) in your saucepan.
- Add the:
- 1/2 Tbsp gram flour
- 1/2 tsp cumin seeds
- and 1 sliced garlic clove
- Fry until the flour is golden brown.
- Very carefully slowly add this to the soup, stirring as you go.
- Strain the soup back into the stockpot and briefly return to the boil.
- Season with salt to taste.


Serving
No spoon required, just lots of naan, coriander leaves and lots of slurping. 🙂

Enjoy,
PK
YOU MIGHT ALSO LIKE
INDIAN CUISINE
CHICKEN DISHES
SOUP
Please consider subscribing to a weekly email summary of our posts or check us out on Facebook @growitcatchitcookit.
[mc4wp_form id=”15771″]
Written by
·
-
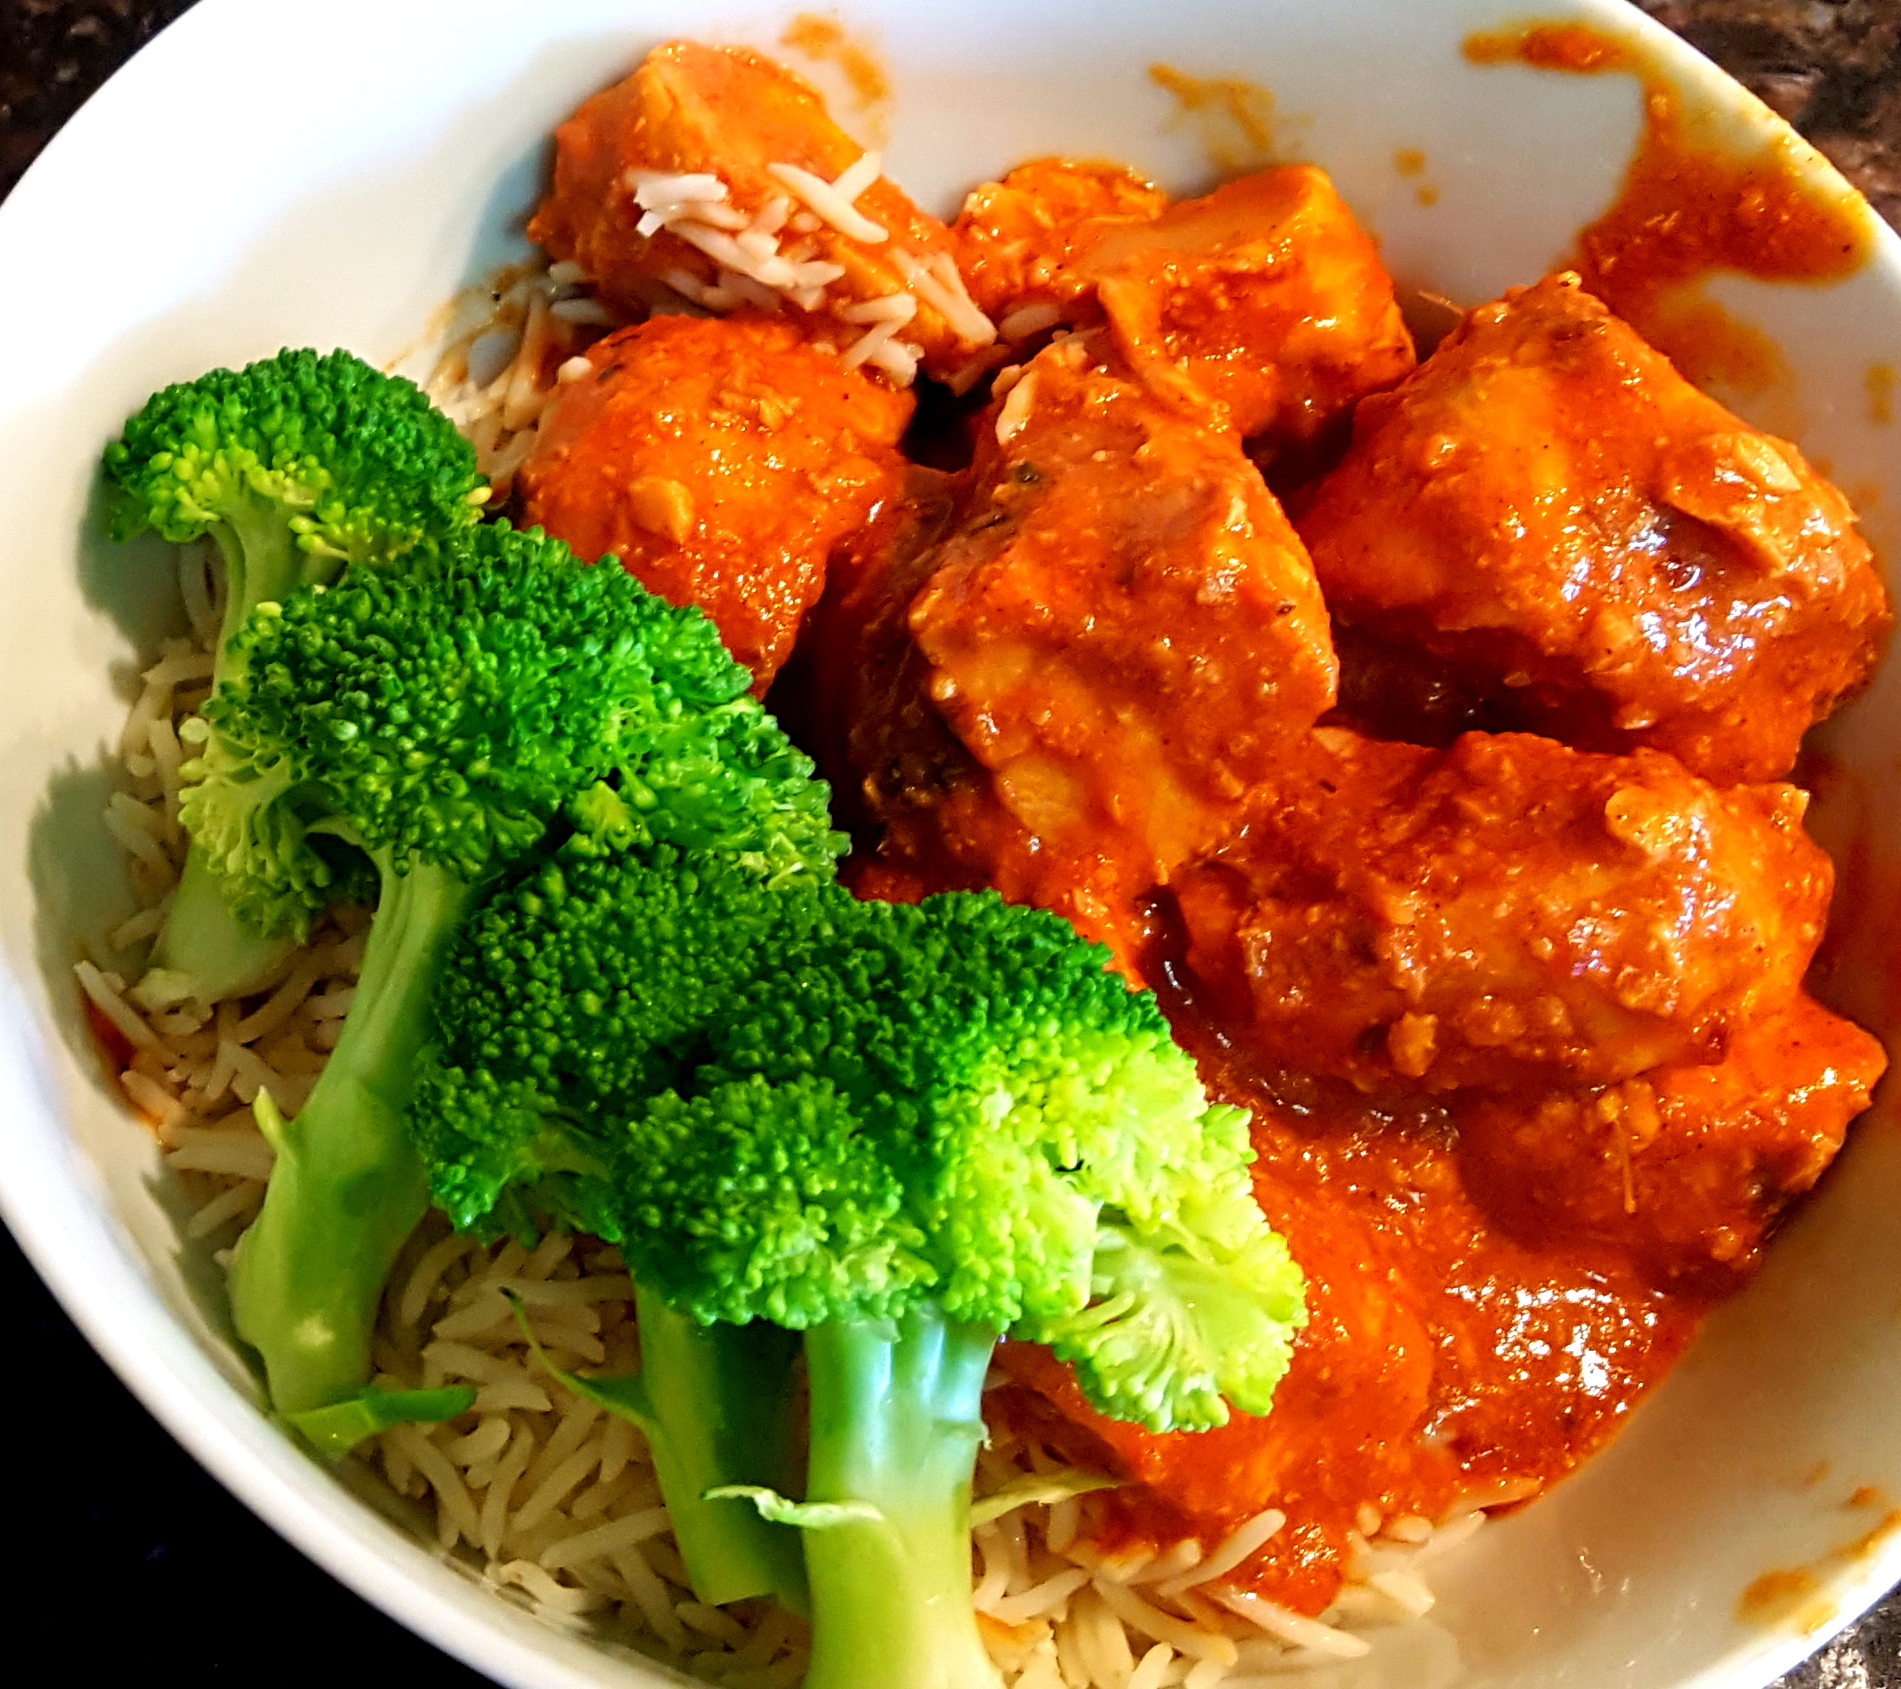
How To Make Rick Stein’s Butter Chicken
You simply can’t get this dish’s depth of flavours using a store bought Butter Chicken paste or simmer sauce. The result is the most succulent chicken in a creamy, nutty, tomato based sauce.
I won’t lie to you though. This is one of the trickier recipes on the blog.
Notes:
- I hope to char grill the chicken better next time but oh my it was amazing anyway. I think I might hit them with a chef’s torch for a bit.
- I also didn’t sprinkle it with Rick’s Chat masala at serving and want to do that next time.
Steps
- Marinating the chicken in marinade 1 for one hour
- Marinating the chicken in marinade 2 for four hours
- Charring the chicken pieces
- Making the sauce
- Serving
Ingredients
- 4 large chicken breasts, skinned and deboned
- Marinade 1
- The juice of 2 limes
- 1 tsp Kashmiri chili powder
- 1 tsp table salt
- Marinade 2
- 50g plain yoghurt
- 50g double cream
- 4 garlic cloves, diced
- 5cm ginger, roughly chopped
- 1 tsp Garam masala
- 1 tsp ground turmeric
- 3/4 tsp ground cumin
- 1/2 tsp beetroot powder (for color)
- The sauce
- 50g ghee
- 5 garlic cloves, diced
- 5cm ginger, diced
- 400g tomato passata
- 1/2 tsp Kashmiri chili powder
- 1/2 tsp ground cumin
- 1/2 tsp ground coriander seeds
- 1/2 tsp ground cinnamon
- 1/2 tsp Garam masala
- 1 tsp dessicated coconut
- 1.5 tsp table salt
- 200ml water
- 25g cashew nuts
- 25g pumpkin seeds
- 2 Tbsp boiling water
- 1 Tbsp fenugreek leaves
- 1/2 tsp caster sugar
- 45ml double cream
Equipment
- 1 chef’s knife
- 1 chopping board
- 1 wooden spoon
- 1 mixing bowl
- 1 bowl or dish for marinading
- 1 wet mixer/blender (used twice so you will need to clean it)
- 1 large heavy based saucepan
- Several skewers
Marinating the chicken in marinade 1 for one hour
- Cut each breast into 3 pieces.
- In a large bowl mix the:
- Two limes worth of juice
- 1 tsp Kashmiri chili powder
- 1 tsp table salt.
- Put the chicken pieces in the marinade and mix to coat.
- Pop the bowl in the fridge for 1 hour.

Marinating the chicken in marinade 2 for four hours
- In your wet mixer/food processor add the:
- 50g plain yoghurt
- 50g double cream
- 4 garlic cloves, diced
- 5cm ginger, roughly chopped
- 1 tsp Garam masala
- 1 tsp ground turmeric
- 3/4 tsp ground cumin
- 1/2 tsp beetroot powder (for color).
- Blend until smooth and add to the chicken making sure every knook and cranny is coated.
- Marinate for 4 hours in the fridge.

Charring the chicken pieces
- Preheat your fan forced oven to 240C.
- Thread the chicken pieces on either oiled metal skewers or pre-soaked (in water to stop them burning) wooden ones.
- Roast for 15-20 minutes aiming for slightly charred but not cooked fully through just yet.
- Start the next step while the chicken is roasting.

Making the sauce
- Grind, dice and chop the sauces ingredients.
- Heat the 50g ghee in the saucepan over a medium heat.
- Add the 5 diced garlic cloves and diced ginger and fry for a minute.
- Stir in the 400g tomato passata and simmer for 5 minutes.
- Stir in the:
- Simmer for another 10 minutes while you do the next step.
- In your wet mixer/food processor blend into a paste the:
- 25g cashew nuts
- 25g pumpkin seeds
- 2 Tbsp boiling water
- Stir the paste into the passata sauce and the rest of the water.
- Add the chicken to the sauce and gently mix everything.
- Simmer for 10 minutes and then stir in the:
- 1 Tbsp fenugreek leaves
- 1/2 tsp caster sugar
- 45ml double cream


Serving
I served this dish over a bed of basmati rice with some steamed vegetables and a plate of pappadums to share.
Spoon the chicken pieces onto the rice using a slotted spoon and then add as much sauce as the person likes.
Rick Stein says to garnish with some torn fresh coriander leaves, shredded ginger and a sprinkle of chat masala.

Enjoy,
PK
YOU MIGHT ALSO LIKE
INDIAN CUISINE
CURRIES GALORE
MORE CHICKEN DISHES
MORE RICK STEIN
Please consider subscribing to a weekly email summary of our posts or check us out on Facebook @growitcatchitcookit.
[mc4wp_form id=”15771″]
Written by
·
-
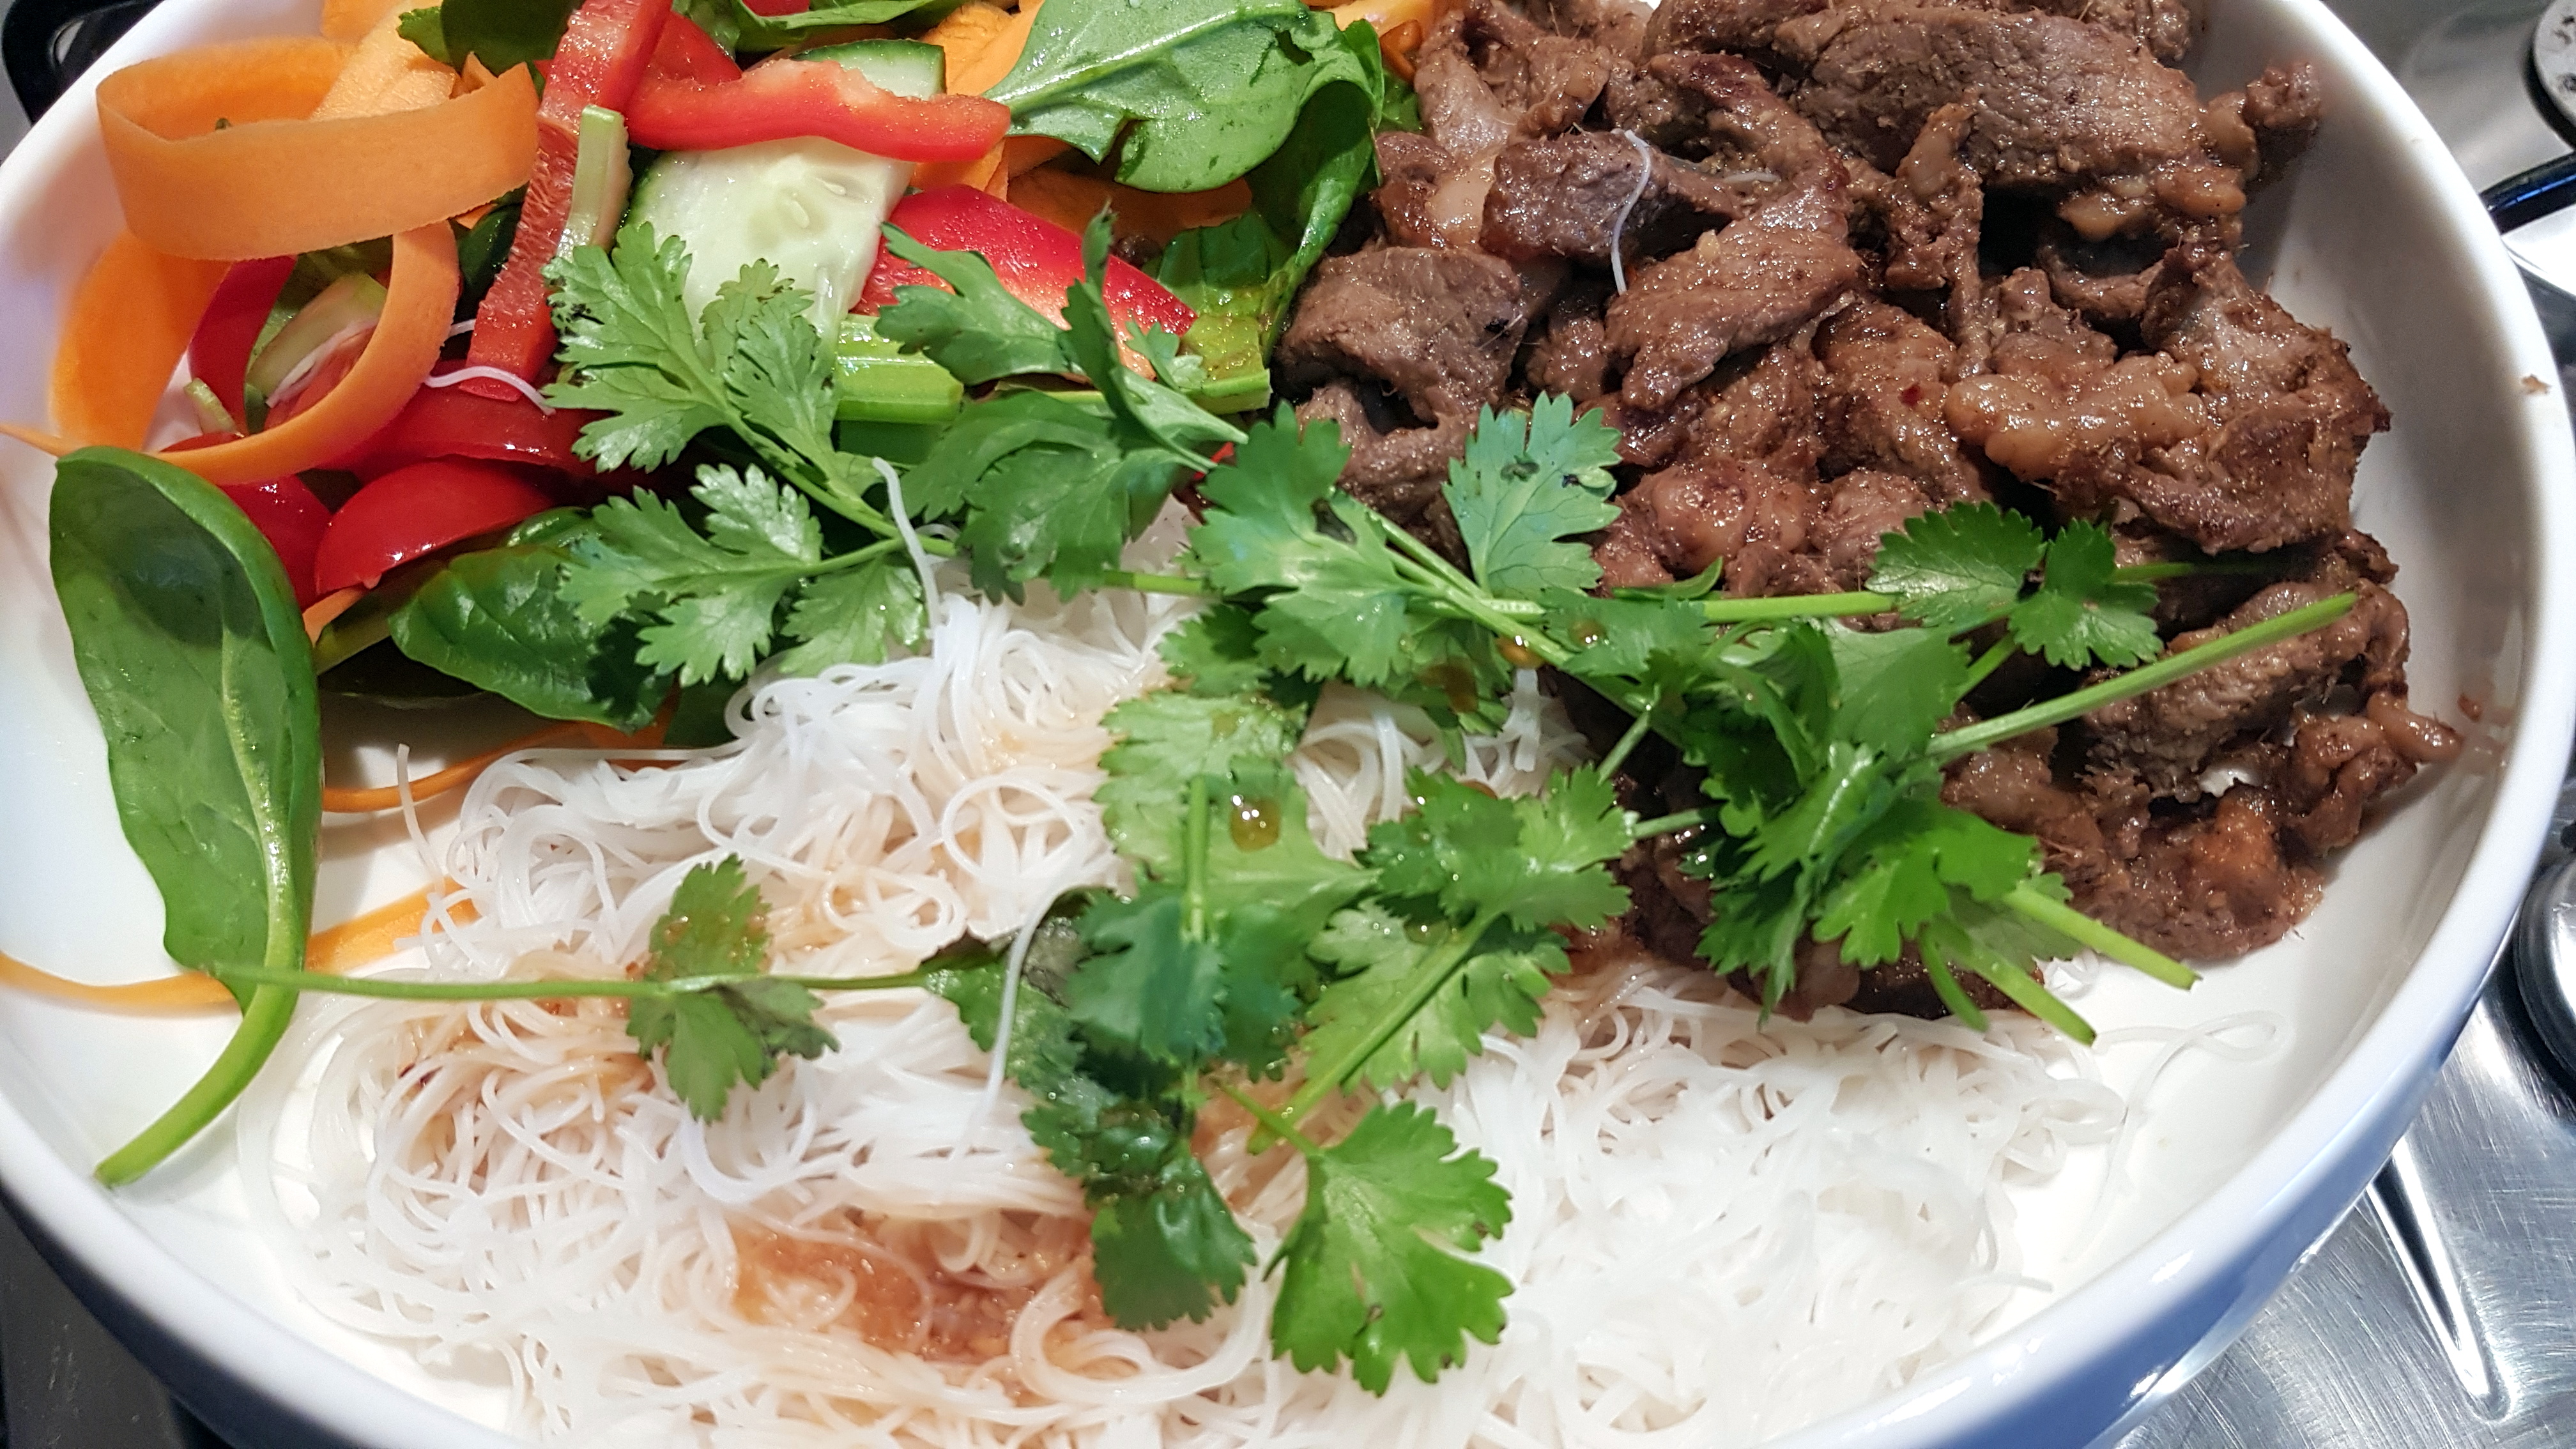
PK’s Vietnamese Beef Noodle Salad
This simple Vietnamese inspired salad could not be easier.
Think of it as a start though and experiment every time you make it. I have said it before, Southeast Asian flavours are hard to get “perfect” but so easy to get “tasty”. The trick is in tailoring the sauce ratios to your preferences. 🙂
Note: I marinade the beef first and then use very little in the way of sauces on the salad and noodles afterwards. Some soy sauce and I am good to go. Your options are endless though.

You will be:
- Preparing everything
- Cooking the beef strips
- Serving
You will need:
- Ingredients:
- PK’s Vietnamese Beef Marinade #1
- several beef scotch fillet or eye fillet (tenderloin) steaks
- a couple of slugs of peanut oil
- a green salad of your choice (see KT’s NoRecipe Green Salad but add things like mint leaves and coriander sprigs)
- Equipment:
- a long sharp knife
- a chopping board
- a fry pan
- a sauce pan or pot for the noodles
- a bowl to marinade the beef in
Preparing everything
- Earlier in the day or the night before, slice the beef steaks into strips and marinade them using something like PK’s Vietnamese Beef Marinade #1.
- Pop the bowl into the fridge.
- Closer to serving time, make a yummy green salad and drizzle with a bit of vinegar.
- Pull the bowl of beef strips out of the fridge to get them to room temperature just as they are going onto the barbecue or hot plate.

Cooking the beef strips
- Chuck the noodles into a bowl of hot water and let them soften as per the instructions on the pack.
- Heat a fry pan, throw a couple of slugs of peanut oil in and start cooking the beef strips.

Serving
Take the meat off the fry pan and allow to cool some. Bring everything together and drizzle with some soy sauce.


Enjoy,
PK
Related Links:
Please consider subscribing to get a weekly email summary of our posts.
[mc4wp_form id=”15771″]
Written by
·
-

Southeast Asian Chicken Salad
By now you know that I love simple, easy cooking using the freshest ingredients. This Southeast Asian chicken salad is the perfect example.
I used my Quick Pulled Chicken Breast FoodHack and then built up a nice fresh mix of vegetables and salad greens. Chuck in anything you like really and then garnish with something like coriander, bean spouts and slices of chili.
I then drizzled over my NoRecipe Southeast Asian Dipping Sauce and sat down to the perfect salad :).


Enjoy,
PK
Related Links:
Written by
·
-

PK’s Easy Pho Ga
When someone mentions Vietnamese cuisine I immediately think of the famous Vietnamese noodle dish called Pho.
Pho (pronounced like ‘fur’ but without the hard r) is a modern take on more traditional dishes. The Vietnamese people rapidly took to this healthy “fast food” and then spread it around the globe.
I imagine everyone has their own favourite style of Pho. Mine is a sweet and sour broth with some lightly poached chicken, lots of vegetables and tons of rice noodles. Simply multiply the ingredients below for each person you are serving.
I go light on the chili factor (even none at all for my family) and then I use Sriracha hot sauce in my bowl to add some heat.
Tip: Make the fried shallots ahead of time using my method here. They are an optional garnish but I feel they really “make” this dish.
You will be:
- Building the broth
- Poaching the chicken
- Serving.
You will need:
- Ingredients:
- Broth for one:
- 3 cups homemade chicken stock
- a splash of fresh lime juice
- 1.5 Tbsp fish sauce
- a small chunk galangal (galanga)
- a small chunk ginger
- 1/2 cinnamon stick
- 1 star anise
- 1 tsp raw sugar
- black peppercorns to taste, ground
- 1 coriander root
- Bowl for one:
- 250g chicken tenderloins, sliced
- 250g rice noodles, pre-softened in boiling water
- a handful of torn coriander leaves
- a handful of mung bean sprouts
- a few sprigs of vietnamese coriander
- 2 spring onions, white parts, sliced on an angle
- jalepenos , sliced, to taste
- 1/2 a lime (for people to adjust the fish sauce/lime juice balance)
- fried shallots and garlic slices
- A handful of chopped mushrooms like shitake or enoki
- Broth for one:
- Equipment:
- a long sharp knife
- a chopping board
- a grater
- a large saucepan
- a serving bowl
Building the broth
I use my home-made chicken stock because it starts you off with a broth that has been built up with chicken bones, vegetables and garlic.
Making a starter broth this way allows you to subsequently build dish specific flavours on top of it and this is what we will do now.
- Add the 3 cups of chicken stock to the saucepan.
- Peel a chunk of galangal and a chunk of ginger and throw them into the pan whole.
- Add the:
- splash of fresh lime juice
- 1.5 Tbsp fish sauce
- 1/2 cinnamon stick
- 1 star anise
- 1 tsp raw sugar
- ground black peppercorns
- 1 coriander root
- Let everything sit for 5 minutes, to infuse, if you have time.
- Put the saucepan on low heat and then gently simmer for about 10 minutes.
Poaching the chicken
- Add the 250g of sliced chicken tenderloins to the gently simmering pan of broth.
- Allow the chicken to cook for 5 minutes and then remove the pan from the heat (by this stage everything is cooked and you don’t want the chicken to overcook as it will go leathery).

Serving
Serve the broth over the rice noodles and vegetables. Garnish with slices of chili, fried shallots and even omelette and peanuts.
Have in easy reach extra fish sauce, lime wedges and of course Sriracha sauce so you and your guests can adjust the taste to suit.


Enjoy,
PK
YOU MIGHT ALSO LIKE
VIETNAMESE CUISINE
NOODLE DISHES
BROWSE INGREDIENTS POSTS
THE FULL GICICI INGREDIENTS LIST
Please consider subscribing to a weekly email summary of our posts or check us out on Facebook @growitcatchitcookit.
[mc4wp_form id=”15771″]
Written by
·
-
PK’s Cheaters Pho Ga For One
When someone mentions Vietnamese cuisine I immediately think of the famous Vietnamese noodle dish called Pho.
Pho (pronounced ‘fur’ but without the hard r) is a modern take on more traditional dishes but the Vietnamese people rapidly took to this healthy “fast food” and then spread it around the globe.
I imagine everyone has their own favourite style of Pho. Mine is a sweet and sour broth with some lightly poached chicken, lots of vegetables and tons of rice noodles. Simply multiply the ingredients below for each person you are serving.
I go light on the chili factor (even none at all for my family) and then I use Sriracha hot sauce in my bowl to add some heat.
Tip: Make the fried shallots ahead of time using my method here. They are an optional garnish but I feel they really “upgrade” this dish.
You will be:
- Building the broth
- Poaching the chicken
- Serving.
You will need:
- Ingredients:
- Broth for one:
- 3 cups homemade chicken stock
- a splash of fresh lime juice
- 1.5 Tbsp fish sauce
- a small chunk galangal (galanga)
- a small chunk ginger
- 1/2 cinnamon stick
- 1 star anise
- 1 tsp raw sugar
- black peppercorns to taste, ground
- 1 coriander root
- Bowl for one:
- 250g chicken tenderloins, sliced
- 250g rice noodles, pre-softened in boiling water
- a handful of torn coriander leaves
- a handful of mung bean sprouts
- a few sprigs of vietnamese coriander
- 2 spring onions, white parts, sliced on an angle
- jalepenos , sliced, to taste
- 1/2 a lime (for people to adjust the fish sauce/lime juice balance)
- fried shallots and garlic slices
- Broth for one:
- Equipment:
- a long sharp knife
- a chopping board
- a grater
- a large saucepan
- a serving bowl
Building the broth
I use my home-made chicken stock because it starts you off with a broth that has been built up with chicken bones, vegetables and garlic.
Making a starter broth this way allows you to subsequently build dish specific flavours on top of it and this is what we will do now.
- Add the 3 cups of chicken stock to the saucepan.
- Peel a chunk of galangal and a chunk of ginger and throw them into the pan whole.
- Add the:
- splash of fresh lime juice
- 1.5 Tbsp fish sauce
- 1/2 cinnamon stick
- 1 star anise
- 1 tsp raw sugar
- ground black peppercorns
- 1 coriander root
- Let everything sit for 5 minutes, to infuse, if you have time.
- Put the saucepan on low heat and then gently simmer for about 10 minutes.
Poaching the chicken
- Add the 250g of sliced chicken tenderloins to the gently simmering pan of broth.
- Allow the chicken to cook for 5 minutes and then remove the pan from the heat (by this stage everything is cooked and you don’t want the chicken to overcook as it will go leathery).

Serving
Serve the broth over the rice noodles and vegetables. Garnish with slices of chili, fried shallots and even omelette and peanuts.
Have in easy reach extra fish sauce, lime wedges and of course Sriracha sauce so you and your guests can adjust the taste to suit.


Enjoy,
PK
Written by
·
-

PK’s Shakshuka For One
After recently being introduced to this amazing dish by ShakShukaMoroccan (these guys are super friendly and they bring skill and passion to their work) at the Palmyra Markets (Western Australia), I have dreamt about it ever since. I present my first attempt in the hope you get addicted too :).
There is something captivating about this ‘eat any time of the day’ dish because the list of ingredients is so simple but the end result makes your draw drop and your senses swim. I intend to chop and change some of the ingredients depending on what I have in the back of the fridge but the core is lots of tomatoes, onion, capsicum, cumin, leafy greens and poached eggs.

You will be:
- Preparing your ingredients.
- Stewing the tomato base.
- Poaching the eggs.
- Serving.
You will need:
- Ingredients:
- a punnet of cherry tomatoes, sliced
- half a brown onion, thinly sliced
- half a capsicum (bell pepper), sliced
- 1 -2 garlic cloves, finely diced
- 1/2 tsp cumin seeds, ground
- 1/2 tsp coriander seeds, ground
- a generous dash of dried paprika, ground
- a handful of spinach
- a good slug of olive oil
- a really good slug of tomato paste
- black peppercorns to taste, cracked
- table salt to taste
- chili powder to taste
- coriander leaves to garnish (mint leaves are also good)
- Equipment:
- a long sharp knife
- a chopping board
- a dry mixer or a mortar and pestle
- a cast iron skillet (mine was 21cm wide) or heavy pan
- a wooden spoon
Preparing your ingredients
- Roughly slice the punnet of cherry tomatoes.
- Finely slice or chop the half a brown onion.
- Slice the half a capsicum (use more if you prefer).
- Finely dice the 1 -2 garlic cloves.
- Roast and the grind the:
- 1/2 tsp cumin seeds
- 1/2 tsp coriander seeds
- Wash the handful of spinach.
- Wash the coriander leaves and rip them up some.
Stewing the tomato base
- Bring your skillet to medium to low heat and add a good slug of olive oil.
-
Add the sliced onion, the ground cumin seeds, ground coriander seeds and a generous dash of ground paprika.
- Cook until the onions have started to soften and add the sliced half a capsicum.
- When the capsicum slices are starting to soften add the punnet of sliced cherry tomatoes and the handful of spinach leaves.


Poaching the eggs
- Once you are happy with the tomato stew turn the heat right down.
- Make a couple of indentations in the stew with your wooden spoon.
- Crack an egg into each indent and keep cooking until the eggs are how you like them. You can put a plate over the skillet if you like the top of your eggs cooked.


Serving
Garnish with some ripped coriander leaves or mint and serve piping hot and still in the skillet.I couldn’t wait and started eating it while it was still on the hob :).Enjoy,
PK
YOU MIGHT ALSO LIKE
MORE NORTH AFRICAN CUISINE
Please consider subscribing to a weekly email summary of our posts or check us out on Facebook @growitcatchitcookit.
[mc4wp_form id=”15771″]
Written by
·
-

PK’s Creamy Cauliflower And Parmesan Soup With Soft Pork Belly
I was day dreaming about a new dish for dinner and thought it would be cool to try pork belly with this soup instead of bacon.
Hope you like it.
Pork belly aside, the soup only takes about 30 minutes to cook and the hands on bit only takes 10 of them.
You will be:
- Making the pork belly
- Making the cauliflower soup
- Serving
You will need:
- Ingredients:
- A slice of pork belly for each serving (ingredients are here)
- A good slug of olive oil
- 1 celery stalk, rough chopped
- 1/2 onion, rough chopped
- 1 garlic clove, finely chopped
- 1 potato, rough chopped
- 3 cups PK’s Slow Cooker Chicken Stock
- 1 bay leaf
- 500g cauliflower florets
- 1/2 cup milk
- 1/2 cup Parmesan cheese, grated
- Water, add in small portions if soup is too thick
- Equipment:
- 1 chef’s knife
- 1 chopping board
- 1 soup pan
- 1 stick mixer
- 1 wooden spoon
Making the pork belly
Make and then chill a strip of pork belly for each serve. Please see the recipe here.
Making the cauliflower soup
- Chuck a slug of olive oil into the pan and bring it to a medium low heat.
- Add and sweat the chopped:
- 1 celery stalk
- 1/2 brown onion
- 1 garlic clove
- Add the bay leaf.
- Add the 500g cauliflower florets and 1 potato and sweat for another minute or so.
- Add the three cups of chicken stock and bring to the boil.
- Reduce heat and simmer for about 15 minutes or the potato is cooked.
- Pull out the bay leaf
- Allow to cool a little and add the 1/2 cup of milk and blend with a stick mixer.
- Add small amounts of water if the soup is too thick for your liking (remember that we are about to add cheese which will thicken it further),
- Add the 1/2 cup parmesan cheese and mix with a wooden spoon or the like.
Serving
My original idea was to serve the soup warm with a piece of pork belly. I ended up chilling the soup however. It was marvelous and the pork belly really complimented the soup’s gentle flavours.

Enjoy,
PK
YOU MIGHT ALSO LIKE
MORE SOUP RECIPES
PORK DISHES
Please consider subscribing to a weekly email summary of our posts or check us out on Facebook @growitcatchitcookit.
[mc4wp_form id=”15771″]
Written by
·
-
PK’s Creamy Cauliflower And Parmesan Soup With Pork Belly
I was day dreaming about a new dish for dinner and thought it would be cool to try pork belly with this soup instead of bacon.
Hope you like it.
You will be:
- Making the pork belly.
- Making the cauliflower soup.
- Serving.
You will need:
- Ingredients:
- a slice of pork belly for each serving (ingredients are here)
- a good slug of olive oil
- 1 celery stalk, rough chopped
- 1/2 onion, rough chopped
- 1 garlic clove, finely chopped
- 1 potato, rough chopped
- 3 cups PK’s Slow Cooker Chicken Stock
- 1 bay leaf
- 500g cauliflower florets
- 1/2 cup milk
- 1/2 cup parmesan cheese, grated
- water to taste, add in small portions if soup is too thick
- Equipment:
- a long sharp knife
- a chopping board
- kitchen shears
- a deep pan
- stick mixer
- wooden spoon
Making the pork belly
Make and then chill a strip of pork belly for each serve. Please see the recipe here.

Making the cauliflower soup
- Chuck a slug of olive oil into the pan and bring it to a medium low heat.
- Add and sweat the chopped:
- 1 celery stalk
- 1/2 brown onion
- 1 garlic clove
- Add the bay leaf.
- Add the 500g cauliflower florets and 1 potato and sweat for another minute or so.
- Add the three cups of chicken stock and bring to the boil.
- Reduce heat and simmer for about 15 minutes or the potato is cooked.
- Allow to cool and add the 1/2 cup of milk and blend with a stick mixer.
- Add small amounts of water if the soup is too thick for your liking (remember that we are about to add cheese which will thicken it further),
- Add the 1/2 cup parmesan cheese and mix with a wooden spoon or the like.
Serving
My original idea was to serve the soup with a piece of pork belly. I ended up doing so but chilled the soup and unlike the picture, chopped the pork belly into cubes. The pork belly’s skin was crisp enough to not be chewy but not be all about the crackling and the meat really complimented the soup’s gentle flavours.

Enjoy,
PK
Written by
·
-

PK’s Chicken Puff Pastry Parcels
These little chicken parcels encourage variety and experimentation when it comes to their fillings. They especially lend themselves to using up leftover chicken and those limp vegetables at the back of the fridge.
Your kids are going to love them and I found them really easy to make even though I am a pastry novice. I even eat them cold the next day at work for a snack.
One sheet of puff pastry makes four small rectangular parcels and you can scale the recipe up easy peasy. I’ll show you how I generally make them below but as I said, mix it up. 🙂
You will be:
- Bringing together the ingredients.
- Making the parcels.
- Cooking the parcels.
- Serving.
You will need:
- Ingredients (makes 4 small parcels):
- PK’s NoRecipe Garlic Butter
- PK’s Pulled Chicken Breast FoodHack
- 1 sheet of frozen puff pastry (I used Pampas brand)
- Small amounts of:
- spinach leaves
- corn kernels
- coriander leaves
- ground black peppercorns
- 1 chicken egg (beaten for the glazing and sealing)
- 2 Tbsp water (for the egg mix)
- Equipment:
- a chopping board
- a small sharp knife
- an oven tray or dish
- a basting brush
- a small whisk
- a bowl to beat the egg
Bringing together the ingredients
- Defrost your frozen puff pastry sheet and cut it into 4 squares.
- Take the garlic butter out of the fridge.
- Take the pulled chicken out of the fridge.
- Wash and dry the spinach leaves and coriander leaves.
- Cook and cool the corn kernels.
- Whisk the single egg along with the 2 Tbsp water.
- Turn your fan forced oven on to 190°C.
Making the parcels
Now for the fun part but remember that with the fillings, less is more :).
- Spoon a little of the garlic butter into the middle lower half of the square.
- Build up the rest of the fillings in layers.
- Brush the egg mix on all four sides of the square to make it stick.
- Then fold the square over to make a pillow shape.
- Press the edges with you finger to seal the pillow and then brush more of the egg mixture over the whole thing.
- Add some air holes with your knife.
- Put the parcels in your oven tray and refrigerate if required by your meal’s timing.
Filling the parcels:
Add some air holes and and few slices with the knife to make them look nice:

Cooking the parcels:
- Put the oven tray into your preheated 190°C fan forced oven and cook until golden brown (approximately 40 minutes).
- Slice one and eat it before anyone else gets one. If you get caught say you are just making sure everything is cooked through :).

Serving
Here I simply served the parcels, about 4 per hungry adult, with some more greens and a glass of white wine.

Enjoy,
PK
YOU MIGHT ALSO LIKE
MORE KID FRIENDLY MEALS
OUR OTHER RECIPES STARRING CHICKEN
Please consider subscribing to a weekly email summary of our posts or check us out on Facebook @growitcatchitcookit.
[mc4wp_form id=”15771″]
- see more kid friendly meals here
Written by
·