Tag: carrot
-

PK’s Coq Au Vin
I have been sitting on this post for about 9 months now because I wasn’t sure it looked appealing. I was worried that you wouldn’t be inspired enough to try it.
Sometimes though we need to be reminded that we are our own worst critic and a good friend of mine just did that. She said its picture looked ‘tasty and who cares what it looks like anyway’ and this made me remember that this blog is all about food connection and the way food makes you feel.
So here it is :).
Coq au vin is a “peasant” French dish of braised chicken (cockerel traditionally) in red wine with a generous heap of bacon, onion, carrots and celery. I should have served with more sauce than shown in the photos below but rest assured the chicken was lovely and tender :).
You will be:
- Preparing your ingredients
- Browning the chicken
- Making the sauce
- Slow cook everything
- Reducing the sauce
- Serving.
You will need:
- Ingredients:
- a whole chicken, skin off, cut into quarters (mine was about 1.3kg)
- 1 celery stick, chopped
- 2 carrots, peeled and chopped
- 140g bacon, chopped (I used ‘short cut’ rashers)
- 1 large brown onion, sliced
- black peppercorns to taste, cracked
- 1 cup plain flour to dust the chicken pieces
- a good slug of olive oil
- 2 cups red wine
- 1/2 cup homemade chicken stock
- A handful of small or chopped mushrooms
- Equipment:
- a long sharp knife
- a chopping board
- an oven proof dish
- tongs
- a wooden spoon
- a dish to keep chicken warm
Preparing your ingredients
- Chop the 1 large brown onion into quarters or slices depending on your preference (you could even use a few whole shallots instead).
- Chop the 2 carrots and the celery stick the way you want too (sometime I prefer larger pieces of vegetables in this dish).
- Quarter the whole chicken (I recommend this knife), remove the skin and dust in flour and black pepper.
- Chop the 140g of bacon.


Browning the chicken
- Chuck a good slug of olive oil in the oven proof dish and put it on the hob (medium heat).
- Brown chicken on all sides.
- Take the chicken pieces out, put them on a plate and chuck them in an oven on very low heat to keep them warm.


Making the sauce
- Put a good slug of red wine to moisten the oven proof dish and then add the:
- 1 celery stick, chopped
- 2 carrots, peeled and chopped
- 140g bacon, chopped
- 1 large brown onion, sliced
- Throw in the handful of chopped mushrooms.
- Add the remainder of the 2 cups red wine and bring to the boil to cook off the alcohol.
- Replace the chicken, cover and put the hob on low heat.


Slow cook everything
Cook for about an hour, turning the chicken every now and again.
Reducing the sauce
Remove the chicken again and put it back into the oven to keep it warm while you reduce the rest of the sauce.


Serving
Mashed or boiled potatoes will go a treat and I also recommend adding some steamed snow peas pods and a nice crusty baguette :).

Enjoy,
PK
Related Links:
- See more chicken recipe posts here
Written by
·
-
PK’s Lazy Slow Cooker Beef Stroganoff
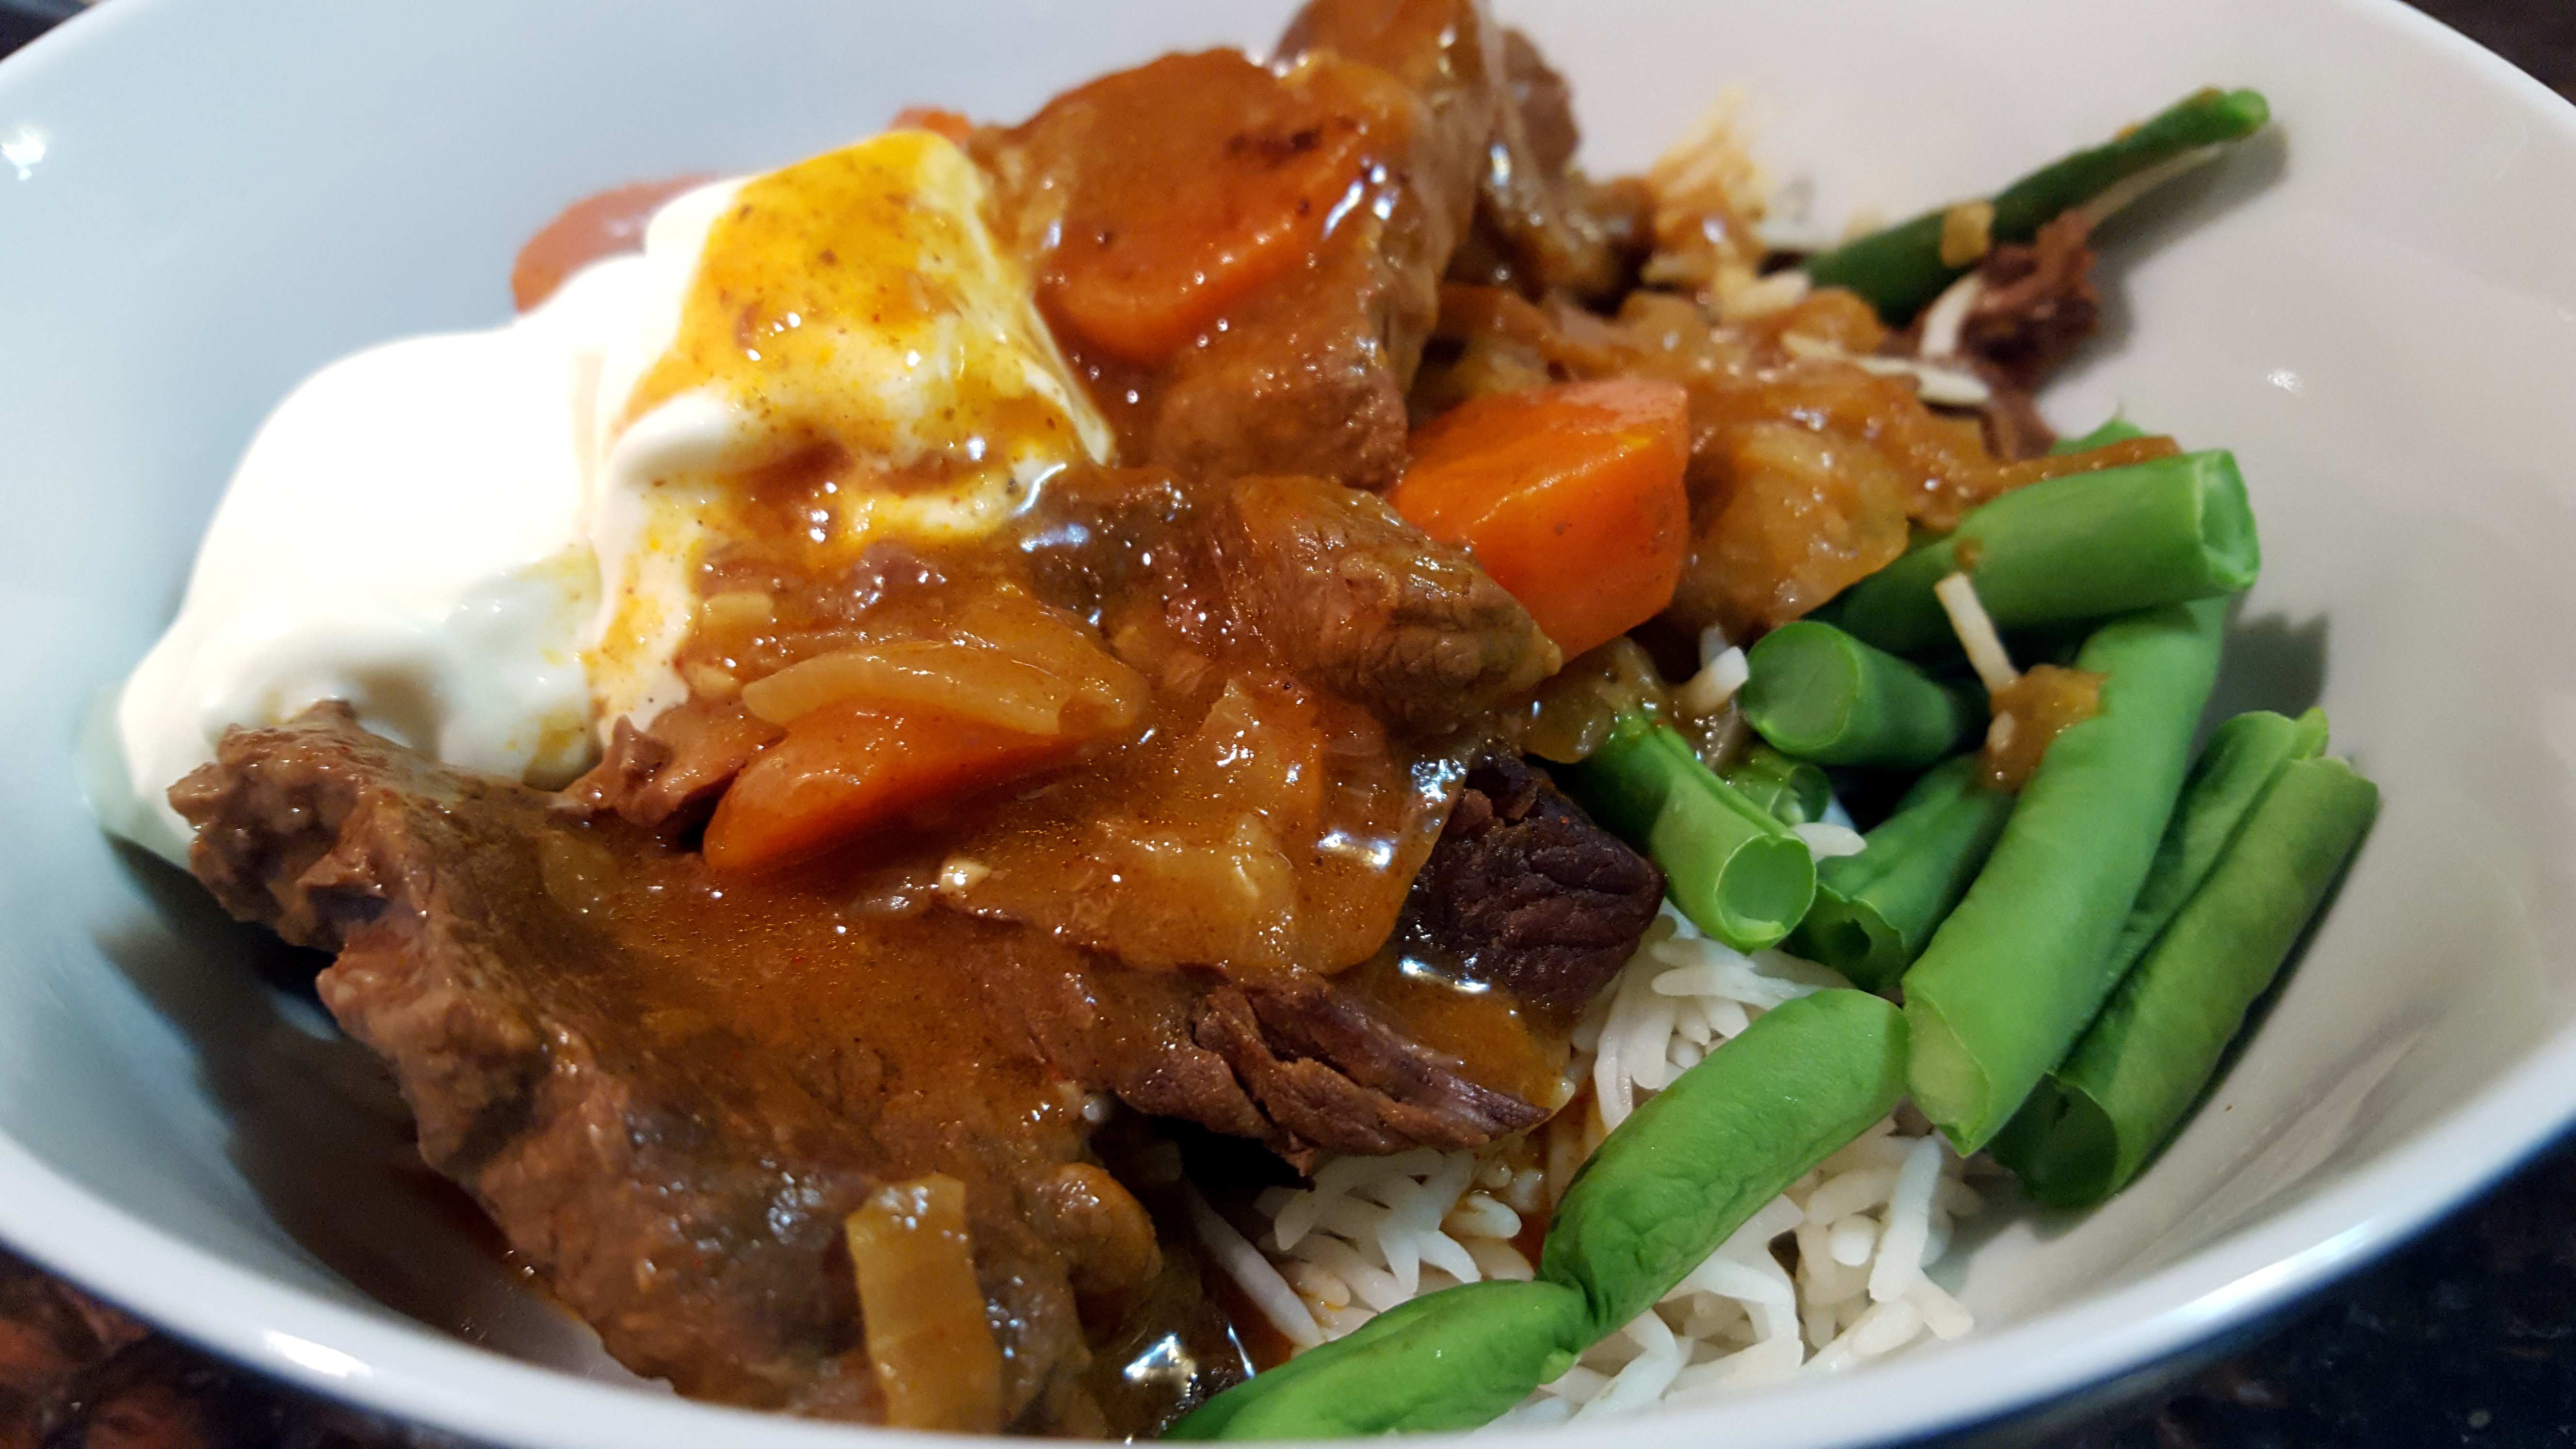
This slow cooked dish isn’t going to win me points for authenticity but it is tasty, easy to make and kid friendly :).
My youngsters insist on having the sour cream (that you would normally mix through) on the side and they are not mushroom fans. I feel however, that you need mushrooms for a richer flavour. My solution is to use whole ‘cup’ or button mushrooms and that seems to avoid turning dinner into a picking out bits of chopped mushroom exercise :).
You will be:
- Preparing your ingredients.
- Browning the beef and softening the vegetables.
- Cooking low and slow.
- Serving.
You will need:
- Ingredients:
- 1kg of beef (I used rump steak), cubed
- A few slugs of olive oil
- 1 large brown onion, sliced
- 2 -3 garlic cloves, finely diced
- 2 large carrots, peeled and chopped
- 1 Tbsp paprika, ground
- 3 medium mushrooms (I used ‘cup’), whole or chopped
- 2 Tbsp plain flour
- Table salt to taste
- Black peppercorns to taste, ground
- 2 cups home-made stock (I only had chicken to hand)
- A good slug of tomato paste
- A good slug of Worcestershire sauce
- A handful of small or chopped mushrooms (optional)
- Equipment:
- 1 long sharp knife
- 1 chopping board
- 1 fry pan
- 1 slow cooker
- 1 mixing jug
- 1 whisk or fork
Prepare your ingredients
- Turn your slow cooker onto medium and add a slug of oil, lid on.
- Cube the 1kg of beef and sprinkle with salt and pepper to taste.
- Slice the 1 brown onion.
- Peel and finely dice the 2 -3 garlic cloves.
- Peel and chop the 2 carrots.
- Rinse the 3 ‘cup’ mushrooms and rough chop them if you prefer.

Browning the beef and softening the vegetables
- Heat a slug of olive oil in a fry pan over medium heat.
- Brown the beef and then add it to the slow cooker along with the whole or chopped mushrooms.
- Add a bit more oil to the fry pan if you need it (I didn’t).
- Throw into the fry pan the
- onions
- garlic
- carrots
- tomato paste
- stock
- 2 Tbsp plain flour
- 1 Tbsp ground cumin
- a good slug of Worcestershire sauce
- Give everything a gentle but thorough mix, cooking on medium heat until the onions have softened.
- Pour the contents of the fry pan into the slow cooker.


Cooking low and slow
1. Cover and cook on medium for 4 to 5 hours and the sauce is somewhat reduced.

Serving
My kids prefer that I take the mushrooms out before I serve the dish on a bed of rice and steamed greens. I then give everyone a very healthy dollop of sour cream.

Enjoy,
PK
Written by
·
-

PK Makes River Cottage’s Citrus Braised Lamb Shanks
Everyone has a dish that they feel slightly guilty about. Guilty because somehow it turns out exceptionally good every single time. This is mine and it has magical powers :).
It is originally from the hit Channel 4 series and books, ‘River Cottage’ and I merely adapted it to work in a slow cooker. I like dishes that are a bit different and I prefer this lighter white wine and citrus version over traditional red wine based lamb shank recipes.
River Cottage’s Hugh Fearnly-Whittingstool can’t have known its romantic power when he added this dish to his cookbook though, surely not. It was the first meal I cooked for my wife to be and she fell madly in love with me. That’s the magical bit and might contradict her version of events :).
You will be:
- Sweating the vegetables in the slow cooker.
- Browning the lamb shanks and deglazing the frypan.
- Cooking it slow.
- Serving.
You will need:
- Ingredients:
- 4 lamb shanks
- 2 carrots
- 1 large brown onion
- 2 celery sticks
- 2 bay leaves
- 2 garlic cloves, peeled
- a few sprigs of fresh thyme or lemon thyme
- a small handful of parsley or celery leaves, chopped
- 1 large orange
- 1 large lemon
- half a bottle of white wine (I used a Sauvignon blanc)
- 1 cup of home made stock (I used chicken stock as that was all I had) or 1 cup water
- several slugs of olive oil
- a good slug of tomato paste
- ground rock salt to taste
- cracked black peppercorns to taste
- 0.5 Tbsp whole black peppercorns (optional)
- A handful of small or chopped mushrooms (optional)
- Equipment:
- a chopping board
- a long sharp knife
- kitchen tongs
- a wooden spoon
- a citrus zester
- a citrus juicer
- a large frypan
- a slow cooker
Steps:
Sweating the vegetables in the slow cooker
- Put a slug of olive oil into your slow cooker and turn it on high, lid on.
- Rough chop the:
- 2 carrots.
- 2 celery sticks.
- handful of parsley or celery leaves.
- Finely slice the 1 large brown onion.
- Finely chop the 2 garlic cloves.
- Add the above to your slow cooker to start them softening up, lid on (mix everything around occasionally).
- Once the onions have started to soften, throw in the 2 bay leaves and the sprigs of thyme.
- If you like a bit of peppery kick, chuck 0.5 Tbsp of black peppercorns in too.
- Juice and then zest the lemon and the orange and add to the slow cooker (retain some of the mixed juice and zest for serving time).
- Add the 1 cup of stock or 1 cup of water and mix gently.
- Add a good slug of tomato paste.
- Add a handful of small mushrooms now if you are using them.
I love seeing ingredients together like this:

Nice and soft:

Browning the lamb shanks and deglazing the frypan
- Season the 4 lamb shanks with salt and pepper.
- Chuck another slug of olive oil into the pan and bring to medium heat.
- Slightly brown every surface of the shanks. Yep, even the ends with a bit of creative meat stacking :).
- Then add them to the slow cooker.
- I now deglaze the frypan with half a bottle of white wine. When boiling I then add it to the slow cooker.
- If the slow cooker looks a bit full don’t panic. Everything will shrink down as it cooks :).

Cooking it slow
- Turn your slow cooker to medium and cook for at least 2 hours using kitchen tongs to periodically move the shanks around.
- Now you can keep the slow cooker on medium for speed or turn it down to low for a slower cook (my preference).
- When the meat is literally falling of the bone, when you are giving it a gentle mix with the kitchen tongs, it is ready.
Serving
I generally serve the shanks on a bed of mashed potato with some steamed green vegetables alongside. This time though I cooked my PK’s NoRecipe Oven Baked Potatoes and served the shanks on the bone with some greens.
Remember how we set aside some mixed zest and juice? Sprinkle a bit of the zest and then drizzle some juice over each serve to freshen the citrus flavours and aromas.
On or off the bone this dish is visually appealing:


Make this dish for someone you love,
PK
Written by
·
-

PK Makes Ching He Huang’s Beef in Oyster Sauce
My hat off to the BBC chef Ching He Huang and her simple but flavoursome Beef in Oyster Sauce recipe.
This dish caught my eye because it calls for tenderising, with a mallet or rolling pin, beef eye fillet (tenderlion) steaks. I can see you shaking your head but trust me it is a transformational part of the recipe. The meat literally melts in your mouth!

Ching’s “… approach is to demystify the notion that Chinese cooking is complicated and time consuming by demonstrating traditional recipes that can be easily adapted for the home cook…”.
Mission accomplished!
You will be
- Bashing and flash seasoning the beef.
- Stir frying the vegetables
- Stir frying the beef
- Serving
You will need
- Ingredients (as the only main it served 2 adults and a hungry toddler very well):
- 350g beef eye fillet steaks
- 1 tsp light soy sauce
- 1.5 Tbsp oyster sauce
- a pinch of raw sugar
- ground rock salt and ground black peppercorns
- 2 slugs of peanut oil
- 3 cloves garlic, finely diced
- 300g baby spinach leaves
- 1 carrot, chopped into matchsticks
- a handful of snow peas, sliced or whole
- 1 Tbsp dry Sherry
- 1 cup of your favourite rice (mine is basmati)
- Equipment
- a chopping board
- a long sharp knife
- several sheets of baking paper
- a bowl for marinading the meat
- a tenderising mallet or a rolling pin
- a wok or deep fry pan
- a serving dish
Steps:
Bashing and flash seasoning the beef
- Place the eye fillet steaks in between two sheets of baking paper and bash the stuffing out of it with a rolling pin or tenderising mallet. I know right :).
- Thinly slice the bashed beef and place into a bowl.
- Season with the:
- 1 tsp light soy sauce
- 1.5 Tbsp oyster sauce
- a pinch of raw sugar
- ground rock salt and black peppercorns to taste.


Stir frying your vegetables
- Chop and slice all of the vegetables.
- Add a slug of peanut oil to the frypan and get it nice and hot.
- Add the 3 cloves garlic (finely diced) and chopped chili to taste if you like it hot.
- Add the 1 carrot (sliced into sticks).
- Add the handful of snow peas.
- Keep everything moving all the time and then when you think it is time chuck in the 300g baby spinach leaves.
- As soon as the spinach leaves wilt and become warm put the whole lot into a serving dish. I sometimes cover them to keep everything piping hot.


Stir frying the beef
- Add another slug of peanut oil to the frypan and get it nice and hot again.
- Add the now seasoned beef slices and stir fry for a few minutes at most, remember that they will continue to cook after you take them out of the pan. We don’t want them to be chewy.
- Pour the 1 Tbsp dry Sherry over the meat and quickly toss everything.
- Add the now cooked beef to the cooked vegetables waiting in the serving dish.

Serving
Serve from a central dish and let everyone take what they need. Make sure there is plenty of rice and good conversation. 🙂

Thanks again to Ching,
PK
Here are some more Chinese and asian fusion posts:
Written by
·
-
PK Makes Beef in Oyster Sauce
This was simply the best stir fry I have ever cooked. I literally sighed when I first tasted it and you couldn’t wipe the smile of my face.
I knew it was good because everyone came back for seconds, even my toddler :).
This dish caught my eye because it calls for tenderising, with a mallet or rolling pin, beef eye fillet (tenderlion) steaks. I can see you shaking your head but trust me it is a transformational part of the recipe. The meat literally melts in your mouth!
My hat off to the BBC chef Ching He Huang and her simple but flavoursome recipe. I modified it slightly by leaving out the chili (at my family’s request), adding a lot more vegetable variety and served it with basmati rice rather than sautéed mushrooms.
Ching’s “… approach is to demystify the notion that Chinese cooking is complicated and time consuming by demonstrating traditional recipes that can be easily adapted for the home cook…”.
Mission accomplished mate!
As per my normal practice, I marinaded the beef first thing in the day. In this case I did it to make it easier, having everything ready to go, when I cooked the meal in the evening. That said, this dish will blow you away even if you just flash marinade the meat for a few minutes.
You will be:
- Bashing and flash seasoning the beef.
- Prepping, quickly stir frying the vegetables and putting them aside.
- Quickly stir frying the beef and combing everything as you serve.
You will need:
- Ingredients (as the only main it served 2 adults and a hungry toddler very well):
- 350g beef eye fillet steaks
- 1 tsp light soy sauce
- 1.5 Tbsp oyster sauce
- a pinch of raw sugar
- ground rock salt and ground black peppercorns to taste
- 2 slugs of peanut oil
- 3 cloves garlic, finely diced
- 300g baby spinach leaves
- 1 carrot, chopped into matchsticks
- a handful of snow peas, sliced or whole
- 1 Tbsp dry Sherry
- 1 cup of your favourite rice (mine is basmati)
- Equipment
- a chopping board
- a long sharp knife
- several sheets of baking paper
- a bowl for marinading the meat
- a tenderising mallet or a rolling pin
- a wok or deep fry pan
- a serving dish
Steps:
Prepare the beef
- Place the eye fillet steaks in between two sheets of baking paper and bash the stuffing out of it with a rolling pin or tenderising mallet. I know right :).
- Very thinly slice the bashed beef and place into a bowl.
- Season with the:
- 1 tsp light soy sauce
- 1.5 Tbsp oyster sauce
- a pinch of raw sugar
- ground rock salt and black peppercorns to taste.


Prep and stir fry your vegetables
- Add a slug of peanut oil to the frypan and get it nice and hot.
- Chop and slice all of the vegetables.
- Add the 3 cloves garlic (finely diced) and chopped chili to taste if you like it hot.
- Add the 1 carrot (sliced into sticks).
- Add the handful of snow peas.
- Keep everything moving all the time and then when you think it is time chuck in the 300g baby spinach leaves.
- As soon as the spinach leaves wilt and become warm put the whole lot into a serving dish. I sometimes cover them to keep everything piping hot.


Stir fry the beef:
- Add another slug of peanut oil to the frypan and get it nice and hot again.
- Add the now seasoned beef slices and stir fry for a few minutes at most, remember that they will continue to cook after you take them out of the pan. We don’t want them to be chewy.
- Pour the 1 Tbsp dry Sherry over the meat and quickly toss everything.
- Add the now cooked beef to the cooked vegetables waiting in the serving dish.

Serving:
Serve immediately :).


Thanks again to Ching,
PK
Written by
·
-

PK’s Savoury Mince And Potatoes
A favourite since childhood, this is simple food that couldn’t be easier to cook. By now you probably know that I think ‘peasant’ food is best.
It freezes very well and what’s more, you can eat it by itself or stretch it out using rice, bread, noodles or other starchy sides. One of my favourites is savoury mince and cheddar in a toasted sandwich.
I think this recipe has a couple of standard ingredients and then add whatever you like extra. Have fun and experiment :).
What are the essentials?
- beef mince
- potatoes
- carrot
- onion
- garlic
- chicken or beef stock (try Italian Beef Stock: Brodo Di Manzo)
- herbs like oregano, marjoram, thyme, bay leaves
- tomatoes or tomato paste
- pepper and salt to taste.
I also add red wine (boil it off of course) and anything else I have in my pantry or fridge that needs using.
Par-boil your potatoes:

Prepare your vegetables:

Sauté the onion in some olive oil:
Add the mince (browning it), herbs and stock (if using red wine bring to the boil) and then simmer until it is all reduced down to your liking:
This is the consistency I aim for:

Oh so tasty tonight and for tomorrow’s lunch:
I hope you like it,
PK
Written by
·
-
PK’s NoRecipe Savoury Mince
A favourite since childhood, this is simple food that couldn’t be easier to cook. By now you probably know that I think ‘peasant’ food is best.
It freezes very well and what’s more, you can eat it by itself or stretch it out using rice, bread, noodles or other starchy sides. One of my favourites is savoury mince and cheddar in a toasted sandwich.
I think this recipe has a couple of standard ingredients and then add whatever you like extra. Have fun and experiment :).
What are the essentials?
- beef mince
- potatoes
- carrot
- onion
- garlic
- chicken or beef stock
- herbs like oregano, marjoram, thyme, bay leaves
- tomatoes or tomato paste
- pepper and salt to taste.
I also add red wine (boil it off of course) and anything else I have in my pantry or fridge that needs using.
Par-boil your potatoes:
Prepare your vegetables:
Sauté the onion in some olive oil:
Add the mince (browning it), herbs and stock (if using red wine bring to the boil) and then simmer until it is all reduced down to your liking:
This is the consistency I aim for:
Oh so tasty tonight and for tomorrow’s lunch:
I hope you like it,
PK
Written by
·
-

PK’s Slow Cooker Chicken Stock
This was the first time I have made my own stock. Up until this point I had thought it wasn’t worth the time and effort required. I couldn’t have been more wrong :).
After a quick bit of prep I left it to its own devices overnight. In the morning I recovered the left over ingredients, filtered the stock and froze it in 2 cup batches.
I got so much joy and reward from making this stock because I:
- got to be in the kitchen cooking :).
- gave a second chance to some carrots at the back of the fridge.
- picked fresh vegetables from the garden with my young son.
- used parts of chickens that normally go to waste.
- didn’t add any packaging to landfill.
- recovered the cooked vegetables for my compost bin.
- recovered the bones to make my own bone meal for soil improvement (post coming soon).
- retained some rendered chicken fat for cooking (hey I never said this was a good health blog hehehehe).
- got an amazingly tasty stock that is salt, sugar and preservative free.
STEPS:
- Get some chicken bones
- Gather/harvest and chop your vegetables
- Slow cooker time
- Straining
- Storing
- Recovery and resuse (optional)
- Defrosting
You will need:
- Ingredients:
- 2 onions
- 4 carrots
- 2 – 4 celery stalks (leaves on)
- 1 Tbsp peppercorns
- 1 handful of basil leaves
- 2kg of chicken bones and/or carcasses
- 2.5L of water
- Equipment
- a chopping board
- a long sharp knife
- a tablespoon
- a 1 cup measuring cup
- a strainer (like you would use for pasta)
- a fine mesh sieve
- a large pot
- several deep dishes to hold the leftover vegetables and bones
- a slow cooker
- freezer containers or glass jars
- a butter knife when it comes time to defrost the stock
Get some chicken bones
There must be tons of methods for doing this but I went to the butchers and bought 6 chicken carcasses. It cost me $5 AUD and they weighed approximately 2.2kgs. There was a little bit of meat on them too.

Steps:
- I took each carcass and wrenched them in the middle to separate them into halves. I only did that to help them fit into the slow cooker though.
- Put them aside and turn your slow cooker on its lowest setting.
Gather/harvest and chop your vegetables

Steps:
- Take about 4 stalks of celery (leaves on and hopefully fresh from your garden) and give them a good wash. Tap dry and then rough chop.
- Rough chop the 4 carrots (skin on) and 2 onions.
- Rough chop a handful of basil leaves (not stems). I used some from my garden that I had previously frozen.
- Add all the vegetables to the now warmed up slow cooker along with 1 Tbsp of peppercorns.
Slow cooker time

Steps:
- Place the chicken carcasses on top of the vegetables and pour in enough boiling water to cover everything. In my case this was 2.5L.
- Don’t worry if the slow cooker is full to the brim and a bit squishy. By the end everything will have shrunk down and there will be plenty of room to stir everything.
- Let it simmer for as long as you can but at least 8 hours on low. I didn’t have to add any water the whole time but keep an eye on the water levels.
- As you notice a bit of space developing you can start to give it the odd stir.
In this picture you can see how everything has reduced down:

Straining
The last few steps can be a little time consuming if you want to make the best use of the left over ingredients.
Steps:
- Pour everything into a pasta colander (or a strainer that will catch most of the larger ingredients but still let the liquid through easily) over a large saucepan. I was worried that using a fine mesh sieve at this point would end with stock all over the place so I used this two part process.
- Now run the stock through the fine mesh sieve over the slow cooker and pour the stock in slowly.
- Clean the sieve under the tap and then run the stock through it again but into the original saucepan.
- Keep putting the vegetables and bones aside if you intend to recover them.
- Let the now filtered stock cool in the fridge slightly to get the skim of fat on the top.
- Spoon a tiny bit of the fat skim off but don’t be too fastidious as I have a tip for that later. We don’t want to lose any more of the precious stock than we have too :).
Storing
At this stage the stock should be super tasty but it will also be oily. I trialled two methods for dealing with this.
Steps:
- Initially I placed a sheet of paper towel on the surface of the stock and let it slowly draw in the fat beads. I carefully removed the paper towel and disposed of it.
- I then used a 1 cup measuring cup to ladle the stock into several freezer containers.
- I then turned the containers upside down and froze them. This means that most of the fat beads will rise to the surface.
In this picture you can see the beads of fat on the top and nice clean stock underneath:

Recovery and Reuse
I will expand on this in a later post but here are a few tips if you want to reuse the leftover ingredients. I had fun doing it but making the bone meal was a labour of love.
- Keep the bones for making your own bone meal.
- Chuck the vegetables into the compost bin.
Defrosting
I would like to show you now the advantage of freezing them upside down in a slightly concave shaped container.
Steps:
- Pop the lid off the container and let it ever so slightly thaw.
- Turn the container upside down again and pop the stock out.
- Using a butter knife, scrape the fat off the top of the stock block.
I got about 1 Tbsp of fat off two cups of stock, enough to fry up some potatoes I bet :).
I would love to hear from you if you have any tips you want to share about making stock.
Enjoy,
PK
Written by
·