Tag: snack
-

KT’s Bush Walker Cookies
My wife has been using this cookie recipe for as long as she can remember. She calls it one of her no fuss recipes. Now we are parents my wife uses less sugar, allegedly but they still come out tasting amazing. My picky toddler never says no to them and he calls them “mummy bi’cuts:” :).
STEPS:
- Combine the cookie ingredients
- Bake and store
You will need:
- Ingredients:
- 0.5 cup butter or margarine
- 1 cup raw sugar
- 1 egg
- 0.5 tsp vanilla essence
- 1 Tbsp water
- 0.5 tsp bicarbonate of soda
- 1 cup of dried fruit (my wife uses raisins and currants)
- 1 cup self-raising flour
- 1 cup rolled oats
- 1 cup of breakfast cereal e.g. Kellogs Cornflakes or Wheaties
- 0.5 cup of desiccated coconut
- Equipment
- a large mixing bowl for the cookie mix
- a small bowl to beat the 1 egg
- a fork or a small whisk
- a non-stick baking tray
- baking paper (optional)
- a fan forced oven
Combine the cookie ingredients
Steps:
- Take the 0.5 cup of margarine (or butter) out of the fridge and let soften for a while.
- Add the margarine to the large mixing bowl and mix in the 1 cup raw sugar.
- Beat the 1 egg, 0.5 tsp vanilla essence, 1 Tbsp water and 0.5 tsp bicarbonate of soda, in the small bowl, with a fork or small whisk.
- Add to the large mixing bowl.
- Mix in the:
- 1 cup of dried fruit
- 1 cup self-raising flour
- 1 cup rolled oats
- 1 cup of breakfast cereal eg Kellogs Cornflakes
- 0.5 cup of desiccated coconut
- Roll the cookie mix into balls, flatten with your hand and place on the oven tray, with or without a sheet of baking paper under them.
Bake and store
Bake the cookies for 20 to 25 minutes in a fan forced oven set to 160°C. When done, place them on a cooling rack.
You will find that the whole family loves them fresh and that they freeze exceptionally well. We use a large snap lock bag in the freezer and pull a few out at a time for the kids’ lunch boxes.

Hope you like them,
PK
Written by
·
-

KT’s Dippy Eggs and Soldiers
My toddler loves a soft boiled egg and soldiers and when he wants them for breakfast he asks for ‘dippy eggs’. The name has stuck I am happy to say :).
The problem was that I had always cooked hard boiled eggs, using this method, growing up. So I had to ask my wife if she knew how to cook a runny egg. Ironically, even though she only eats poached eggs, she remembered a recipe from BabyMac’s blog (see it here).
I gave it a try and was amazed at the results. Now I cook a couple of eggs for the kids’ brekkie (that is what we call breakfast in Australia) and a sneaky extra one for dad. Add a couple of pieces of toast to make “soldiers” and you are done in under 10 minutes!
We try and source ethically produced eggs with
middling success(we now have a good supplier in Gale Force Farm Organic Free Range Eggs ) but that is a story for another day.STEPS:
- Gather the ingredients
- Boil the eggs and cook the toast
- Serving
You will need:
- Ingredients:
- several slices of toast per person
- one chicken egg per person
- butter, margarine or butter blend for the “soldiers”
- Equipment
- a chopping board
- a butter knife to cut the top off the eggs, butter the toast and cut them into “soldiers”
- a small saucepan
- a toaster
- a timer
- a small plate for the toast
- several egg cups
Gather the ingredients
Steps:
- Put aside a few slices of bread for each person and pop them in the toaster but don’t start toasting them yet.
- Take an egg or two per person out of the fridge and let them start to warm up to room temperature.
- Take the butter out of the fridge.
- Fill a saucepan with water, enough to cover the eggs (one layer deep). Bring it to a rolling boil.
- Set your timer to 5 minutes.
Boil the eggs and cook the toast
Steps:
- I used a slotted spoon to lower the eggs into the boiling water and pressed start on the timer. Be very careful not to put a crack in the shells.
- At 2 minutes left, lower the bread into the toaster. We have our toaster set to make semi-frozen bread into golden brown toast in two minutes.
- At 0 minutes take all of the eggs out off the boiling water.
- Butter the toast and cut into 1.5cm wide strips.
Here is a video of what I think a rolling boil looks like:
Serving
My wife says commit when it comes to taking the top off an egg. Take a butter knife and slice the top part off. It isn’t so much a chopping motion as it is a slow but forceful movement from one side to the other all the way through. Previously I used a teaspoon to crack it all the way around and then scoop off the top but never again. My wife’s way is so much better as you get less broken shell in the yolk :).
A very important note: take the tops off all of the eggs. If you don’t they will continue to cook past the runny egg stage that we are trying to achieve.

Thanks to Beth from BabyMac,
PK
Written by
·
-
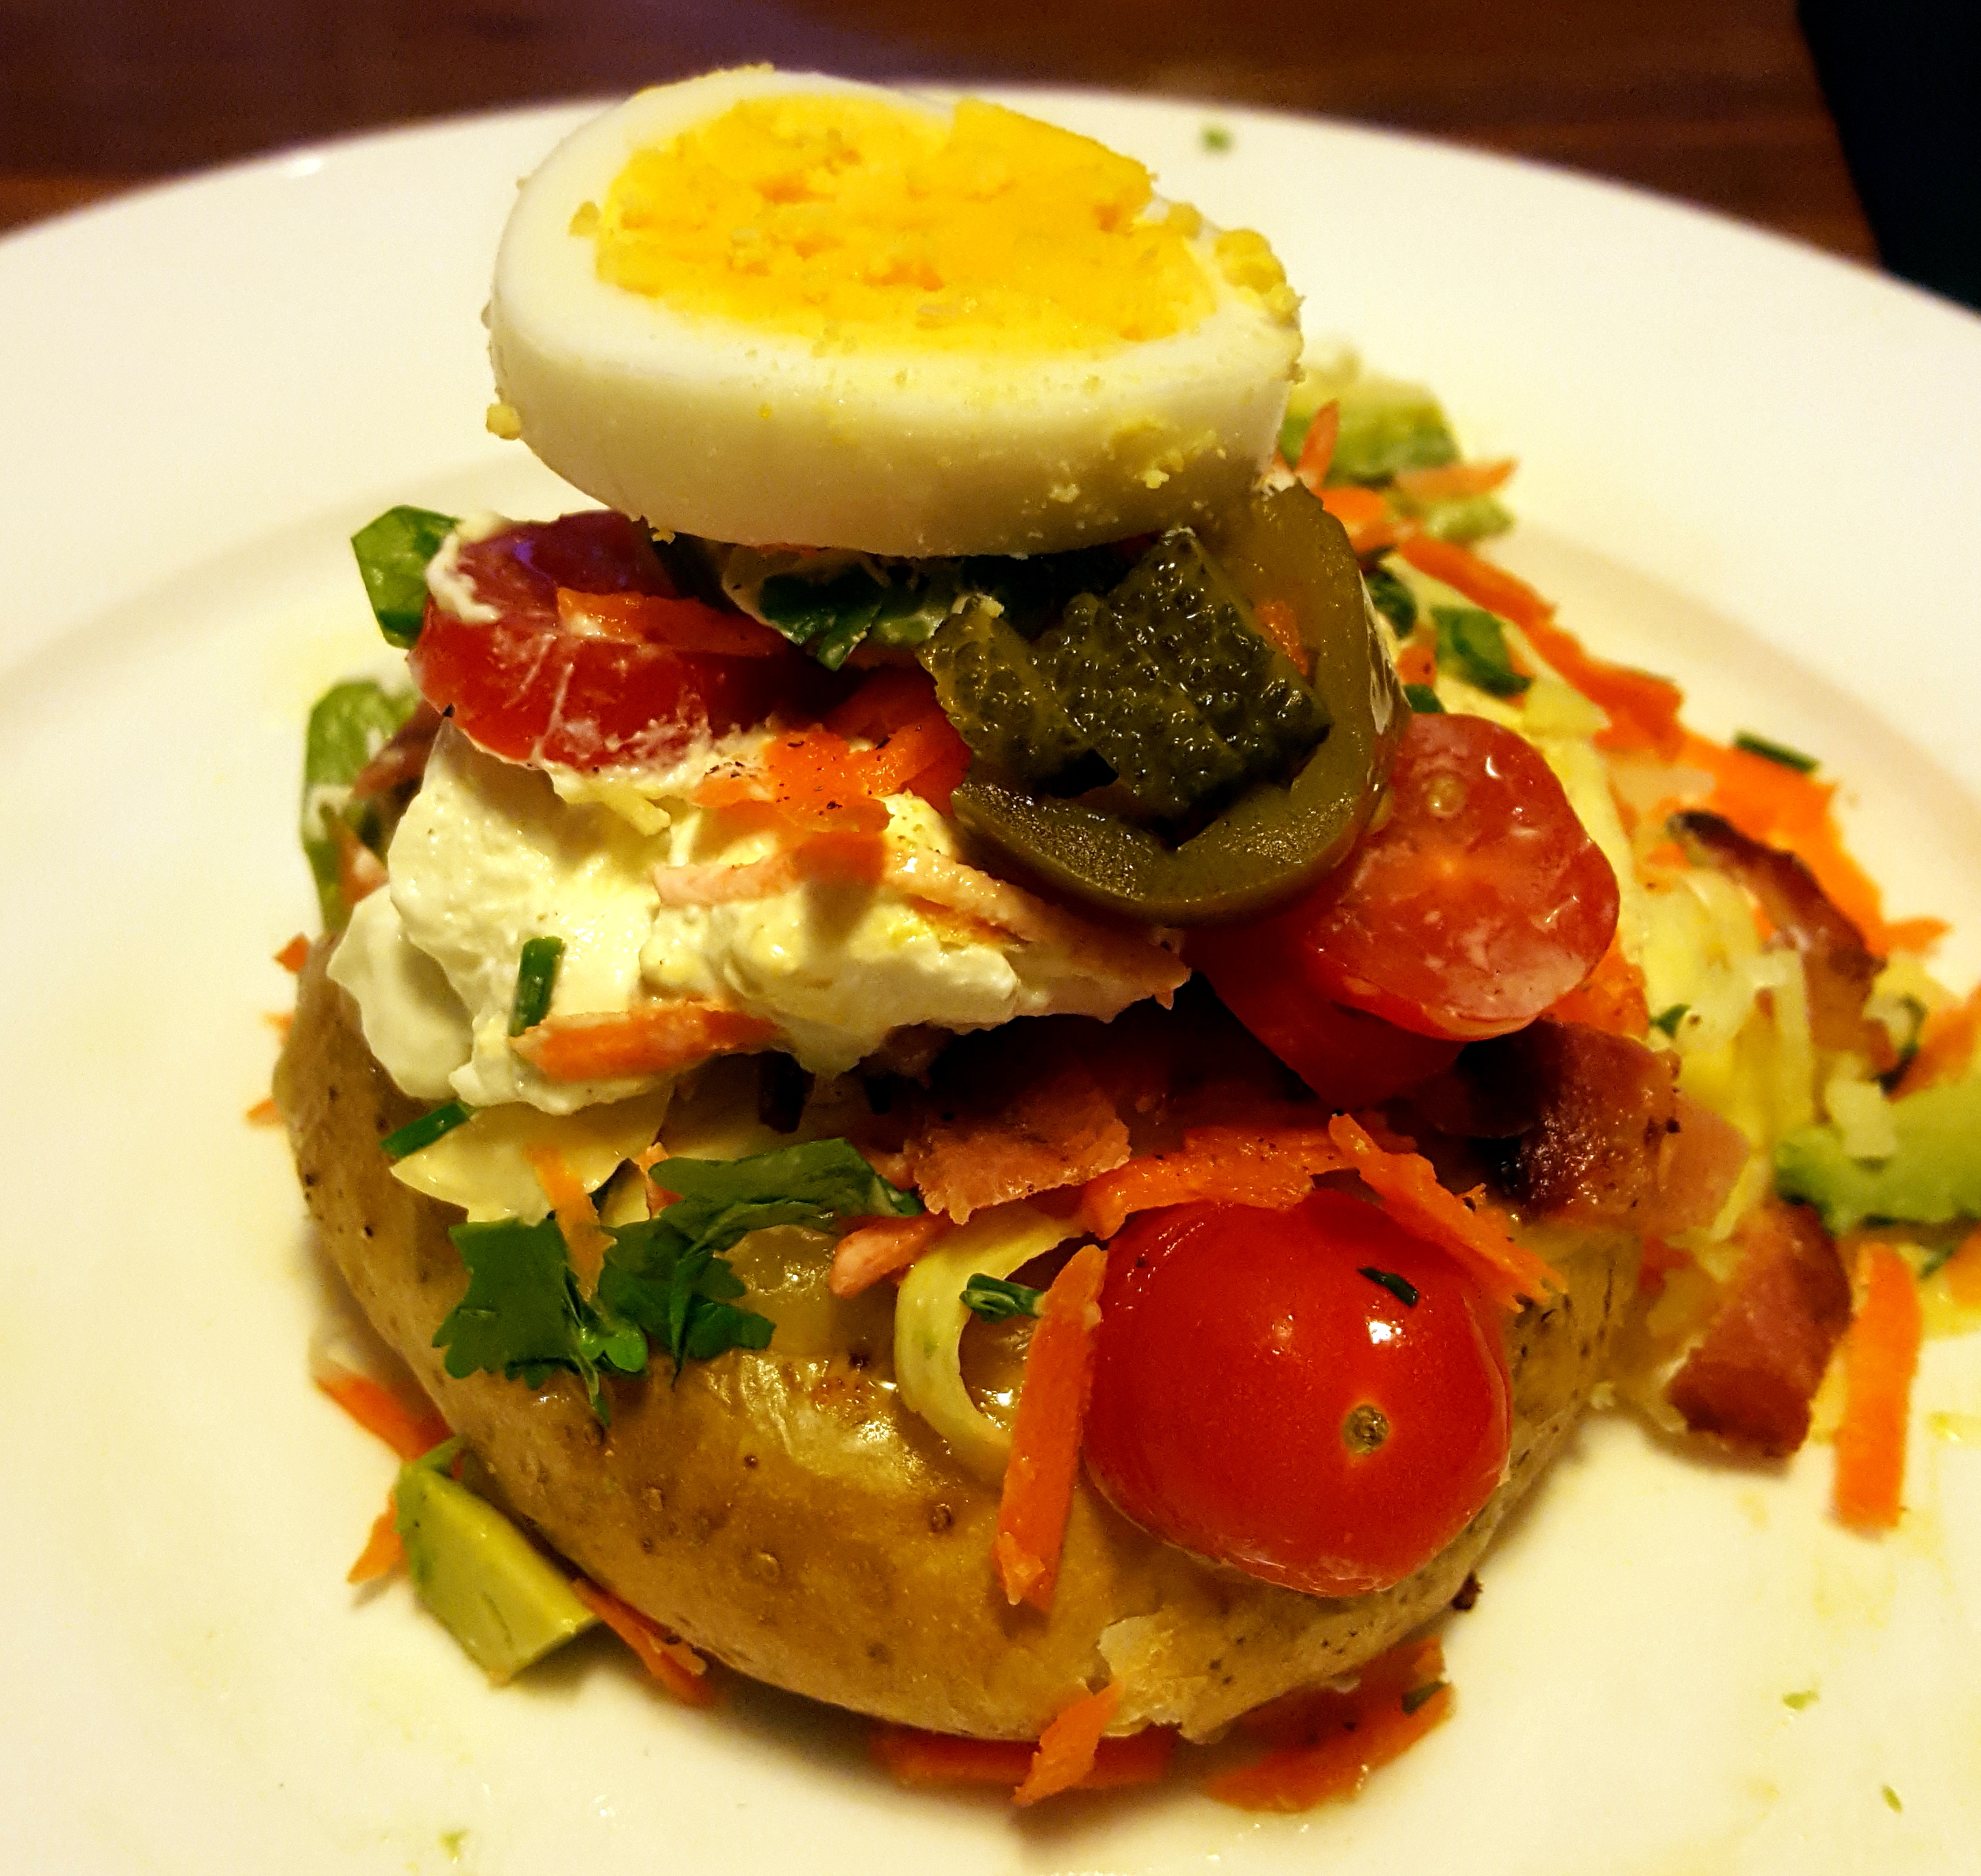
PK’s NoRecipe Oven Baked Potatoes
Perfectly crisp on the outside, fluffy in the middle, these baked potatoes are perfect for a Perth winter night. This is a great meal for enjoying with friends and family as you can build your own topping as you go. There is nothing better than eating with your hands as you chat away :).
I suggest 1.5 medium potatoes per adult and then add a few more for tomorrow’s lunch :).
Everyone has their favourite potato variety that you must use for baked potatoes. However, I have found that you can make perfect oven baked potatoes from most varieties. I think I am using Carlingfords here but only because in Western Australia we are pretty limited on the varieties available.
STEPS:
- Prepare and cook the potatoes
- Prepare your toppings
- Serving
You will need:
- Ingredients:
- your favourite potatoes
- table salt
- ground black pepper
- your favourite toppings, sauces and condiments.
- Equipment
- paper towel
- a chopping board
- a long sharp knife
- an oven dish or oven rack
- several plates to serve the toppings
Prepare and cook the potatoes
Steps:
- Pre-heat your oven to 200 degrees Celsius.
- Scrub each potato to remove dirt, eyes and deeper imperfections.
- Dry them thoroughly using the paper towel, this is important for the crispy finish.
- Spray each potato with olive oil spray and dust them liberally with salt and pepper.
- Pop them on the oven rack (or oven dish) making sure there is space between them.
- Cook for about 1 hour (longer depending on your oven or if you are using really big potatoes). I test the largest potato at this stage. If it is ready the others are too.
Prepare your toppings
Steps:
- Harvest, chop, slice and gather your favourite toppings.
- Put them on plates in the middle of the table so your guests can build their own potato :).
Here is what I used. Sour cream, cheese and coleslaw are must haves 🙂

Serving
I can’t remember where I read this but it is the most important part of the process.
Just before serving the potatoes, you need to cut them, squeeze them with your thumbs and forefingers (to break up the insides) and then flatten them out a bit. This will let the steam out and stop the potato skin from going soggy. You will also have a great base to load the toppings onto.
Here is a video of me doing just that whilst trying not to burn my fingers:
Here are a few of my favourite combinations:
They don’t freeze but they do make a great lunch the following day:

Enjoy,
PK
Written by
·
-
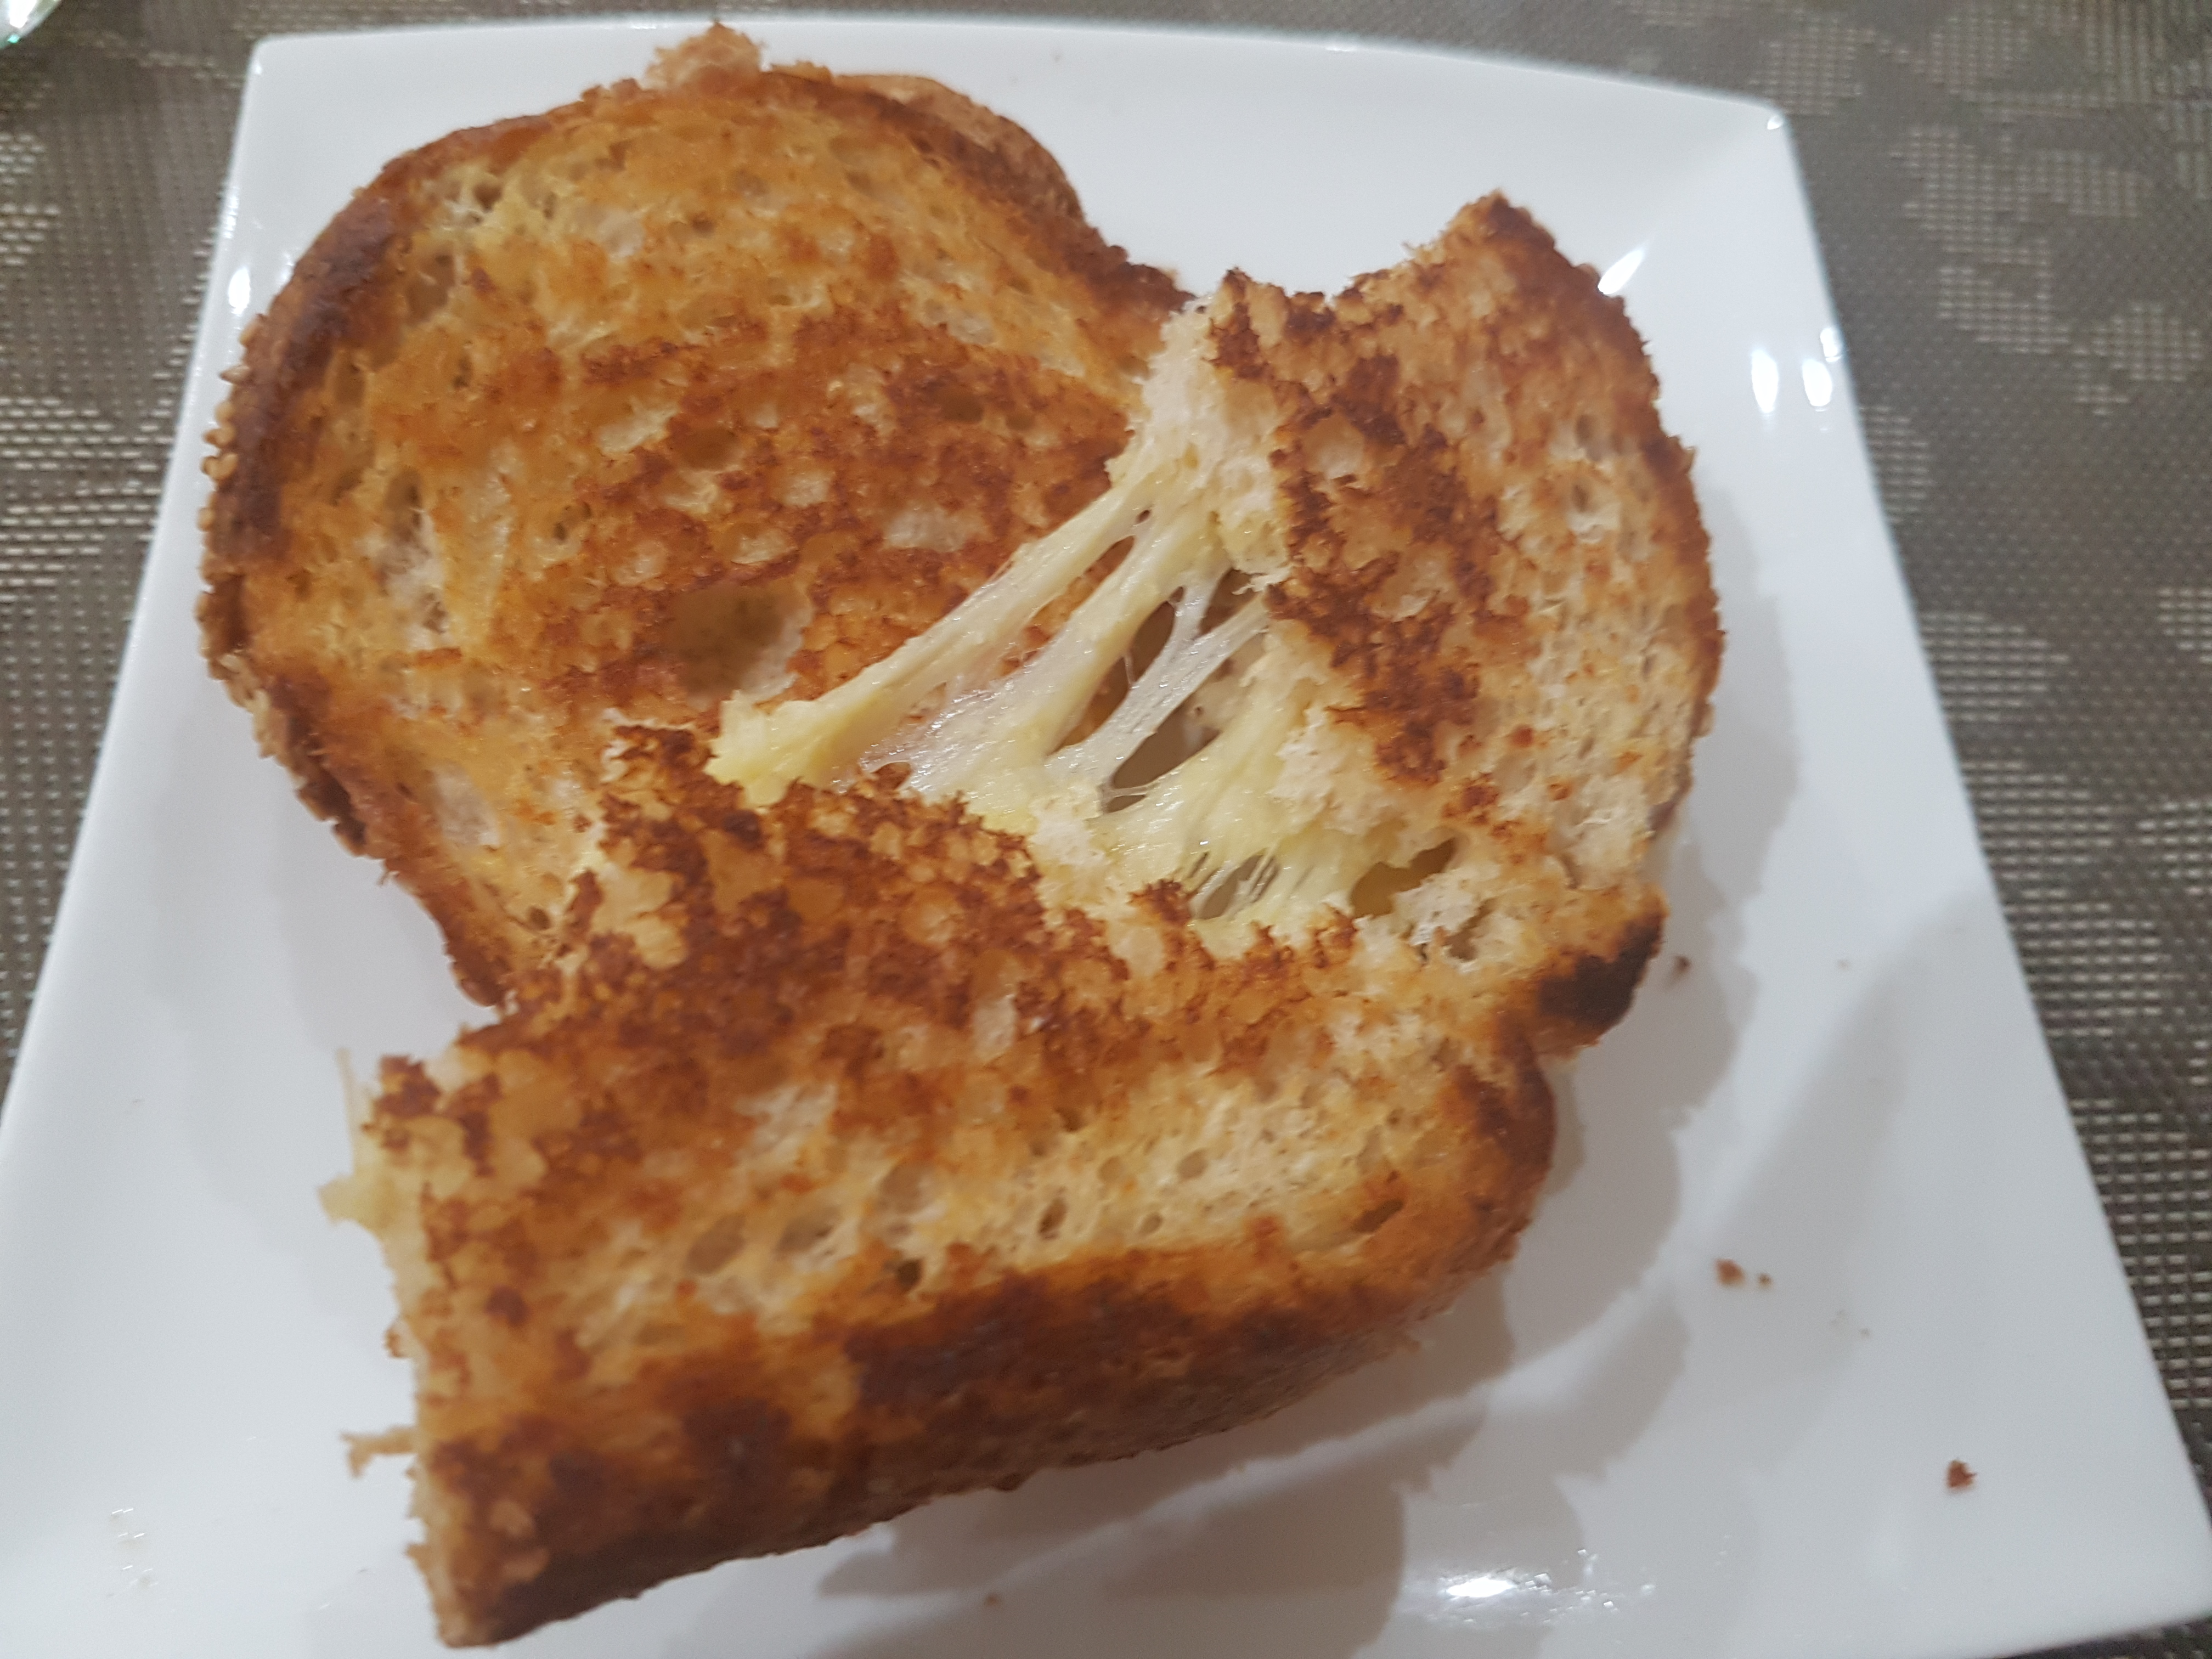
Welchy’s Ultimate Cheese Toastie
As a kid, the ultimate treat was one of Mum’s cheese toasted sandwiches. This wasn’t just your run of the mill, use-a-toaster type of toasted sandwich though. Mum perfected the Ultimate Cheese Toastie in the fry-pan! Buttery, toasted, crunchy goodness on the outside with superbly melted and stringy cheese in the middle…served with you know…a heaping side of motherly love.

First off, I’d start with a range of cheeses. I chose Cheddar, 4 cheese blend and Parmesan. Pick any cheese you like though really, Gruyere, Mozzerella, anything that melts well. I then cut up some fresh bread and butter and we’re ready to go!
Ingredients/Utensils
- Fresh bread
- Butter
- Cheeses (a few slices/enough for a sandwich) – Cheddar, American, Gruyere, Mozzarella, Parmesan, Four Cheese mix, whichever you prefer/have handy.
- Frying pan
Method
1. Butter both sides of the bread. Put a dollop of butter in the pan too for extra buttery crunch!

2. Place one side of the bread into the pan. Layer with the cheddar, then the four cheese mix and top off with the Parmesan. Allow the bread to fry in the pan, usually about 30 seconds. Use a spatula to lift the corner and check if it’s browning. Once it starts to brown, add the lid of the sandwich and flip!

3. Fry the second side for 30 seconds to 1 minute, or until nicely browned.

And you are done!
This recipe isn’t much, it’s not overly difficult, and can be made fairly quickly once you get the hang of it. Great to eat wrapped in some parchment paper as you race out the door, or as I prefer, at the table with a glass of ice cold milk. Enjoy…!

Written by
·
-
Welchy’s Ultimate Fry Pan Cheese Toastie
As a kid, the ultimate treat was one of Mum’s cheese toasted sandwiches. This wasn’t just your run of the mill, use-a-toaster type of toasted sandwich though. Mum perfected the Ultimate Cheese Toastie in the fry-pan! Buttery, toasted, crunchy goodness on the outside with superbly melted stringy cheese in the middle…served with you know…a heaping side of motherly love.
Look how simple the ingredient list is:

First off, I’d start with a blend of cheeses. I chose Cheddar, Kraft’s 4 cheese blend and Parmesan. Pick any cheeses you like though, Gruyere, Mozzerella, Havarti, anything that melts well. I cut up some fresh bread and butter and we’re ready to go!
Ingredients/Utensils
- Fresh bread
- Butter
- Cheeses (a few slices/enough for a sandwich) – Cheddar, American, Gruyere, Mozzarella, Parmesan, Four Cheese mix, whichever you prefer/have handy.
- Frying pan
Method
1. Butter both sides of the bread. Put a dollop of butter in the pan too for extra buttery crunch!

2. Place one side of the bread into the pan. Layer with your selected cheeses. Allow the bread to fry in the pan, usually about 30 seconds. Use a spatula to lift the corner and check if it’s browning. Once it starts to brown, add the lid of the sandwich and flip!

3. Fry the second side for 30 seconds to 1 minute, or until nicely browned.

And you are done!
This recipe isn’t much, it’s not difficult, and it can be made fairly quickly once you get the hang of it. Great to eat wrapped in some parchment paper as you race out the door, or as I prefer, at the table with a glass of ice cold milk.
Love Welchy,
Here are some more snacks and more Welchy posts”
Written by
·